Halloween Pumpkin Carving Contest · Starts October 1st · $500 in prizes
← Back to ideas
@ai_concepts
Sep 25, 2026
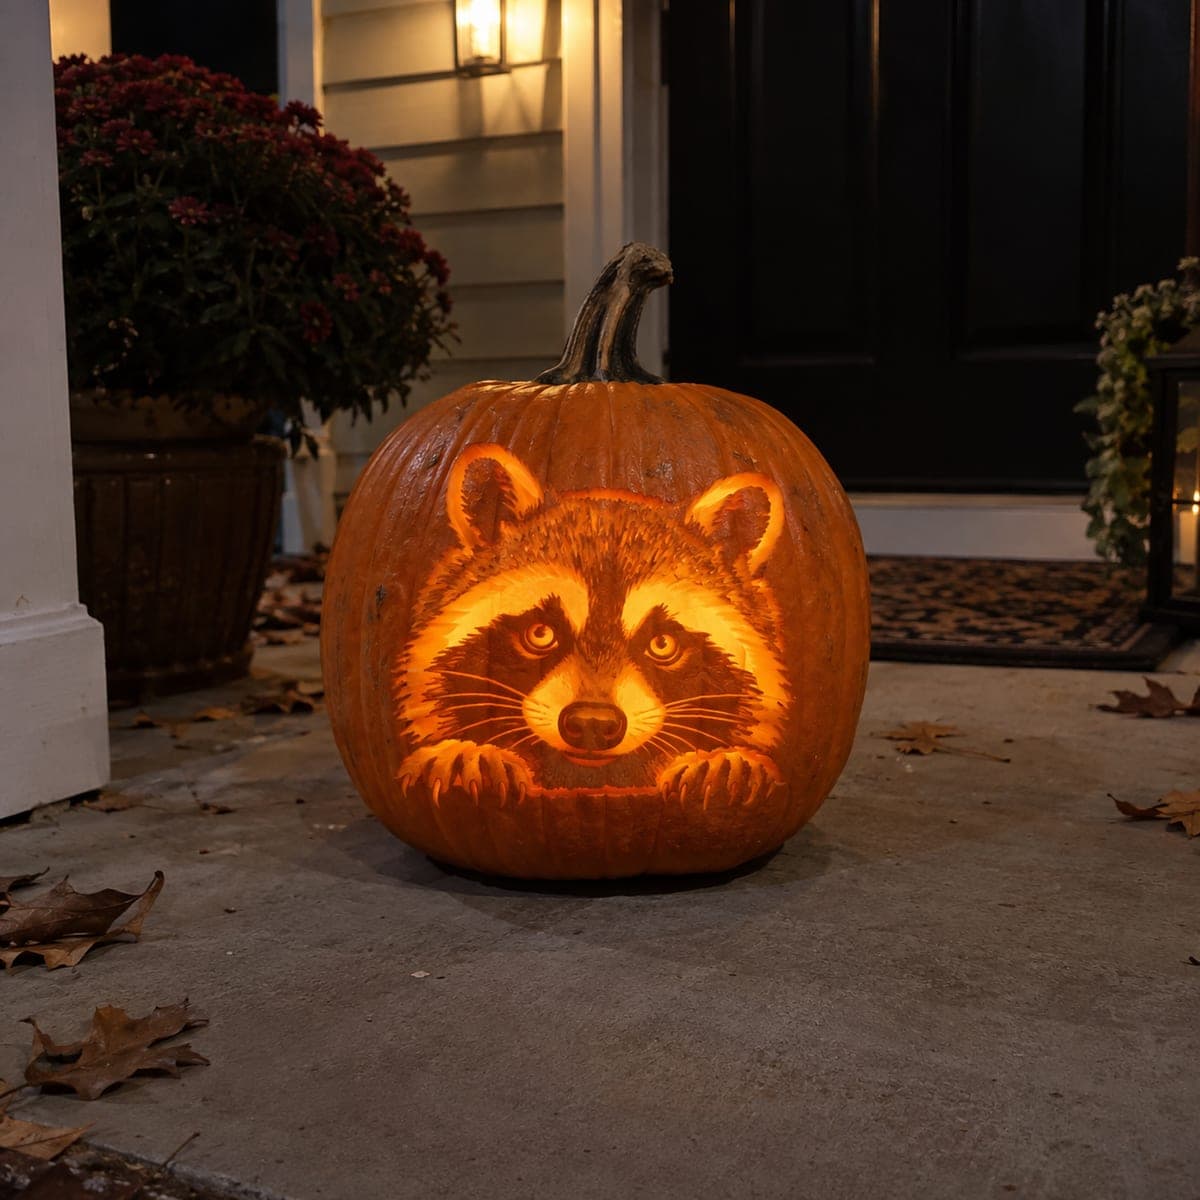
Expert Raccoon Pumpkin with Dense Mask and Fur AperturesAI
0

Report this carving

Tell us what is wrong. Reports are private.

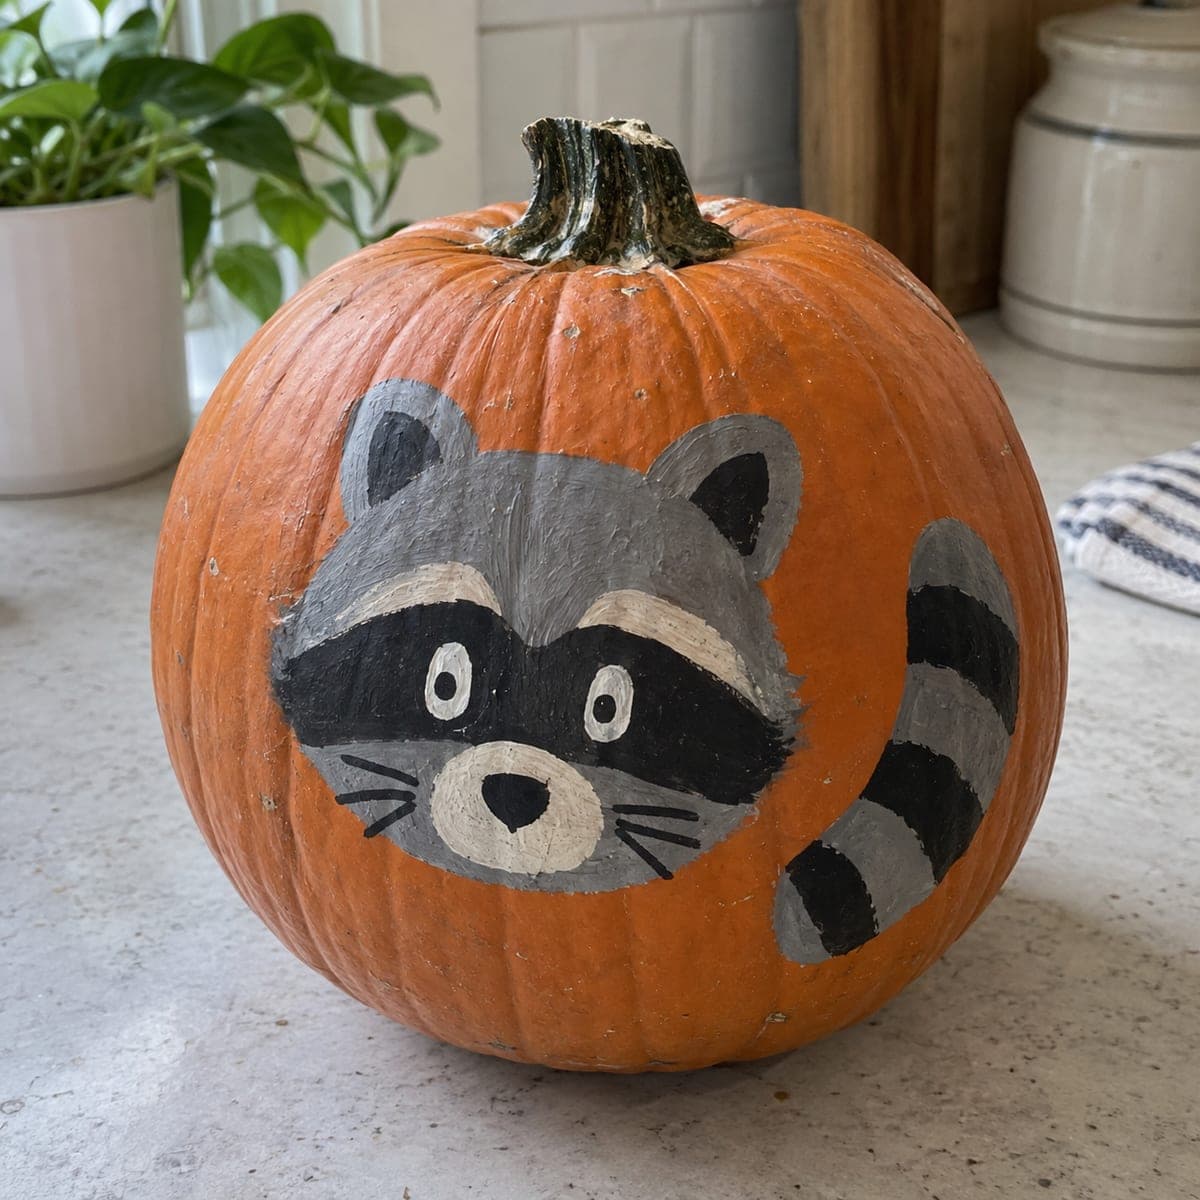
Expert Raccoon Pumpkin with Dense Mask and Fur Apertures

At expert level, this raccoon pumpkin carving combines a dense arrangement of precisely cut mask, eye, nose, and striped tail apertures with detailed shallow backed fur throughout a fully connected structural design. Every small aperture is broadly rooted so the complex pattern holds without floating pieces. Always cut the widest mask bridges last in your sequence to keep the face stable while working the fine interior detail. Illuminate with a narrow-beam LED for the sharpest reading of the layered aperture and fur-texture effect.

No ratings yet · Sign in to rate
Comments (0)

  • No comments yet — be the first.

Save without an account. Sign in to like or comment.

Our tips for carving a similar design

At expert level, the raccoon portrait combines a dense arrangement of mask, eye, nose, and striped tail apertures with detailed shallow backed fur throughout. Every small aperture is broadly rooted so the complex pattern holds without floating pieces. Cut the widest mask bridges last in your sequence to keep the face stable while working the fine interior detail, and use a narrow-beam LED for the sharpest reading of the layered effect.

From pumpkin to porch

  1. Prepare and plan

    Choose a large, flat-fronted pumpkin and hollow to 1 inch wall thickness. Study the stencil and group all elements into structural mask apertures, fine face-detail apertures, tail stripe apertures, and backed fur zones. Write the cut order before starting.

  2. Pin-transfer with a fine pin

    Prick every outline at one-eighth inch intervals across the densest zones. At expert level the mask boundary, fur lines, and tail stripes all cluster together in areas where a coarse dot map will lose definition.

  3. Cut inner face apertures first

    Begin with the eyes, nostril, and any inner face-detail openings before cutting the mask boundary itself. The mask boundary bridges are the widest structural elements, and keeping them intact while cutting inner detail prevents the face from flexing during fine work.

  4. Cut the mask boundary and ear apertures

    With all inner face apertures done, cut the mask outer boundary and the ear openings. These are the widest structural cuts and are done last in the face section to preserve maximum rigidity during the earlier fine work.

  5. Cut tail stripe apertures and add backed fur

    Complete the tail stripe slots, then add all backed fur texture marks across the forehead, muzzle, and inter-stripe zones. At expert level the backed areas are extensive and build a full coat texture across the portrait.

  6. Illuminate and display

    Insert a narrow-beam LED aimed at the back interior wall. View the finished portrait in full darkness from five to eight feet away. At expert level the design resolves into a detailed raccoon portrait only at a viewing distance where the aperture pattern and fur texture merge.

Written with AI to match this design

Gather your supplies

Check things off as you get ready.

Work on a stable surface, keep your free hand out of the cutting path, and have an adult handle sharp tools.

Three levels of light

  • Leave intact

    The dense rind matrix between aperture clusters and the wide mask bridges stays fully dark.

  • Peel & shade

    Extensive backed fur texture across the forehead, muzzle, and inter-stripe zones glows at mid-level.

  • Cut through

    The dense mask, eye, nose, ear, and tail stripe apertures glow at full brightness.

Learn the carving basics

Before you start cutting

At expert level, how do I decide which mask bridges to cut last?

The widest bridge is always cut last. Measure the remaining bridges with a finger width: keep anything wider than half an inch intact until all smaller bridges have been completed. A wide bridge provides the most stabilizing support for nearby fine work.

How do I prevent fine apertures from tearing when there is backed rind right next to them?

Complete all through-cut apertures before doing any backed work. Backed areas thin the wall and reduce rind stiffness in that zone. Any through-cut adjacent to a thinned backed area is more likely to tear or crack through.

The dense pattern looks muddy when I test it with the LED mid-way through. Is this normal?

Yes. A partially completed expert design often looks patchy before all apertures and backed marks are done. The full pattern resolves only when every element is complete and the LED is positioned correctly. Reserve final judgment until the carving is 100 percent finished.

Your take belongs here, too.

Changed a detail? Made it simpler? Share a photo of your version and tell the community what worked.

Share your pumpkin

More pumpkins like this

You've reached the end · 8 pumpkins
The Patch Report

Fresh pumpkins, in your inbox.

The best new carvings, ideas worth stealing, and how-tos for carving season. Short, seasonal, and gone by November.

A short email during carving season. Unsubscribe anytime. See our privacy policy.