Halloween Pumpkin Carving Contest · Starts October 1st · $500 in prizes
← Back to ideas
@ai_concepts
Sep 25, 2026
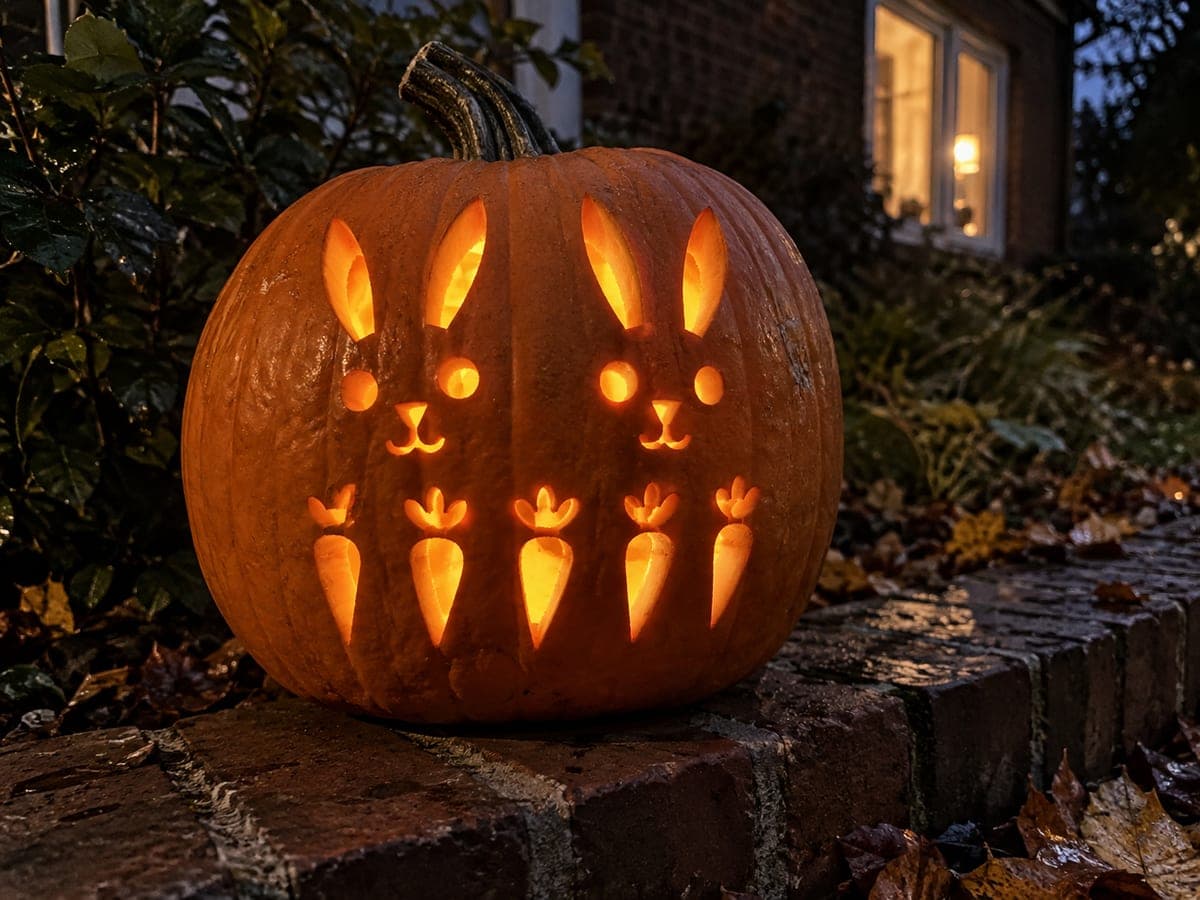
Detailed Bunny Pumpkin Carving with Fine AperturesAI
0

Report this carving

Tell us what is wrong. Reports are private.

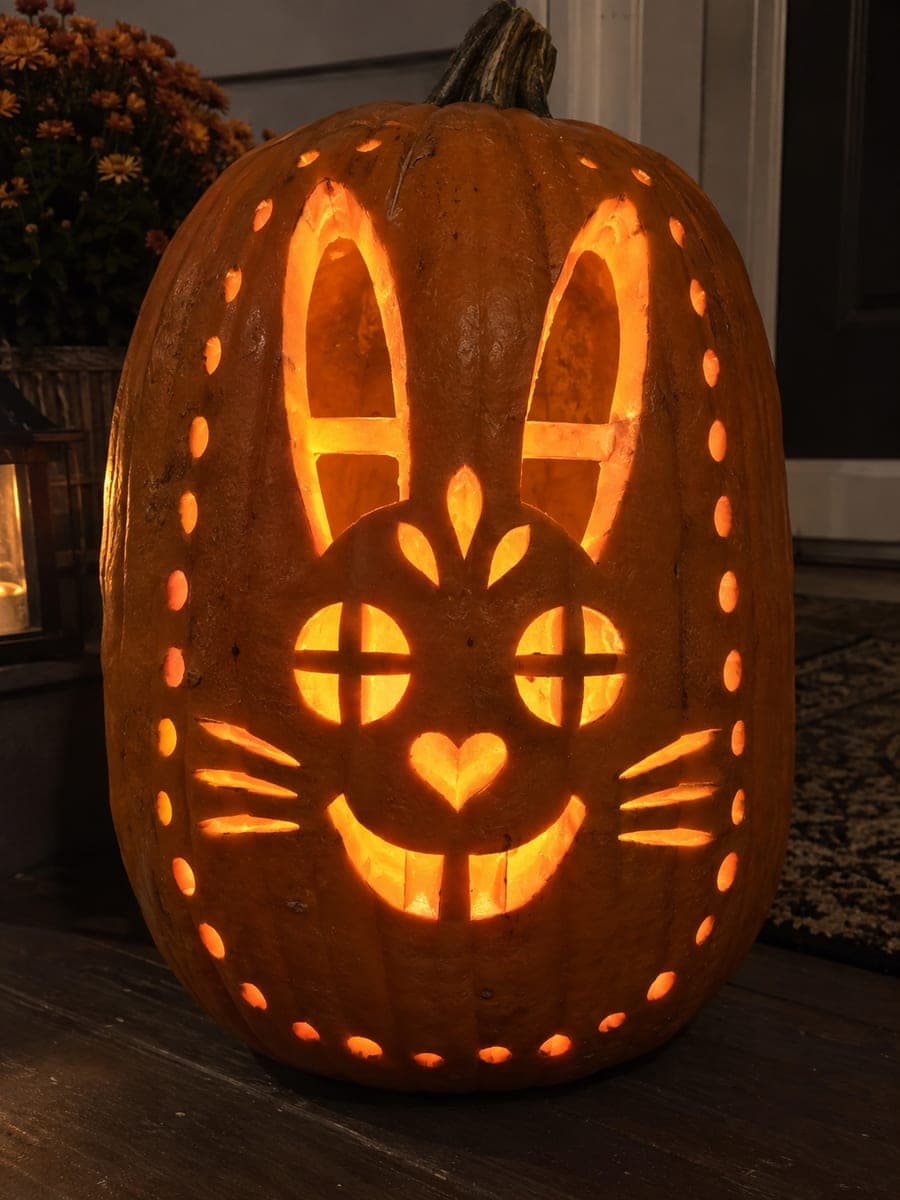
Detailed Bunny Pumpkin Carving with Fine Apertures

This hard bunny pumpkin carving idea uses a greater number of fine apertures and closely spaced retained features, all broadly rooted so the design holds together even at the hard complexity level. Shallow backed detail appears only where the rind has full backing beneath, adding texture without structural risk. Pin-transfer the stencil precisely, then cut the widest apertures first to lock in the framework before tackling smaller interior openings. Backlit with a bright LED, the fine aperture pattern reads as detailed fur and facial structure.

No ratings yet · Sign in to rate
Comments (0)

  • No comments yet — be the first.

Save without an account. Sign in to like or comment.

Our tips for carving a similar design

The core trick here is a dense cluster of fine apertures that together suggest fur texture, bright eyes, and the distinctive tall ears of a bunny. Every aperture connects back to a broad root so nothing floats. Pin-transfer the stencil with precision, then cut the widest apertures first to lock in the framework before tackling the smaller interior openings.

From pumpkin to porch

  1. Choose and prep the pumpkin

    Select a pumpkin with a smooth, flat front panel to give the fine aperture pattern the best surface. Hollow to a consistent wall thickness of about 1 inch; slightly thinner than 1.25 inches helps fine cuts pass through without too much force, but never go below three-quarters of an inch.

  2. Pin-transfer the full stencil

    Tape the stencil securely and use the pin tool to prick every outline, including the smallest aperture shapes. Fine patterns need a complete dot map before you cut, because it is hard to freehand corrections once the first cuts are made.

  3. Cut structural and large apertures first

    Begin with the ear outlines and the main eye windows. These are the largest openings and define the overall silhouette. Getting them right first means the rest of the fine detail can be judged against a stable reference frame.

  4. Work through medium and small apertures

    Progress inward to the medium-sized nose and mouth openings, then to the smaller fine-detail cuts. Use a narrow detail blade and short strokes. Rotate the pumpkin as needed to keep a comfortable cutting angle and avoid awkward hand positions that reduce control.

  5. Add backed texture marks

    With all through-cuts done, add shallow backed marks for fur texture in areas with solid wall backing. A small linoleum gouge in a sweeping motion mimics short fur strokes. Confirm each backed area against the LED light before moving on.

  6. Illuminate and photograph

    Use a bright LED inside and turn off room lights completely. The fine aperture pattern at hard level reads as detailed fur and facial structure only in darkness, so let your eyes adjust before judging the result. Photograph on a tripod for the crispest image.

Written with AI to match this design

Gather your supplies

Check things off as you get ready.

Work on a stable surface, keep your free hand out of the cutting path, and have an adult handle sharp tools.

Three levels of light

  • Leave intact

    The broad rind bridges between aperture clusters and the outer ear edges stay fully dark.

  • Peel & shade

    Shallow backed fur-texture marks across the face glow at mid-level, adding depth between the bright cut openings.

  • Cut through

    The fine aperture clusters forming the eyes, nose, and ear interior glow at full brightness.

Learn the carving basics

Before you start cutting

How do I prevent a fine aperture from tearing when I push the piece out?

Work the blade all the way around the opening before pushing. On very small cuts, twist the blade tip gently in place at each corner to free the piece rather than pushing straight through. A piece that is not fully cut will tear the neighboring rind when forced.

Some of my fine cuts are drifting off the dot lines. How do I stay accurate?

Re-dust with flour every few minutes to keep the dot pattern visible. Cut in short strokes of no more than a quarter inch at a time for the finest shapes, and stop to reorient the blade whenever the cut starts to drift.

Can I do the backed texture marks before all the through-cuts?

It is better to do all through-cuts first. While the rind is fully intact it flexes less, which means the backed areas are less likely to crack through accidentally when you apply pressure nearby for the cutouts.

Your take belongs here, too.

Changed a detail? Made it simpler? Share a photo of your version and tell the community what worked.

Share your pumpkin

More pumpkins like this

You've reached the end · 8 pumpkins
The Patch Report

Fresh pumpkins, in your inbox.

The best new carvings, ideas worth stealing, and how-tos for carving season. Short, seasonal, and gone by November.

A short email during carving season. Unsubscribe anytime. See our privacy policy.