Halloween Pumpkin Carving Contest · Starts October 1st · $500 in prizes
← Back to ideas
@ai_concepts
Sep 25, 2026
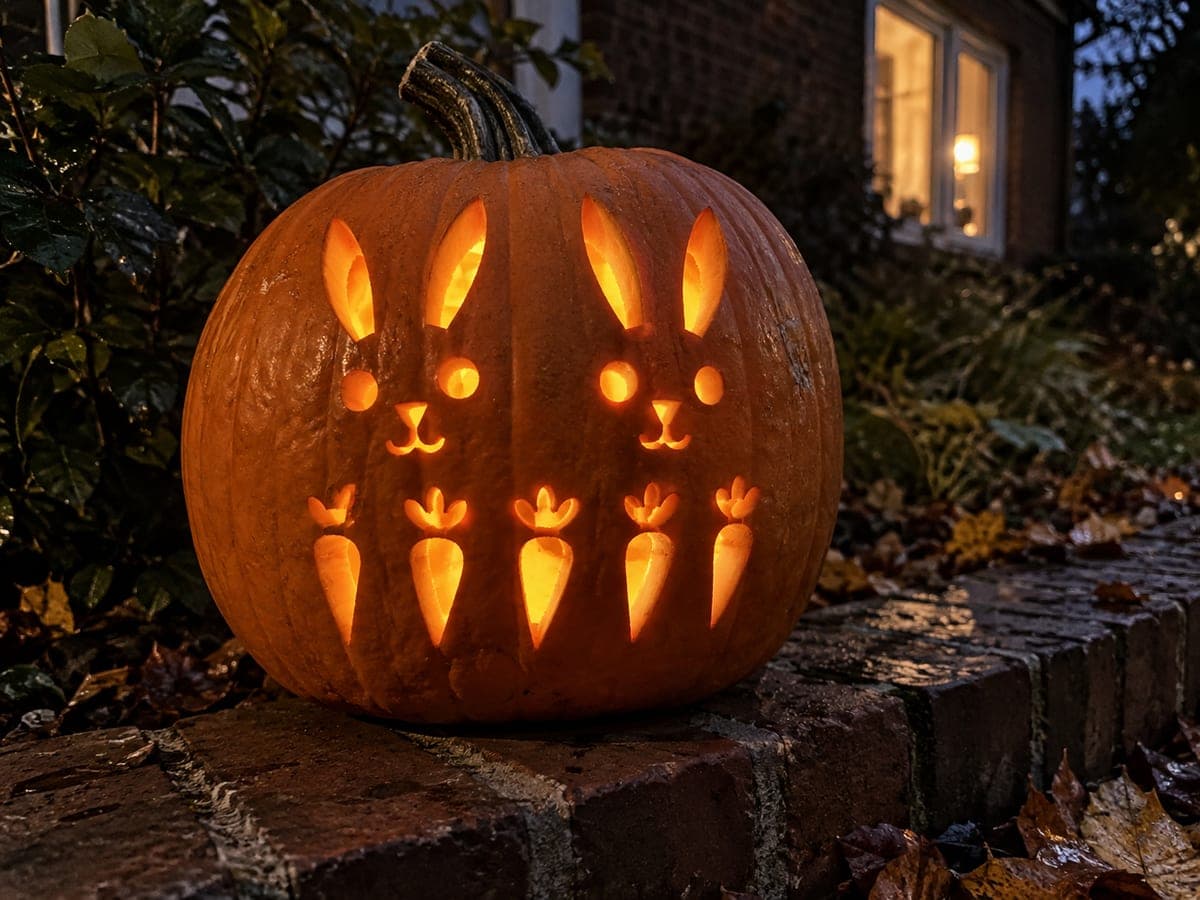
Expert Bunny Pumpkin with Dense Aperture PatternAI
0

Report this carving

Tell us what is wrong. Reports are private.

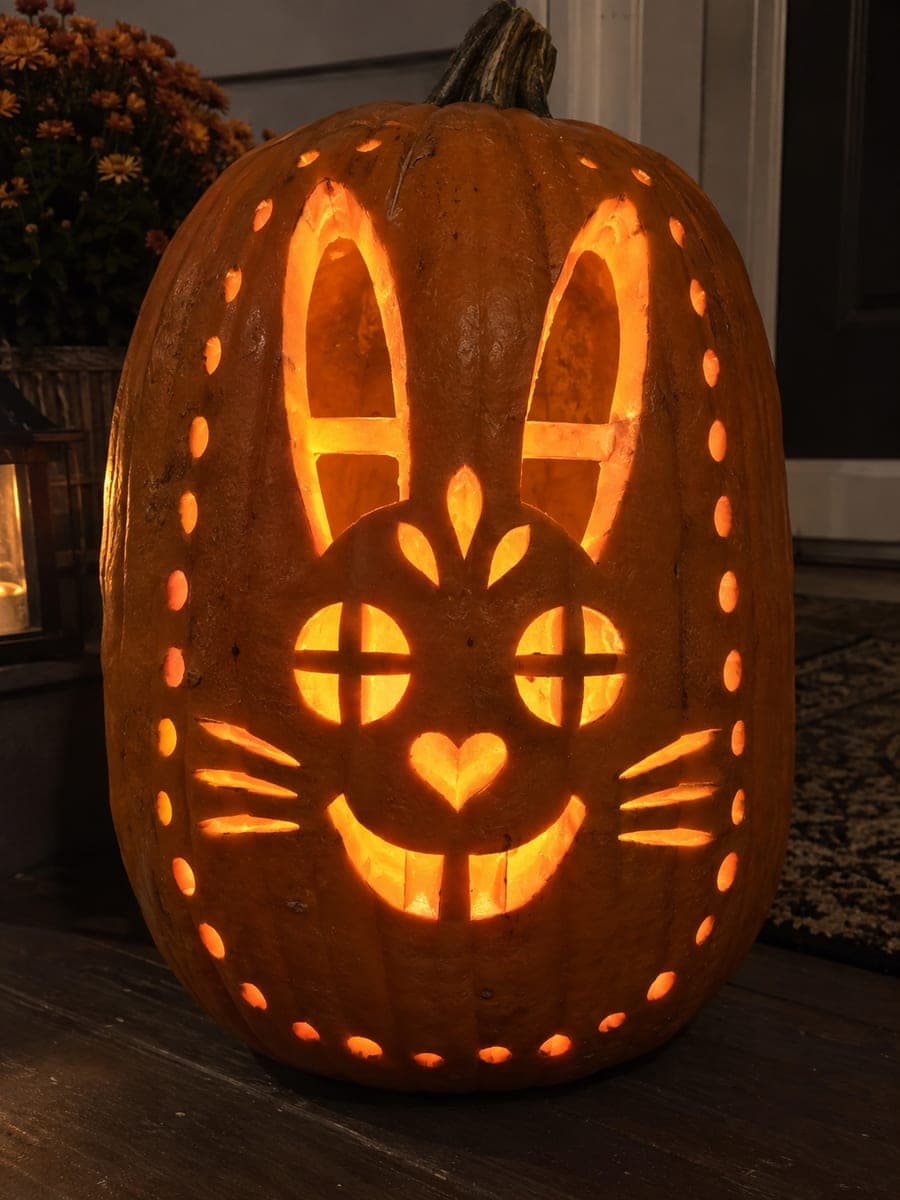
Expert Bunny Pumpkin with Dense Aperture Pattern

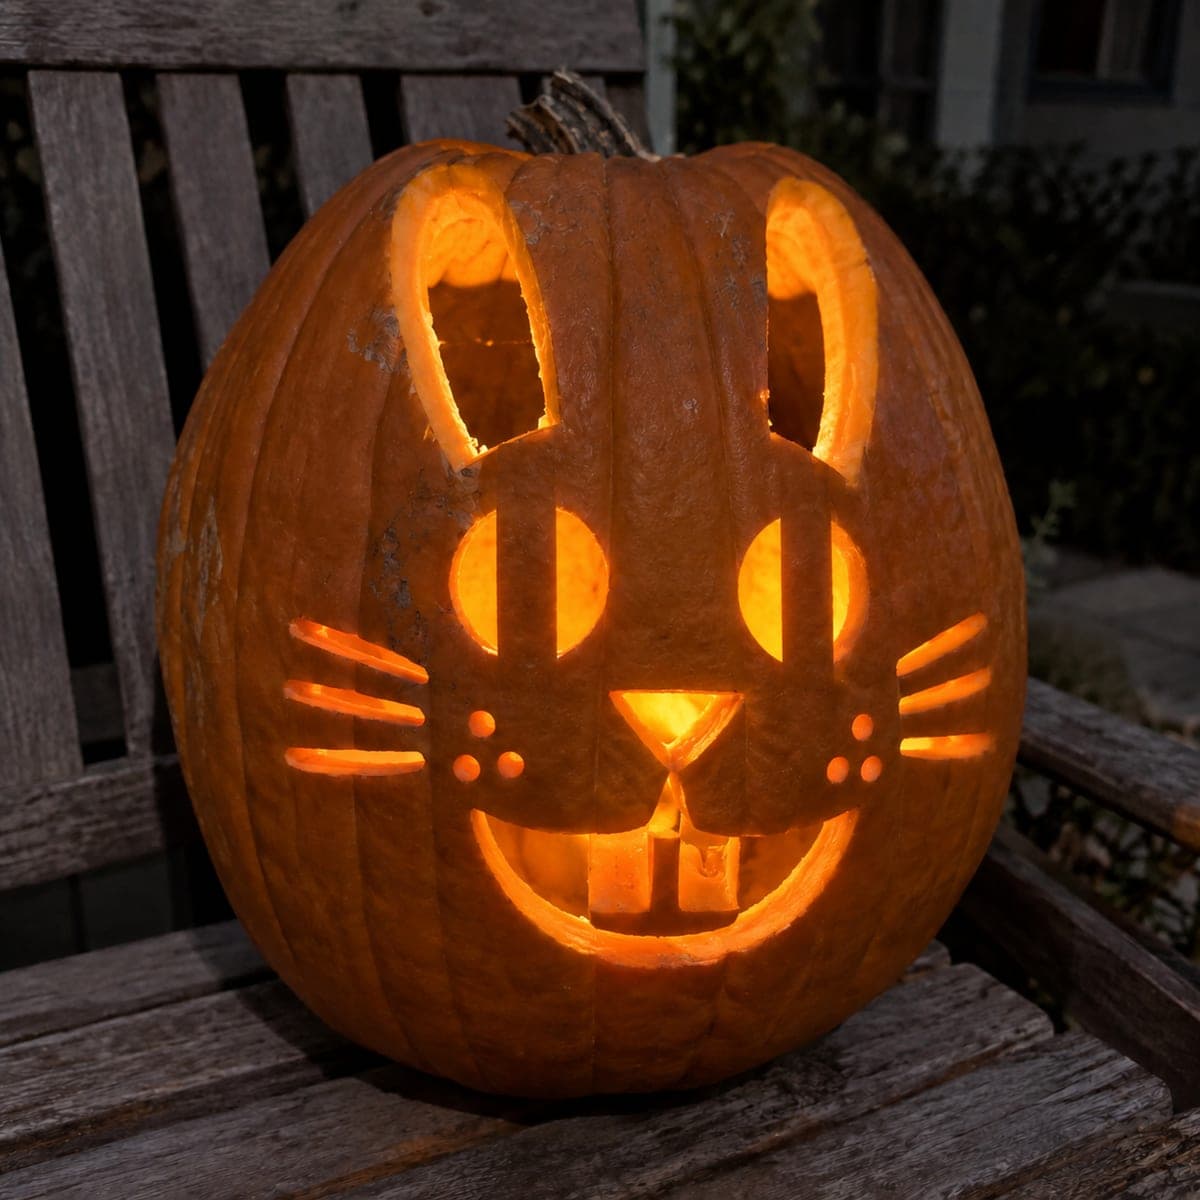
At expert level, this bunny pumpkin carving idea features a dense network of separate through apertures and precisely rooted retained rind sections that work together to build a highly detailed portrait. Shallow backed marks add texture wherever the backing allows, creating a layered effect when lit. The key to success is planning your cut order: always remove the widest, most structurally important apertures first, then work toward the finest details. Illuminate with a narrow-beam LED aimed at the back interior wall for maximum definition.

No ratings yet · Sign in to rate
Comments (0)

  • No comments yet — be the first.

Save without an account. Sign in to like or comment.

Our tips for carving a similar design

The design builds a realistic bunny portrait through a dense network of separate through-apertures and precisely rooted retained rind sections, layered with shallow backed texture marks wherever the wall is fully supported. The key to success is a strict cut sequence: always remove the widest, most structurally important apertures first, then work toward the finest details at the very end. A narrow-beam LED aimed at the back interior wall maximizes definition across the complete aperture map.

From pumpkin to porch

  1. Select and hollow the pumpkin

    Choose the largest, flattest pumpkin available for a design this dense. Hollow to 1 inch wall thickness and scrape the interior smooth so the LED sits flat and distributes light evenly across the whole face area.

  2. Pin-transfer with extra precision

    Tape the stencil tightly against the rind to prevent shifting. Prick holes every one-eighth inch along all aperture outlines, and mark the edges of all backed texture areas with a lighter dot pressure. Losing the map mid-carve on a dense expert pattern is very difficult to recover from.

  3. Cut all structural apertures first

    Identify the three or four widest apertures that form the main structural bridges and cut those first. These are the ear outlines and the largest eye or face-contour openings. Completing them establishes the skeleton the rest of the pattern hangs on.

  4. Progress through layers of detail

    Move to medium apertures next, then to the finest slit-like cuts last. On a dense expert pattern you may have four or five size categories. Use a fresh blade for each size category if possible, as a dull tip tears rind on very fine cuts.

  5. Add backed texture throughout

    With all through-cuts completed, add the backed texture marks using a sharp gouge. At expert level these marks cover larger areas and include fine directional lines that suggest individual hairs. Work in consistent sweeping strokes that follow the natural direction fur would grow.

  6. Final check and display

    Insert the narrow-beam LED and position it aimed at the back wall. View the design from across the room in full darkness. At expert level the combined apertures and backed marks create a portrait-quality illusion that rewards viewing distance.

Written with AI to match this design

Gather your supplies

Check things off as you get ready.

Work on a stable surface, keep your free hand out of the cutting path, and have an adult handle sharp tools.

Three levels of light

  • Leave intact

    The dense rind matrix between aperture clusters and all structural bridge sections stay fully dark, forming the portrait's shadow tones.

  • Peel & shade

    Extensive shallow backed texture marks across the fur, ears, and muzzle glow at mid-level, creating mid-tone gradients across the portrait.

  • Cut through

    The dense network of fine apertures forming eyes, nose, ear interior, and fur highlight clusters glow at full brightness.

Learn the carving basics

Before you start cutting

How do I plan the cut sequence on a design this complex without losing track?

Before you start cutting, use a washable marker to number the apertures by size group directly on the rind surface, then cut each group in order from largest to smallest. Wipe off any remaining marker with a damp cloth before lighting the display.

At expert level, how thin can rind bridges safely go?

A bridge that is one-quarter inch wide is about the minimum for a design that will be displayed for several days. Thinner bridges will hold right after carving but tend to dry out and crack within 24 hours. If the stencil calls for anything narrower, add a short bridge to preserve the intent of the design visually while keeping structural integrity.

Should I refrigerate the pumpkin between carving sessions?

Yes. An expert carve can take several hours across multiple sessions. Wrap the pumpkin tightly in plastic wrap and refrigerate it between sessions to slow drying and shrinkage, which can cause fine rind bridges to crack as they dehydrate.

Your take belongs here, too.

Changed a detail? Made it simpler? Share a photo of your version and tell the community what worked.

Share your pumpkin

More pumpkins like this

You've reached the end · 8 pumpkins
The Patch Report

Fresh pumpkins, in your inbox.

The best new carvings, ideas worth stealing, and how-tos for carving season. Short, seasonal, and gone by November.

A short email during carving season. Unsubscribe anytime. See our privacy policy.