Halloween Pumpkin Carving Contest · Starts October 1st · $500 in prizes
← Back to ideas
@ai_concepts
Sep 25, 2026
Intermediate Bunny Jack-O-Lantern with Rooted FeaturesAI
0

Report this carving

Tell us what is wrong. Reports are private.

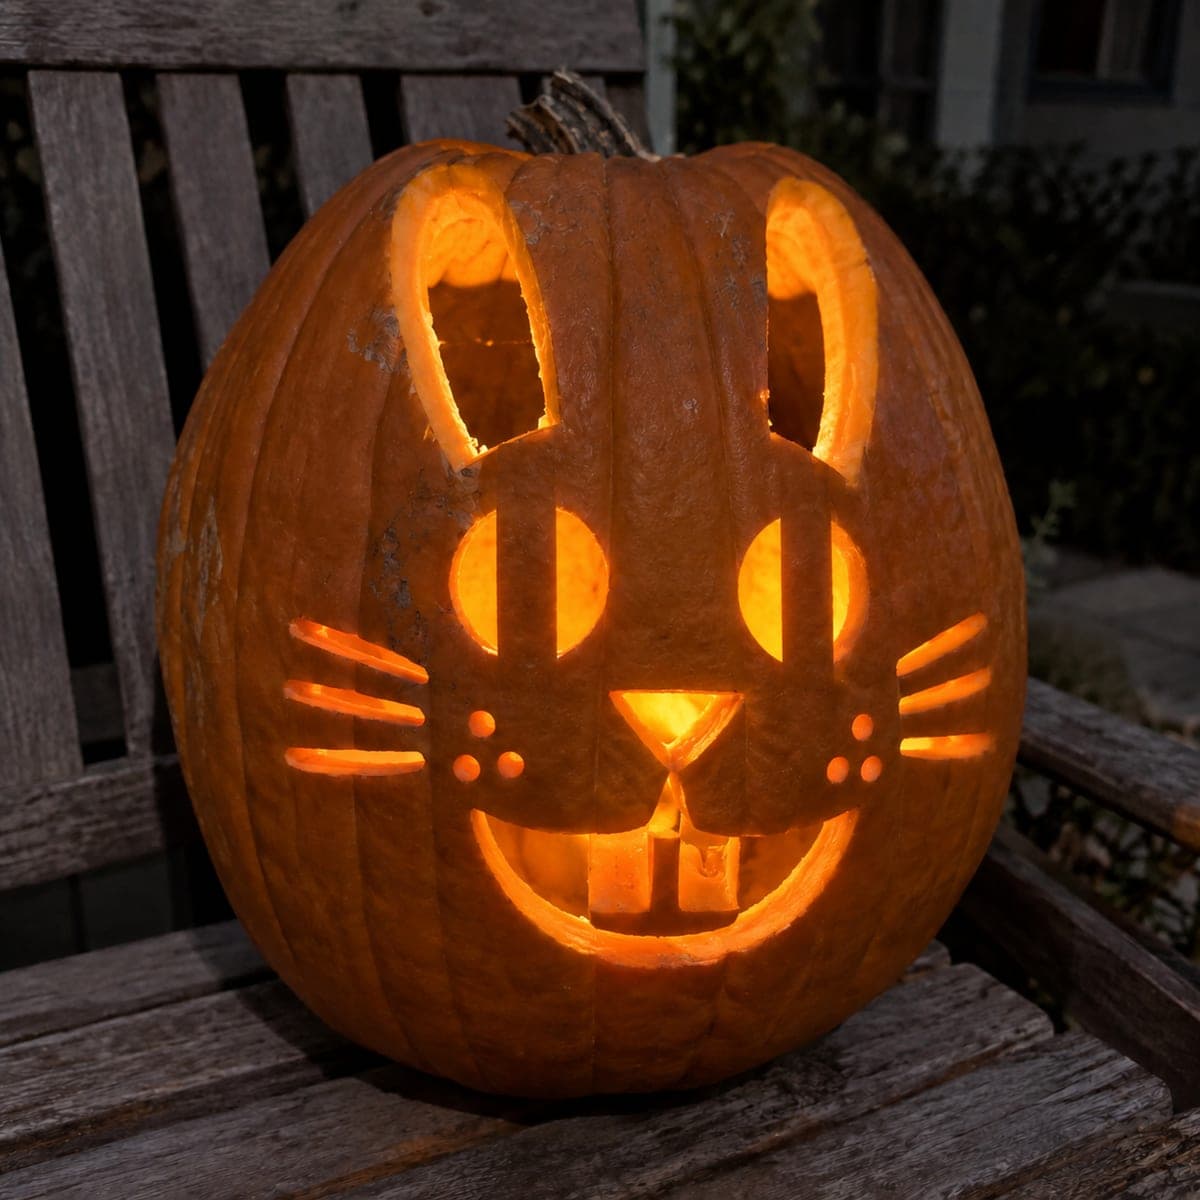
Intermediate Bunny Jack-O-Lantern with Rooted Features

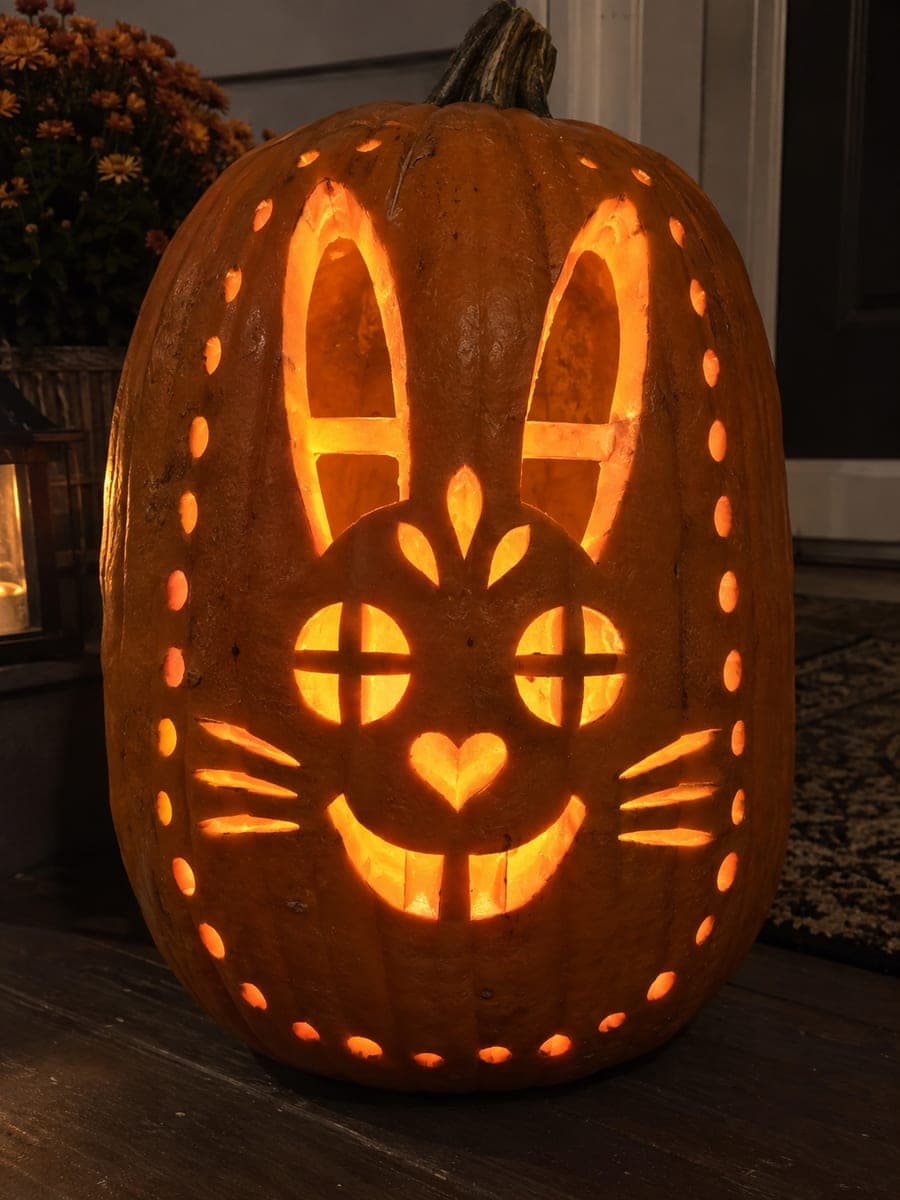
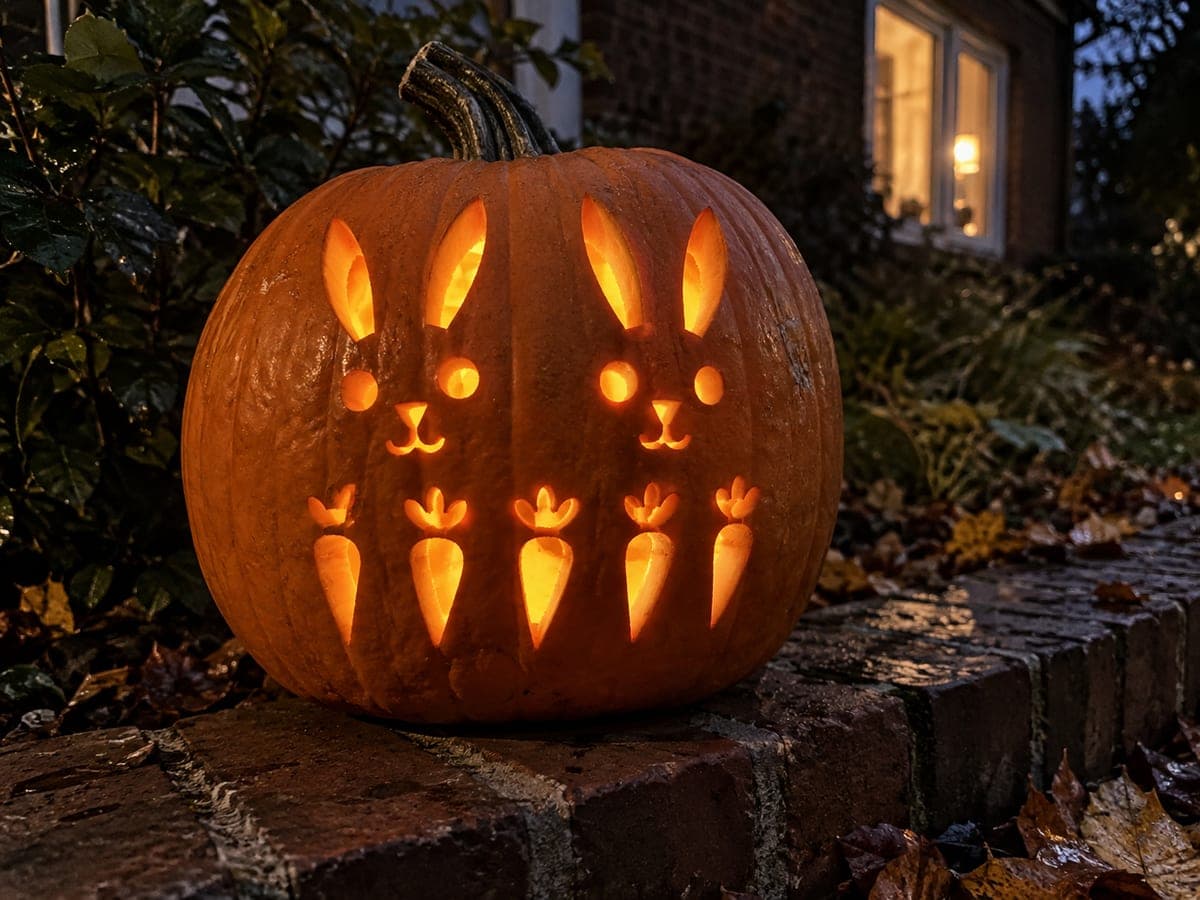
Broadly rooted retained features and separate through apertures give this intermediate bunny jack-o-lantern clean structure, with shallow relief added only where the rind is fully backed. At this level, the design introduces more apertures and finer retained shapes than the easy version. Work from the center outward, cutting larger openings before smaller accent holes. Positioning the pumpkin near a reflective surface doubles the glow for a more dramatic display.

No ratings yet · Sign in to rate
Comments (0)

  • No comments yet — be the first.

Save without an account. Sign in to like or comment.

Our tips for carving a similar design

This design builds on the basic bunny silhouette by adding more cutout openings and finer retained rind shapes that give the face more expression. All retained features stay broadly rooted so nothing floats free. Work from the center of the face outward, tackling larger openings before smaller accents, to keep the design stable throughout the process.

From pumpkin to porch

  1. Prep the pumpkin

    Cut the lid at an angle and hollow out the pumpkin until the walls are a consistent 1 to 1.5 inches thick. A thinner wall lets light pass more easily, but anything under three-quarters of an inch becomes fragile in a design with multiple apertures.

  2. Transfer the stencil

    Tape the stencil to the pumpkin front and pin-transfer every outline carefully, including the smaller accent openings. Rub chalk or flour across the surface after removing the paper to make the dot pattern clearly visible in all lighting conditions.

  3. Cut the main facial apertures

    Begin with the largest eye and head-outline openings, using a pumpkin saw with short strokes. At medium difficulty the apertures sit closer together than at beginner level, so pause between cuts to check that each bridge between openings is still intact before moving on.

  4. Cut accent and detail openings

    Move to the smaller nose, mouth, and any secondary openings once the primary shapes are clear. Use a narrow detail blade for tighter curves. Push each freed piece inward gently rather than pulling, to avoid stressing neighboring bridges.

  5. Add backed shallow marks

    Anywhere the stencil calls for a backed (shaded, not pierced) mark, use a gouge to remove only the outer skin. Keep strokes even in pressure and depth to create a consistent glow level. Test with your LED to confirm the mid-glow reads as intended before finalizing.

  6. Light and display

    Place a bright LED inside and position the pumpkin near a reflective surface such as a white wall or a mirror to double the perceived glow. The additional apertures at medium level cast more scattered light points than the beginner version, giving a livelier nighttime display.

Written with AI to match this design

Gather your supplies

Check things off as you get ready.

Work on a stable surface, keep your free hand out of the cutting path, and have an adult handle sharp tools.

Three levels of light

  • Leave intact

    The rind forming the broad ear roots, forehead, and jaw bridges stays fully dark.

  • Peel & shade

    Shallow backed contours on the inner ears and cheek areas glow at a soft mid-level.

  • Cut through

    The multiple eye apertures, nose opening, and any mouth cutouts glow at full brightness.

Learn the carving basics

Before you start cutting

How do I keep the narrow bridge between two close eye openings from cracking?

Cut one eye completely first and allow the rind to settle for a moment before starting the second. Keep the bridge at least half an inch wide if possible, and cut the inner edge of each opening with short nibbling strokes rather than one long push.

My shallow backed marks are blotchy and inconsistent. How do I even them out?

Work with the gouge at a low angle and use a consistent light pressure across the whole area before going deeper in any one spot. If an area goes too thin and light leaks through, dab the back of that section with a thin layer of petroleum jelly to diffuse the hot spot.

Will a regular tea light work, or do I need a brighter LED?

A tea light is enough for the beginner version, but the intermediate design has more apertures that spread the light further. A slightly brighter LED disc light or a battery-powered string coiled inside will keep the whole face evenly lit.

Your take belongs here, too.

Changed a detail? Made it simpler? Share a photo of your version and tell the community what worked.

Share your pumpkin

More pumpkins like this

You've reached the end · 8 pumpkins
The Patch Report

Fresh pumpkins, in your inbox.

The best new carvings, ideas worth stealing, and how-tos for carving season. Short, seasonal, and gone by November.

A short email during carving season. Unsubscribe anytime. See our privacy policy.