Halloween Pumpkin Carving Contest · Starts October 1st · $500 in prizes
← Back to ideas
@ai_concepts
Sep 25, 2026
Easy Floppy-Eared Dog Face Pumpkin Carving IdeaAI
0

Report this carving

Tell us what is wrong. Reports are private.

Easy Floppy-Eared Dog Face Pumpkin Carving Idea

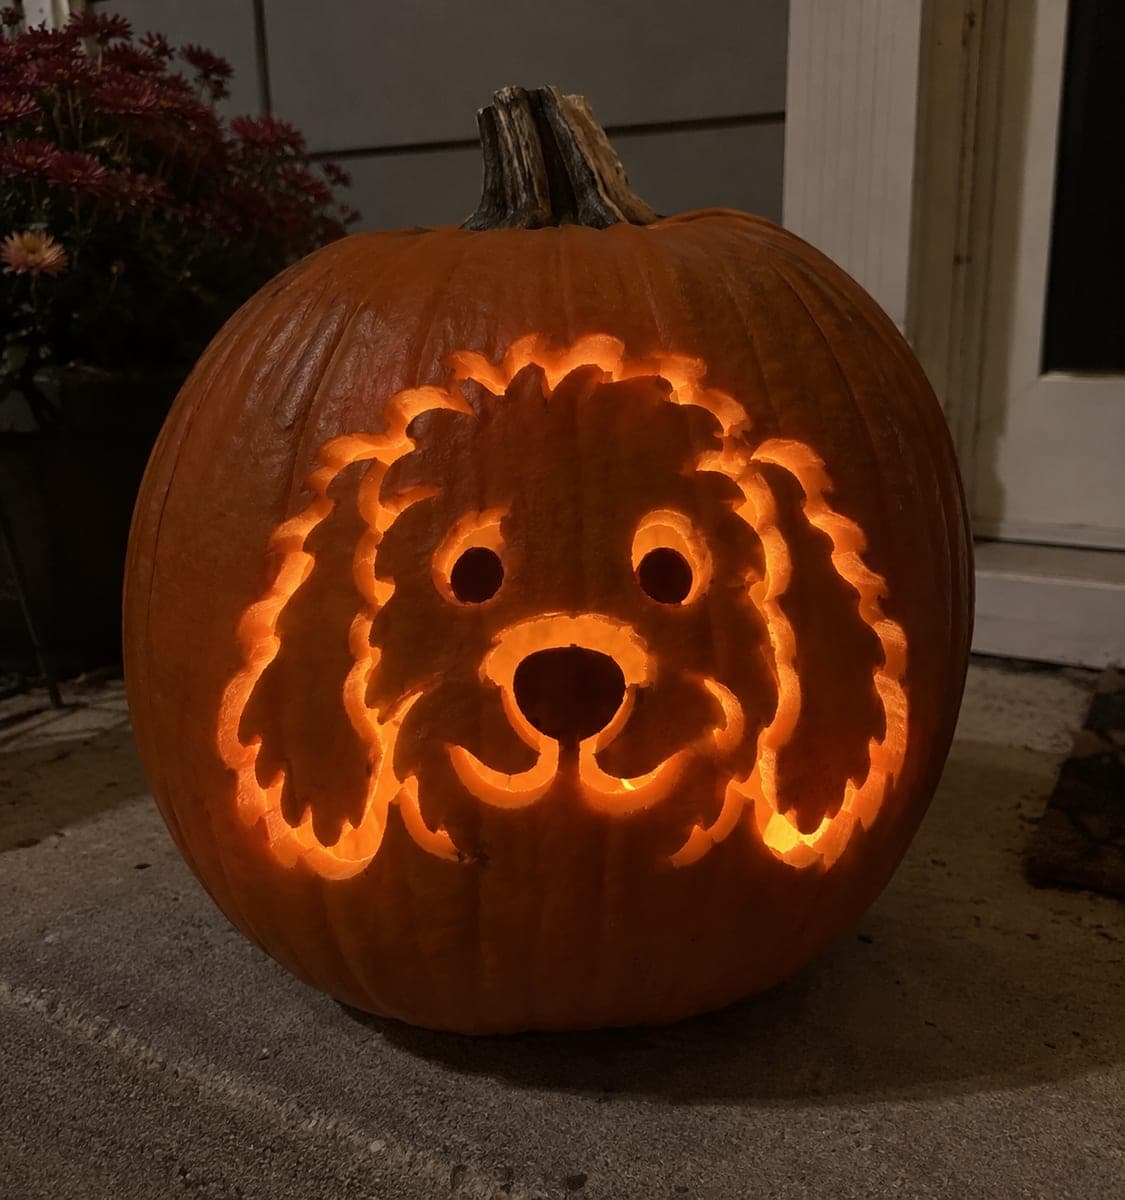
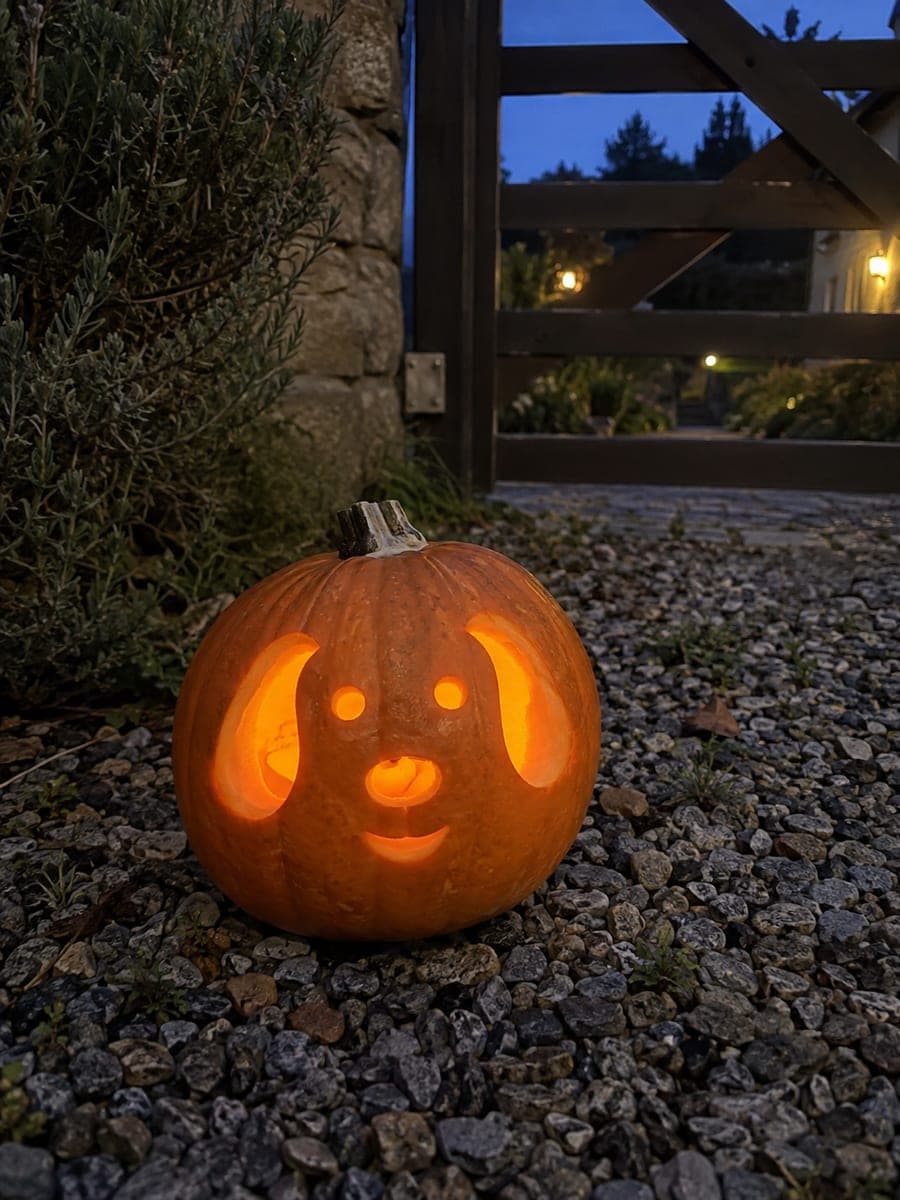
Separate ear openings, round eyes, a wide nose and a curved smile cut through the rind give this easy dog pumpkin carving its instantly lovable expression, with broad rind preserved between every cut for beginner-friendly stability. Start with the eyes to anchor the face proportions, then work outward to the ears and finish with the nose and smile. A cookie-cutter or printed template helps keep the ear shapes symmetrical on the round pumpkin surface. A warm LED candle inside makes the floppy ears glow like a golden retriever lit from within.

No ratings yet · Sign in to rate

Comments (0)

  • No comments yet — be the first.

Save without an account. Sign in to like or comment.

Our tips for carving a similar design

Each facial element, the ears, eyes, nose and smile, is an independent cut with broad rind preserved between every opening. This isolated aperture approach means no bridging is needed and no single cut endangers another. Starting with the eyes anchors the face proportions before the other elements are placed.

From pumpkin to porch

  1. Hollow the pumpkin

    Cut a lid from the back or base to keep the front face clean. Scoop all seeds and scrape the inner wall to about an inch thick across the entire face panel. This even wall thickness means all apertures glow with similar brightness.

  2. Transfer the design

    Use a printed dog-face template or cookie-cutter impressions to mark the ear shapes symmetrically, then position the eyes below the ears, the nose centered beneath the eyes and the smile below the nose. Confirm at least two centimeters of solid rind separates every element before picking up a blade.

  3. Cut the eyes first

    Use a detail saw to cut both round or oval eye holes, working in a smooth rotating motion. The eyes establish the face's center axis, so symmetry here matters most. Pop out the waste pieces cleanly.

  4. Cut the ears

    Work outward from the eyes to the floppy ear openings. The ears are the largest apertures on this design, so use longer strokes for the straight sections and slow down for the rounded bottom curves. Keep each ear shape symmetrical by checking against your template.

  5. Cut the nose and smile

    Finish with the wide nose and the curved smile opening. These sit low on the face, so brace the pumpkin on a stable surface while cutting to prevent it from rolling. A C-clamp or folded towel under the pumpkin helps.

  6. Light and display

    Set a warm LED candle toward the back of the pumpkin's interior to distribute light evenly. The floppy ear openings glow softly and the round eyes create bright focal points. Display on a porch step or low table where the face is at or slightly below eye level.

Written with AI to match this design

Gather your supplies

Check things off as you get ready.

Work on a stable surface, keep your free hand out of the cutting path, and have an adult handle sharp tools.

Three levels of light

  • Leave intact

    All intact rind forming the face, head sides and the rind bridges between apertures

  • Peel & shade

    None, this design uses only full cut-through openings

  • Cut through

    Both ear holes, both eye holes, the wide nose opening and the curved smile hole

Learn the carving basics

Before you start cutting

How do I keep the two ear shapes symmetrical on a round pumpkin?

Tape a printed template to the pumpkin and poke-transfer the ear outlines rather than freehand drawing them. Alternatively, press a cookie cutter with the right ear shape gently into the rind to leave an impression on both sides. Check symmetry by measuring the distance from each ear to the vertical center line.

Can children help with this carving?

Children can help scooping, transferring the template and placing the LED candle. Adults should handle all blade work. Children can choose the design and help frame the finished pumpkin with leaves or small gourds for display.

What LED color looks best for a dog face design?

A warm white or amber LED candle gives the orange rind a golden glow that suits the friendly dog theme well. Cool white or blue LEDs work if you prefer a more graphic, graphic-novel look, but the warm tones feel more inviting for this style.

Your take belongs here, too.

Changed a detail? Made it simpler? Share a photo of your version and tell the community what worked.

Share your pumpkin

More pumpkins like this

You've reached the end · 8 pumpkins
The Patch Report

Fresh pumpkins, in your inbox.

The best new carvings, ideas worth stealing, and how-tos for carving season. Short, seasonal, and gone by November.

A short email during carving season. Unsubscribe anytime. See our privacy policy.