@midnightcarver
Sep 5, 2026
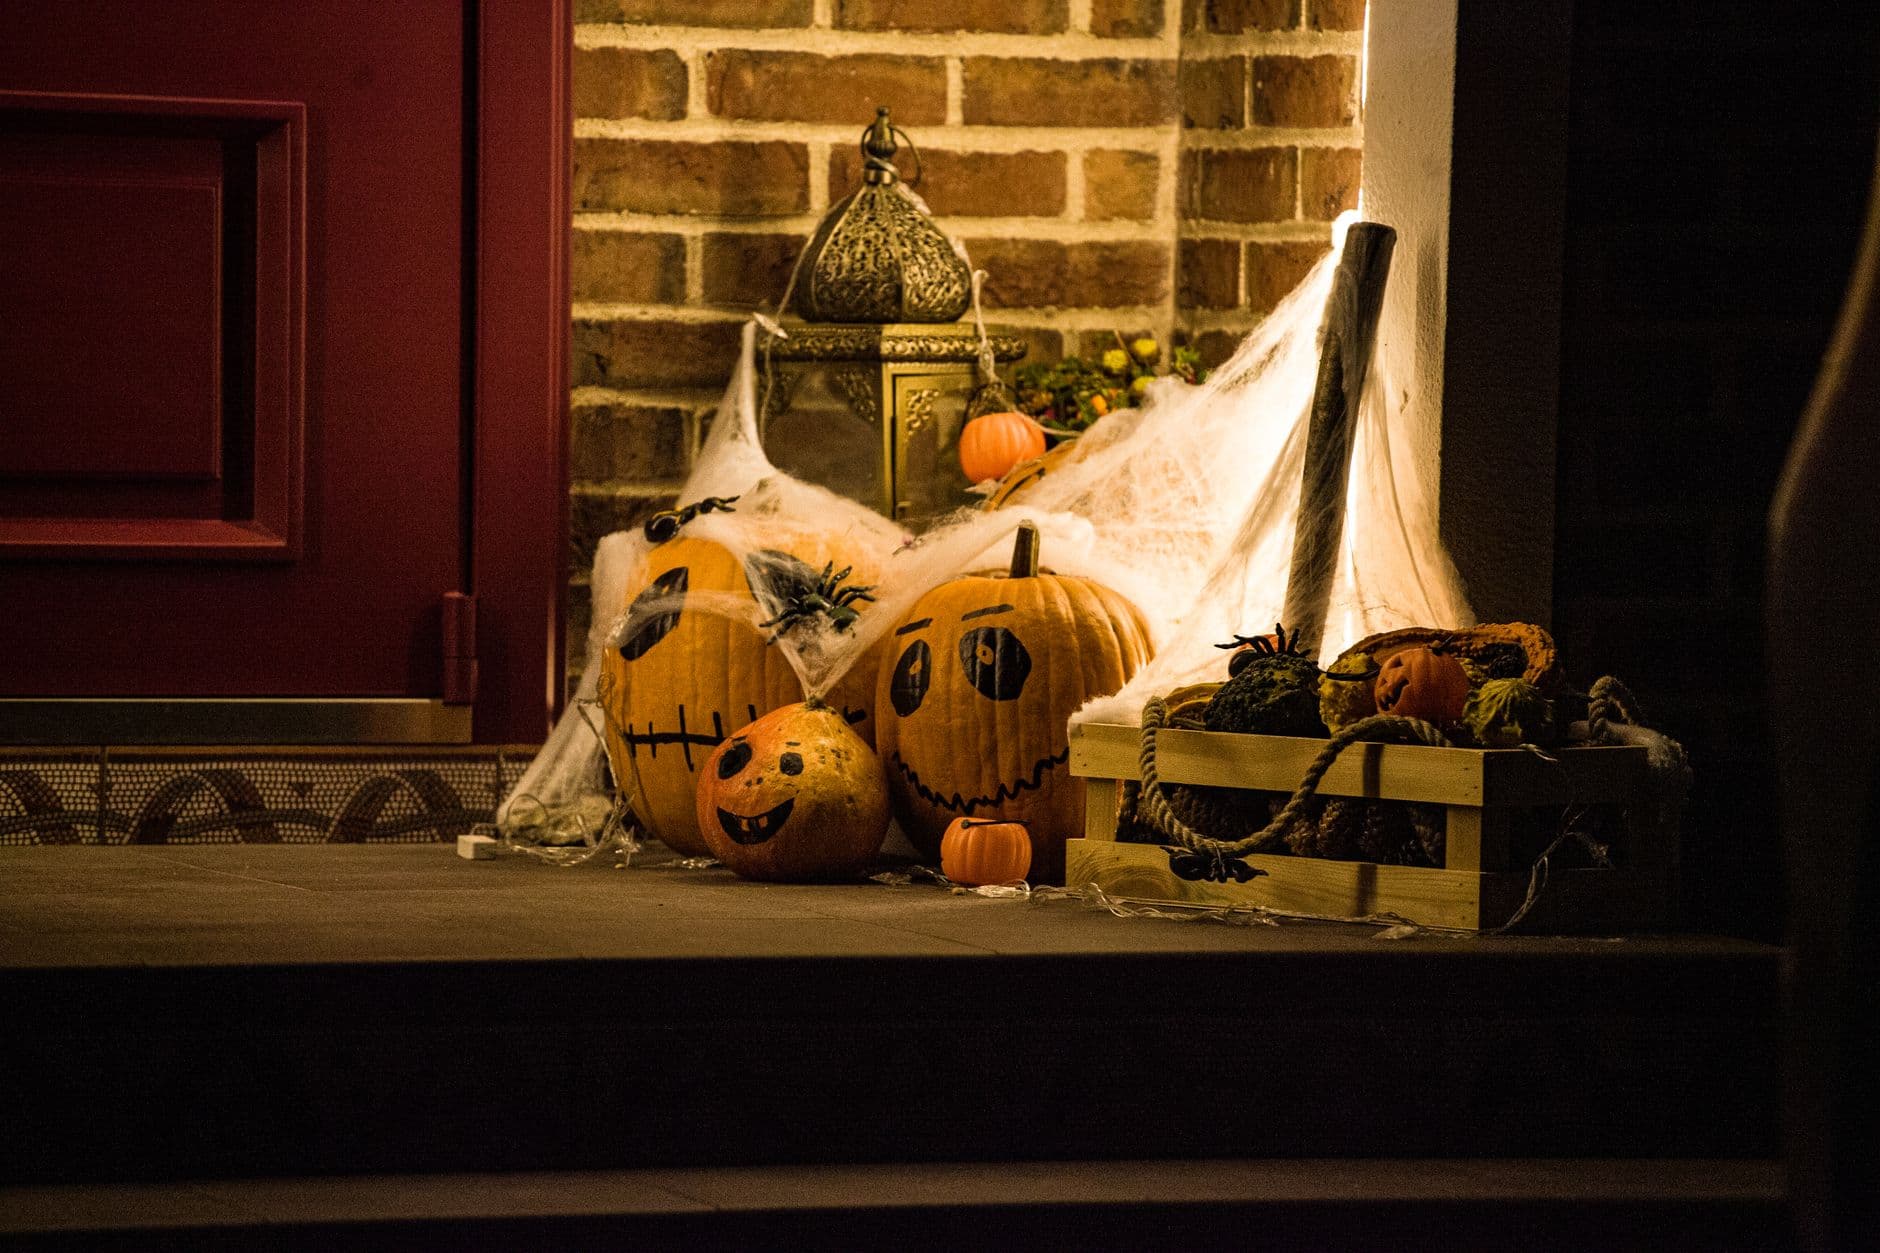
The whole trick here is that nothing gets cut at all. You draw three different expressions on three pumpkins with a bold marker, then group them close and drape fake cobwebs over the pile so they look like a nervous little family. Because there is no carving, the payoff comes from face expression and staging rather than light through the skin.
Written by PumpkinCarvingIdeas.com, inspired by @midnightcarver's photo above. These are our suggestions, not instructions from the uploader, and this approach hasn't been tested on their exact carve.
Choose three pumpkins of slightly different sizes so the group has personality. Wipe each one down with a dry cloth to remove dirt and moisture, since marker takes better on a clean, dry surface. Set them on newspaper indoors where you have good light. Leave the stems on for character.
Plan one stitched frown, one nervous grin, and one wide-eyed \"seen things\" stare so each pumpkin feels different. Use a pencil or a washable marker to rough in eyes and mouths before you commit. Trace a simple face stencil if you want even spacing. Step back and check the expressions from a few feet away.
Go over your sketch with a black permanent marker, using a fine tip for details like stitches and a chisel tip for thick brows. Draw slowly and let each stroke dry a second before crossing it, so you do not smear. Keep the mouths simple, a zigzag grin or a stitched line reads clearly from the porch. Add small eyebrows to sell the worried mood.
Move the pumpkins to your porch or step and cluster them tight so they touch, tucking a smaller one in front. Position the biggest, most dramatic face toward the walkway. Add a couple of mini gourds or a wooden crate beside them to fill the scene. This grouping is what turns three faces into a story.
Stretch fake spider webbing thin and drape it loosely over the tops, pulling it out so it looks wispy rather than clumped. Anchor the web to a nearby wall or lantern so it stays put in a breeze. Tuck a battery LED lantern behind or beside the group to throw warm light across the faces. Skip open flames near the synthetic webbing.
Look at the display after dark to make sure the faces catch the light and the webs read clearly. Nudge any pumpkin that hides its face in shadow. Snap a photo from a low angle near the step to capture the huddled look. Wipe off any marker smudges with a damp cloth if needed.
Check things off as you get ready.
Work on a stable surface, keep your free hand out of the cutting path, and have an adult handle sharp tools.
The entire orange skin stays uncut and dark, since this is a drawn design that relies on marker faces rather than glow.
No skin is peeled, but a nearby LED lantern washes soft warm light across the surface to mimic a dim glow.
Nothing is cut through on these pumpkins; brightness comes from the external lantern lighting the group.
Permanent marker holds up well on dry pumpkin skin for a couple of weeks. Rain and heavy dew can cause slight smearing, so keep the pumpkins under a porch roof if you can. Touch up any faded lines with a fresh pass of marker.
No, that is the beauty of a no-carve design. Leaving them whole means they last longer and do not attract as many pests. Just wipe the outside clean before you draw.
Use a battery LED lantern or string lights placed beside or behind the group. Since the pumpkins are draped in synthetic webbing, keep all real flames far away. LEDs give you a warm glow without any fire risk near the webs.
Changed a detail? Made it simpler? Share a photo of your version and tell the community what worked.
The best new carvings, ideas worth stealing, and how-tos for carving season. Short, seasonal, and gone by November.







Comments (0)