The 2026 contest winners are inGrand Prize, People's Choice and Most Creative, all crowned.
@ai_concepts
Sep 25, 2026
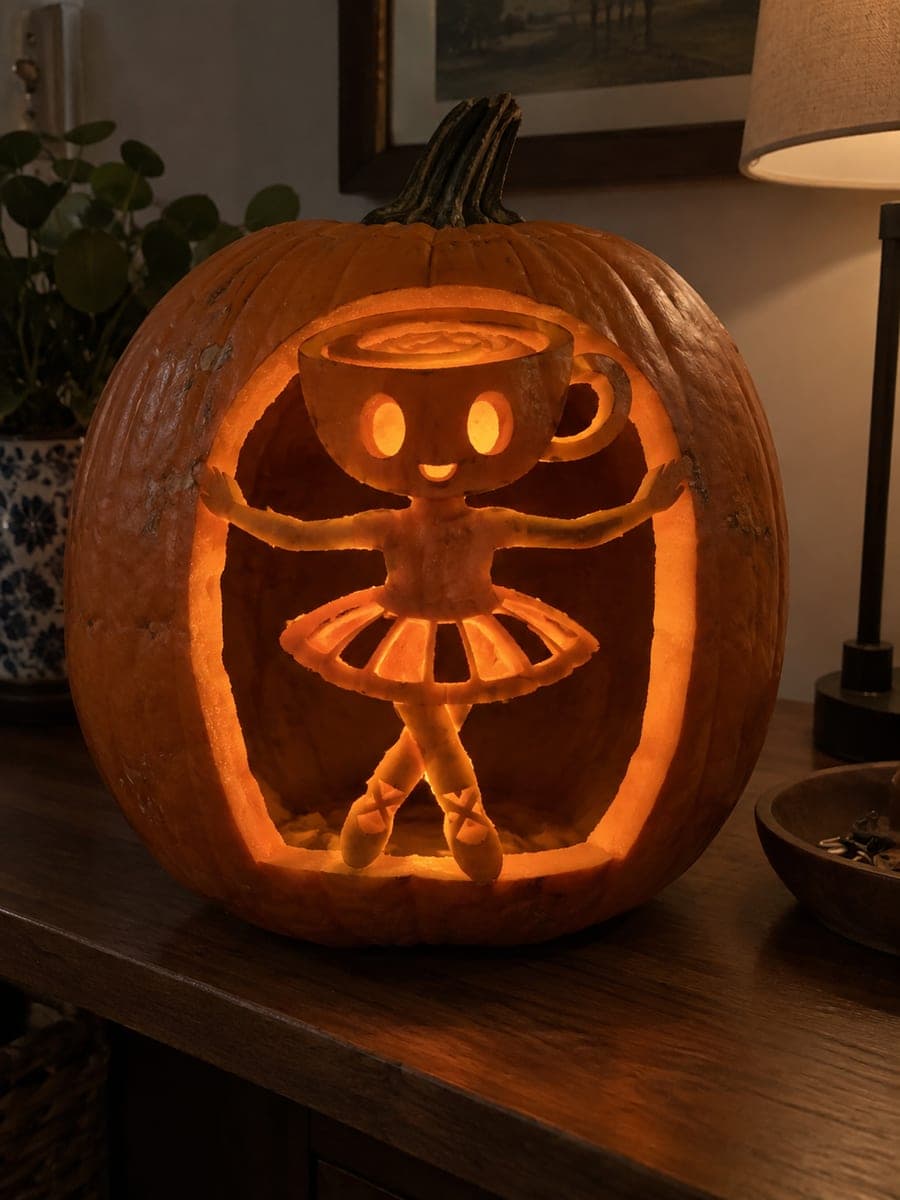
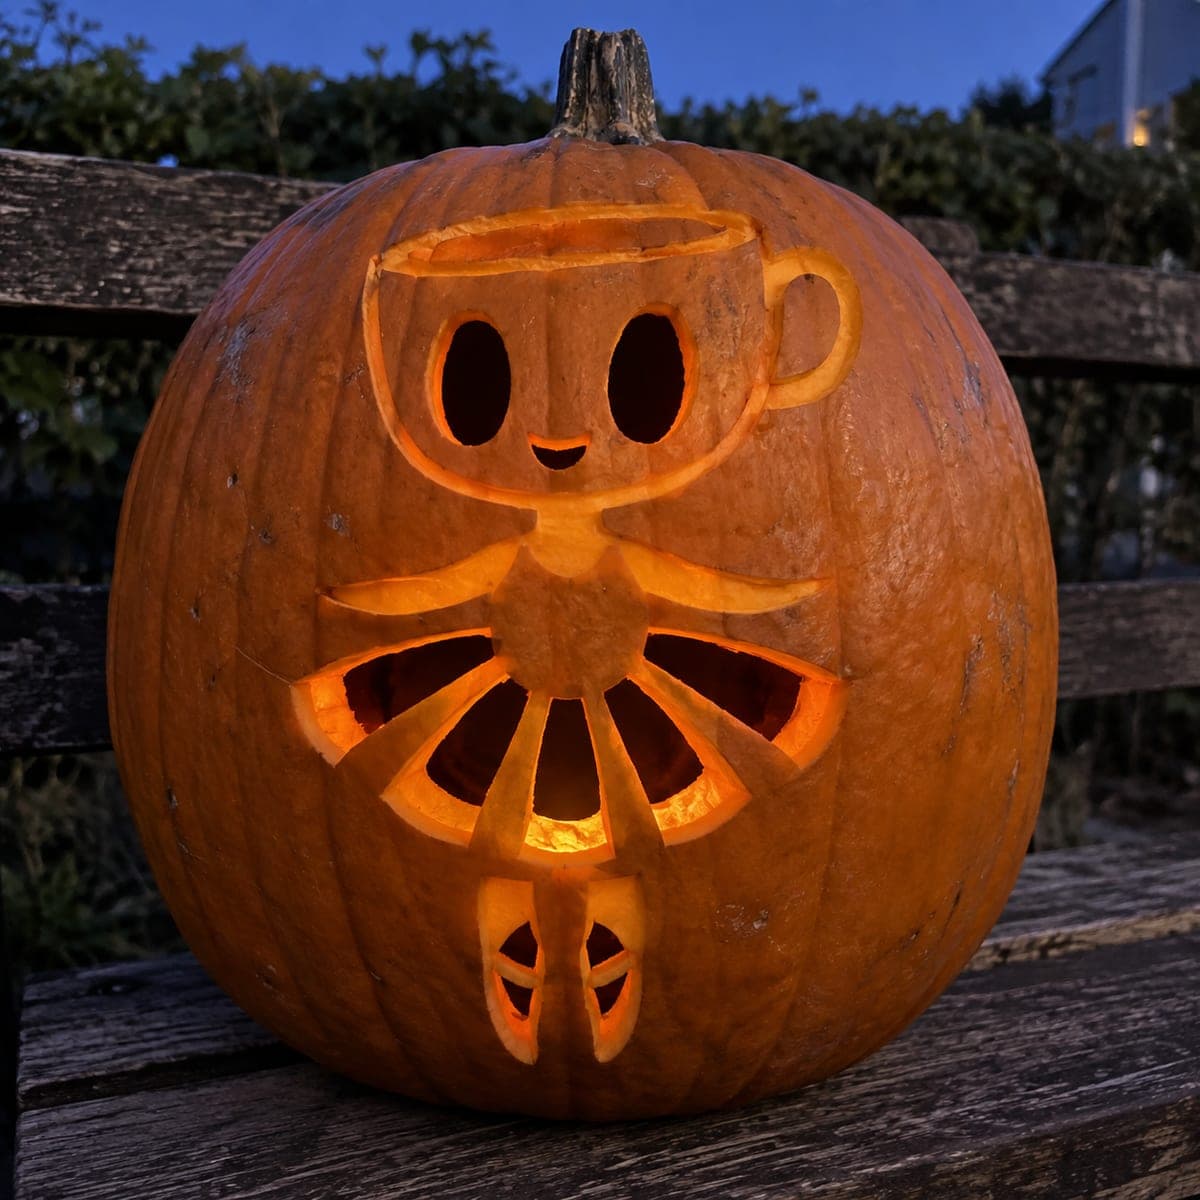
Easy Ballerina Cappuccina PumpkinAI
0

Report this carving

Tell us what is wrong. Reports are private.

Easy Ballerina Cappuccina Pumpkin

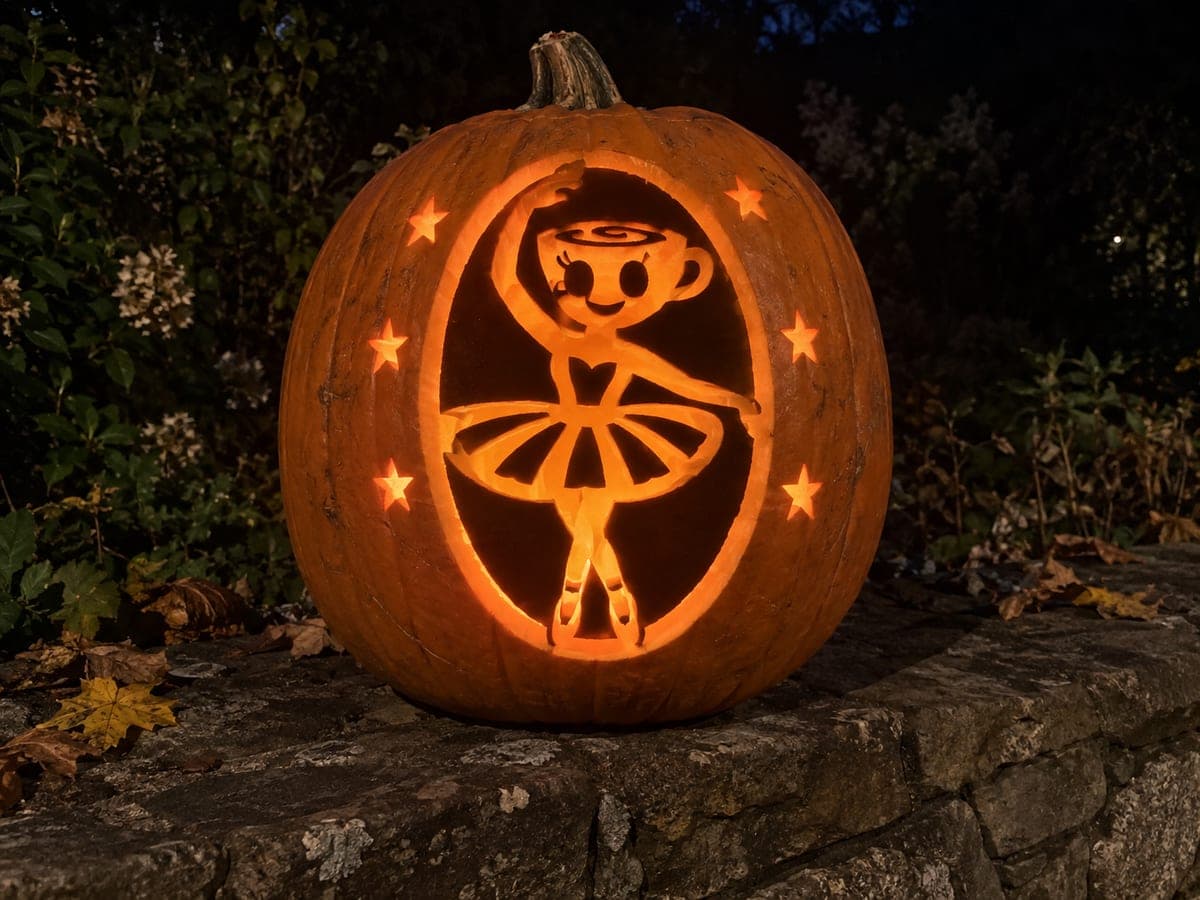
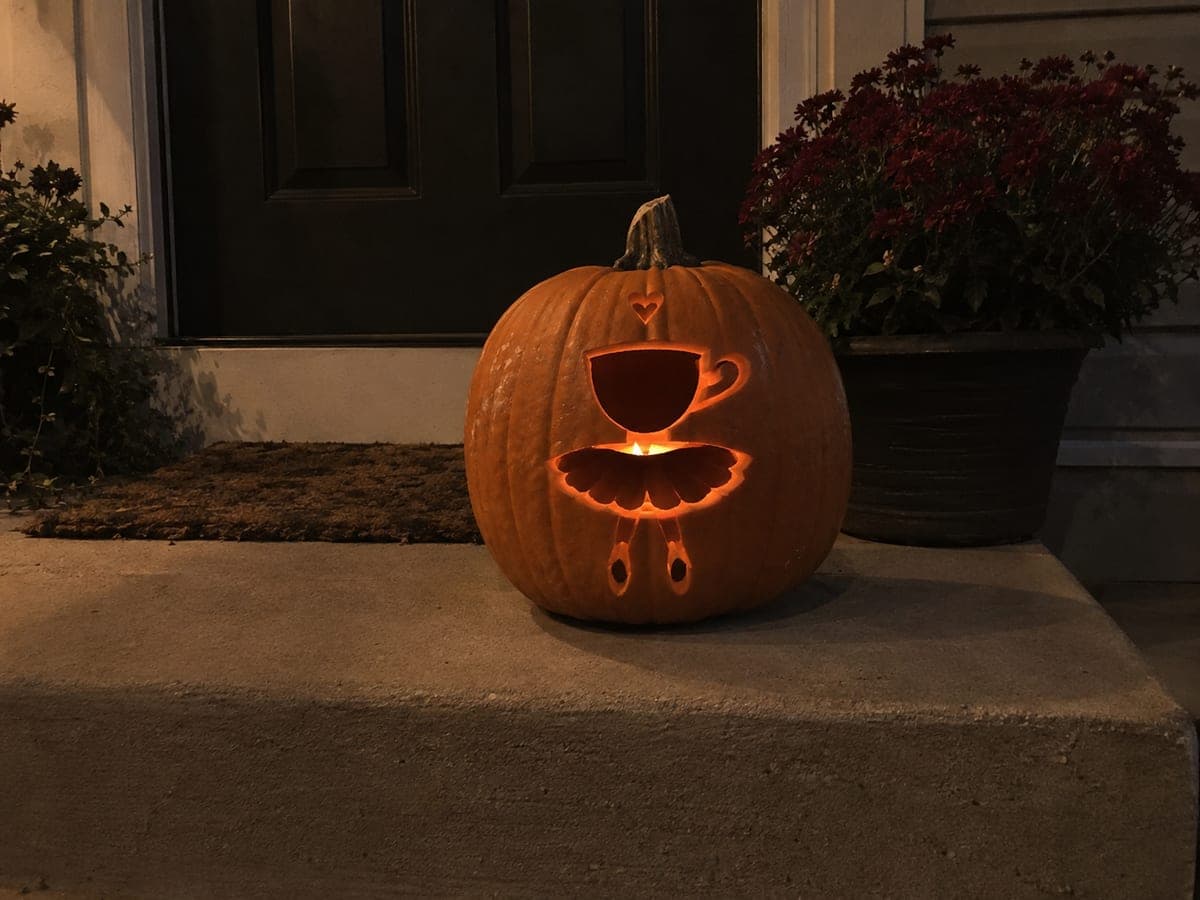
This easy Ballerina Cappuccina pumpkin carving idea cuts the coffee cup, tutu, and ballet slipper shapes as separate apertures divided by broad intact shell sections, while the handle and heart accents are scored lightly into the rind. The wide rind bridges between each opening keep this pumpkin very sturdy for a beginner. Cut the cup opening first, then space the tutu panels evenly below it before finishing with the slipper slots at the base. A warm LED inside makes each opening glow distinctly against the orange rind.

No ratings yet · Sign in to rate
EasyFantasyFunnyClassic Cutout
ballerina-cappuccinafantasymemebrainrotcartoonfunnyeasytutu-cutout

Save this design for carving night, then share a photo of your own jack-o'-lantern once it's glowing.

Ballerina Cappuccina and all related characters, names, logos, and trademarks are the property of their respective owners. This is an unofficial fan carving shared by our community for inspiration only. PumpkinCarvingIdeas.com is not affiliated with, sponsored by, or endorsed by any rights holder or person depicted, and no such connection is implied.
Comments (0)

  • No comments yet. Be the first.

Our tips for carving a similar design

The cup, tutu, and slipper apertures each sit as separate openings divided by broad rind bridges, making this one of the most structurally forgiving designs at this difficulty level. Handle and heart accents stay as light surface scores that add charm without weakening the wall. Cutting the cup opening first and spacing the tutu panels evenly below it creates a natural top-to-bottom workflow that keeps the pumpkin stable throughout.

From pumpkin to porch

  1. Gut and sketch the layout

    Remove a back panel and scoop the interior to about 1-inch thickness. Draw the cup opening at the top of the design area, three or four tutu panel slots in the middle, and slipper slots at the base with a dry-erase marker. Include the handle score line and small heart accent location.

  2. Score the handle and heart accent

    Use a linoleum cutter to score the cup handle curve and the small heart shape lightly into the rind skin only. These are decorative details that create a soft glow without cutting through. Keep depth consistent and the handle curve smooth.

  3. Cut the cup opening

    Pierce inside the cup outline and saw around it with a thin-bladed pumpkin saw. This is the largest opening and should be cut first while the pumpkin is fully supported. Remove the piece and clean edges with a craft knife.

  4. Cut the tutu panel slots

    Working outward from the center panel, cut each tutu slot separately. Leave broad rind strips between each slot, at least three-quarters of an inch. The wide bridges are what keep this design so sturdy for a beginner. Take your time on the curved top edge of each panel.

  5. Cut the slipper slots at the base

    Cut the two slipper-shaped openings at the bottom of the design last, since they are the lowest structural elements. Keep them proportional to the tutu panels above. Smooth any jagged edges with a craft knife so the slots look clean when lit.

  6. Light and display

    Place an LED tea light inside through the back panel, positioning it toward the center of the design. Each opening will glow individually against the orange rind. The scored handle and heart will glow softly as secondary details. Display on a flat surface where all the openings face viewers directly.

Written with AI to match this design

Gather your supplies

Check things off as you get ready.

Work on a stable surface, keep your free hand out of the cutting path, and have an adult handle sharp tools.

Three levels of light

  • Leave intact

    The broad rind bridges between apertures and the outer shell stay solid and dark orange.

  • Peel & shade

    The scored cup handle and small heart accent glow as dim, warm shadow details.

  • Cut through

    The cup opening, tutu panel slots, and slipper slots cut fully through for bright warm light.

Learn the carving basics

Before you start cutting

How wide should the rind bridges between the tutu panels be?

At minimum three-quarters of an inch, and wider is better for a first-time carver. These bridges carry the structural load of the rind above them and also define the tutu's skirt rib look. Narrower than half an inch and they become fragile within a few days as the pumpkin dries.

Can I add more tutu panels for a fuller skirt look?

Yes, four or five panels work well. Just keep the spacing even and the bridges consistent. More panels means more total rind removed from the middle zone, so consider widening the bridges slightly to compensate for the extra material removed.

The scored heart is barely visible. How do I make it more defined?

Deepen the score lines slightly with the linoleum cutter and remove a bit more skin, but stop before the flesh becomes visible. You can also carve a very shallow back-peel inside the heart area, thinning the wall to about half its original thickness, which lets much more light through and makes the heart read clearly.

Your take belongs here, too.

Changed a detail? Made it simpler? Share a photo of your version and tell the community what worked.

Share your pumpkin

Want more designs like this? Browse our full library of pumpkin carving ideas, or pick a free printable stencil. Every pattern and template in our own collection is free to print at home.

More pumpkins like this

You've reached the end · 8 pumpkins
The Patch Report

Fresh pumpkins, in your inbox.

The best new carvings, ideas worth stealing, and how-tos for carving season. Short, seasonal, and gone by November.

A short email during carving season. Unsubscribe anytime. See our privacy policy.