The 2026 contest winners are inGrand Prize, People's Choice and Most Creative, all crowned.
@ai_concepts
Sep 25, 2026
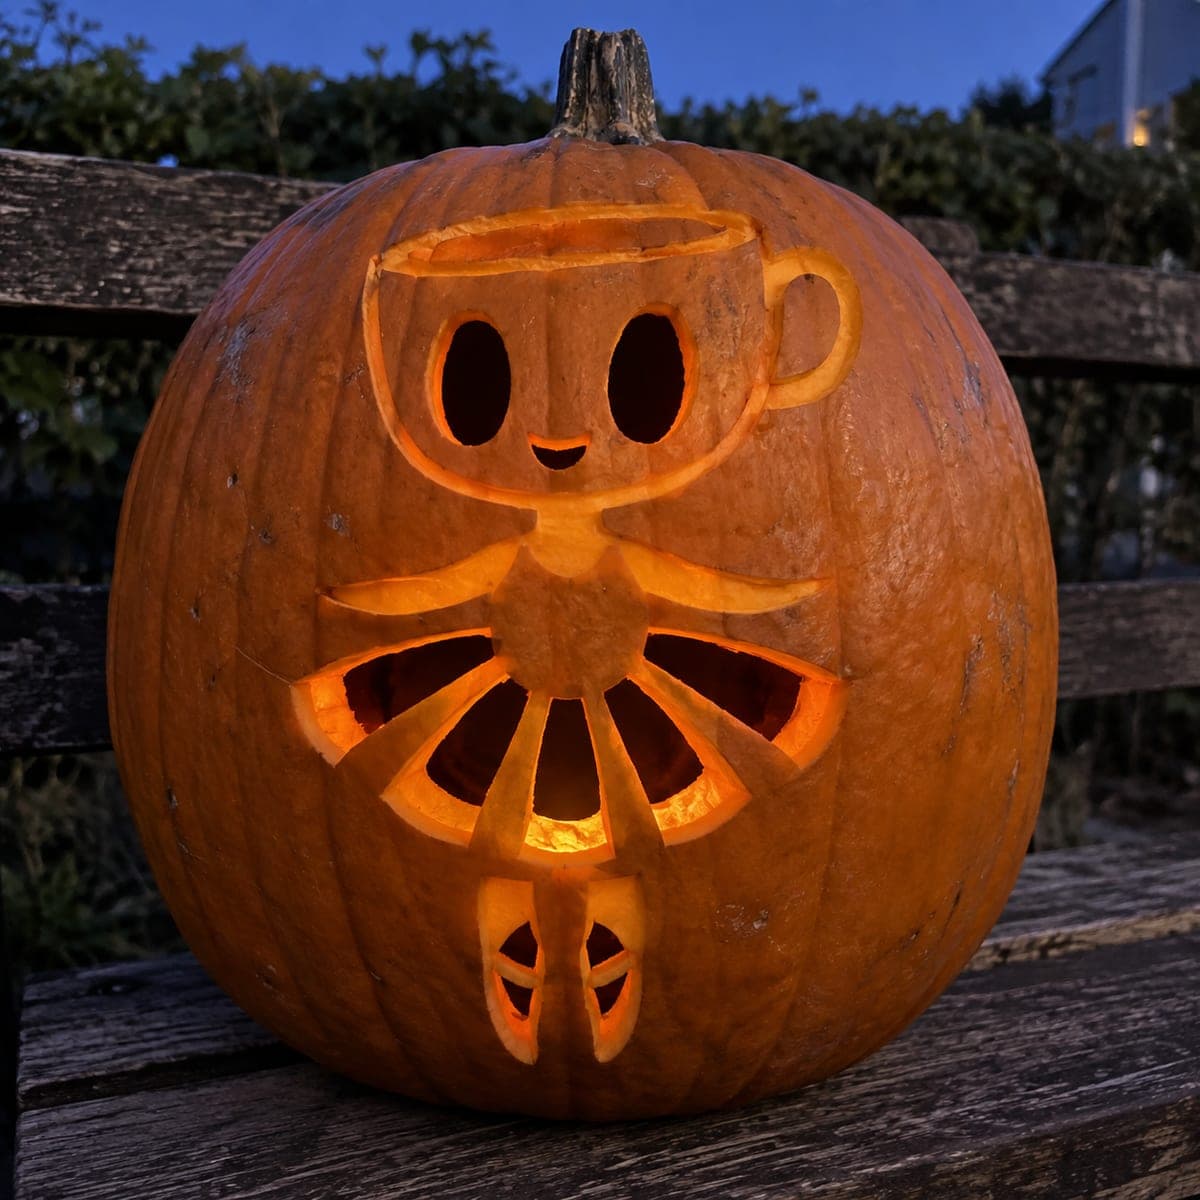
Ballerina Cappuccina Arch Jack-O-Lantern pumpkin carvingAI
0

Report this carving

Tell us what is wrong. Reports are private.

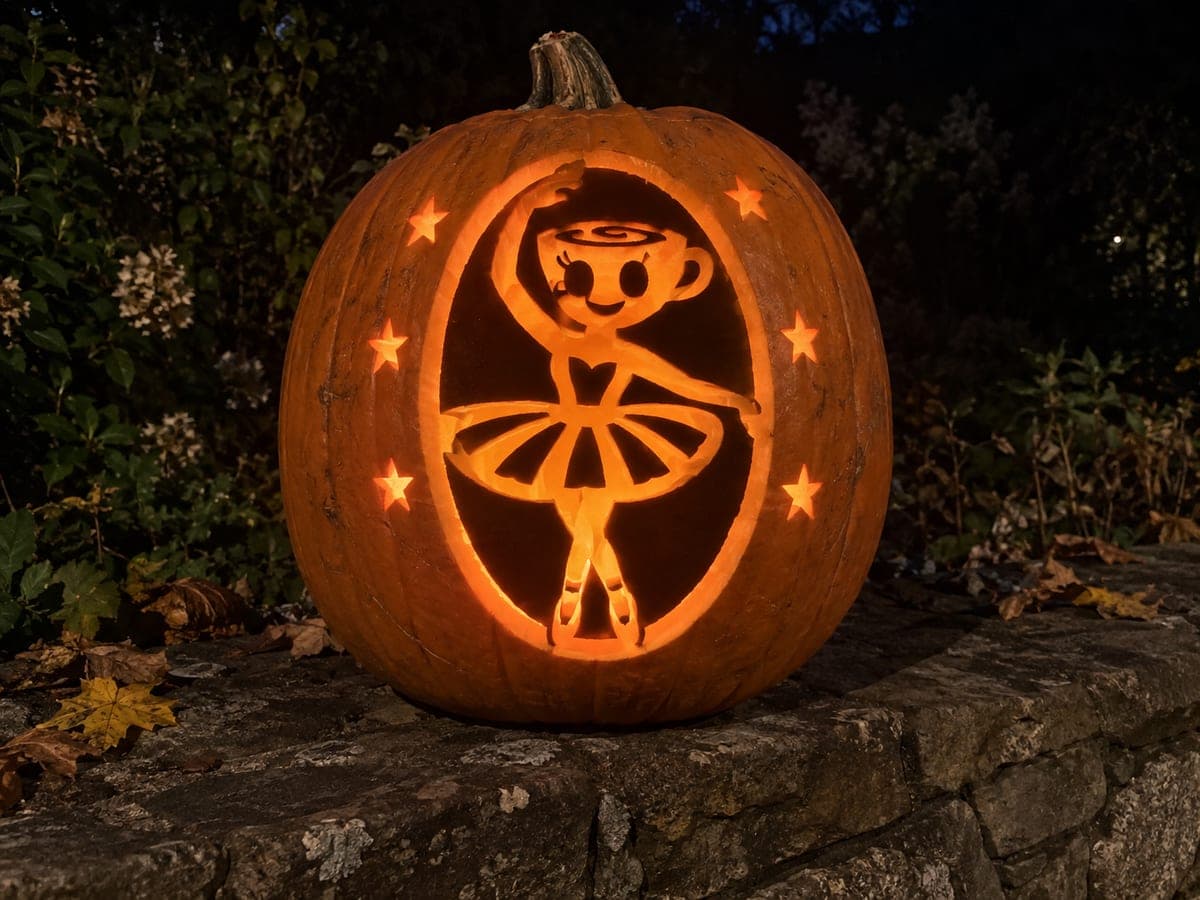
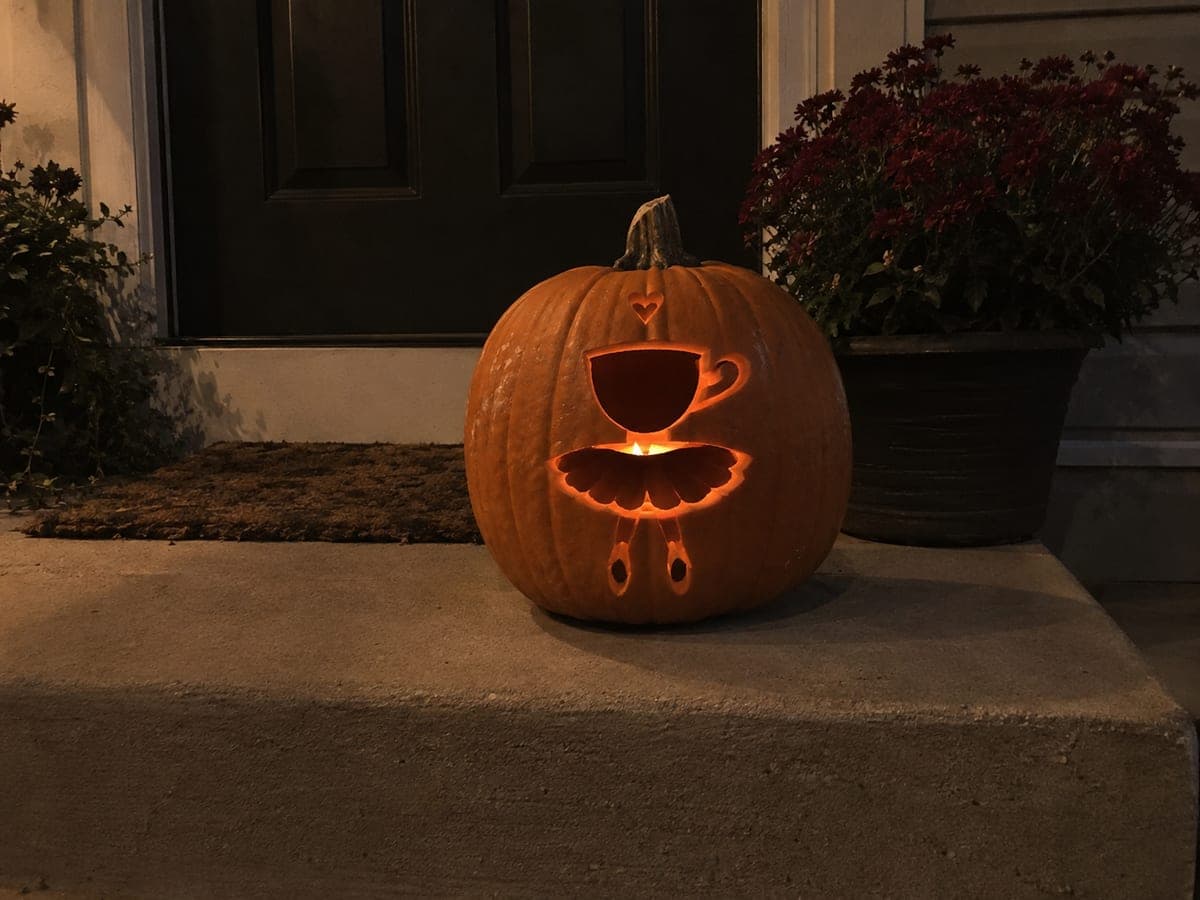
Ballerina Cappuccina Arch Jack-O-Lantern

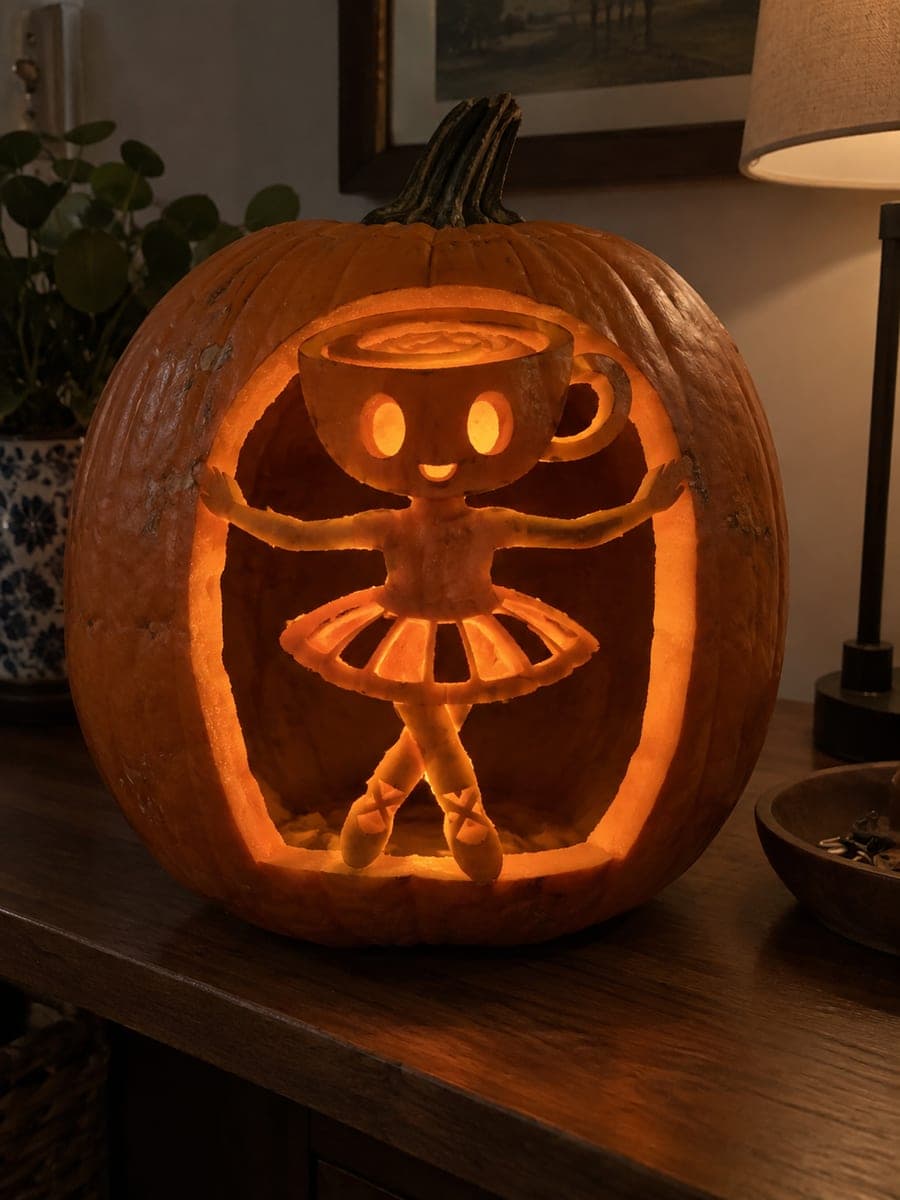
This hard Ballerina Cappuccina pumpkin carving features a large hollow arch surrounding the figure, fanned tutu panel openings, and the character retained as rind attached at the top cup, the side hands, and the crossed slippers at the base. Face and latte detail are shallow backed for texture without piercing through. Carve the large arch first so you understand how much structural rind remains before opening the tutu panels. The crossed slipper connection at the base is the most fragile point, so leave it until the very end of the session.

No ratings yet · Sign in to rate
HardFantasyFunnyClassic Cutout
ballerina-cappuccinafantasymemebrainrotcartoonfunnyarch-framecrossed-slipper

Save this design for carving night, then share a photo of your own jack-o'-lantern once it's glowing.

Ballerina Cappuccina and all related characters, names, logos, and trademarks are the property of their respective owners. This is an unofficial fan carving shared by our community for inspiration only. PumpkinCarvingIdeas.com is not affiliated with, sponsored by, or endorsed by any rights holder or person depicted, and no such connection is implied.
Comments (0)

  • No comments yet. Be the first.

Our tips for carving a similar design

A large hollow arch surrounds the ballerina figure, which is retained as rind connected at the top cup, the side hands, and the crossed slippers at the base. Fanned tutu panel openings within the arch add internal glow and the crossed slipper connection at the base is deliberately the last cut of the session because it is the most structurally fragile point. Face and latte details stay as shallow backed relief to add texture without adding more full cuts to an already complex wall.

From pumpkin to porch

  1. Gut and plan all connection points

    Remove a back panel and scoop to 1-inch walls. Draw the arch, figure, tutu panels, and all three connection bridge locations (top cup, side hands, crossed slippers) on the pumpkin surface. Mark the connection bridges clearly as no-cut zones before starting any saw work.

  2. Score the face and latte relief

    While the wall is fully solid, score the face features and latte pattern on the cup body with a linoleum cutter to about half the wall thickness. This relief will glow as textured mid-level amber once the pumpkin is lit. Keep lines crisp and consistent in depth.

  3. Cut the outer arch opening

    Pierce just inside the arch outline and work the saw around the full arch, pausing at each of the three connection bridge marks. The arch is a large opening, so take breaks to confirm the figure is still attached at all points as you progress around the curve. Remove arch sections and clean edges.

  4. Open the fanned tutu panels

    Cut the tutu panel openings within the figure one at a time, fanning outward from the body center. Leave the retained ribs between panels wide enough to hold under the weight of the figure they support. The figure's skirt attachment to the arch sides at the hands stabilizes this zone.

  5. Cut the crossed slippers last

    With everything else complete, carefully cut the spaces around the crossed slippers at the base of the figure. These cuts are the last remaining bridge connections to the arch frame. Work with a short, controlled saw motion. The slipper shapes will remain as rind attached to the bottom arch edge on both sides.

  6. Light and display

    Place a bright LED inside through the back panel. The arch opening, tutu panels, and face relief all contribute to a multi-toned glow. Display at eye level so viewers see the full figure framed by the arch. Apply petroleum jelly to all cut edges and reapply every two days.

Written with AI to match this design

Gather your supplies

Check things off as you get ready.

Work on a stable surface, keep your free hand out of the cutting path, and have an adult handle sharp tools.

Three levels of light

  • Leave intact

    The retained figure body, connection bridges, and outer rind beyond the arch stay fully dark and solid.

  • Peel & shade

    The shallow backed face features and latte detail on the cup body glow as soft mid-level amber.

  • Cut through

    The arch opening and the tutu panel slots within the figure cut fully through for bright warm light.

Learn the carving basics

Before you start cutting

The crossed slippers connection feels very thin. Should I widen it before cutting?

If your sketch shows the crossed slipper area is less than 3/4 inch of rind connecting to the arch on each side, widen the slipper outline slightly so more rind stays attached. A slightly less exact shape is far better than a broken bridge, since the slippers are barely visible once the pumpkin is lit from inside anyway.

How do I keep the fanned tutu panels from being uneven?

Mark all panel slots and all ribs with a dry-erase marker before cutting any of them. A slight fan angle means outer panels are slightly wider than inner ones, which is visually correct. Measure rib width at both top and bottom of each rib to keep them consistent from top to bottom.

Can I substitute a different connection point if one of the three bridges breaks mid-carve?

If a side hand bridge breaks, you can reinforce the remaining hand and rely on the top cup and slippers to hold the figure. If the top cup bridge breaks, the figure may start to tilt immediately and should be stabilized with a toothpick and craft glue before finishing. Never continue major cuts after losing a bridge without stabilizing first.

Your take belongs here, too.

Changed a detail? Made it simpler? Share a photo of your version and tell the community what worked.

Share your pumpkin

Want more designs like this? Browse our full library of pumpkin carving ideas, or pick a free printable stencil. Every pattern and template in our own collection is free to print at home.

More pumpkins like this

You've reached the end · 8 pumpkins
The Patch Report

Fresh pumpkins, in your inbox.

The best new carvings, ideas worth stealing, and how-tos for carving season. Short, seasonal, and gone by November.

A short email during carving season. Unsubscribe anytime. See our privacy policy.