The 2026 contest winners are inGrand Prize, People's Choice and Most Creative, all crowned.
@ai_concepts
Sep 25, 2026
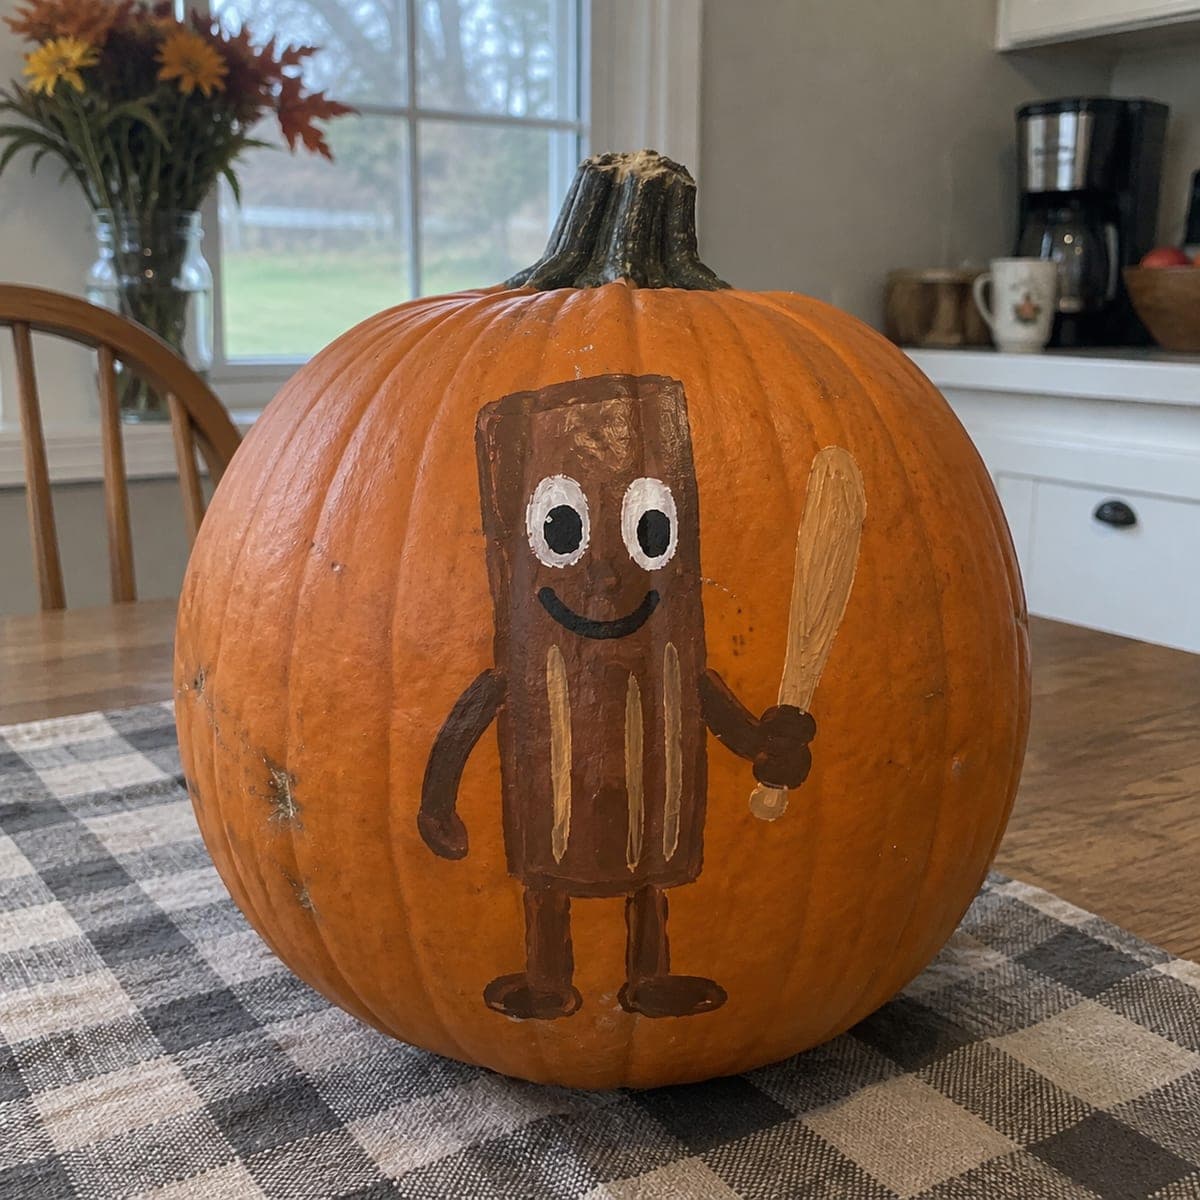
Tung Tung Tung Sahur Full-Figure Jack-O-Lantern pumpkin carvingAI
0

Report this carving

Tell us what is wrong. Reports are private.

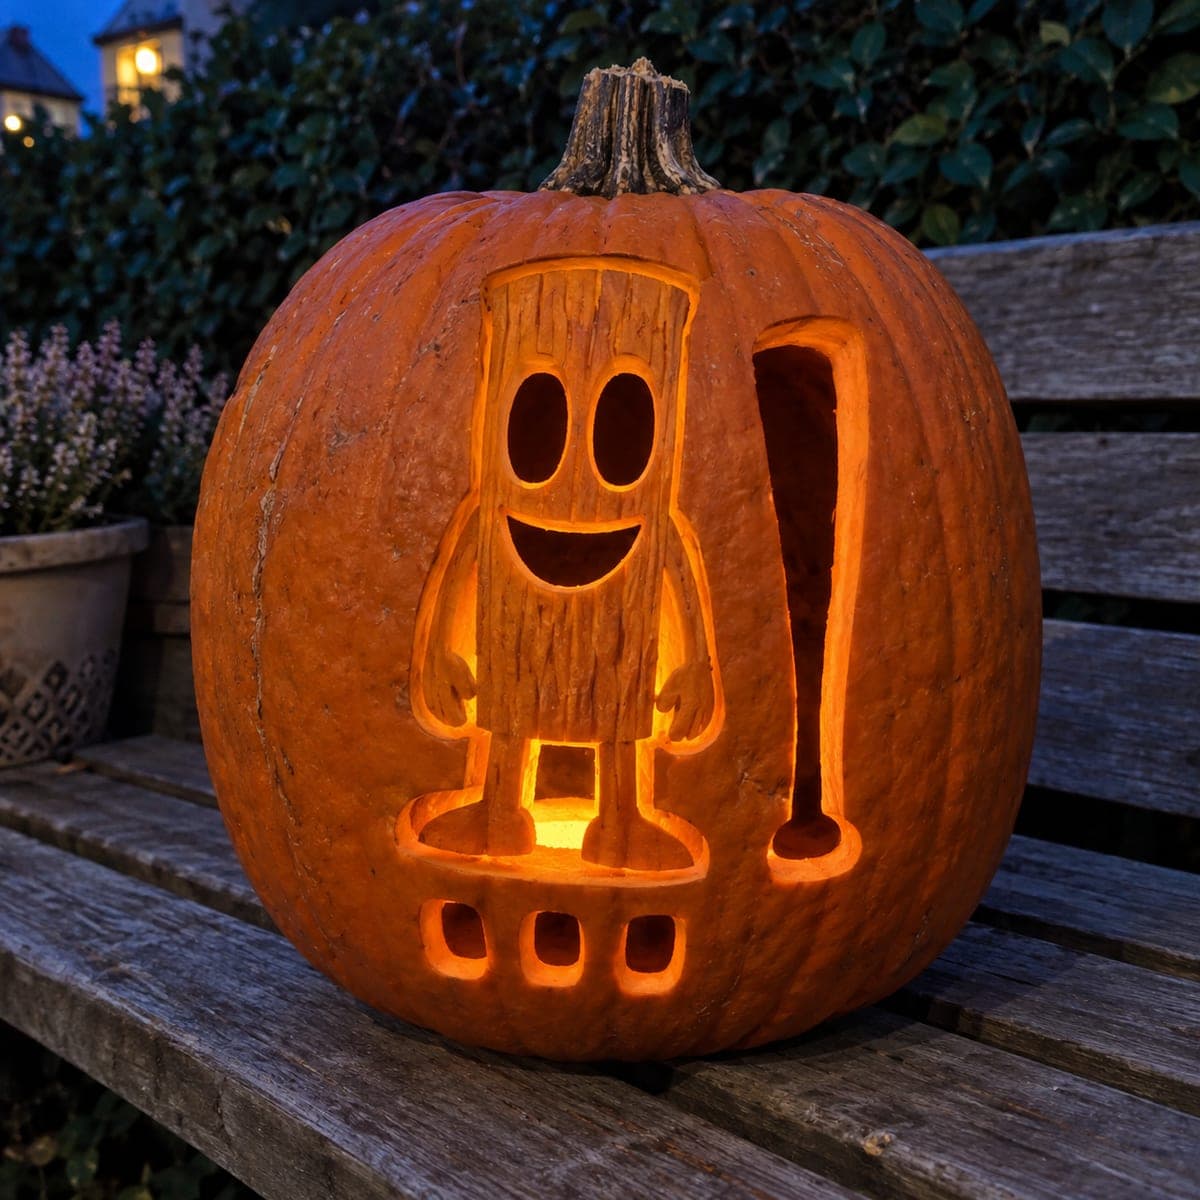
Tung Tung Tung Sahur Full-Figure Jack-O-Lantern

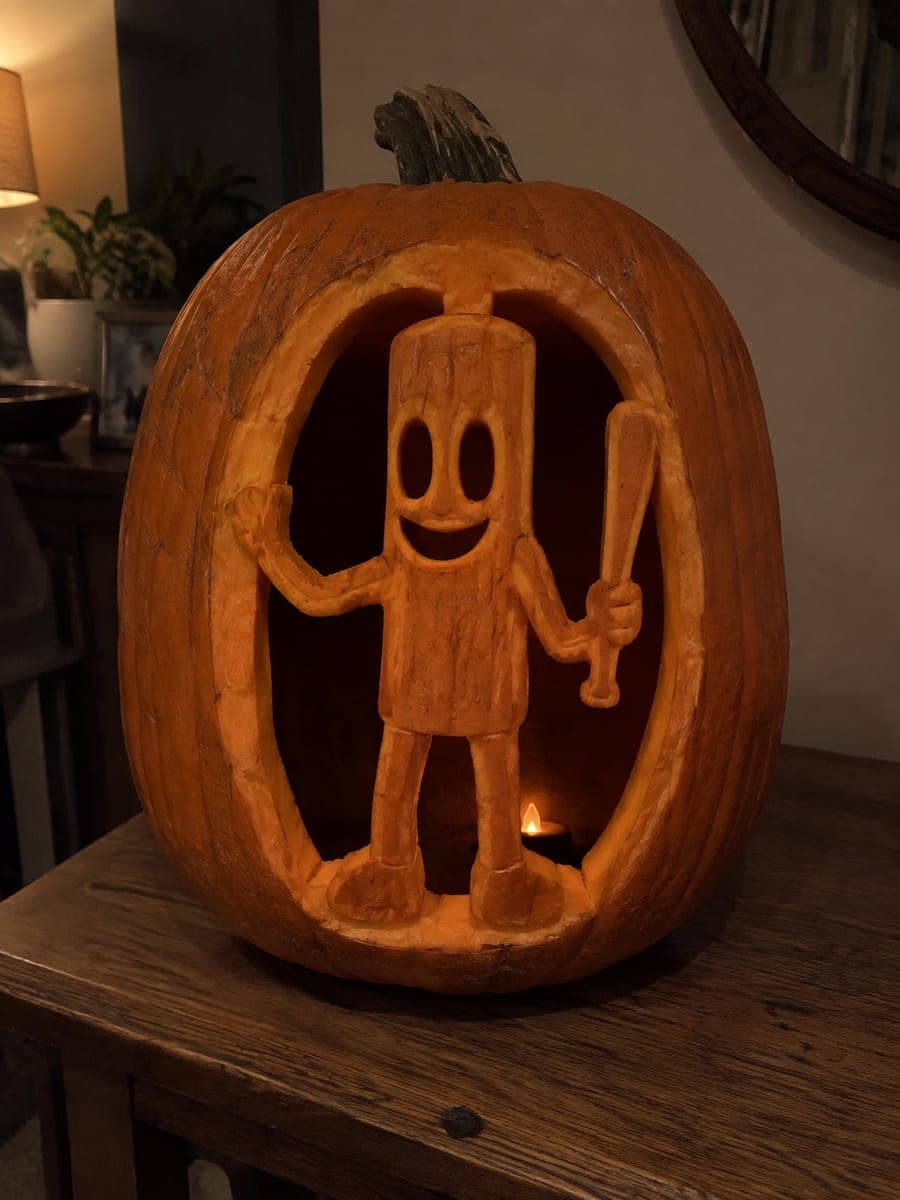
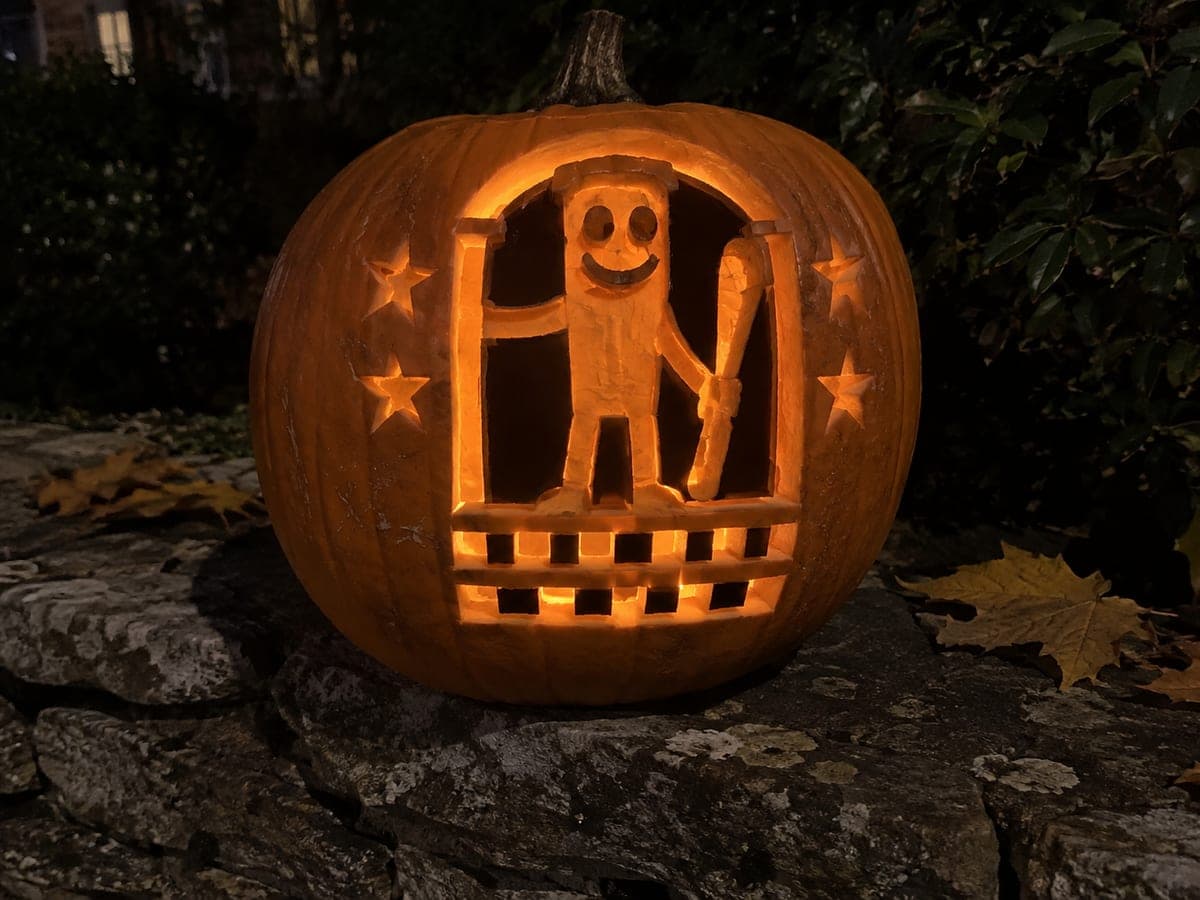
This hard Tung Tung Tung Sahur pumpkin carving turns the meme character into a full-figure design: a hollow arch frames the body while the log figure connects at the head, left hand, right bat arm, and both feet so no section falls free. The hollow facial holes within that frame provide the main candlelit glow. Plan all five connection points on paper before cutting, since losing any attachment mid-carve will cause pieces to shift. Display it lit from below to cast the figure shape upward onto a wall.

No ratings yet · Sign in to rate
HardFantasyFunnyClassic Cutout
tung-tung-tung-sahurfantasymemebrainrotcartoonfunnyarch-framefull-figure

Save this design for carving night, then share a photo of your own jack-o'-lantern once it's glowing.

Tung Tung Tung Sahur and all related characters, names, logos, and trademarks are the property of their respective owners. This is an unofficial fan carving shared by our community for inspiration only. PumpkinCarvingIdeas.com is not affiliated with, sponsored by, or endorsed by any rights holder or person depicted, and no such connection is implied.
Comments (0)

  • No comments yet. Be the first.

Our tips for carving a similar design

A hollow arch surrounds the full log figure, which stays attached to the frame at five points: the top of the head, the left hand, the right bat arm, and both feet. The hollow facial holes inside the figure provide the main glowing light. Planning all five connection points on paper before touching a saw is essential because losing any attachment mid-session causes the figure to shift or detach. Displaying the finished pumpkin lit from below casts a dramatic upward silhouette onto a wall.

From pumpkin to porch

  1. Gut and plan connection points

    Remove a back panel and scoop to about 1-inch walls. Draw the full arch and figure on paper first, clearly marking all five connection bridges. Transfer this layout to the pumpkin surface with a dry-erase marker so you can see the bridge locations before any saw work begins.

  2. Cut the outer arch

    Pierce just inside the arch outline and work the saw around the entire arch opening, stopping at each of the five bridge locations. Do not cut through any bridge. Remove the arch pieces in sections and clean all edges. Verify that the figure is still firmly attached at all five points.

  3. Open the facial holes

    With the arch secure, cut the hollow eye sockets and any other facial openings inside the figure. These are the primary light sources, so make them clean and proportional. Work carefully near the edges of the figure where rind near the arch frame is thinner.

  4. Refine connection bridges

    Inspect each of the five bridges and confirm they are wide enough to hold the figure in place over a week of display. Any bridge narrower than 3/4 inch is at risk. If one feels thin, lightly reinforce it by leaving the adjacent rind slightly thicker than the rest of the wall.

  5. Light from below

    Place a bright LED on the ground just in front of and below the pumpkin, or inside pointing downward and outward. From below, the light travels upward through the arch and face openings, casting the figure's silhouette onto any wall or surface behind it. Adjust angle and distance until the shadow reads clearly.

  6. Final check and display

    Coat any cut surfaces lightly with petroleum jelly to slow drying. Check that no bridge has developed a hairline crack. Display on a stable, level surface so the pumpkin does not shift and stress the connection points during the display period.

Written with AI to match this design

Gather your supplies

Check things off as you get ready.

Work on a stable surface, keep your free hand out of the cutting path, and have an adult handle sharp tools.

Three levels of light

  • Leave intact

    The log figure body and the outer rind surrounding the arch stay fully solid and dark.

  • Peel & shade

    None on this design; all texture comes from the contrast between solid rind and cut openings.

  • Cut through

    The arch opening and the facial holes within the figure cut fully through, producing bright glow and wall shadows.

Learn the carving basics

Before you start cutting

What is the best way to mark the five connection bridges before cutting?

Draw a solid filled rectangle over each bridge location with your dry-erase marker before picking up the saw. These rectangles act as stop signs during cutting. When your blade approaches a marked bridge, pause, re-enter the cut from the other side of the bridge, and work outward. Never saw through a marked bridge.

How do I prevent the figure from sagging inside the arch over several days?

Keep all five bridges as wide as possible, at least 3/4 inch. Applying petroleum jelly to all cut surfaces every two days slows dehydration and reduces the shrinkage that causes sagging. A cool, shaded display spot also extends the life of the bridges significantly.

Can I light this from the inside instead of below?

Yes, an interior LED will light the facial openings brightly. You lose the upward wall-shadow effect, but the arch opening still glows dramatically and the figure reads as a dark silhouette against the bright surrounding light. Both approaches work well depending on your display space.

Your take belongs here, too.

Changed a detail? Made it simpler? Share a photo of your version and tell the community what worked.

Share your pumpkin

Want more designs like this? Browse our full library of pumpkin carving ideas, or pick a free printable stencil. Every pattern and template in our own collection is free to print at home.

More pumpkins like this

You've reached the end · 8 pumpkins
The Patch Report

Fresh pumpkins, in your inbox.

The best new carvings, ideas worth stealing, and how-tos for carving season. Short, seasonal, and gone by November.

A short email during carving season. Unsubscribe anytime. See our privacy policy.