The 2026 contest winners are inGrand Prize, People's Choice and Most Creative, all crowned.
@ai_concepts
Sep 25, 2026
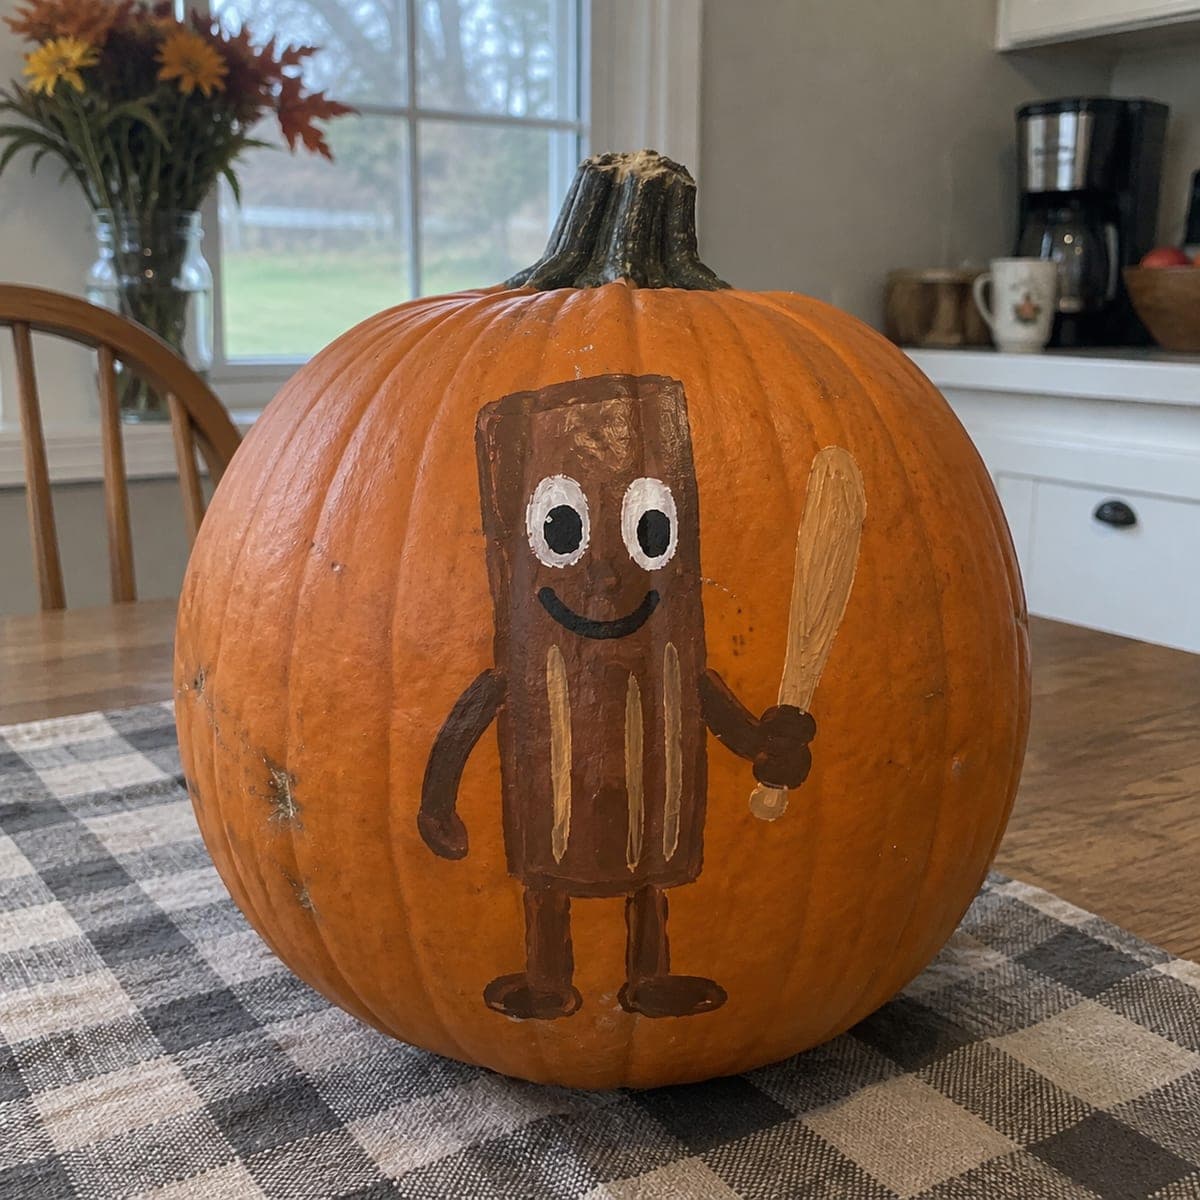
Tung Tung Tung Sahur Checkerboard PumpkinAI
0

Report this carving

Tell us what is wrong. Reports are private.

Tung Tung Tung Sahur Checkerboard Pumpkin

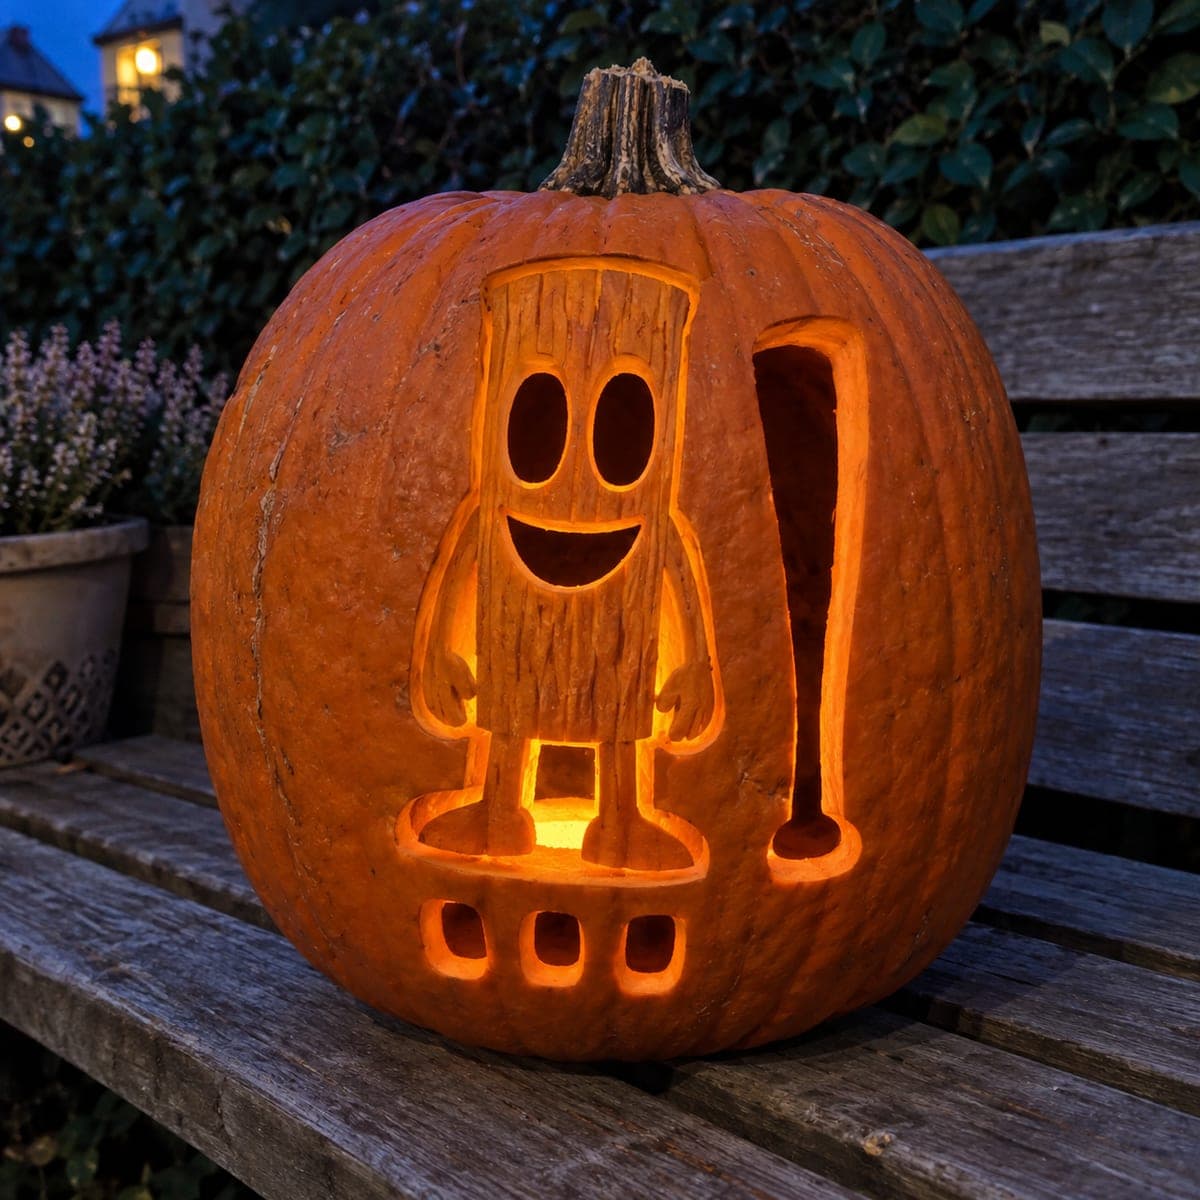
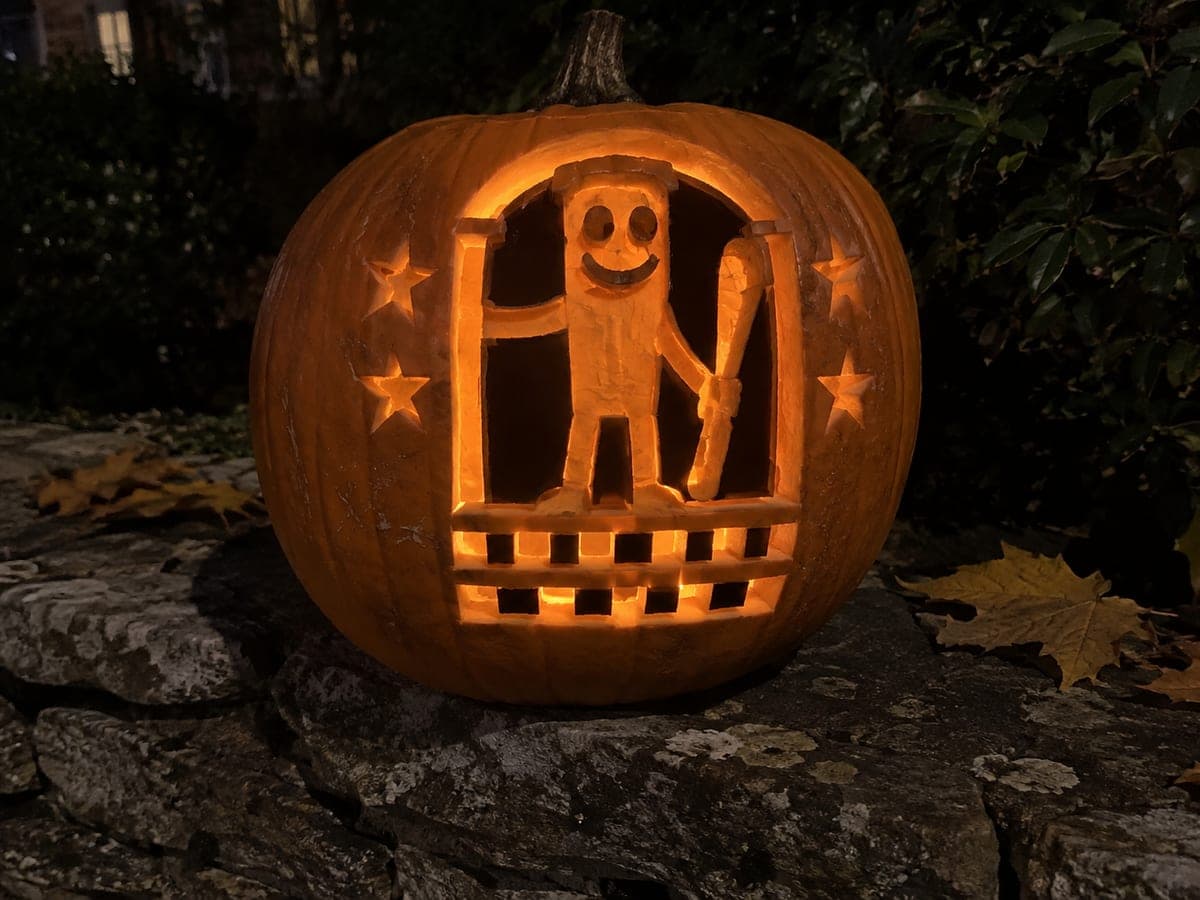
This expert Tung Tung Tung Sahur pumpkin carving pairs a hollow arch at the top with a checkerboard pattern of base openings below, while the broad log figure stays connected at the head, one arm gripping a bat through the side, and both feet at the bottom. Face and wood grain details are shallow backed to add texture without piercing through. Cut the checkerboard squares with a thin-bladed saw, leaving equal rind strips between each opening to prevent cracking. A bright LED placed inside reveals both the checkerboard glow and the subtle woodgrain shading.

No ratings yet · Sign in to rate
ExpertFantasyFunnyClassic Cutout
tung-tung-tung-sahurfantasymemebrainrotcartoonfunnycheckerboardarch-frame

Save this design for carving night, then share a photo of your own jack-o'-lantern once it's glowing.

Tung Tung Tung Sahur and all related characters, names, logos, and trademarks are the property of their respective owners. This is an unofficial fan carving shared by our community for inspiration only. PumpkinCarvingIdeas.com is not affiliated with, sponsored by, or endorsed by any rights holder or person depicted, and no such connection is implied.
Comments (0)

  • No comments yet. Be the first.

Our tips for carving a similar design

This design combines a hollow arch at the top, a checkerboard grid of base openings, and a broad log figure connected at the head, one arm holding a bat, and both feet. The face and woodgrain are shallow backed for texture without additional through-cuts, keeping the wall solid where the most complex cuts happen nearby. Cutting the checkerboard squares with a thin-bladed saw and leaving equal-width rind strips between each opening is the most time-consuming part and requires patience to keep spacing consistent.

From pumpkin to porch

  1. Gut and draft the full layout

    Remove a back panel, scoop to 1-inch walls, and draw the complete design on the pumpkin with a dry-erase marker. Mark the arch boundary, the log figure with all three connection points, the bat arm path, both feet, and the full checkerboard grid at the base. Count your checkerboard squares and measure even spacing before making any cuts.

  2. Score face and woodgrain relief

    Use a linoleum cutter to score the face features and woodgrain lines into the skin only, removing skin without piercing the flesh. Do this while the wall is still fully intact for maximum stability. Check depth with your fingernail: you should feel a distinct groove but no softness beneath.

  3. Cut the top arch opening

    Pierce just inside the arch line and saw the full arch, pausing at the connection bridge where the figure's head attaches to the frame. Remove arch pieces and clean edges. Confirm the log figure is still solidly attached at the top before continuing.

  4. Cut the bat arm and figure connections

    Carefully cut the spaces around the bat arm and figure torso, leaving the arm-to-bat connection bridge intact. The bat passes through the side of the arch, so trim closely around it without severing the bridge. Check both feet bridges at the base remain wide and secure.

  5. Cut the checkerboard base openings

    Work the checkerboard squares with a thin-bladed saw in a grid pattern, keeping the rind strips between squares at least half an inch wide. Cut one square at a time, alternating from corner to corner so you never weaken two adjacent strips simultaneously. Resist the urge to cut faster as you tire; this is the step most prone to cracking.

  6. Insert LED and evaluate

    Place a bright LED inside through the back panel. The checkerboard base should glow in a grid of distinct bright squares, the arch opening illuminates the figure outline, and the scored face and woodgrain emit subtle textured glow. Adjust the LED height to balance brightness between the arch and the base grid.

Written with AI to match this design

Gather your supplies

Check things off as you get ready.

Work on a stable surface, keep your free hand out of the cutting path, and have an adult handle sharp tools.

Three levels of light

  • Leave intact

    The log figure body, surrounding rind, and unscored surfaces stay solid and dark.

  • Peel & shade

    The shallow-scored face features and woodgrain lines glow as soft, low-contrast texture in warm amber.

  • Cut through

    The arch opening, checkerboard base squares, and spaces around the bat arm and feet cut fully through for bright light output.

Learn the carving basics

Before you start cutting

How do I keep the checkerboard squares evenly spaced on a curved pumpkin surface?

Measure and mark the grid with a ruler and dry-erase marker before any cutting. A flexible ruler or strip of tape bent around the curve helps keep horizontal lines parallel. Marking all squares before cutting any of them is much better than marking as you go, because the rind distorts slightly as you remove material.

The bat arm passes through the side of the arch. How do I cut that junction cleanly?

Cut the arch first, stopping just before where the bat arm crosses the arch edge. Then cut around the bat arm shape from inside the arch, working carefully at the crossing point. Leave a small connecting tab if the arm is very thin at the crossing to keep it stable during the rest of the session.

How long will an expert-level carving like this last before it starts to collapse?

Expect 5-7 days in cool weather with daily petroleum jelly applied to all cut surfaces. Keep the pumpkin out of direct sun and in a shaded, dry spot. Refrigerating the pumpkin when not on display can extend its life significantly if your display window is spread over several evenings.

Your take belongs here, too.

Changed a detail? Made it simpler? Share a photo of your version and tell the community what worked.

Share your pumpkin

Want more designs like this? Browse our full library of pumpkin carving ideas, or pick a free printable stencil. Every pattern and template in our own collection is free to print at home.

More pumpkins like this

You've reached the end · 8 pumpkins
The Patch Report

Fresh pumpkins, in your inbox.

The best new carvings, ideas worth stealing, and how-tos for carving season. Short, seasonal, and gone by November.

A short email during carving season. Unsubscribe anytime. See our privacy policy.