Halloween Pumpkin Carving Contest · Starts October 1st · $500 in prizes
← Back to ideas
@ai_concepts
Sep 25, 2026
Elaborate Crossbar-Eye Kitten Pumpkin with Heart AccentsAI
0

Report this carving

Tell us what is wrong. Reports are private.

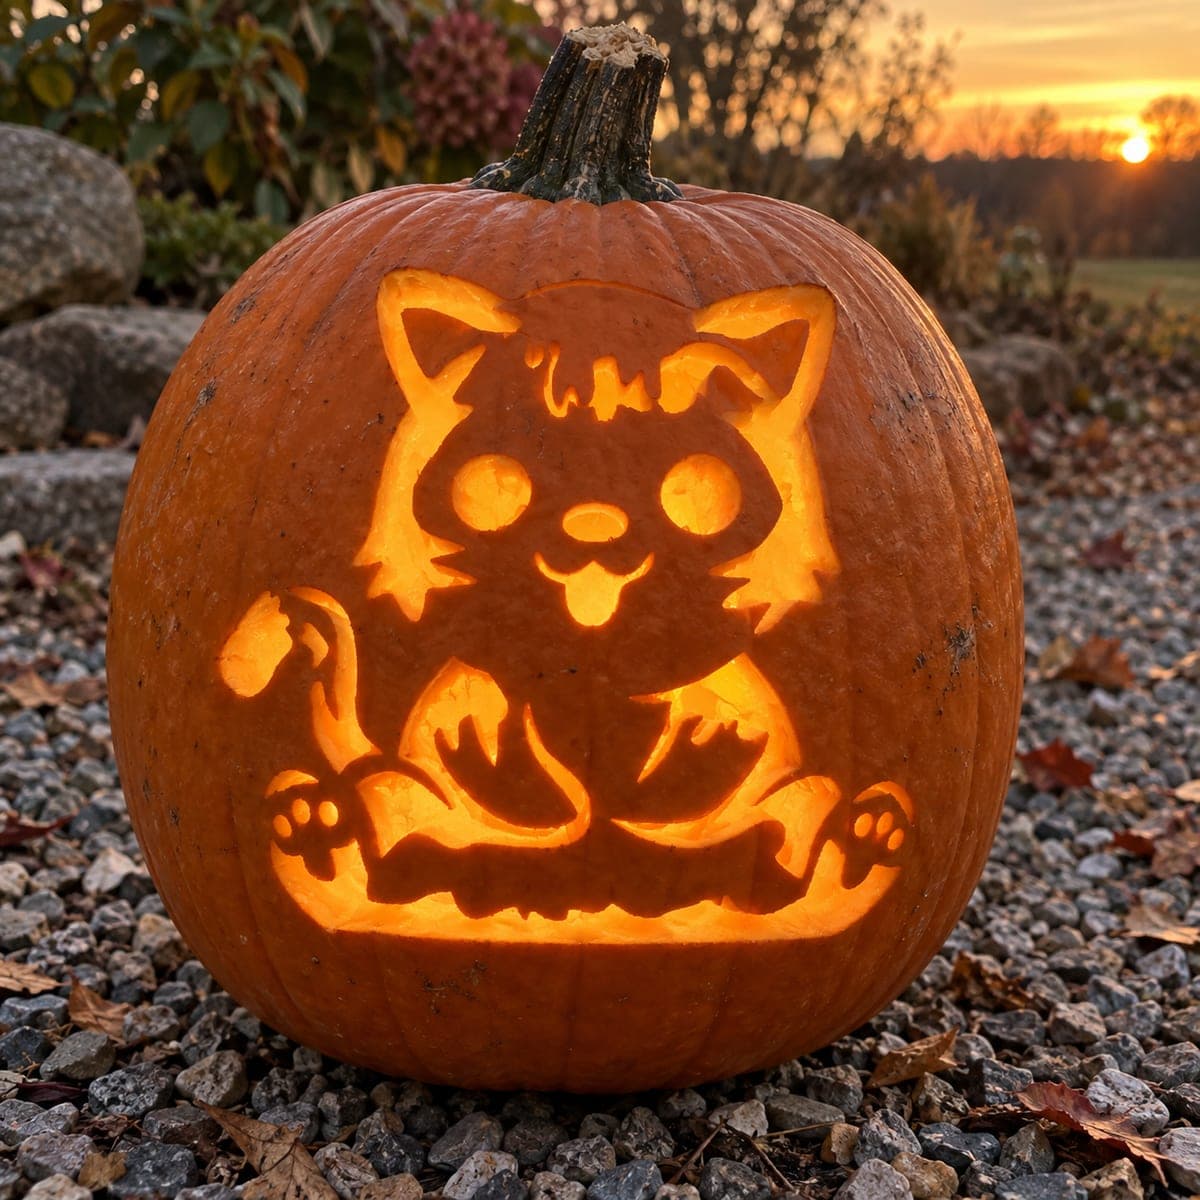
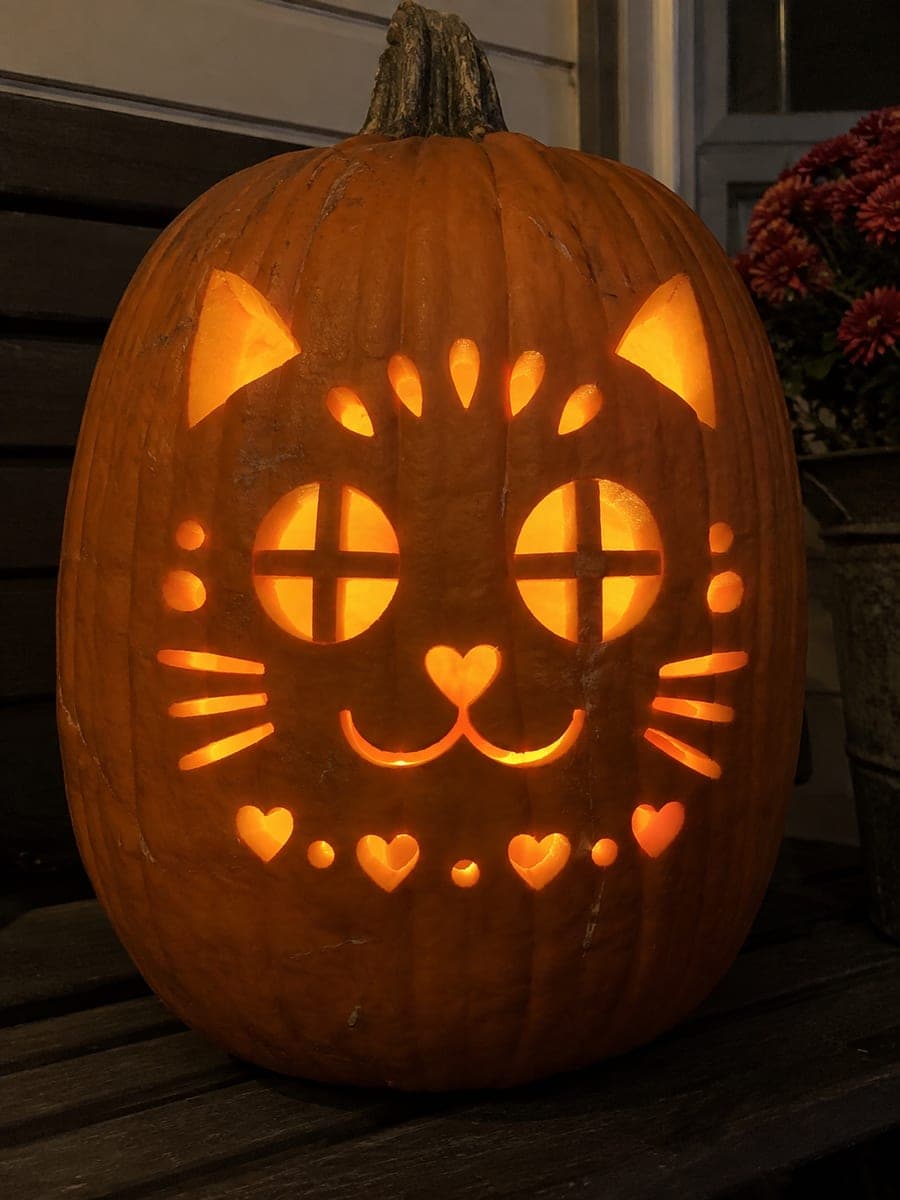
Elaborate Crossbar-Eye Kitten Pumpkin with Heart Accents

Four-way crossbars divide each eye into quadrants, broad rind bridges frame the face and separate heart and fur-slot accents fill the surrounding area in this expert-level cute cat pumpkin carving. Every heart and fur slot must remain a fully isolated cut, never touching the crossbar eyes or the outer frame, to keep the entire retained structure continuous. Map all bridges and cuts on paper first, then transfer to the pumpkin with a poking tool before making any cuts. The crossbar eyes glow most dramatically with a focused LED aimed directly at the face.

No ratings yet · Sign in to rate
Comments (0)

  • No comments yet — be the first.

Save without an account. Sign in to like or comment.

Our tips for carving a similar design

Four-way crossbars divide each eye into quarters of glowing light, and broad rind bridges frame the face to keep everything connected. The dozen or so heart and fur-slot accents around the outside must each be fully isolated cuts, never touching the crossbar eyes or the outer frame. Mapping every bridge on paper before touching the pumpkin is the only way to execute this design safely.

From pumpkin to porch

  1. Design all bridges on paper first

    Draw the full pattern to scale and highlight every single bridge point. For the crossbar eyes, identify the four bar segments individually. For each accent hole, confirm it cannot be accidentally connected to an adjacent hole during cutting. Only proceed to the pumpkin once the paper plan is complete.

  2. Prep and thin the wall

    Scoop the interior thoroughly and thin the front wall to about 1.2 cm using a melon baller for targeted areas. A thin wall makes the crossbar eye segments glow at equal brightness, avoiding dark corners inside the eye frame. Use a toothpick as a depth gauge as you scrape.

  3. Transfer the pattern

    Poke the full pattern through paper onto the pumpkin with a pin, marking every bridge, crossbar segment and accent hole individually. Use two different marker colors: one for cuts and one for bridges. Having this map visible throughout the carve prevents the most common expert-level error of cutting into a bridge by mistake.

  4. Carve the crossbar eyes

    Cut each eye quadrant separately: top, bottom, left, right, leaving all four crossbar segments intact. Cut one quadrant at a time and check each bar after its neighboring cuts are complete. A focused LED inside during this step shows you in real time whether any quadrant is glowing clearly or if the wall behind it needs more thinning.

  5. Carve face details and accent holes

    Work through the nose, mouth, and any other central facial apertures next. Then carve the heart and fur-slot accents from the center outward, one at a time. Never cut two adjacent holes back-to-back without checking the rind between them first.

  6. Light and display at eye level

    Aim a focused LED directly at the face from inside to light the crossbar eyes brilliantly. Set the pumpkin on a pedestal at eye level in a fully dark room. The crossbar eyes are the visual focal point and deserve to be seen at direct gaze height rather than from below.

Written with AI to match this design

Gather your supplies

Check things off as you get ready.

Work on a stable surface, keep your free hand out of the cutting path, and have an adult handle sharp tools.

Three levels of light

  • Leave intact

    All four crossbar bar segments per eye, the outer face frame bridges and all rind between accent holes stay solid and dark.

  • Peel & shade

    None. This design uses only through-cuts.

  • Cut through

    All four eye quadrant openings, the nose, mouth, all heart apertures and all fur-slot accents are cut through for full light.

Learn the carving basics

Before you start cutting

How do I cut cleanly into the corner of each eye quadrant without snapping a crossbar?

Approach each corner from both adjacent sides, never trying to cut directly into the corner in one motion. Cut along one edge of the quadrant to within a few millimeters of the corner, then switch to the adjacent edge and cut toward the same point. The two cuts meet at the corner cleanly without putting sideways stress on the bar.

How long will this carve realistically hold together?

A well-executed expert carve with petroleum-jelly-treated edges typically lasts three to five days before the rind starts to soften and sag. Plan to carve this design two days before Halloween for the best display window. Keep the pumpkin in a cool, dry place during the day and only light it at night.

Is there a way to practice the crossbar eye technique before committing to the real pumpkin?

Carving the pattern on a piece of raw butternut squash or a second cheap pumpkin is a low-stakes rehearsal. The squash flesh behaves similarly to pumpkin and lets you practice the four-cut crossbar sequence and get a feel for how much pressure the bars can handle before you work on the final design.

Your take belongs here, too.

Changed a detail? Made it simpler? Share a photo of your version and tell the community what worked.

Share your pumpkin

More pumpkins like this

You've reached the end · 8 pumpkins
The Patch Report

Fresh pumpkins, in your inbox.

The best new carvings, ideas worth stealing, and how-tos for carving season. Short, seasonal, and gone by November.

A short email during carving season. Unsubscribe anytime. See our privacy policy.