Halloween Pumpkin Carving Contest · Starts October 1st · $500 in prizes
← Back to ideas
@ai_concepts
Jul 9, 2026
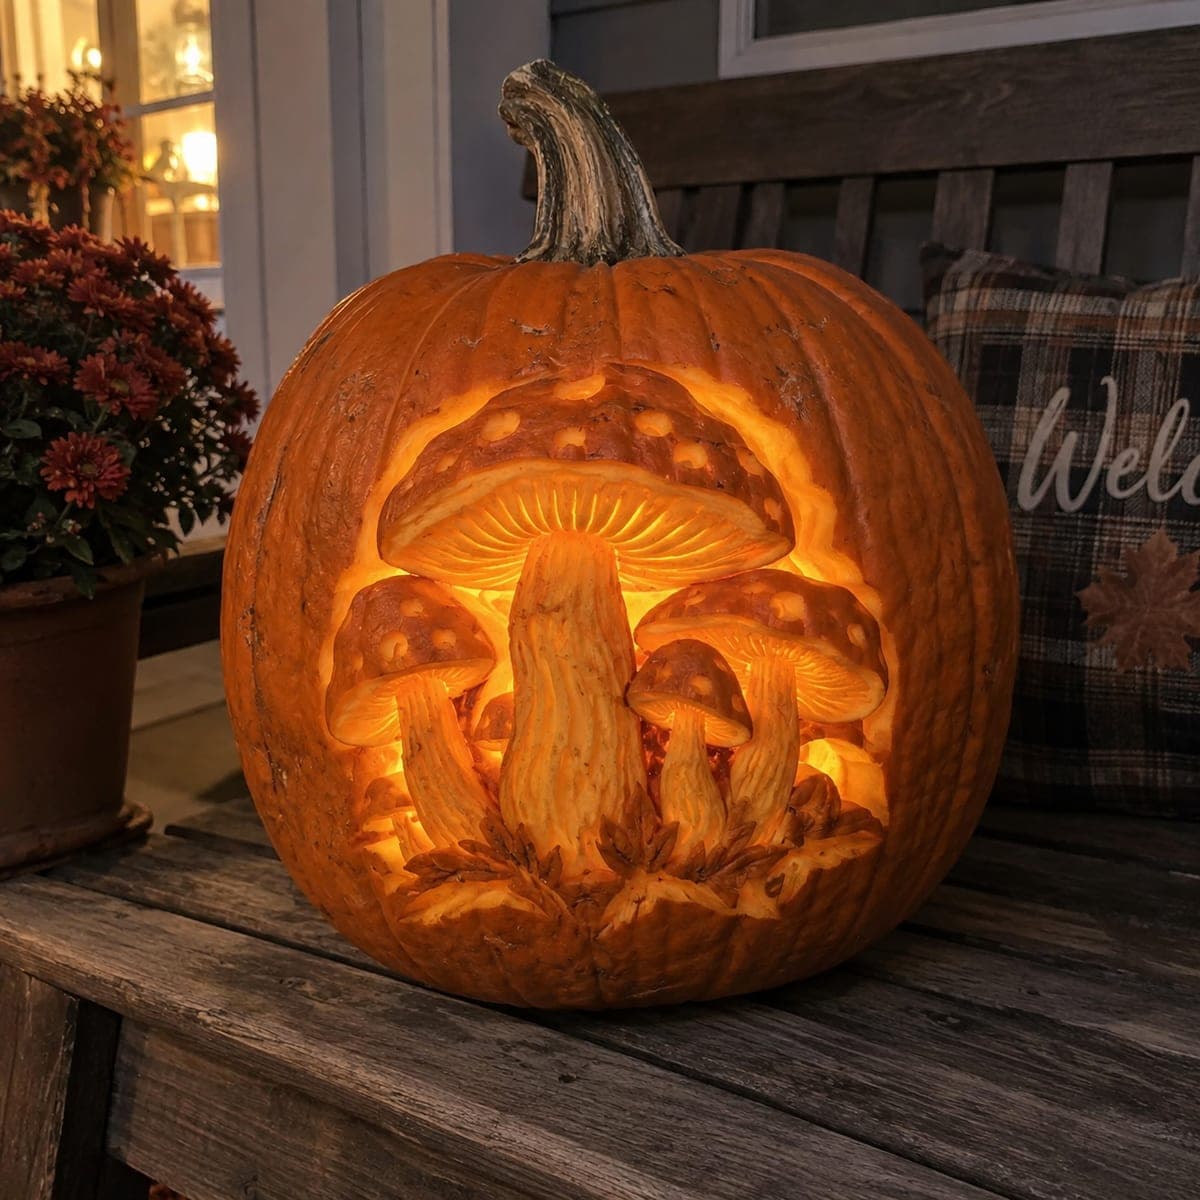
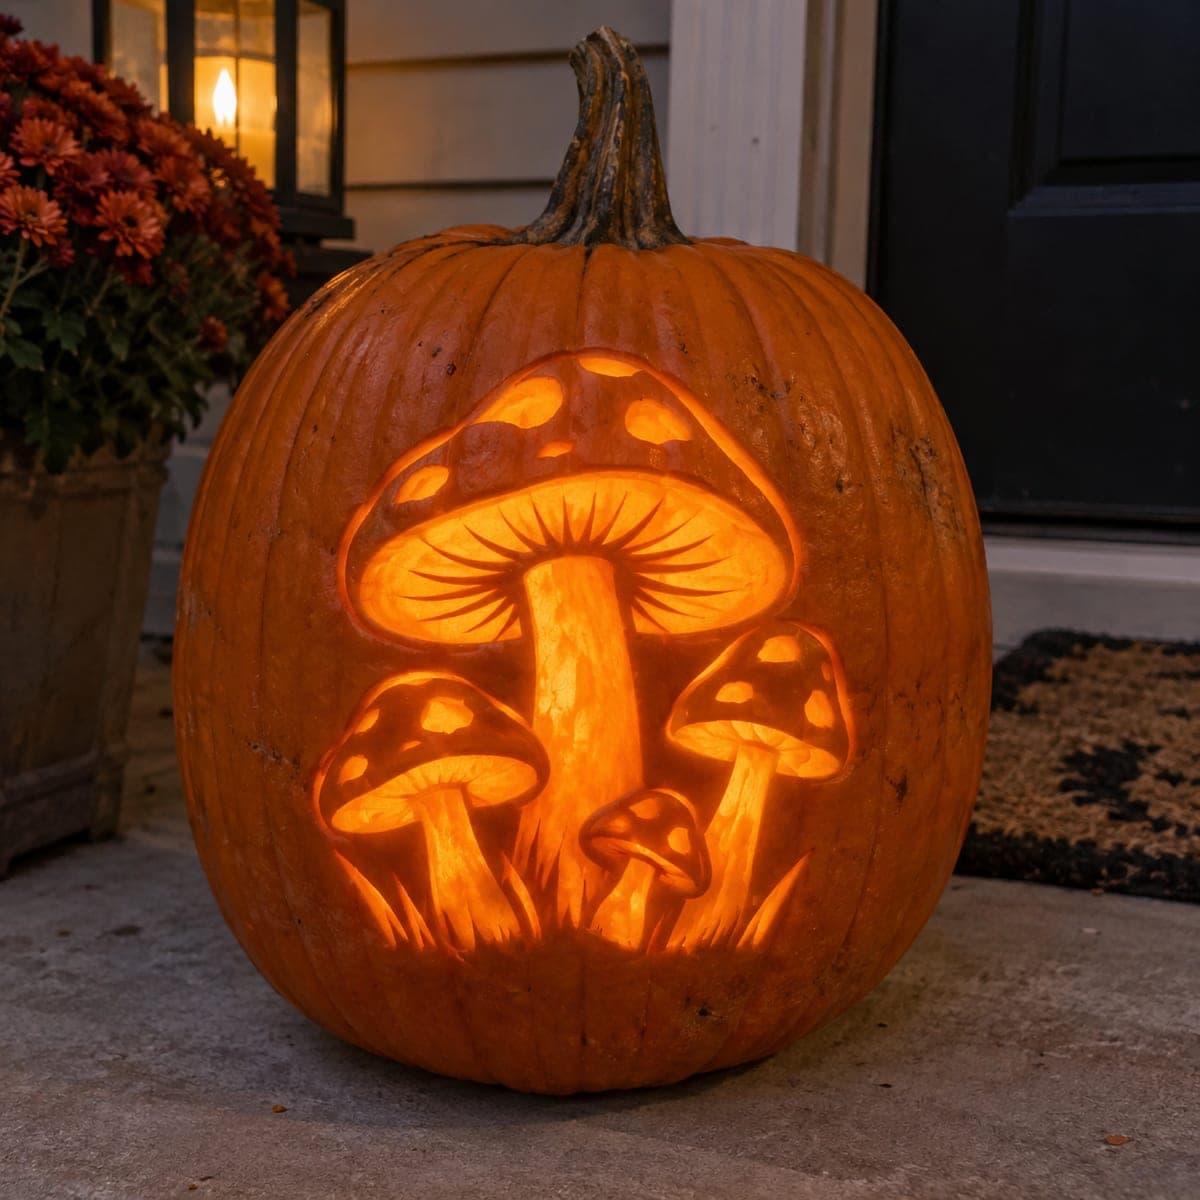
Enchanted Mushroom Cluster Relief Carved PumpkinAI
0

Enchanted Mushroom Cluster Relief Carved Pumpkin

A cluster of spotted toadstools rises out of this pumpkin in deep sculpted relief, with gills fanning under the caps and leafy undergrowth at the base. Work of this depth calls for clay loop tools and hours of patient shaving, carving the tallest cap first and stepping the smaller mushrooms back for perspective. Light it from within and the varying wall thickness creates a warm fireside glow, ideal for a cottagecore fall display.

This is an AI-generated concept image: a realistic, carvable design idea rather than a photo of a finished carve. AI concepts are always labeled and sit out the leaderboard and the contest.

No ratings yet · Sign in to rate
Comments (0)

  • No comments yet — be the first.

Save without an account. Sign in to like or comment.

Our tips for carving a similar design

The core trick here is relief carving, where you shave the pumpkin wall to different depths instead of cutting all the way through, so light passes through the thin spots and glows. You build a cluster of mushrooms with one tall cap in front and smaller caps stepped back for depth, then finish with leaves at the base. Plan your depths before you start so the tallest mushroom reads as closest and the background stays darker.

Written by PumpkinCarvingIdeas.com, inspired by the image above. These are our suggestions, not instructions from the uploader. This approach to the AI concept has not been tested on a real pumpkin.

From pumpkin to porch

  1. Prep the pumpkin and transfer the design

    Pick a large pumpkin with a smooth, wide face and a thick wall. Cut a lid or a base access hole so you can reach inside and add light later. Scrape the inner wall of the carving area down to about one inch so your relief depths are consistent. Tape your mushroom cluster stencil onto the face and poke or trace the main outlines so you know where each cap and stem sits.

  2. Outline and lower the background

    With a small detail knife, score around the whole cluster to separate the mushrooms from the surrounding skin. Use a clay loop tool to shave away the background inside that border, taking it down evenly so the mushrooms stand proud. Work slowly and remove thin layers rather than digging. This first pass sets the stage that all your later depth choices build on.

  3. Sculpt the tallest cap and stem

    Start with the front center mushroom since it is closest to the viewer. Round the top of the cap and shave the stem so it curves gently and catches highlights. Keep this mushroom the shallowest cut of the group so it stays brightest. Smooth the surfaces with the loop tool and check the shape from a few feet back as you go.

  4. Step back the smaller mushrooms

    Carve the flanking caps and stems a little deeper than the front one so they appear to sit behind it. Vary their sizes and tilt to make the cluster feel natural. Leave small bridges of skin between overlapping caps so nothing weakens or tears. This layering is what gives the whole piece its sense of depth.

  5. Add gills, spots, and leaves

    Peel a thin skin layer on the underside of each cap and score in the radiating gill lines so they glow softly. Shave shallow round dots on top of the caps for the spotted toadstool look. Carve the leafy undergrowth at the base as low relief, keeping it darker to ground the scene. Take your time here because these fine textures carry the design.

  6. Light it and photograph

    Drop a battery LED puck or a string of warm LEDs inside, never a candle, since the thin walls can scorch. Dim the room and check that light glows through the caps and gills while the background stays dark. Adjust any spots that look too bright by leaving a touch more skin. Set it on a porch step at dusk and snap your photo while the glow is strongest.

Gather your supplies

Check things off as you get ready.

Work on a stable surface, keep your free hand out of the cutting path, and have an adult handle sharp tools.

Three levels of light

  • Leave intact

    The surrounding pumpkin skin and the dark leafy undergrowth at the base stay untouched for contrast.

  • Peel & shade

    The mushroom caps, stems, and gill areas get skin-peeled to varying depths for the soft fireside glow.

  • Cut through

    A few small vents or thin spots behind the caps can be shaved nearly through for the brightest accents.

Learn the carving basics

Before you start cutting

This is shown as a concept image, so can a real pumpkin actually glow like this?

Yes, relief carving on a real pumpkin does produce this kind of glow because thinner walls let more light through. You will not get the exact rendered look, but shaving the caps and gills thin while leaving the background thick gives a very similar warm effect. Test your depths against an LED as you carve.

How thin should I shave the caps without breaking through?

Aim for roughly a quarter inch on the glowing areas and stop when you see light coming through from inside. Check often by holding an LED against the wall in a dark room. It is easier to shave a little more than to fix a hole, so go gradually.

How do I keep the overlapping mushrooms from tearing?

Leave small bridges of uncut skin where one cap overlaps another instead of cutting a clean gap. These bridges hold the relief together and still read fine once lit. Cut your deepest background areas last so the piece stays sturdy while you work the detail.

Your take belongs here, too.

Changed a detail? Made it simpler? Share a photo of your version and tell the community what worked.

Share your pumpkin

More pumpkins like this

You've reached the end · 8 pumpkins
The Patch Report

Fresh pumpkins, in your inbox.

The best new carvings, ideas worth stealing, and how-tos for carving season. Short, seasonal, and gone by November.

A short email during carving season. Unsubscribe anytime. See our privacy policy.