Halloween Pumpkin Carving Contest · Starts October 1st · $500 in prizes
← Back to ideas
@ai_concepts
Jul 12, 2026
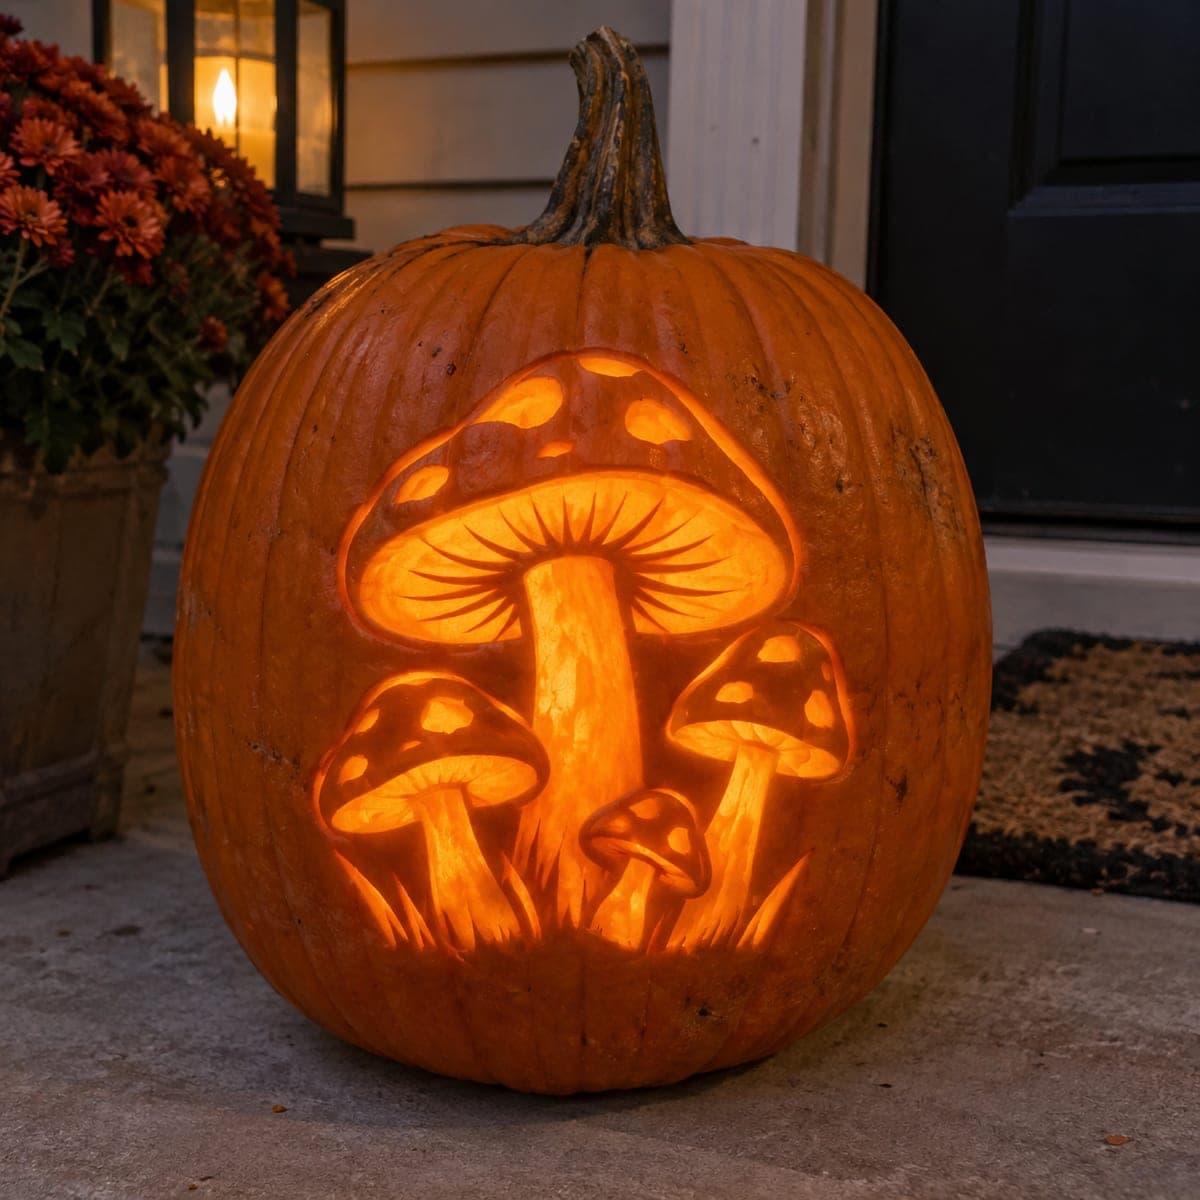
Enchanted Mushroom Cluster Relief PumpkinAI
0

Enchanted Mushroom Cluster Relief Pumpkin

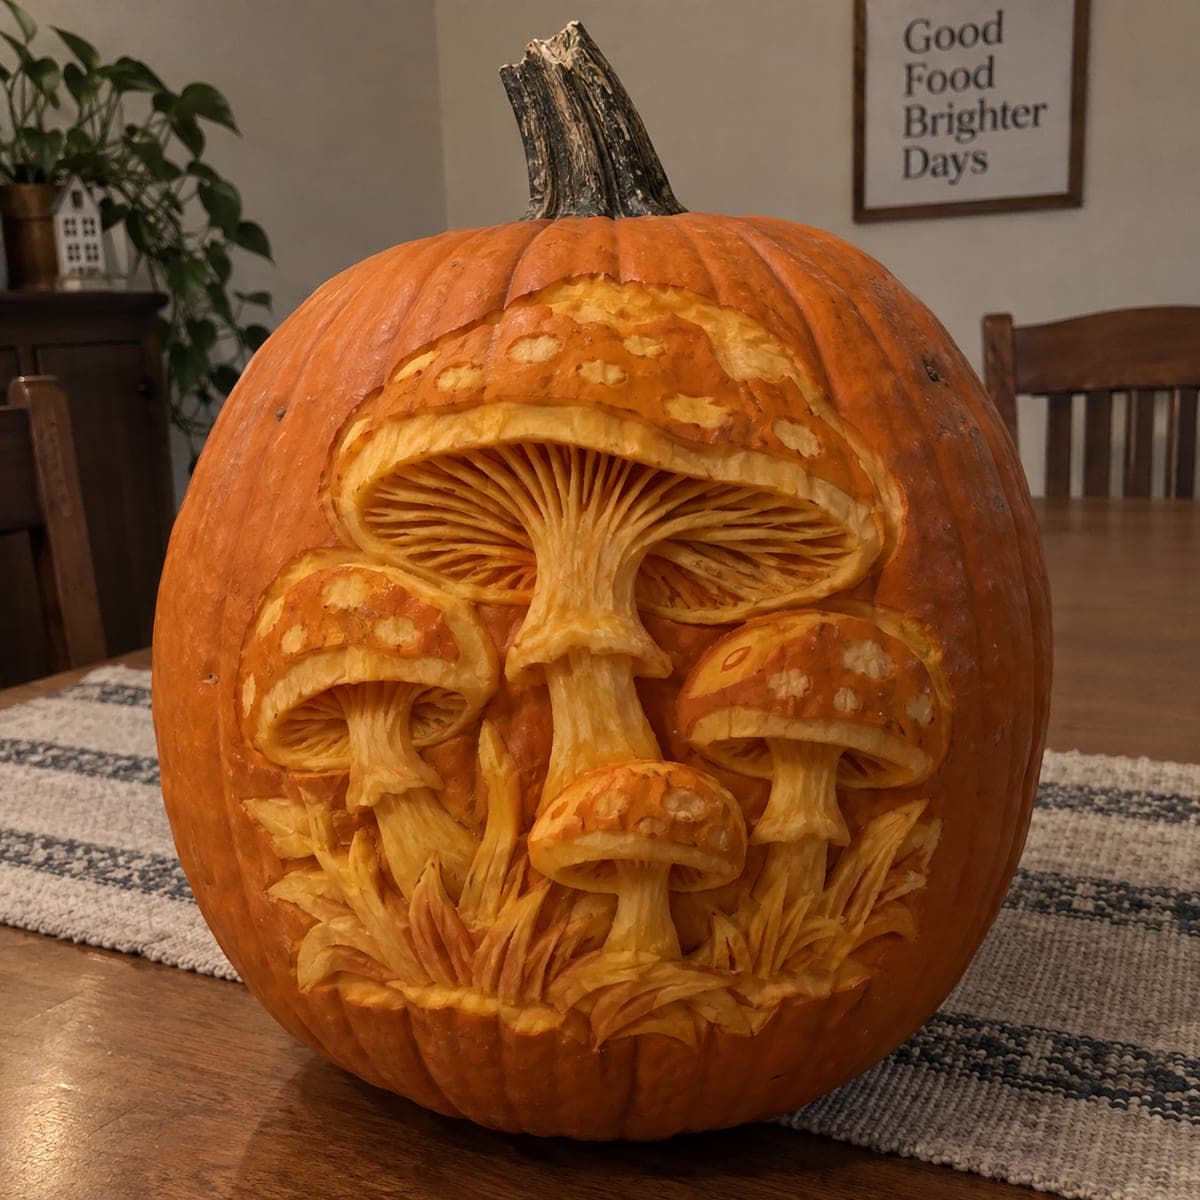
A cluster of spotted toadstools erupts from this pumpkin in deep sculptural relief, with delicately carved gills fanning under the largest cap. Cottagecore fans will love how the ferny leaves swirl around the stems, all shaved from the flesh at different depths with no through-cuts. Carve the big cap and its gill lines first, since they are the focal point, then step the smaller mushrooms back at shallower depths. Excellent centerpiece for a fall dinner table, no candle required.

This is an AI-generated concept image: a realistic, carvable design idea rather than a photo of a finished carve. AI concepts are always labeled and sit out the leaderboard and the contest.

No ratings yet · Sign in to rate
Comments (0)

  • No comments yet — be the first.

Save without an account. Sign in to like or comment.

Our tips for carving a similar design

This design is built entirely from surface relief, so the whole picture lives in shaved depths rather than punched-through holes. The core trick is carving the big central cap first and giving its fanned gills the sharpest, deepest lines, then stepping each smaller mushroom back at a shallower level so the cluster reads as layered and dimensional. The ferny leaves at the base are the shallowest of all, just skimmed for texture.

Written by PumpkinCarvingIdeas.com, inspired by the image above. These are our suggestions, not instructions from the uploader. This approach to the AI concept has not been tested on a real pumpkin.

From pumpkin to porch

  1. Prep and transfer the layout

    Pick a large pumpkin with a smooth, flat-faced front and a healthy wall. Since this is a candle-free relief piece, leave the pumpkin whole rather than cutting a lid, so the surface stays firm. Tape your mushroom cluster pattern to the front and poke or trace the main outlines: the big cap, the two side caps, the low front mushroom, and the leaf clumps. Mark which shapes sit forward and which sit back so you keep your depths straight.

  2. Rough out the depth map

    With a loop or ribbon tool, gently shave away the pumpkin skin across every shape you plan to sculpt, leaving only the true untouched skin where you want the darkest areas. Establish the big central cap as the highest, most forward form, then take the side and front mushrooms down a bit lower. This is where you set the stepped, layered feel. Work slowly and keep checking the whole face so no single area gets too deep too fast.

  3. Sculpt the big cap and gills

    This cap is the focal point, so give it your best attention. Round the top edge of the cap so it catches light, then use a small V-gouge or detailing tool to carve the radiating gill lines fanning out beneath it. Keep the gill grooves clean and evenly spaced, deepening them slightly near the center for shadow. Leave thin ridges of flesh between each groove so the gills stay crisp and supported.

  4. Shape the smaller mushrooms and stems

    Move to the two side caps and the low front mushroom, sculpting them at shallower depths so they sit visually behind the big one. Round each cap, then carve short gill hints under the smaller ones. Shape the thick stems with gentle rounding down each side to give them a fleshy, three dimensional look. Keep the stems attached to the surface at all points since nothing here should be cut through.

  5. Add spots, ferns, and shading

    Peel the skin in small oval patches on the caps to create the classic toadstool spots that will glow softly. Skim the ferny leaves around the base at the shallowest depth, using light strokes to suggest thin fronds without undercutting them. Vary how deep you scrape across the whole piece to build soft gradients of light. Step back often to judge the balance of light and shadow.

  6. Clean up and light for photos

    Go over every edge with a small detail tool to sharpen the gills, spot borders, and leaf tips. Wipe the surface with a damp cloth and pat dry. Since there are no through-cuts, skip an interior light and instead set a warm LED spotlight or lamp to one side so the relief casts gentle shadows. Photograph it as a table centerpiece while the flesh is fresh and glowing.

Gather your supplies

Check things off as you get ready.

Work on a stable surface, keep your free hand out of the cutting path, and have an adult handle sharp tools.

Three levels of light

  • Leave intact

    The untouched orange skin around the cluster and the darkest gill shadows stay dark for contrast.

  • Peel & shade

    The mushroom caps, stems, spots, and ferny leaves are skin-peeled to varying depths for soft orange glow.

  • Cut through

    Nothing is cut fully through on this design; it is pure relief, so there are no bright open cutouts.

Learn the carving basics

Before you start cutting

There are no through-cuts, so how do I light it?

Because this is a relief carving with no openings, an interior light will not shine out. Instead, aim a warm LED spotlight or lamp at the pumpkin from one side. The angled light rakes across the sculpted depths and makes the gills and caps pop with shadow.

How do I keep the gill lines from tearing?

Use a sharp small V-gouge and pull each stroke in one smooth motion rather than sawing back and forth. Leave a thin ridge of flesh between grooves so each gill stays supported. If the flesh feels stringy, slow down and take shallower passes.

Since this is an AI concept, can a real pumpkin actually hold this detail?

Yes, a relief design like this is very achievable on a fresh, thick-walled pumpkin because nothing is cut through and every shape stays anchored to the body. The key is choosing a firm pumpkin and keeping delicate ferns and gills shallow so they do not crumble. Work in one session while the flesh is moist for the cleanest lines.

Your take belongs here, too.

Changed a detail? Made it simpler? Share a photo of your version and tell the community what worked.

Share your pumpkin

More pumpkins like this

You've reached the end · 8 pumpkins
The Patch Report

Fresh pumpkins, in your inbox.

The best new carvings, ideas worth stealing, and how-tos for carving season. Short, seasonal, and gone by November.

A short email during carving season. Unsubscribe anytime. See our privacy policy.