Halloween Pumpkin Carving Contest · Starts October 1st · $500 in prizes
← Back to ideas
@ai_concepts
Sep 25, 2026
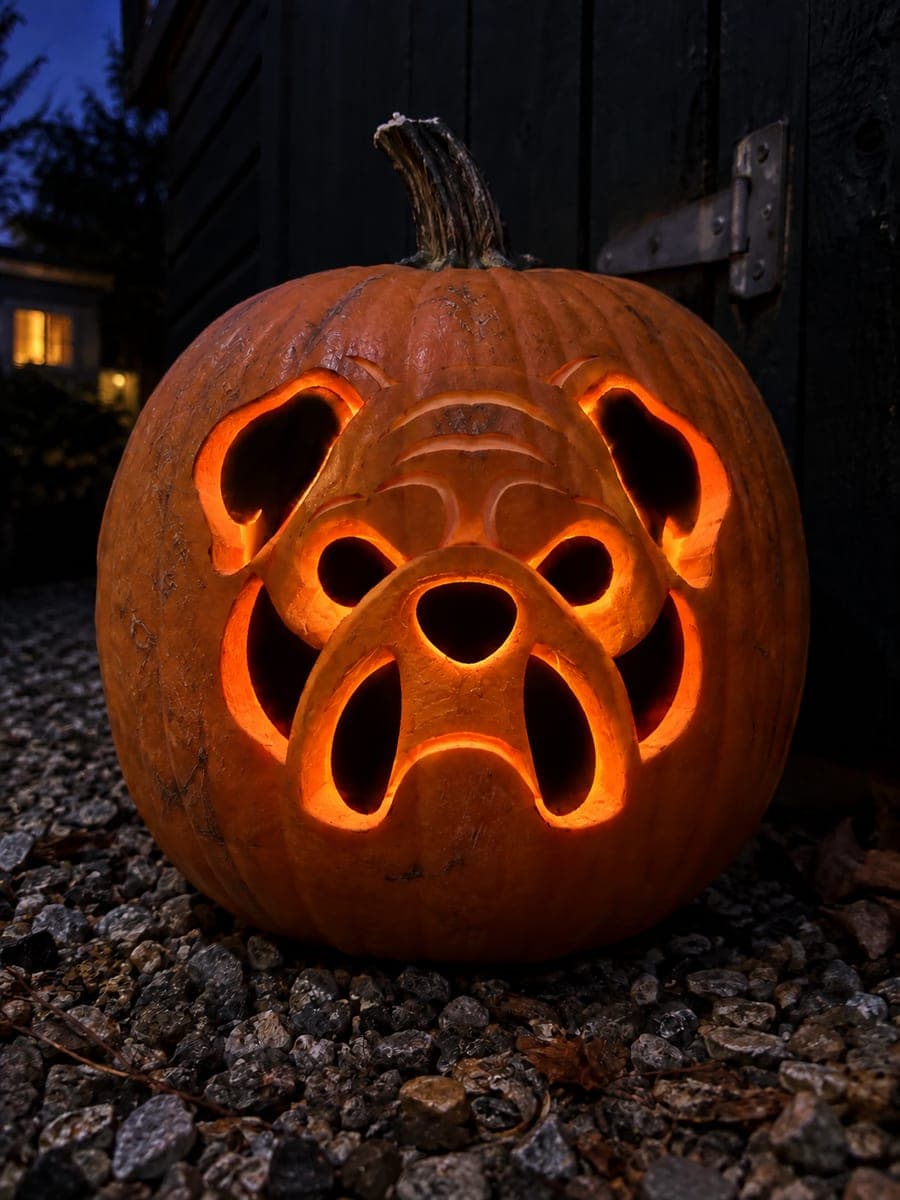
English Bulldog Pumpkin with Jowl Relief CarvingAI
0

Report this carving

Tell us what is wrong. Reports are private.

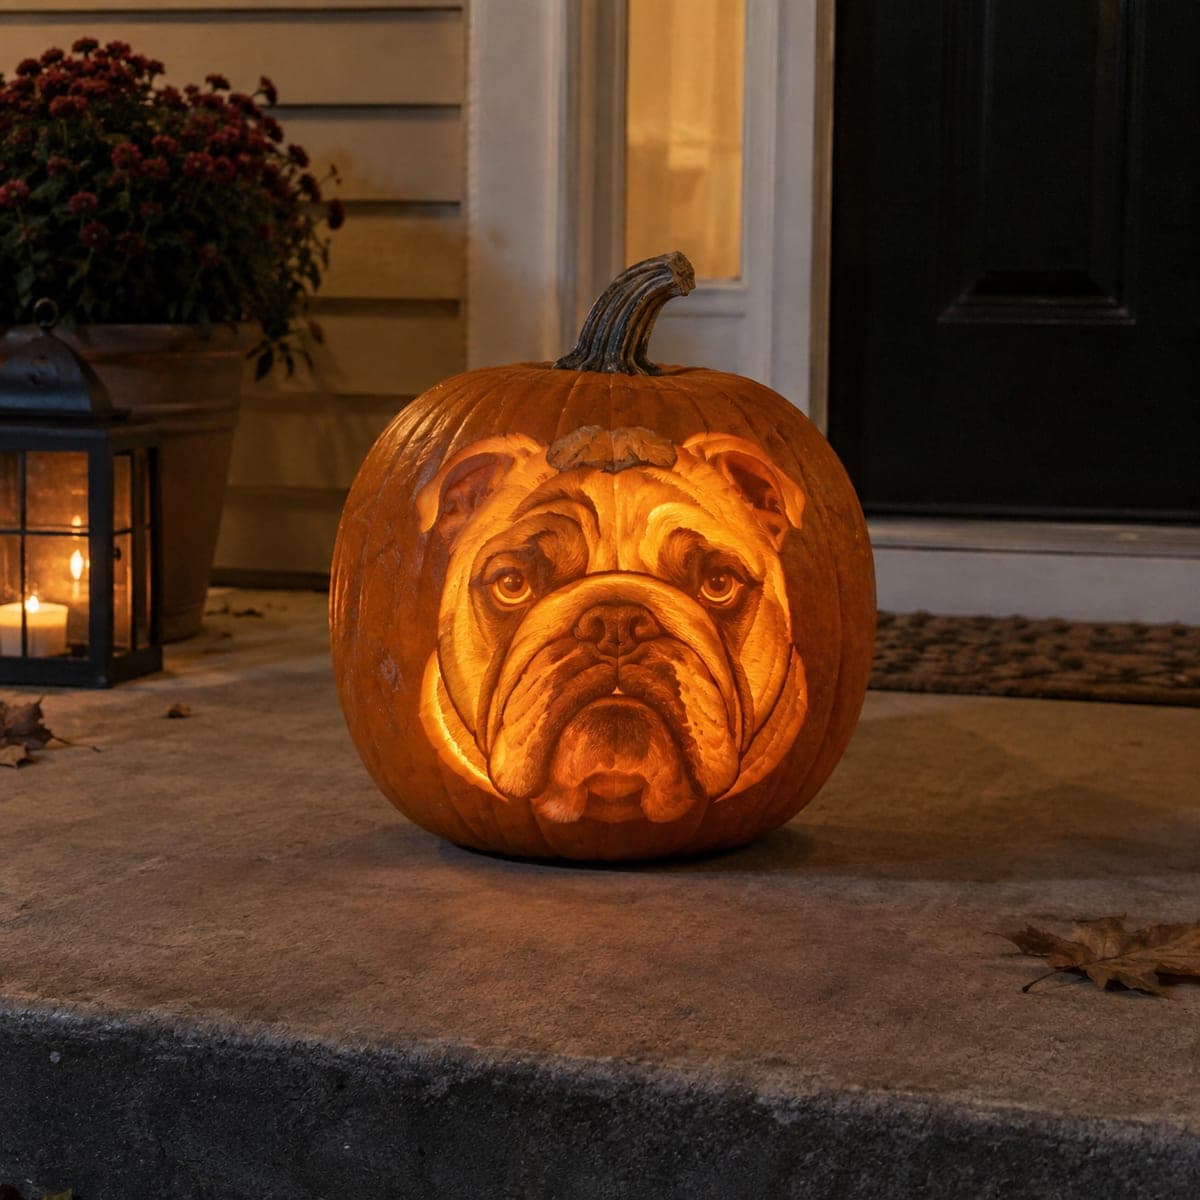
English Bulldog Pumpkin with Jowl Relief Carving

Open eyes and a central mouth aperture anchor this medium english bulldog pumpkin carving, with the head, ear, brow, and jowl contours carved as backed relief around the intact nose and cheek panels. The retained nose bridge and cheeks sit on solid rind backing, so this design holds together well even with several distinct regions. Cut the mouth and eyes first, then work outward to the backed contours. Displaying it on a slightly elevated surface lets the jowl shadow fall naturally.

No ratings yet · Sign in to rate

Comments (0)

  • No comments yet — be the first.

Save without an account. Sign in to like or comment.

Our tips for carving a similar design

The open eyes and central mouth are the light sources, but the retained nose and cheek panels resting on solid backing give the design its three-dimensional character. Backed head, ear, brow, and jowl contours radiate outward from those anchored panels, building the bulldog's wrinkled expression in layers. Cut the interior openings first so the backing contours have fixed reference points.

From pumpkin to porch

  1. Hollow to consistent depth

    Scoop the pumpkin interior to roughly half an inch throughout, taking extra care in the retained nose and cheek areas. These panels sit on solid backing, so their wall thickness affects how bright they appear relative to the cut apertures. An even scoop means even glow contrast.

  2. Transfer all lines

    Pin-transfer the stencil and mark through-cut zones and backed-relief zones in two colors. Note that the nose and cheeks are retained rind that you will never cut through. Confirm those boundaries on the marked surface before picking up a saw.

  3. Cut the mouth aperture

    The central mouth opening is the widest through-cut and anchors the entire lower face. Cut it first to set the reference for everything above. Saw slowly around any curved corners to keep edges clean.

  4. Cut the eye apertures

    Open both eye apertures above the nose bridge. Keep the nose bridge intact by stopping each eye cut well above the retained nose panel. The nose and cheek panels should now be surrounded by open apertures but still solidly connected to the shell.

  5. Carve the backed contours

    Use a detail knife at a low angle to carve the head, ear, brow, and jowl contours to about half the wall depth. Follow the natural plane of each facial region and vary the pressure to create subtle depth transitions. Elevating the pumpkin on a turntable or lazy Susan helps reach the sides evenly.

  6. Final light check

    Insert an LED candle and view in a darkened room. The retained nose and cheeks should read as dim orange shapes surrounded by brighter glow. Deepen any relief sections that appear too flat and smooth rough aperture edges with a fine detail knife.

Written with AI to match this design

Gather your supplies

Check things off as you get ready.

Work on a stable surface, keep your free hand out of the cutting path, and have an adult handle sharp tools.

Three levels of light

  • Leave intact

    Retained nose bridge, cheek panels, and the outer shell perimeter

  • Peel & shade

    Head outline, ear, brow, and jowl contours carved to approximately half wall depth

  • Cut through

    Both eye apertures and the central mouth opening

Learn the carving basics

Before you start cutting

How do I keep the retained nose panel from cracking during the eye cuts?

Always cut away from the nose bridge rather than toward it, and stop each eye cut at least a half-inch from the nose panel boundary. If you are using a saw, avoid pressing the blade sideways near the nose edge as lateral pressure can crack thin remaining rind.

The jowl relief looks like wrinkles on my pumpkin. Is that right?

Yes, that is exactly the intended effect. The backed jowl contours mimic the dog's loose skin folds when viewed in raking light. If the wrinkle effect is subtle, deepen the grooves slightly and recheck in darkness. The shadow contrast makes the texture much more visible than it appears in daylight.

My eyes came out uneven in size. Can I fix this after cutting?

You can carefully widen the smaller eye aperture with a detail knife to match the larger one. Work slowly in small increments and test the visual balance frequently. It is much easier to remove more material than to replace it, so go slowly.

Your take belongs here, too.

Changed a detail? Made it simpler? Share a photo of your version and tell the community what worked.

Share your pumpkin

More pumpkins like this

You've reached the end · 8 pumpkins
The Patch Report

Fresh pumpkins, in your inbox.

The best new carvings, ideas worth stealing, and how-tos for carving season. Short, seasonal, and gone by November.

A short email during carving season. Unsubscribe anytime. See our privacy policy.