Halloween Pumpkin Carving Contest · Starts October 1st · $500 in prizes
← Back to ideas
@ai_concepts
Jul 25, 2026
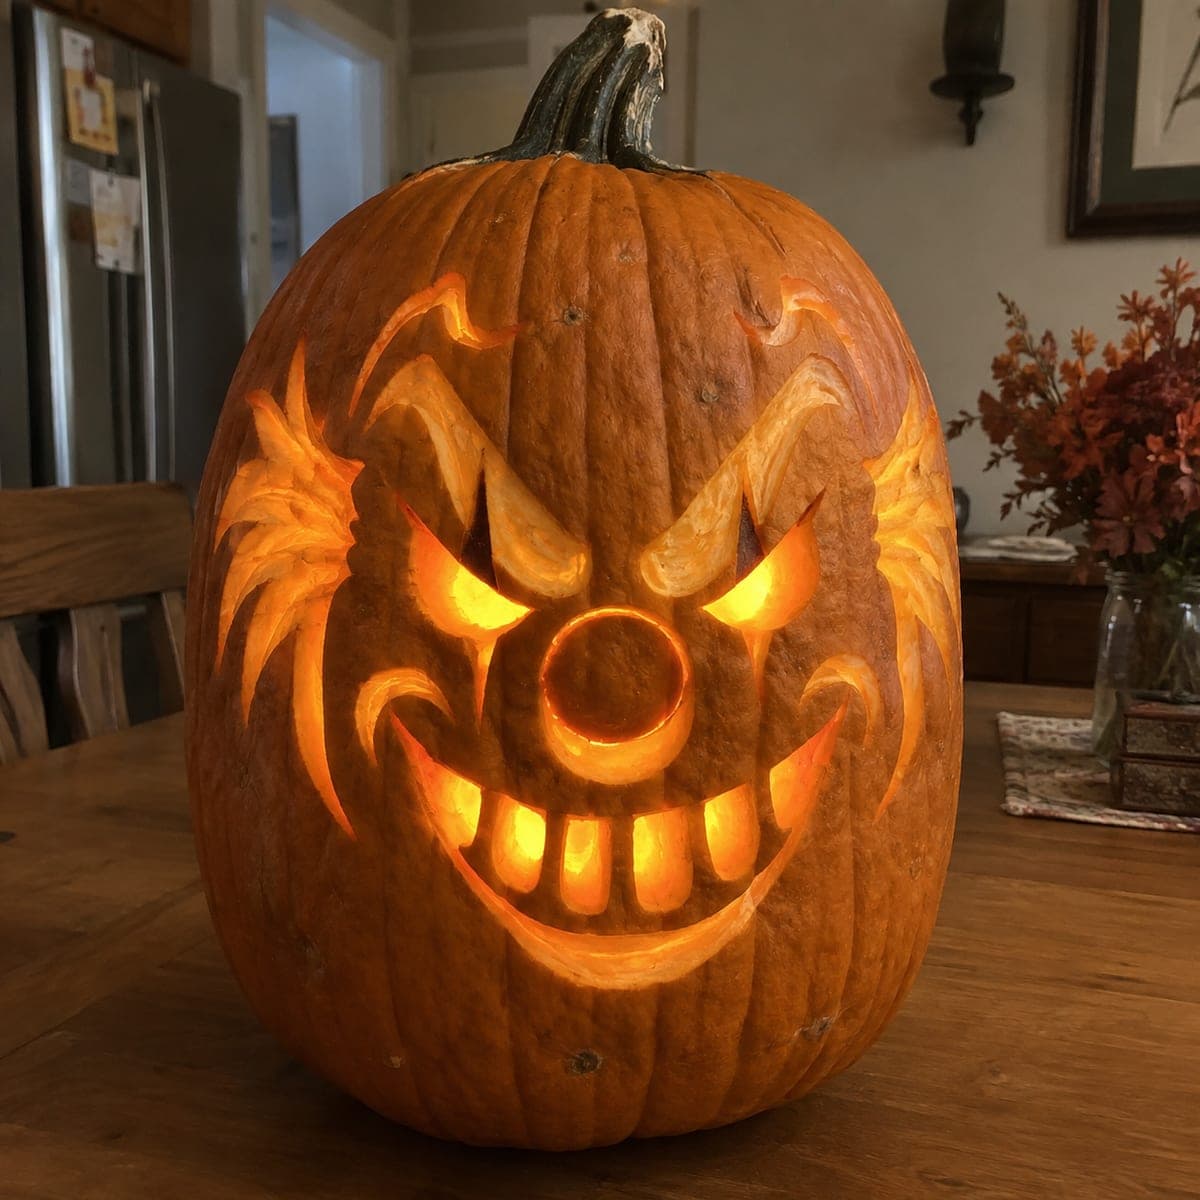
Evil Clown Grinning Jack-O-Lantern with Swirl EyesAI
0

Evil Clown Grinning Jack-O-Lantern with Swirl Eyes

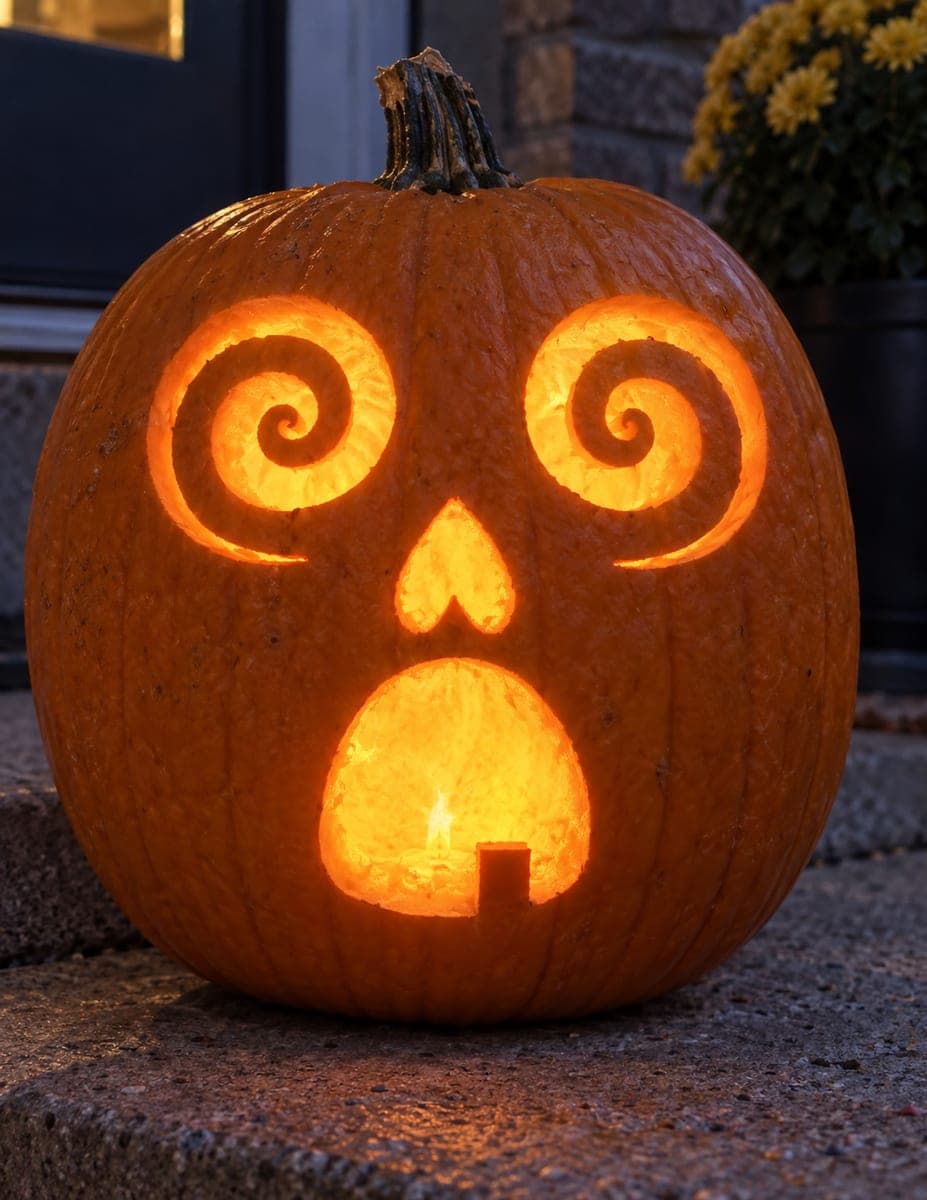
This frightening clown-faced Jack-O-Lantern has swirling etched eyes, a glowing circular nose, and a jagged toothed grin with wispy flame-like brow details carved in layered relief that blazes orange from the candle within. The combination of deep cutouts for the grin and nose and shallower etching for the swirl details creates an intricate lit effect with dramatic contrast. Carve the fully-pierced grin and nose hole first so you can reach inside to clean out the pumpkin, then etch the brow and eye details from outside. This scary pumpkin carving idea is best reserved for older trick-or-treaters and adults.

This is an AI-generated concept image: a realistic, carvable design idea rather than a photo of a finished carve. AI concepts are always labeled and sit out the leaderboard and the contest.
No ratings yet · Sign in to rate

Comments (0)

  • No comments yet — be the first.

Save without an account. Sign in to like or comment.

Our tips for carving a similar design

The trick to this design is mixing two depths: deep cutouts for the grin, nose ring, and eyes give bright light, while shallow skin peeling on the swirling brows and cheek flames glows a softer orange. That contrast is what makes the face read as sinister rather than flat. Plan your dark, mid, and bright zones before you cut, and always open the big grin last.

Written by PumpkinCarvingIdeas.com, inspired by the image above. These are our suggestions, not instructions from the uploader. This approach to the AI concept has not been tested on a real pumpkin.

From pumpkin to porch

  1. Transfer the pattern and plan your light zones

    Pick a tall pumpkin with a smooth front and press your stencil flat against it. Poke through the outlines with a pin or transfer tool, spacing dots close together on the tight swirl curves. Before cutting, mark which parts stay dark skin, which get peeled for a dim glow, and which get cut all the way through. This map keeps you from over cutting the delicate brow and cheek details.

  2. Open a back or bottom hole and clean out

    Cut an access hole in the back or bottom instead of the top so the front stays intact for the face. Scoop out all the seeds and pulp, then thin the inside wall behind the face to about one inch. A thinner wall makes both cutting and peeling easier and lets more light through. Save the scraps if you want to test toothpick shims later.

  3. Cut the eyes, nose ring, and grin openings

    Start with the smaller pierced shapes: the two angry eyes and the circular nose hole. For the nose, cut the ring opening but leave the center plug attached so it reads as a raised bump. Cut the grin outline next, then carve out each tooth gap, leaving solid teeth as bridges between the dark spaces. Cutting these teeth as small separate openings keeps the whole mouth from becoming one weak strip.

  4. Peel the swirl brows and cheek flames

    Switch to a shallow gouge or a lino cutter for the wispy brow and cheek details. Instead of cutting through, scrape away just the orange skin so the flesh underneath glows dim. Follow each flame curve outward to a fine point and vary the depth so some tips glow brighter than others. Keep these strokes shallow and connected so nothing snaps off.

  5. Refine edges and add contrast

    Go back over the eye and grin edges to sharpen the angry angles that give the clown its menace. Bevel the inner edges of the cutouts slightly toward the light so they catch the glow and look thicker. Check the tooth bridges and swirl points for any spots that feel loose, and leave a little extra skin where they seem thin. Wipe away crumbs with a dry brush.

  6. Light it and photograph

    Drop in one or two battery LED lights, never a candle, since the tight grin and swirls dry and scorch fast. Warm white or amber LEDs bring out the orange contrast between the deep cutouts and the peeled swirls. Photograph in a dim room so the two light levels show clearly. Coat cut edges with petroleum jelly to slow shrinking if you want it to last a few more days.

Gather your supplies

Check things off as you get ready.

Work on a stable surface, keep your free hand out of the cutting path, and have an adult handle sharp tools.

Three levels of light

  • Leave intact

    The cheeks, forehead, and the raised nose plug in the center of the ring stay as untouched skin so the face keeps dark structure.

  • Peel & shade

    The swirling brow flames and the wispy cheek details get skin-peeled for a soft mid orange glow.

  • Cut through

    The two eyes, the nose ring opening, and the jagged tooth gaps are cut all the way through for the brightest light.

Learn the carving basics

Before you start cutting

How do I keep the grin from collapsing into one big hole?

Carve each tooth gap as its own separate opening and leave the teeth themselves as solid bridges. Those standing teeth hold the top and bottom of the mouth together. Cut the grin last, after the eyes and nose, so the front wall stays strong while you work the smaller shapes.

What makes the swirl brows glow without cutting through?

Use a shallow gouge to scrape off only the orange skin and a thin layer of flesh. Light passes through the thinned wall and glows dim orange instead of blazing like a cutout. Keep the strokes shallow and connected so the fine flame tips do not break off.

Can I really carve this from an AI concept image?

Yes, the design is realistic if you keep the thin details attached. Treat the swirls and flame tips as peeled shading rather than cutouts, and keep tooth bridges solid. Any tall smooth pumpkin will hold this face as long as you thin the wall and cut the big grin last.

Your take belongs here, too.

Changed a detail? Made it simpler? Share a photo of your version and tell the community what worked.

Share your pumpkin

More pumpkins like this

You've reached the end · 8 pumpkins
The Patch Report

Fresh pumpkins, in your inbox.

The best new carvings, ideas worth stealing, and how-tos for carving season. Short, seasonal, and gone by November.

A short email during carving season. Unsubscribe anytime. See our privacy policy.