Halloween Pumpkin Carving Contest · Starts October 1st · $500 in prizes
← Back to ideas
@ai_concepts
Sep 25, 2026
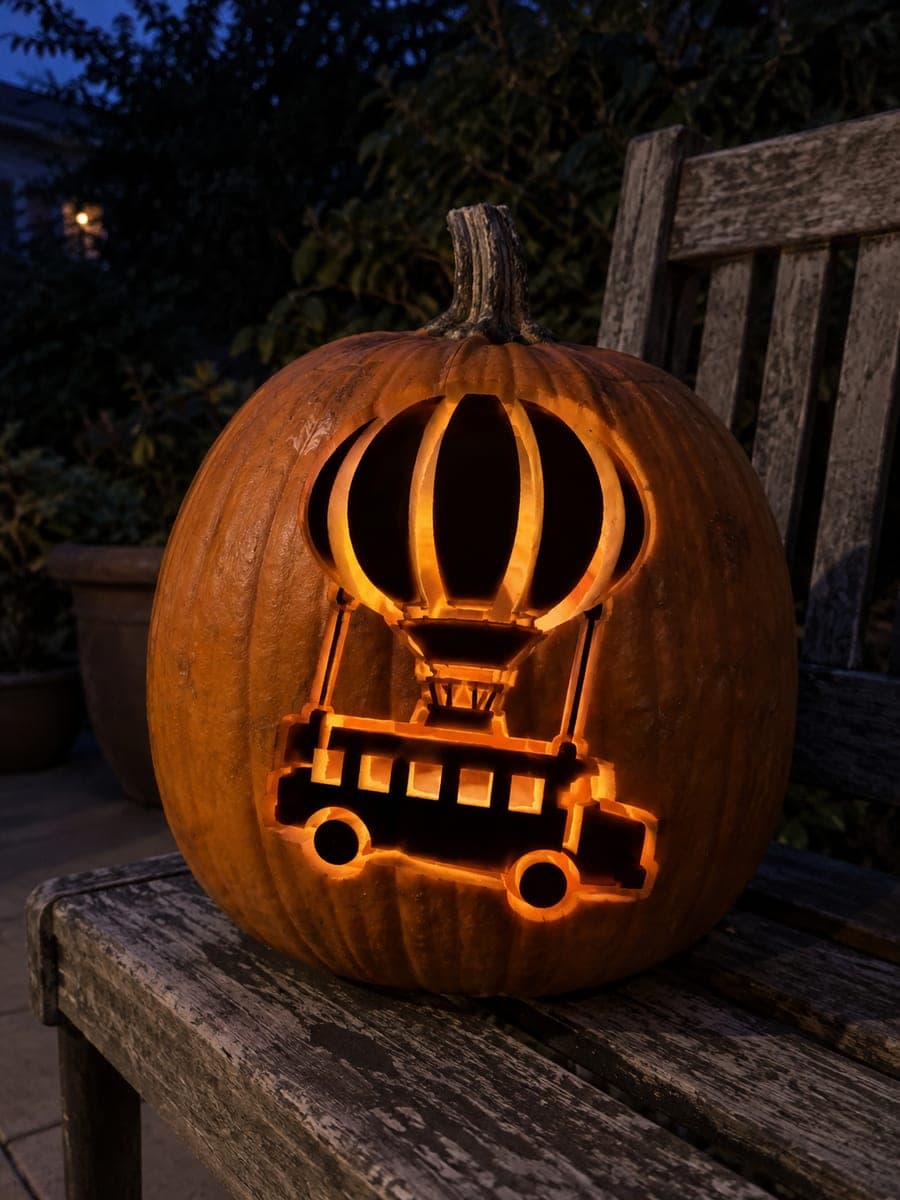
Expert Fortnite Llama Bus Combo Jack-O-LanternAI
0

Report this carving

Tell us what is wrong. Reports are private.

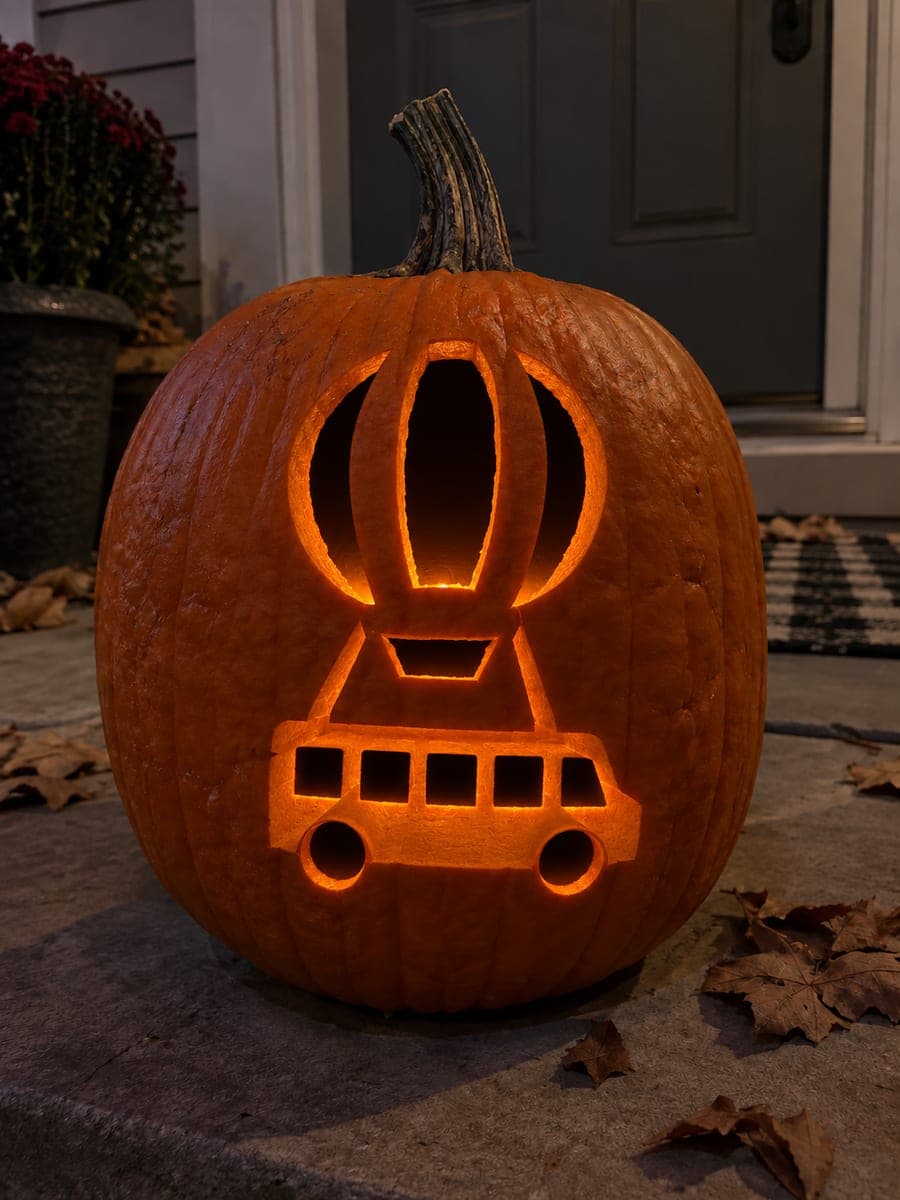
Expert Fortnite Llama Bus Combo Jack-O-Lantern

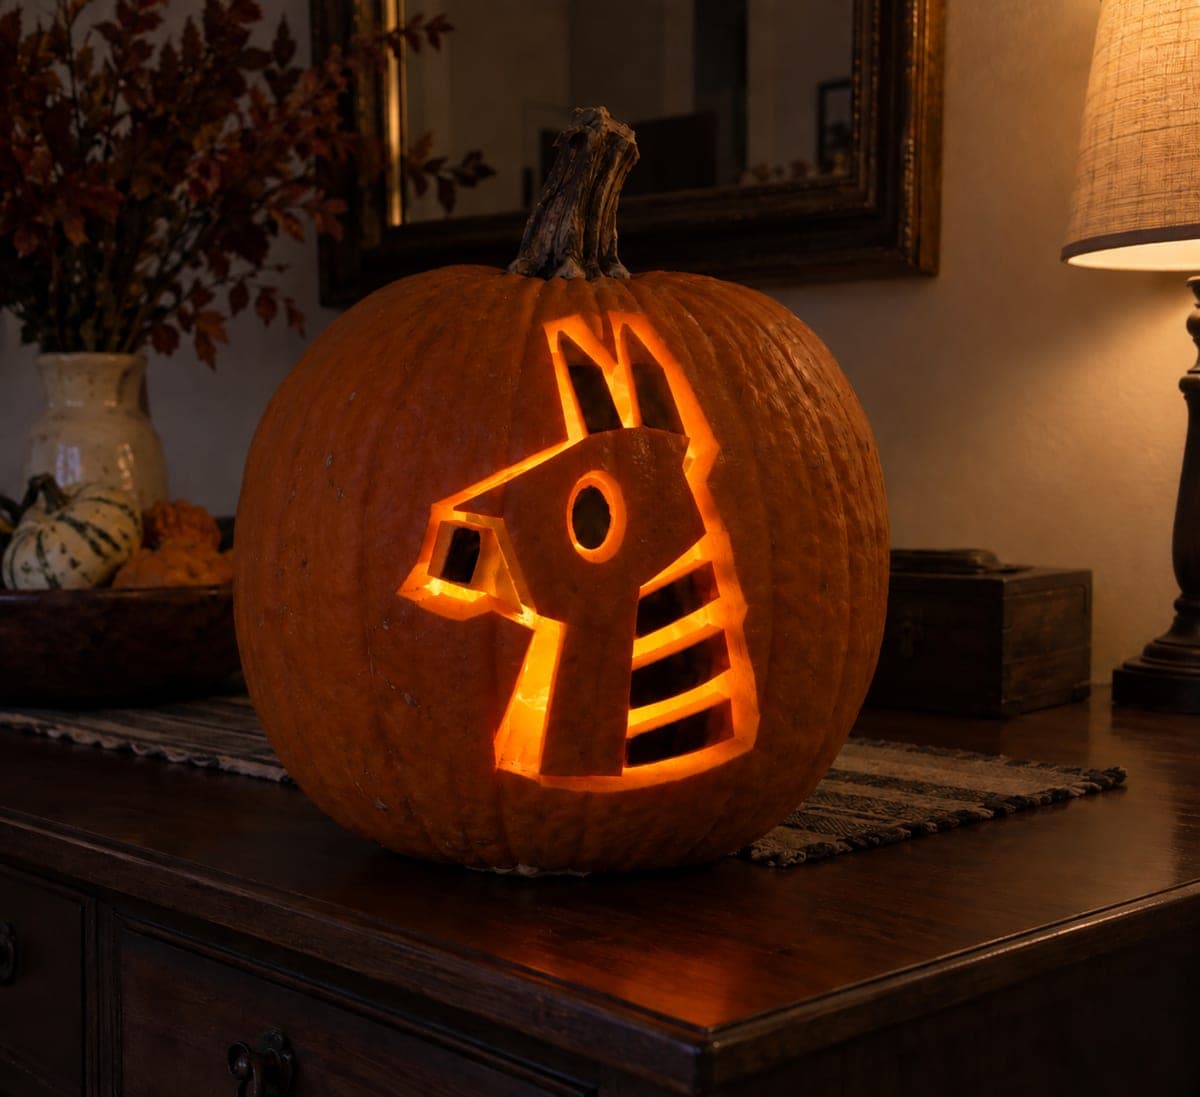
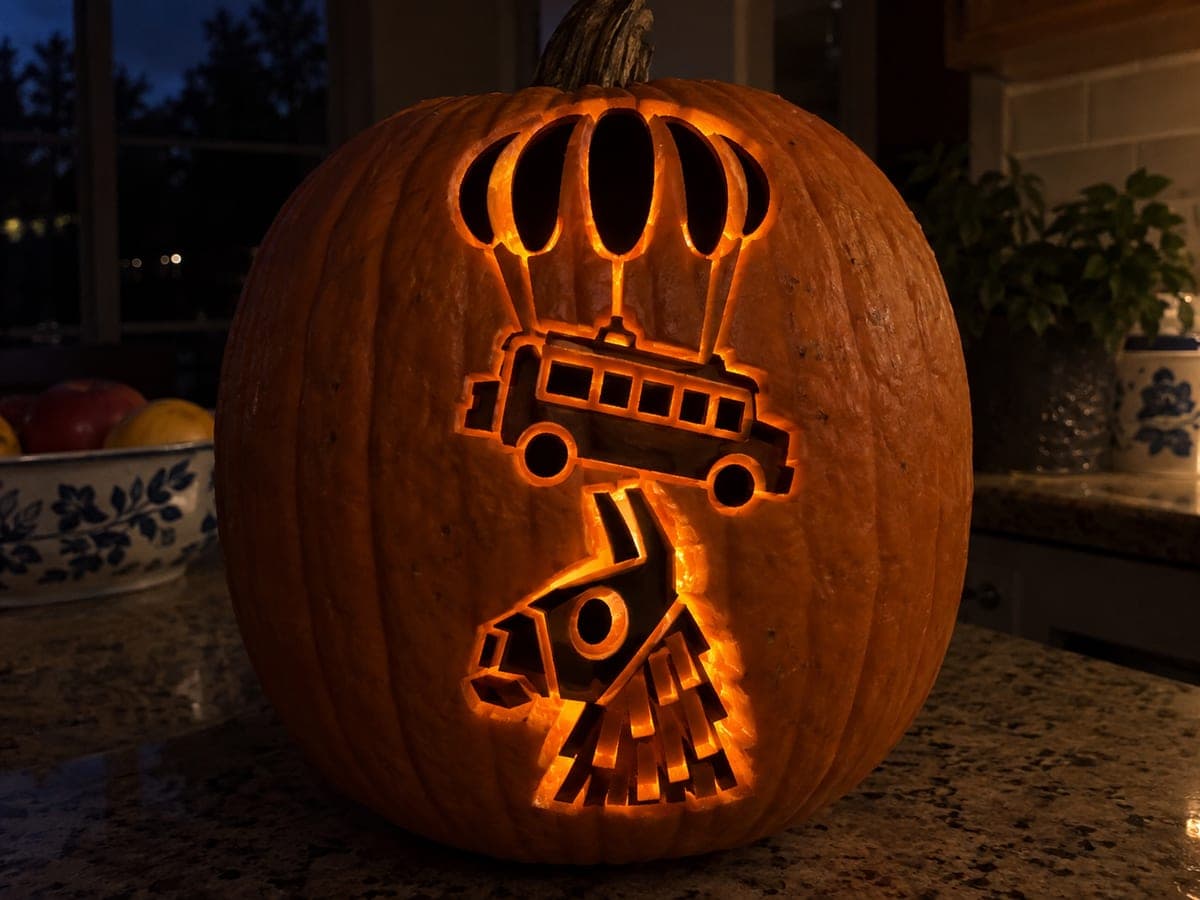
The expert fortnite pumpkin carving combines the Battle Bus balloon panels, bus windows, wheel centers, and llama eye into one intricate glowing design, with all retained rind bridges and outer character contours backed for strength. Begin with the largest hollow panel openings to establish the composition, then add the llama eye and window details with a fine detail blade. Photographing the design from a low angle with the pumpkin backlit shows all the layered openings at their most dramatic.

No ratings yet · Sign in to rate
Comments (0)

  • No comments yet — be the first.

Save without an account. Sign in to like or comment.

Our tips for carving a similar design

This design packs balloon panels, bus windows, wheel centers, and the llama eye into a single composition, with all the connecting bridges and outer character contours backed for strength. Starting with the largest hollow openings establishes the composition's negative space and keeps the backed bridges stable while the finer details are added. Low-angle backlighting shows all the layered openings at their most dramatic.

From pumpkin to porch

  1. Prep a wide, firm pumpkin

    Choose a wide pumpkin with a large, relatively flat face to accommodate both the bus and llama elements side by side. Bottom-cut and gut it, scraping the interior walls to a consistent three-quarter-inch depth. Thinning slightly more behind the window and llama-eye zones ensures those smaller openings glow as brightly as the larger panels.

  2. Transfer with carbon paper

    Carbon-paper transfer is essential for this dense multi-element stencil. Tape both the stencil and carbon sheet flat across the full face, working out any bubbles with your palm before taping. Trace every element firmly: balloon panels, ribs, windows, wheel centers, llama eye, and all backing zone outlines. Use three marker colors to distinguish large cut, small cut, and scrape zones.

  3. Cut the large balloon panels first

    Open all three balloon panels before any other cuts, keeping the ribs between them at the full marked width. These panels anchor the top half of the composition. Use a flexible saw and work slowly around each panel's curved top edge. Remove all panel pieces cleanly before moving on.

  4. Cut the bus windows, wheel centers, and llama eye

    Work systematically downward: cut the bus windows with a pointed knife for clean rectangular corners, then the wheel-center circles with a rotating gouge motion, then the llama eye oval. Remove all cut pieces immediately through the bottom opening so they do not rattle loose and damage the rind walls. Check the interior for loose debris between each step.

  5. Back all bridges and outer contours

    Switch to flat and narrow gouges to shallow-back every retained bridge zone and the outer character contour. The bridges between the bus and llama elements are critical structural points, so keep their backing depth conservative, around 3 millimeters, to preserve floor thickness. Work in long smooth passes along each contour to maintain even depth.

  6. Photograph from a low angle

    Place the LED inside and position the pumpkin on the floor or a very low surface, then photograph from ground level with the lens tilted upward slightly. This angle silhouettes the upper panels against any ambient light while the lower wheel centers and llama eye glow in the same frame. Include a dark background for maximum impact.

Written with AI to match this design

Gather your supplies

Check things off as you get ready.

Work on a stable surface, keep your free hand out of the cutting path, and have an adult handle sharp tools.

Three levels of light

  • Leave intact

    The main bus frame, rib areas, and outer character contours are fully dark, holding the composition together.

  • Peel & shade

    All retained bridges and outer contour zones are shallow-backed for a structural mid glow.

  • Cut through

    The balloon panels, bus windows, wheel centers, and llama eye are all cut fully through for maximum brightness.

Learn the carving basics

Before you start cutting

How do I avoid accidentally cutting through a bridge when working near it with a saw?

Mark every bridge with a bold felt-tip line after removing the stencil and do not allow your saw blade to cross that line for any reason. Cut with the blade angled away from the bridge on any pass near it. If you feel the blade approaching a bridge, stop, back the blade out, and approach from the opposite direction.

The llama eye is very close to one of the bus windows. How do I keep them from merging?

Cut both openings to their exact marked borders rather than slightly oversizing either one, and check the gap between them after each cut before proceeding. If the gap looks too narrow after cutting, leave the adjacent edges slightly rough rather than tidying them, as any additional material removal reduces the bridge. A gap of even a quarter inch reads as a clear separation when lit.

Is it worth spreading this project across two evenings?

Yes, carving the large panels on the first evening and saving the small detail cuts and backing work for the next day is a smart approach. Keep the partially carved pumpkin wrapped in a damp cloth in the refrigerator between sessions. The cooler temperature firms the rind and makes the finer cuts cleaner on the second session.

Your take belongs here, too.

Changed a detail? Made it simpler? Share a photo of your version and tell the community what worked.

Share your pumpkin

More pumpkins like this

You've reached the end · 8 pumpkins
The Patch Report

Fresh pumpkins, in your inbox.

The best new carvings, ideas worth stealing, and how-tos for carving season. Short, seasonal, and gone by November.

A short email during carving season. Unsubscribe anytime. See our privacy policy.