Halloween Pumpkin Carving Contest · Starts October 1st · $500 in prizes
← Back to ideas
@ai_concepts
Sep 25, 2026
Fortnite Bus and Balloon Pumpkin With Wheel CentersAI
0

Report this carving

Tell us what is wrong. Reports are private.

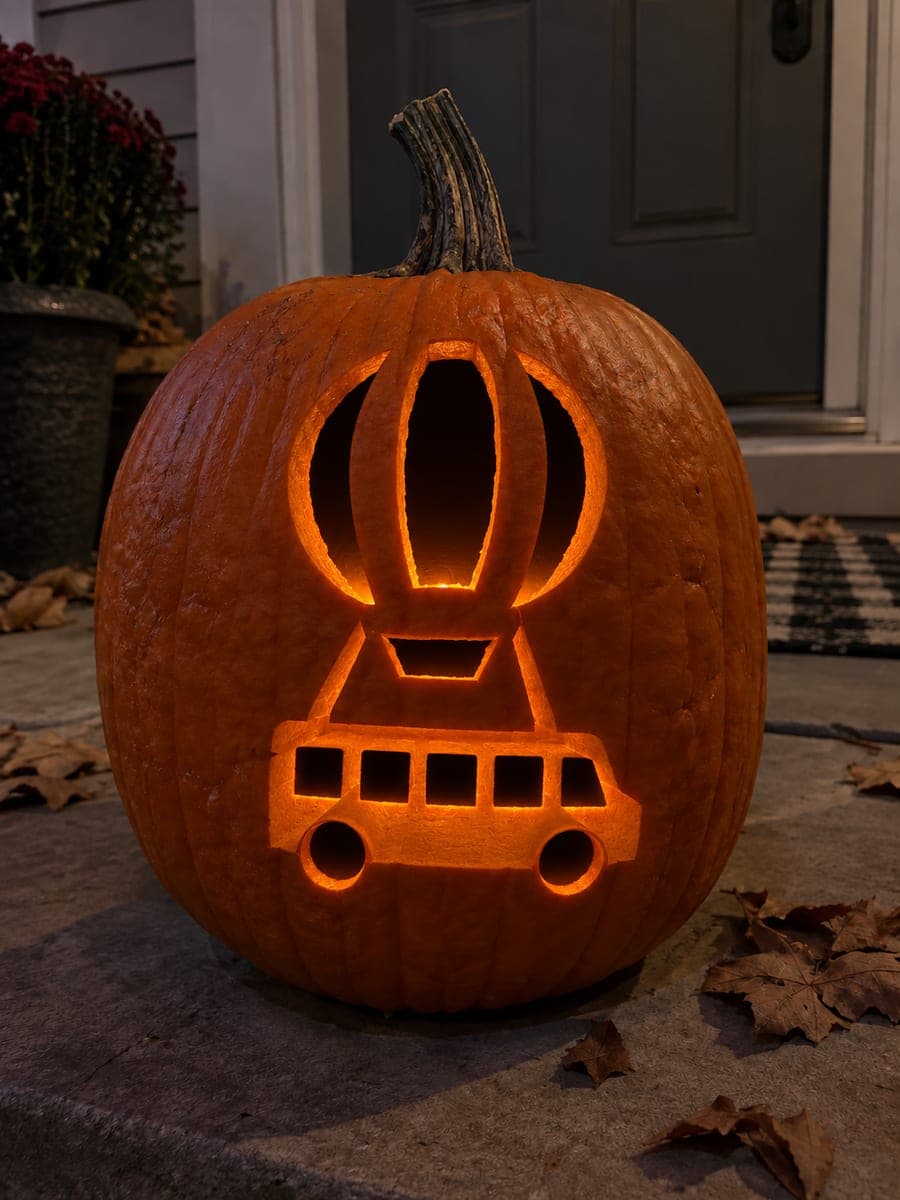
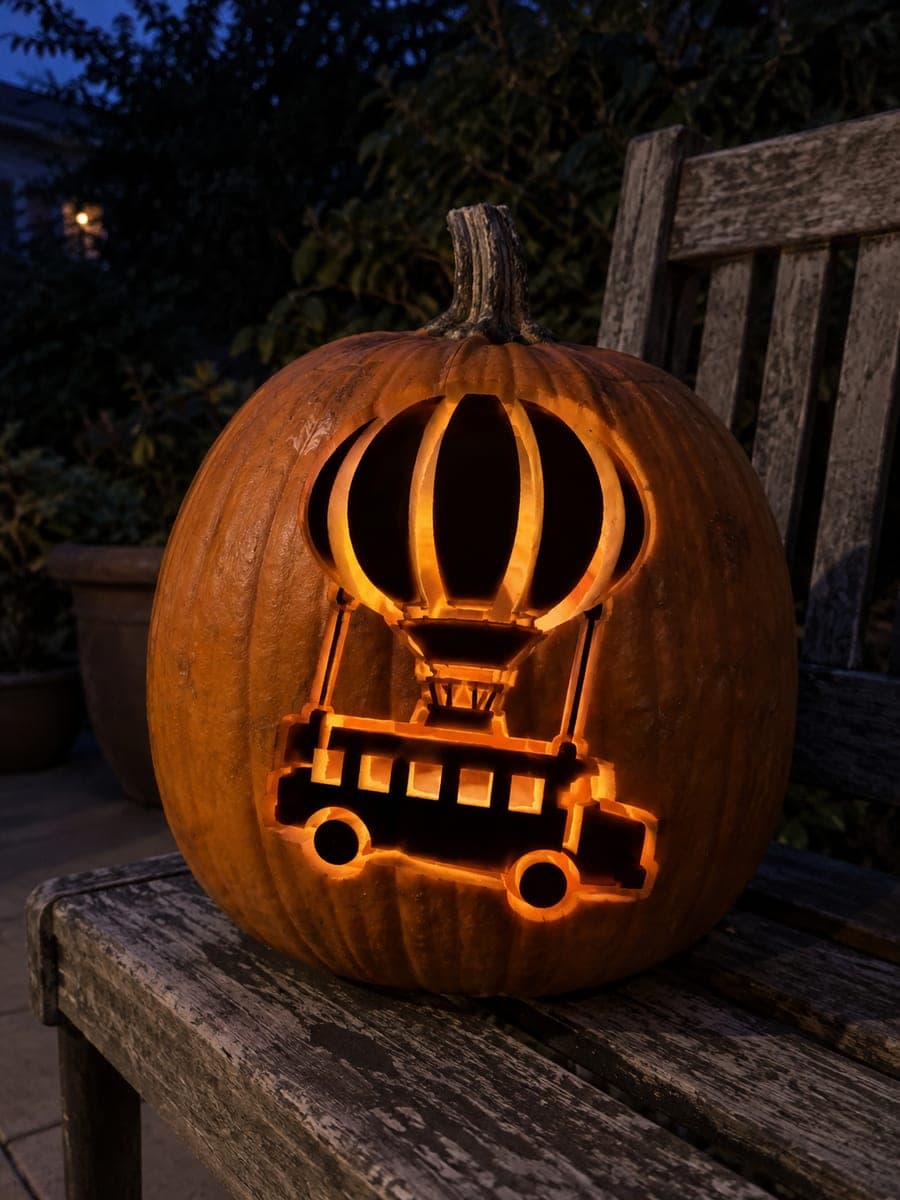
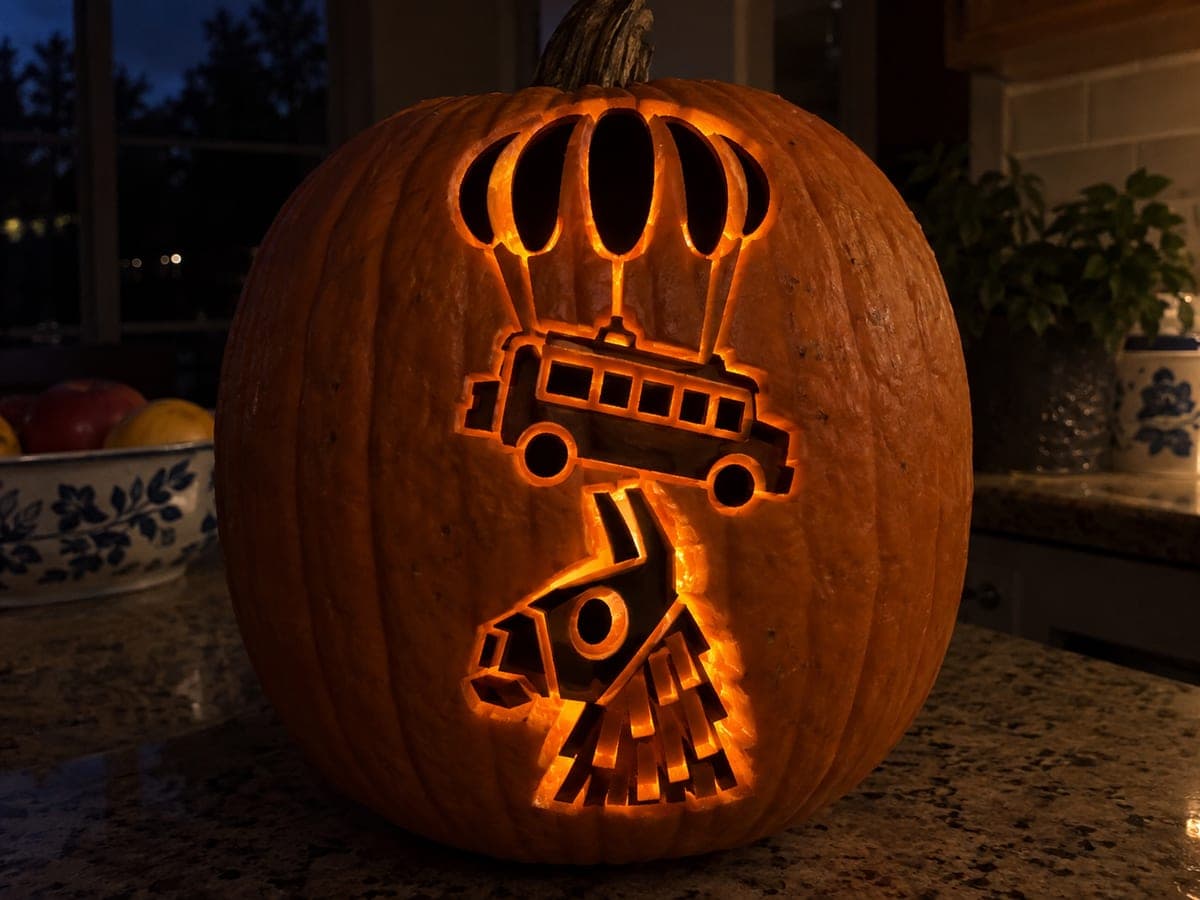
Fortnite Bus and Balloon Pumpkin With Wheel Centers

This hard-level fortnite pumpkin carving opens the main balloon panels and wheel centers as full hollow cuts, with bus body window accents and suspension details carried as shallow backed relief in the intact rind. Work the wheel-center circles with a small round gouge to keep them perfectly circular, and leave the broad ribs between balloon panels intact to support the whole composition. An orange LED inside casts the balloon glow in an appropriately festive autumn tone.

No ratings yet · Sign in to rate
Comments (0)

  • No comments yet — be the first.

Save without an account. Sign in to like or comment.

Our tips for carving a similar design

The main balloon panels and wheel centers are full hollow cuts here, with the bus body window accents and suspension details carried as shallow backed relief. The wheel-center circles are the most technically demanding element, requiring a small round gouge or pointed knife to stay circular. An orange LED inside gives the balloon panels a warm, festive glow matching the in-game bus color.

From pumpkin to porch

  1. Prep and gut the pumpkin

    Bottom-cut and gut the pumpkin with extra care to scrape the wall behind the wheel-center zone extra thin, since those are small openings that need strong light transmission. Dry the interior thoroughly and mark horizontal and vertical centerlines on the face to help align the bus stencil symmetrically.

  2. Transfer the full stencil

    Use carbon paper for this more complex stencil, tracing every balloon rib, window shape, wheel center, and suspension detail line. Mark cut zones in one color and scrape zones in another. Pay particular attention to the ribs between balloon panels since they are the key structural elements.

  3. Cut the balloon panels with their ribs

    Open each balloon panel as a full cut, working from the topmost panel down. Leave the ribs between panels fully intact at their marked width, which should be at least three-quarters of an inch. Use a flexible thin-bladed saw to follow the curved panel edges cleanly.

  4. Cut the wheel centers

    Use a small round gouge or a pointed knife working in a rotating motion to cut each wheel-center circle. Score the circle outline completely before removing the center piece. Cut slowly and keep the blade angled slightly inward so the hole has clean, non-torn edges. Remove the center plugs through the bottom opening.

  5. Scrape the window accents and suspension

    Switch to a narrow flat gouge to shallow-back the rectangular bus window shapes and the suspension detail area below the body. Keep a consistent scrape depth of 3 to 4 millimeters. These backed details add the bus shape and make the design recognizable from across a yard, even before the LED is turned on.

  6. Light with orange LED and photograph

    Insert an orange LED candle through the bottom and position it below the balloon panels for even coverage. The warm orange glow through the panels captures the in-game Battle Bus color accurately. Photograph from slightly above and at a 45-degree angle to capture both the balloon panels and the wheel centers in the same frame.

Written with AI to match this design

Gather your supplies

Check things off as you get ready.

Work on a stable surface, keep your free hand out of the cutting path, and have an adult handle sharp tools.

Three levels of light

  • Leave intact

    The outer bus frame, balloon ribs, and broad body areas stay fully dark, defining the vehicle shape.

  • Peel & shade

    The bus window accents and suspension detail are shallow-backed for a dim mid-glow.

  • Cut through

    The main balloon panels and all wheel centers are cut fully through for the brightest illumination.

Learn the carving basics

Before you start cutting

My wheel-center circles are coming out oval because of the pumpkin's curve. What helps?

Pressing a round bottle cap or circular cookie cutter into the rind to score the outline gives you a perfect circle guide regardless of surface curvature. Follow the scored line with the gouge or knife rather than trying to freehand a circle on a curved surface. The slight visual distortion from the curve actually corrects itself when you view the pumpkin from straight on.

Can I substitute a different LED color if I do not have orange?

A warm white LED paired with a strip of orange cellophane over the inside of the pumpkin achieves the same result. Alternatively, yellow LEDs give a similar warm tone to orange. Avoid blue or cold-white LEDs for this design since they shift the balloon glow away from the in-game palette.

The backed window accents are invisible when the pumpkin is unlit. Is that normal?

Shallow-backed details are most visible when light passes through them from behind. In daylight or room light you may see only a slight change in rind tone, but once the LED is on the windows will glow visibly against the fully dark bus body. If you want better daylight visibility, deepen the scrape slightly to create more contrast in the rind color.

Your take belongs here, too.

Changed a detail? Made it simpler? Share a photo of your version and tell the community what worked.

Share your pumpkin

More pumpkins like this

You've reached the end · 8 pumpkins
The Patch Report

Fresh pumpkins, in your inbox.

The best new carvings, ideas worth stealing, and how-tos for carving season. Short, seasonal, and gone by November.

A short email during carving season. Unsubscribe anytime. See our privacy policy.