Halloween Pumpkin Carving Contest · Starts October 1st · $500 in prizes
← Back to ideas
@ai_concepts
Jul 17, 2026
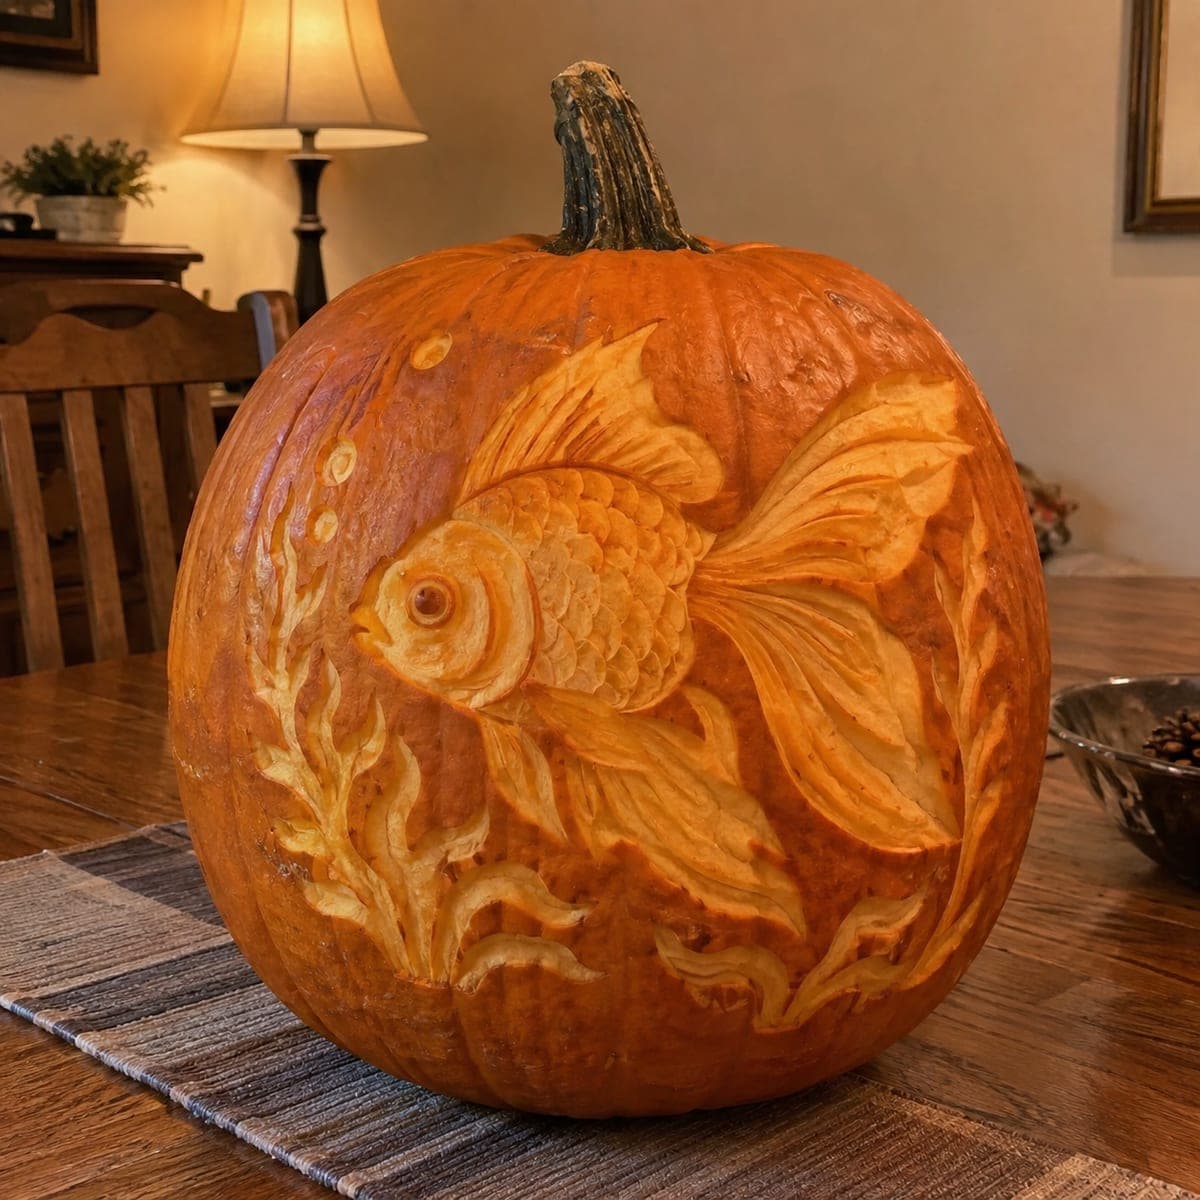
Fancy Goldfish Etched Pumpkin CarvingAI
0

Fancy Goldfish Etched Pumpkin Carving

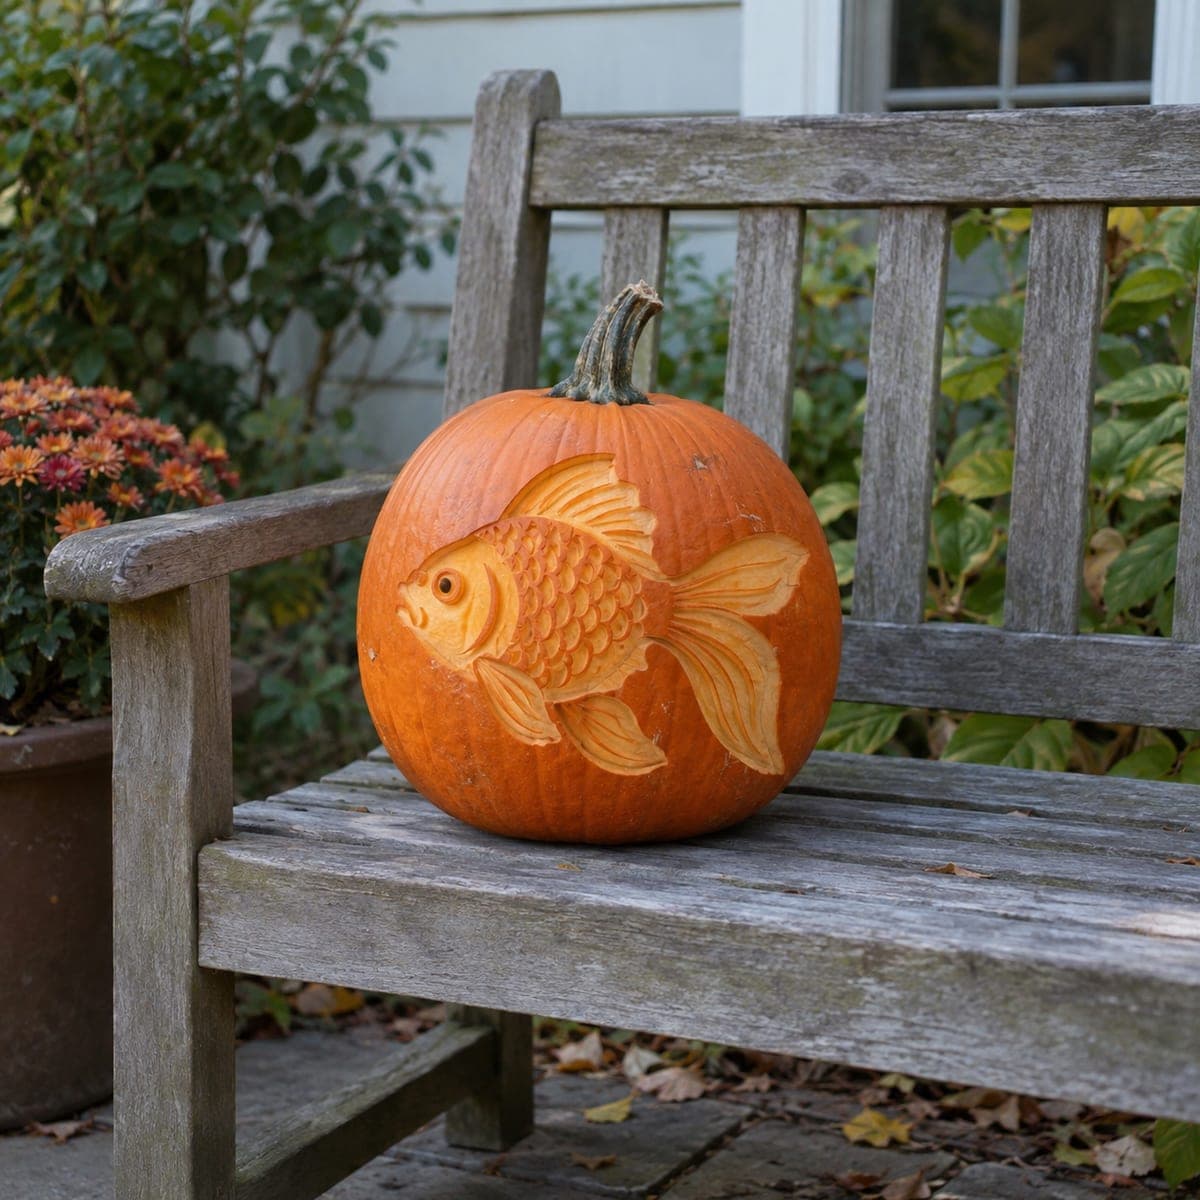
A fantail goldfish glides across this pumpkin with flowing double fins and a fully scaled body, each scale peeled as a small crescent to catch the light. The carving reads beautifully in daylight, so it can live on a garden bench without any candle. Outline the fish and carve the sweeping fin ribbons first, then work the scales in overlapping rows from tail to head, keeping each crescent stroke shallow and consistent.

This is an AI-generated concept image: a realistic, carvable design idea rather than a photo of a finished carve. AI concepts are always labeled and sit out the leaderboard and the contest.

No ratings yet · Sign in to rate
Comments (0)

  • No comments yet — be the first.

Save without an account. Sign in to like or comment.

Our tips for carving a similar design

The core trick here is surface etching rather than cutting all the way through: the whole goldfish is shaped by peeling the skin at different depths so it reads in daylight. You outline the body and flowing fins, then build the scales as rows of shallow overlapping crescents from tail to head. Because nothing gets cut through, the design stays strong and can sit on a bench without a light inside.

Written by PumpkinCarvingIdeas.com, inspired by the image above. These are our suggestions, not instructions from the uploader. This approach to the AI concept has not been tested on a real pumpkin.

From pumpkin to porch

  1. Prep the pumpkin and transfer the design

    Pick a large pumpkin with a smooth, flat side facing out and wipe it clean and dry. Tape your goldfish stencil over the flat area and poke the main outlines with a pushpin or use transfer paper. Focus on the body edge, the fin ribbons, and the eye so you have clear guides. Since this is a shading design, you do not need to mark every scale, just the row lines.

  2. Outline the fish and lower the background

    With a small detail knife or a shading loop tool, score along the outer edge of the body and fins to lock in the silhouette. Then use a ribbon or gouge tool to skin-peel the pumpkin around the fish, removing just the orange rind so the background sits slightly lower and dimmer. Keep your cuts shallow and even so the fish appears to stand up from the surface. Work slowly and pull the tool away from your holding hand.

  3. Carve the sweeping fins

    Move to the tail and dorsal fins and scoop long, shallow ribbon grooves that follow the flow of each fin. Vary the depth a little so the ridges between grooves catch light and read as flowing membrane. Leave thin ridges of skin between grooves intact as natural bridges so the fins stay strong. Do not cut through; these are surface valleys, not openings.

  4. Etch the scales from tail to head

    Start at the tail end of the body and peel each scale as a small shallow crescent, then overlap the next row like roof shingles. Keep every stroke the same depth and size so the pattern stays even and calm. Working tail to head means each new row tucks under the last for a natural layered look. Take breaks to step back and check your rows are following the curve of the body.

  5. Detail the face and refine

    Peel the cheek and gill area a touch deeper for a soft glow, then carefully define the eye and mouth with a small detail blade. The eye can be a shallow round recess with a tiny dark center left uncarved for contrast. Clean up any ragged edges along the fins and body outline. Blot away crumbs with a paper towel so the etched texture shows clearly.

  6. Seal, display, and photograph

    Because the carving is all surface work, coat the exposed areas with a thin layer of petroleum jelly to slow drying and keep the peeled skin bright. Set the pumpkin on a bench or step in daytime where side light rakes across the scales and fins. If you want a nighttime version, tuck a small LED puck beside it or behind a shallow cutout rather than using a candle. Snap your photo in soft morning or late afternoon light for the best shadows.

Gather your supplies

Check things off as you get ready.

Work on a stable surface, keep your free hand out of the cutting path, and have an adult handle sharp tools.

Three levels of light

  • Leave intact

    The dark eye center and any deep fin shadow lines stay as untouched skin for contrast.

  • Peel & shade

    The whole body, scales, and fins are skin-peeled at varied shallow depths for a soft daylight and dim glow.

  • Cut through

    Nothing needs full cutouts here; keep an optional shallow window behind for an LED only if you want night light.

Learn the carving basics

Before you start cutting

Do I have to cut all the way through for this to work?

No, and that is the whole point of this design. It is an etched or shaded carving, so you only peel the rind at different depths and let daylight or side light do the work. That also keeps the pumpkin much stronger than a cutout version.

How do I keep the scales even across a curved surface?

Mark a few guide rows first and always work tail to head so each row overlaps the last like shingles. Keep every crescent the same shallow depth and roughly the same width. Step back often to check the rows are curving with the body instead of drifting flat.

Since this is a concept image, will a real pumpkin look the same?

This is an AI concept, so no real pumpkin was carved, but the technique is completely doable. Use a large smooth pumpkin and expect a slightly more rustic texture in the peeled areas. The scales and flowing fins translate well to real rind as long as you keep your strokes shallow and consistent.

Your take belongs here, too.

Changed a detail? Made it simpler? Share a photo of your version and tell the community what worked.

Share your pumpkin

More pumpkins like this

You've reached the end · 8 pumpkins
The Patch Report

Fresh pumpkins, in your inbox.

The best new carvings, ideas worth stealing, and how-tos for carving season. Short, seasonal, and gone by November.

A short email during carving season. Unsubscribe anytime. See our privacy policy.