Halloween Pumpkin Carving Contest · Starts October 1st · $500 in prizes
← Back to ideas
@ai_concepts
Sep 13, 2026
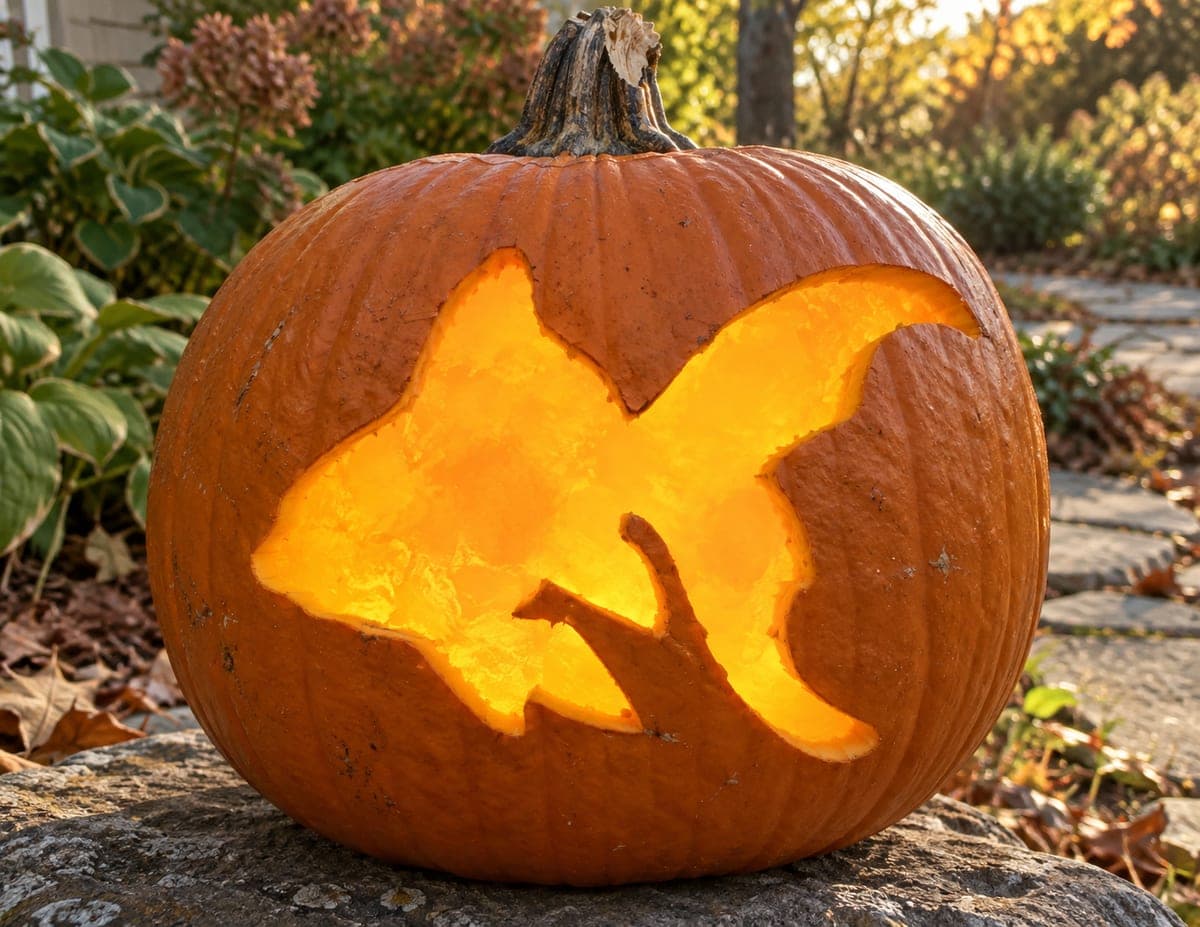
Fancy Goldfish Etched Pumpkin With Flowing FinsAI
0

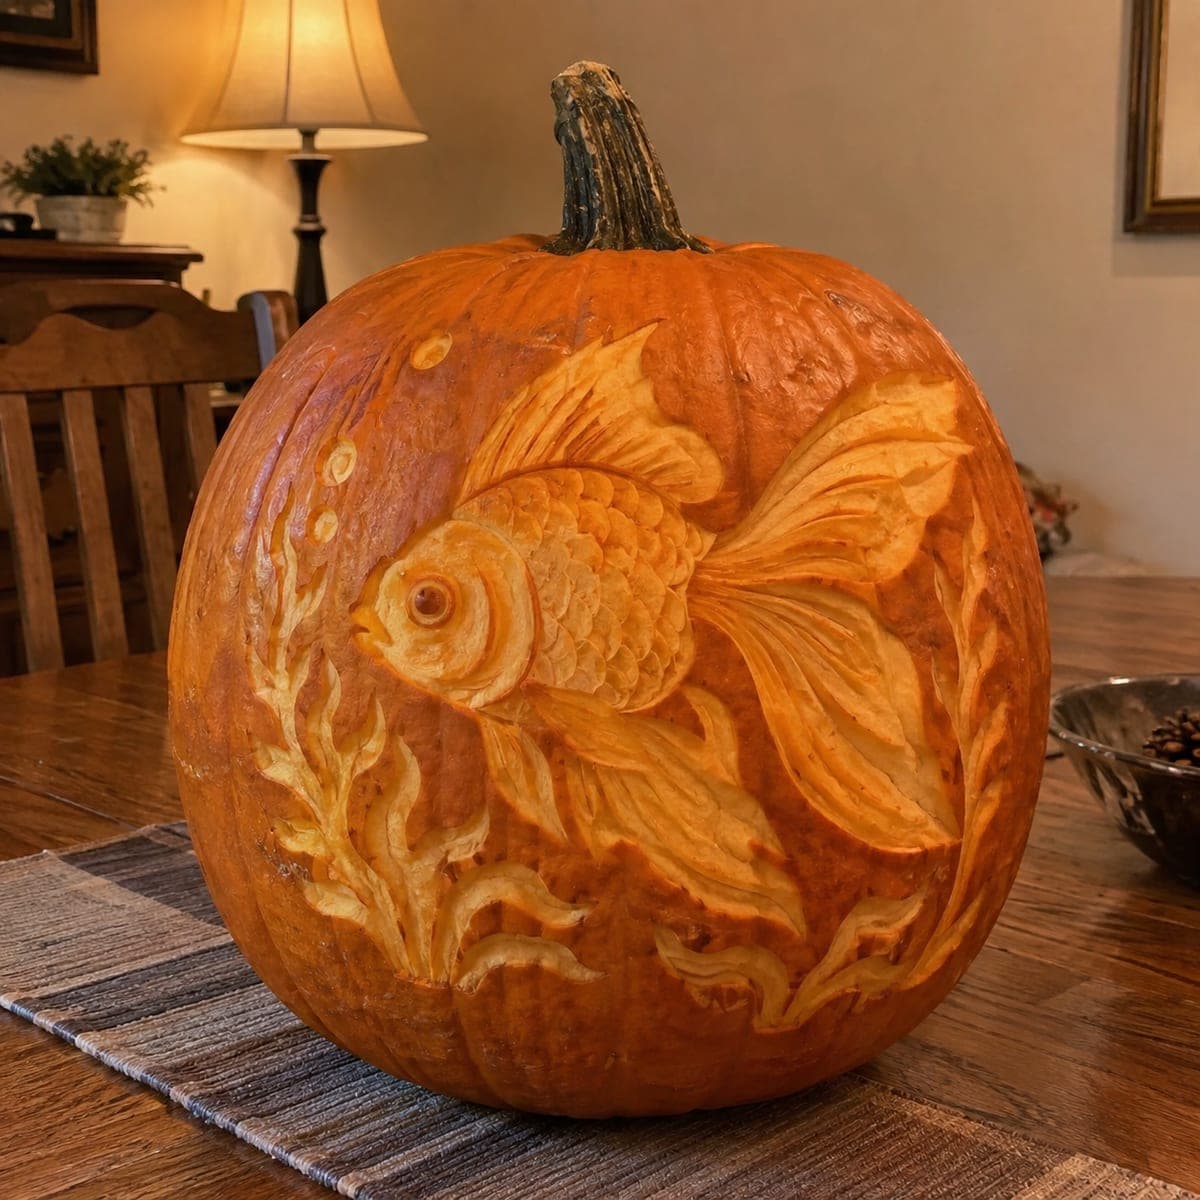
Fancy Goldfish Etched Pumpkin With Flowing Fins

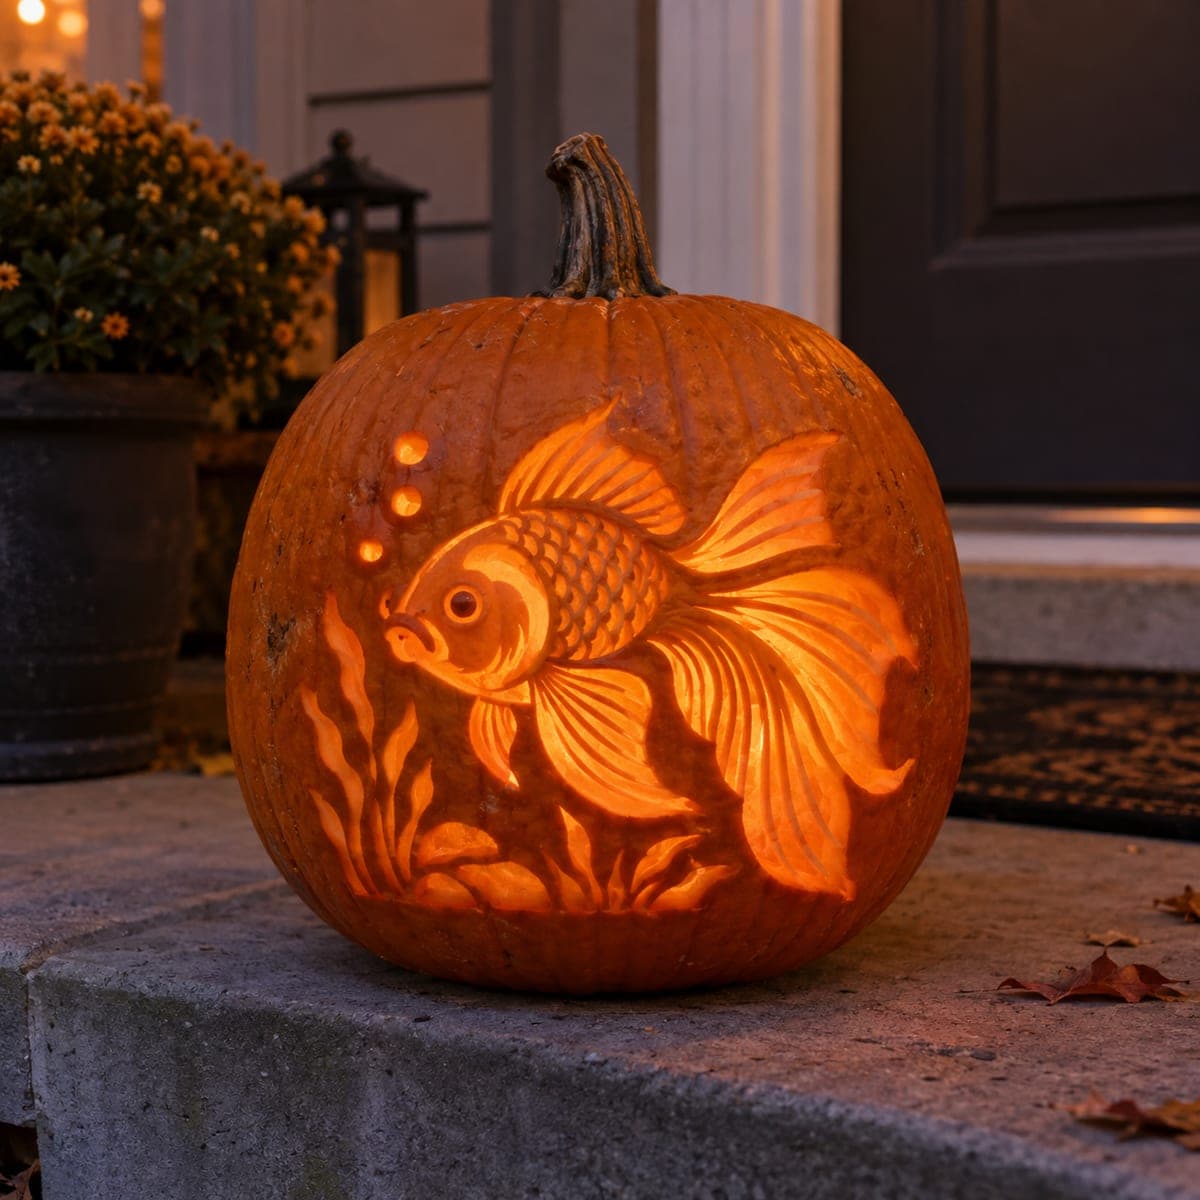
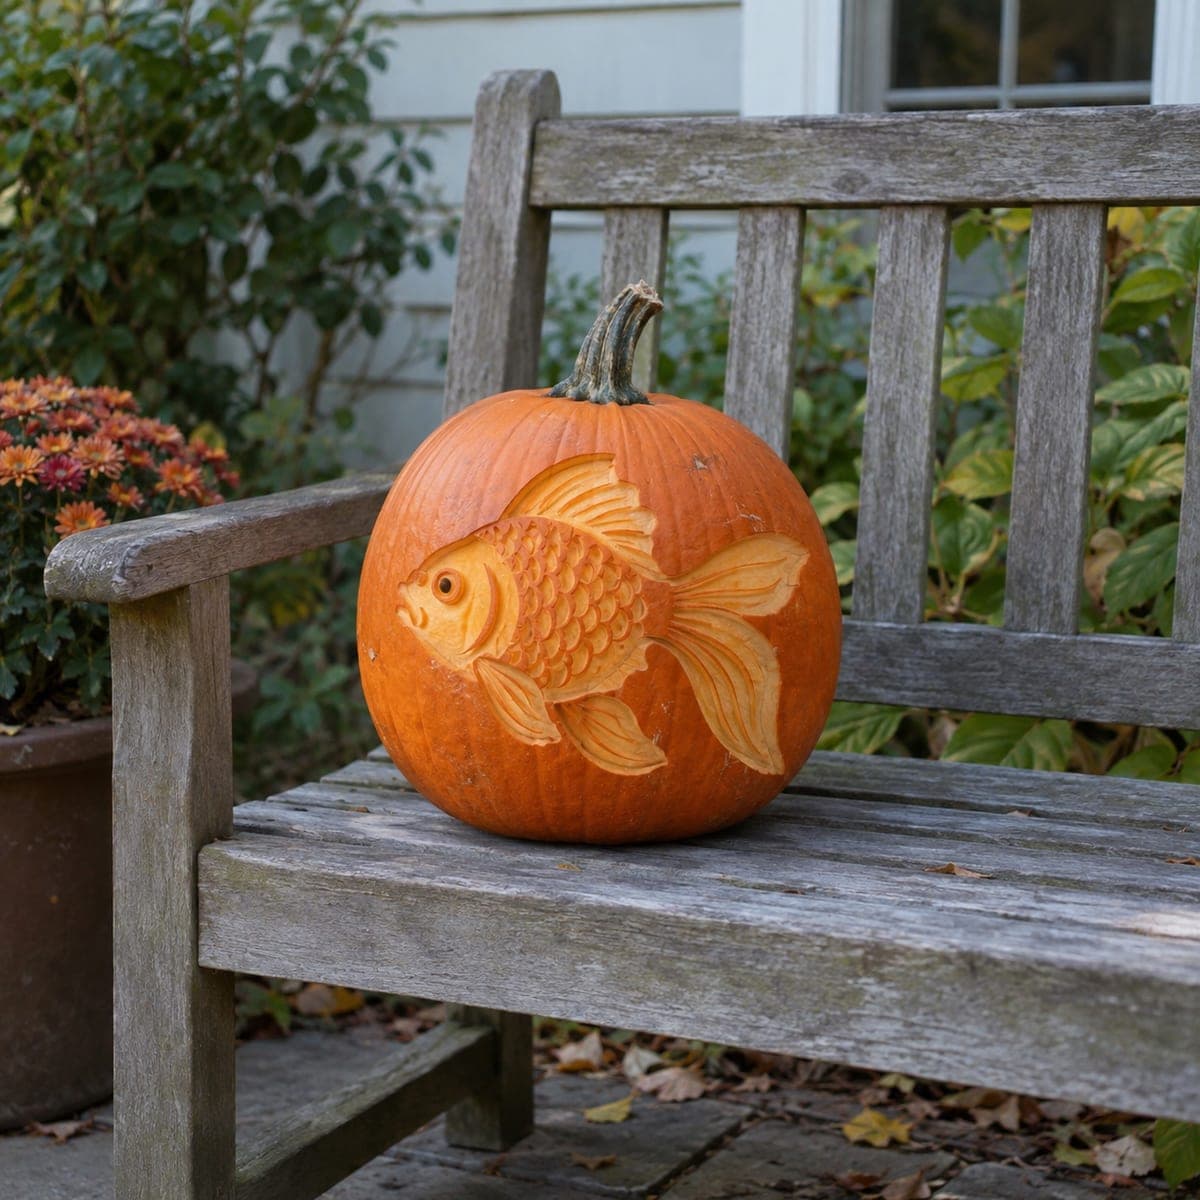
A fantail goldfish drifts among carved water plants on this pumpkin, its layered scales and ribbon-like fins etched in sweeping relief. The composition wraps the whole front, with rising bubbles and swaying stems framing the fish so the design feels like a glimpse into an aquarium. Establish the eye and mouth first, texture the scales with overlapping crescent cuts, and let the fins trail off in long, thin strokes toward the edges.

This is an AI-generated concept image: a realistic, carvable design idea rather than a photo of a finished carve. AI concepts are always labeled and sit out the leaderboard and the contest.

No ratings yet · Sign in to rate
Comments (0)

  • No comments yet — be the first.

Save without an account. Sign in to like or comment.

Our tips for carving a similar design

The core trick here is relief carving rather than cutting all the way through, so the fish and water plants glow at different depths against a dark skin background. You build the goldfish from a shaded body, overlapping crescent scales, and long trailing fins, then frame it with peeled bubbles and swaying stems. Since this is a concept image, plan it as a design you could recreate by working shallow to deep and saving any full cutouts for the very end.

Written by PumpkinCarvingIdeas.com, inspired by the image above. These are our suggestions, not instructions from the uploader. This approach to the AI concept has not been tested on a real pumpkin.

From pumpkin to porch

  1. Transfer the layout and anchor the eye

    Tape your pattern onto the smoothest side of the pumpkin and poke through the main outlines with a needle tool or pin. Focus first on the eye and mouth, since those set the fish's expression and everything else keys off them. Remove the paper and lightly score the body, fins, bubbles, and plant stems so you can see the full composition. Step back and check that the fins have room to trail toward the edges before you cut anything deeper.

  2. Peel the body to a mid glow

    Using a loop or ribbon tool, scrape the skin off the fish body down to the lighter flesh so it reads as a soft orange shape. Keep the depth even and shallow at this stage, about an eighth of an inch. Leave the surrounding water area as untouched skin so the fish pops against a dark background. Work slowly and rotate the pumpkin rather than reaching across your cutting hand.

  3. Texture the scales with crescent cuts

    Switch to a small V gouge or detail knife and carve rows of overlapping half moon shapes across the body, each row tucked under the one before it. Vary the depth slightly so light catches the raised edges and gives the scales dimension. Start near the head and work back toward the tail so the pattern flows naturally. Take your time here, since this texture is what sells the fancy goldfish look.

  4. Etch the flowing fins and plants

    Carve the fins and tail as long, thin relief strokes that fan outward, cutting deeper where you want more brightness and shallower where the fabric folds. Do the same for the swaying water plants along the bottom and side, keeping the strokes sweeping and slightly curved. Leave narrow ridges of flesh between strokes so nothing tears loose. These bridges of pumpkin keep the delicate fins strong and readable when lit.

  5. Add bubbles and the brightest accents

    Now cut the small rising bubbles a little deeper so they catch the most light, and if you want a spark of life, cut a tiny full opening for the eye highlight. Save these deeper and any all-the-way-through cuts for last so the surface stays firm while you do the fine work. Clean up stray fibers with the tip of your knife. Keep openings small so the shell does not weaken.

  6. Light it and take the photo

    Set a battery LED puck or string inside, since the shallow relief needs steady light and open flame is a fire risk with all this thin detail. Warm white light brings out the orange body best. Rub a little petroleum jelly on the cut edges to slow drying, and shoot your photo in a dim room with the LED as the main glow. Turn the pumpkin until the fins catch the light for the most dramatic angle.

Gather your supplies

Check things off as you get ready.

Work on a stable surface, keep your free hand out of the cutting path, and have an adult handle sharp tools.

Three levels of light

  • Leave intact

    The surrounding water, kept as untouched skin so the fish stands out against a dark field

  • Peel & shade

    The fish body, fins, and swaying plants, skin-peeled to a soft mid orange glow

  • Cut through

    The rising bubbles and a tiny eye highlight, cut deepest or through for the brightest sparkle

Learn the carving basics

Before you start cutting

Do I need to cut all the way through anywhere?

Not much. This is mostly relief carving, where you peel and shade rather than open the shell. You can cut a few small bubbles or a pinpoint eye highlight all the way through for brightness, but keep those openings tiny so the pumpkin stays strong.

How do I keep the thin fins from breaking?

Carve them as shallow etched strokes rather than deep cuts, and leave narrow ridges of flesh between each stroke to act as bridges. Those ridges hold the delicate fin shapes together. Avoid undercutting the edges, since that is where thin flesh tends to snap.

What is the best order for the scales?

Start at the head and work toward the tail, laying each row of crescent cuts so it overlaps the row before it. This keeps the scales flowing in one direction and prevents you from carving yourself into a corner. Vary the depth a little so the light picks out the raised edges.

Your take belongs here, too.

Changed a detail? Made it simpler? Share a photo of your version and tell the community what worked.

Share your pumpkin

More pumpkins like this

You've reached the end · 8 pumpkins
The Patch Report

Fresh pumpkins, in your inbox.

The best new carvings, ideas worth stealing, and how-tos for carving season. Short, seasonal, and gone by November.

A short email during carving season. Unsubscribe anytime. See our privacy policy.