Halloween Pumpkin Carving Contest · Starts October 1st · $500 in prizes
← Back to ideas
@ai_concepts
Sep 25, 2026
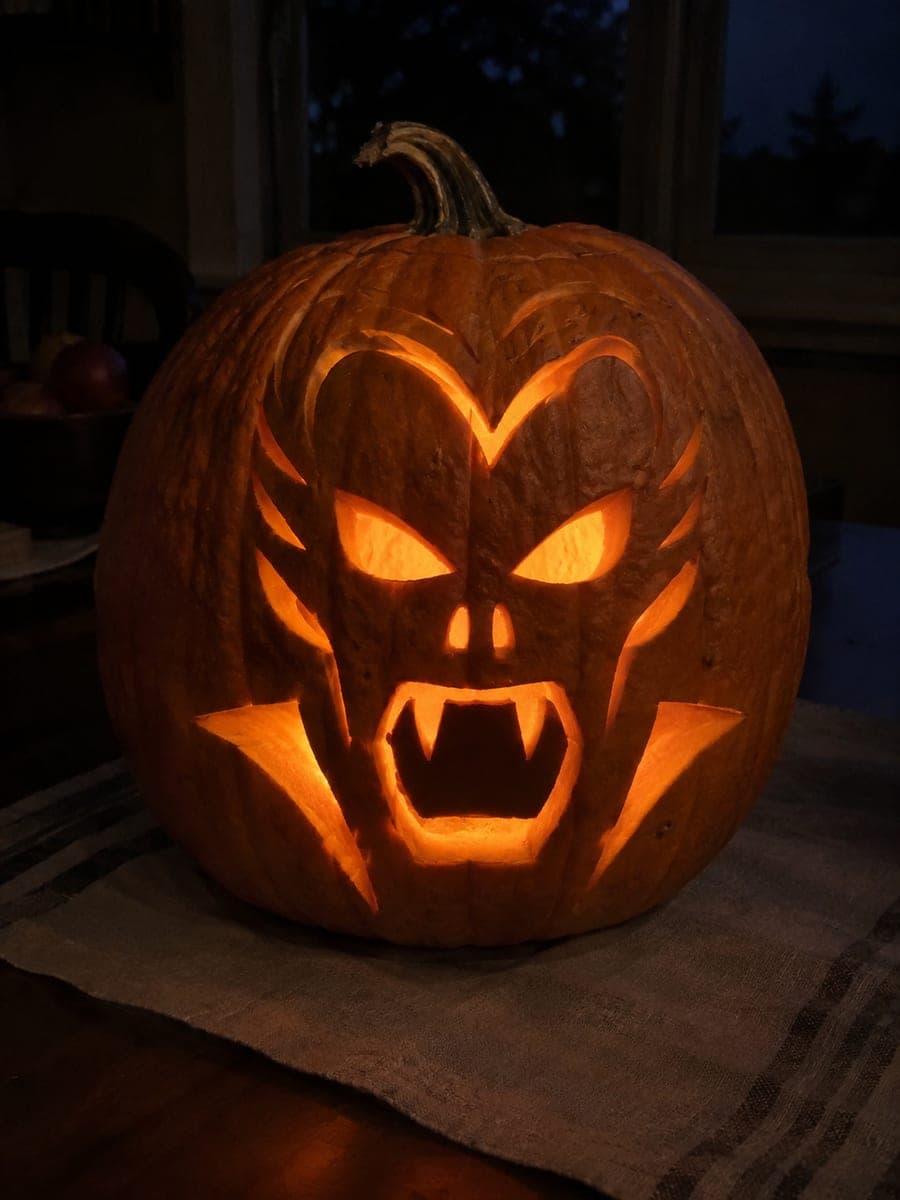
Frankenstein Expert Horror Movie Jack-O-LanternAI
0

Report this carving

Tell us what is wrong. Reports are private.

Frankenstein Expert Horror Movie Jack-O-Lantern

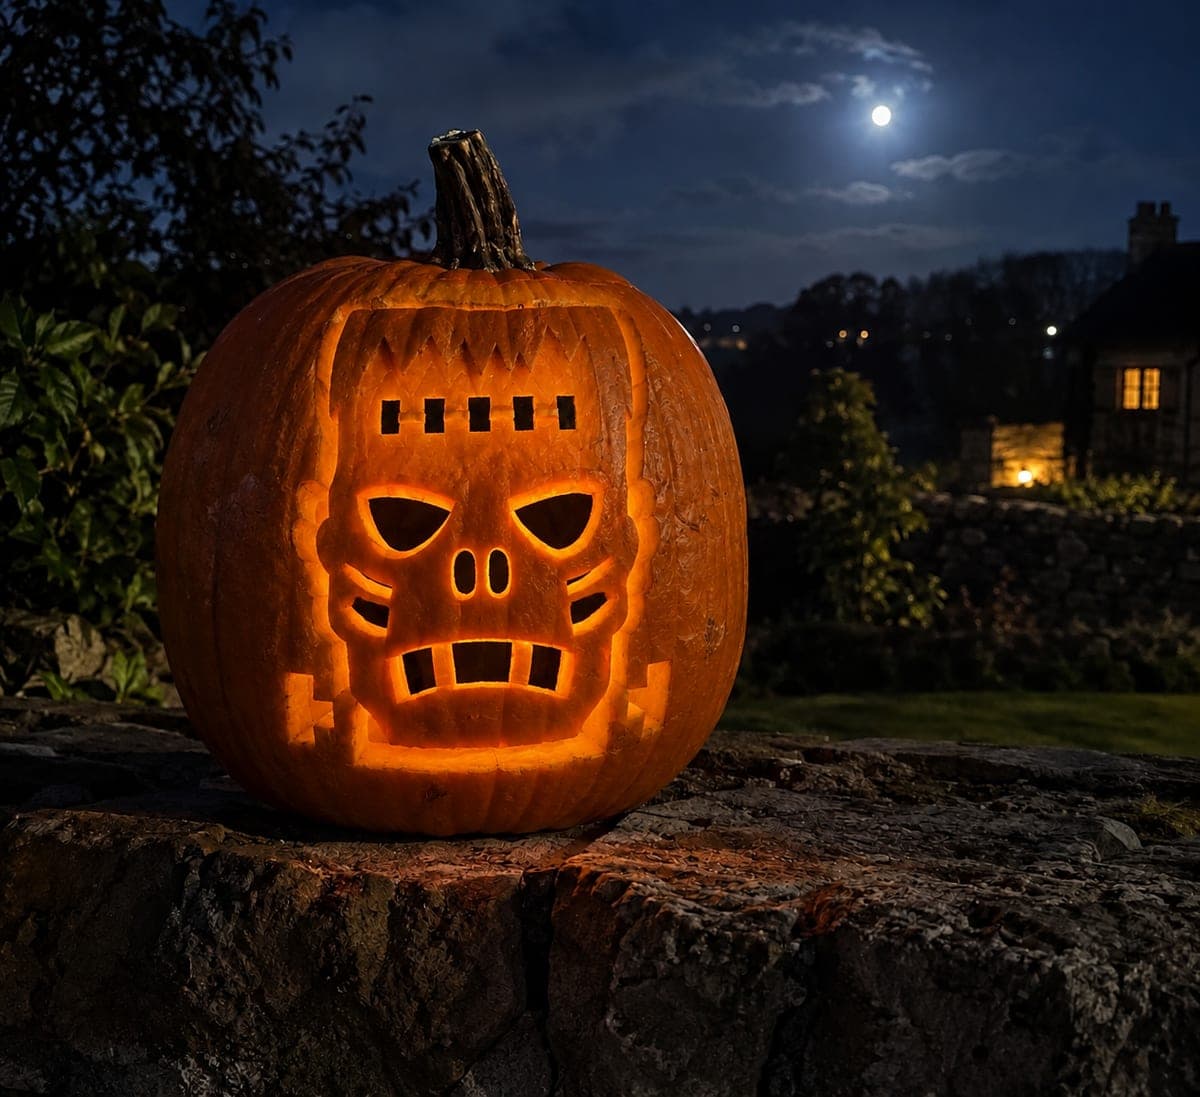
Frankenstein's monster stares out of this expert horror movie pumpkin carving idea with glowing eye holes, open nostrils, mouth windows, cheek slots, and forehead rectangle cutouts, while the perimeter, neck bolts, and hair are all kept as shallow-backed carvings. The combination of fully open apertures and surface engraving at this level creates a two-tone effect where carved recesses glow softer than the cut-through holes. Plan the hollow sections first on paper, confirming each has at least one bridge to solid rind, before cutting. A flickering LED heightens the monster's electric-laboratory origin story.

No ratings yet · Sign in to rate
Comments (0)

  • No comments yet — be the first.

Save without an account. Sign in to like or comment.

Our tips for carving a similar design

This design achieves a two-tone portrait effect by combining fully open eye holes, nostrils, mouth windows, cheek slots, and forehead rectangles with shallow-backed scoring for the perimeter, neck bolts, and hair. Carved recesses glow at a lower intensity than cut-through holes, creating visible depth layers. All hollow sections must be mapped on paper with confirmed bridges before the first cut.

From pumpkin to porch

  1. Plan and transfer the full design

    Sketch or print the full Frankenstein portrait and map every element as either a full cutout or a scored groove before transferring. Confirm that each hollow section has at least one bridge connecting it to solid rind. Transfer to the pumpkin with a pin tool and use two colors of marker to distinguish full-cut areas from scored areas.

  2. Score the perimeter, bolts, and hair

    Begin with all the shallow-backed scoring: perimeter outline, neck bolt shapes, and hair texture lines. Use a V-gouge and keep depth consistent at about one-third through the rind. Completing all scoring before any cuts keeps the rind stable and lets you assess the full composition before committing to the hollow sections.

  3. Cut the forehead rectangles

    The forehead rectangles are the topmost hollow elements. Cut each individually with a narrow blade, keeping cuts well inside the forehead zone so each has solid rind around it. Push each piece through from the front. These cuts establish the forehead's green-tinted glow that is central to the Frankenstein look.

  4. Cut the eye holes and cheek slots

    Cut the two eye holes with a narrow detail blade, using short strokes around any curved edges. Then cut the cheek slots, which are thin elongated shapes that represent the monster's defined cheekbones. Maintain a solid rind bridge between each eye and adjacent cheek slot.

  5. Cut the nostrils and mouth windows

    Cut the nose apertures as two small ovals or simple holes. The mouth area consists of multiple window-like rectangles rather than one open shape, so cut each window separately and preserve the rind strips between them as a grid of retained rind. These strips must be at least half an inch wide.

  6. Light with a flickering LED and photograph

    Insert a flickering LED to mimic the lightning-lab atmosphere of the original monster story. Position it toward the back center of the pumpkin. The two-tone light effect, brighter through cut sections and dimmer through scored grooves, shows up best in a completely dark environment. Photograph within the first two days before the rind begins to dry.

Written with AI to match this design

Gather your supplies

Check things off as you get ready.

Work on a stable surface, keep your free hand out of the cutting path, and have an adult handle sharp tools.

Three levels of light

  • Leave intact

    The facial rind between apertures, the outer perimeter area, and solid face bridges all remain dark.

  • Peel & shade

    Perimeter outline, neck bolt shapes, and hair texture scoring glow as dim backed grooves.

  • Cut through

    Eye holes, nostrils, mouth window rectangles, cheek slots, and forehead rectangles are all cut fully through.

Learn the carving basics

Before you start cutting

How do I keep the mouth grid strips from cracking after hours of display?

Keep each grid strip at least half an inch wide and rub petroleum jelly on all cut and scored surfaces immediately after carving. Store the pumpkin in the refrigerator or a cool space when not on display. Narrower strips will dry and crack faster, so widen them even if it means simplifying the mouth pattern slightly.

How does the two-tone light effect actually work?

Fully cut-through apertures let the full brightness of the LED out, appearing bright orange or white. Shallow-backed scored areas have a thin layer of rind left over them, and light passes through that thinned layer at reduced brightness, appearing as a soft amber or rust glow. The contrast between these two intensities is what creates the portrait depth.

I am worried about losing track of what I have already cut. Any tips for managing the complexity?

Number each element on your paper design and on the pumpkin surface, and check off each one as it is completed. Work in a systematic order, top to bottom or outer to inner, so you do not accidentally skip or double-cut anything. Photograph the pumpkin face after each major step so you have a record if something needs to be referenced.

Your take belongs here, too.

Changed a detail? Made it simpler? Share a photo of your version and tell the community what worked.

Share your pumpkin

More pumpkins like this

You've reached the end · 8 pumpkins
The Patch Report

Fresh pumpkins, in your inbox.

The best new carvings, ideas worth stealing, and how-tos for carving season. Short, seasonal, and gone by November.

A short email during carving season. Unsubscribe anytime. See our privacy policy.