Halloween Pumpkin Carving Contest · Starts October 1st · $500 in prizes
← Back to ideas
@ai_concepts
Sep 25, 2026
Michael Myers Hollow Eyes Pumpkin CarvingAI
0

Report this carving

Tell us what is wrong. Reports are private.

Michael Myers Hollow Eyes Pumpkin Carving

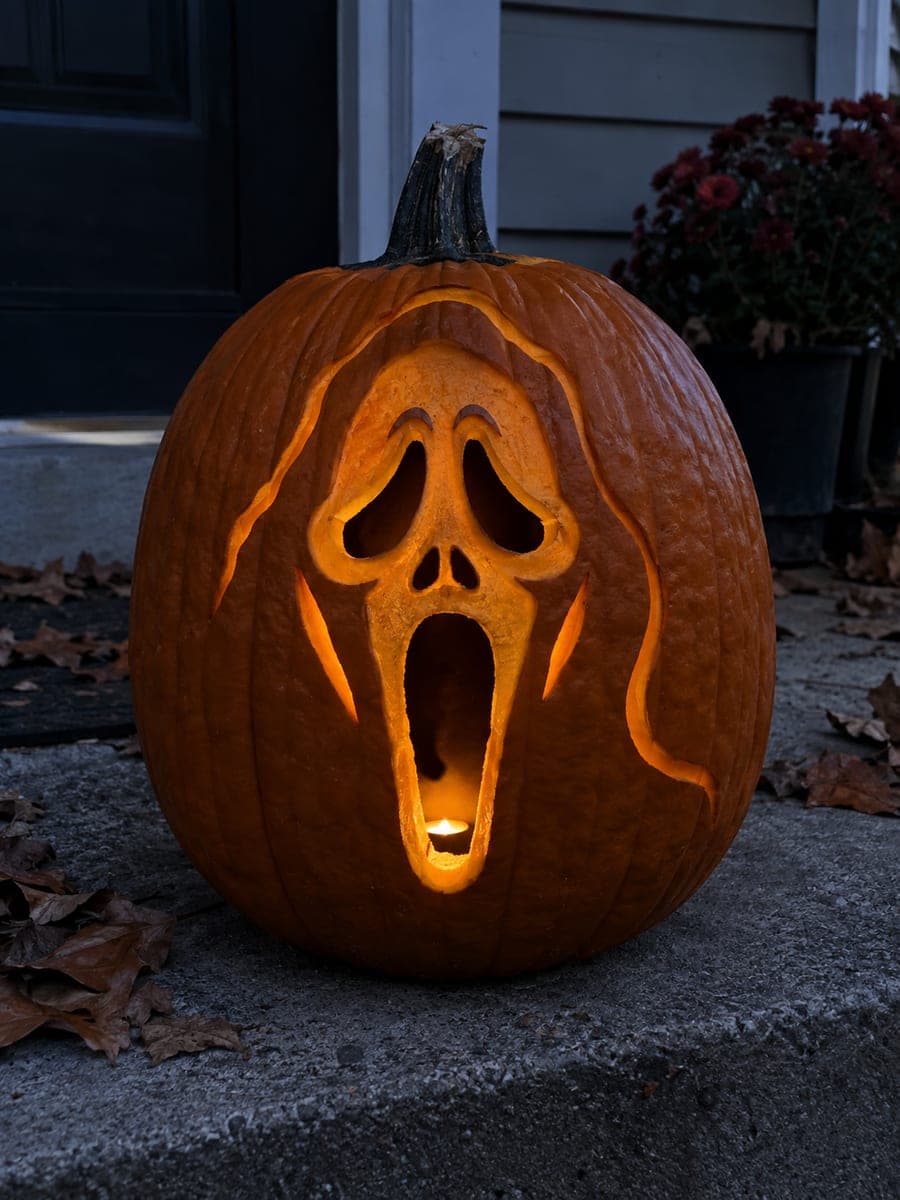
Empty eye sockets and open nose and mouth apertures define this intermediate michael myers pumpkin carving idea, with broad retained facial rind bridges connecting each opening and shaded hair, contour, and cheek highlights added as shallow-backed carvings. The shallow work is what shifts the design from simple to cinematic, giving the mask its weathered, worn quality. Complete all the hollow cuts first to establish structure, then use a small V-gouge for the backed contour lines. Display outdoors with a single warm bulb to cast long shadows across the engraved face details.

No ratings yet · Sign in to rate

Comments (0)

  • No comments yet — be the first.

Save without an account. Sign in to like or comment.

Our tips for carving a similar design

The hollow eye sockets, nose, and mouth pour out full light while shallow V-gouge work for hair, facial contours, and cheek highlights shifts this from a basic cutout to a character portrait. The hollow cuts establish the structure first, then the engraving follows, using the open sections as reference points for where to place the contour shading.

From pumpkin to porch

  1. Gut, prep, and transfer

    Clean the pumpkin and transfer the mask design with a pin tool and marker. Use two different markers to distinguish the fully open eye sockets and mouth from the scored contour lines. Confirm the broad rind bridge connecting each open section before proceeding.

  2. Cut the eye socket openings

    Cut the two eye socket shapes using a narrow detail blade. These are larger than simple dot eyes: they represent the broad hollow orbital sockets of the mask. Keep the bridge of rind between them at least half an inch and the rind below each eye socket at least an inch before the mouth opening begins.

  3. Cut the nose and mouth apertures

    Cut the nose aperture as a narrow oval below the eye line. Cut the mouth opening as a flat, slightly wider shape below the nose. These three facial openings should be connected by solid rind bridges on all sides. Check all bridges after cutting and do not proceed if any feel thin.

  4. Score the hair contours

    Using a small V-gouge, score the hair across the top of the mask face in flowing lines that suggest a close-cropped, slightly disheveled hairstyle. Keep strokes at one-third rind depth and work from the hairline outward. Shallow, confident strokes are better than multiple tentative passes.

  5. Score the facial contour and cheek highlights

    Score the cheekbone highlights and facial contour lines as shorter, lighter grooves. These represent the mask's slightly sunken cheeks and the shadow lines that give a flat mask its three-dimensional quality. Keep contour lines parallel to the natural curves of the pumpkin face.

  6. Light and display outdoors

    Place a single warm LED inside near the pumpkin's back wall. Display the pumpkin outdoors on a step or porch where a single light source falls across the front, throwing the scored contours into relief. Photograph from a slight angle to capture the shadow depth in the engraved lines.

Written with AI to match this design

Gather your supplies

Check things off as you get ready.

Work on a stable surface, keep your free hand out of the cutting path, and have an adult handle sharp tools.

Three levels of light

  • Leave intact

    Broad facial rind bridges between all openings and all outer surrounding rind remain solid and dark.

  • Peel & shade

    Hair scoring, cheekbone highlights, and facial contour lines are shallow-backed and glow as dim amber grooves.

  • Cut through

    Both eye sockets, the nose aperture, and the mouth opening are cut fully through.

Learn the carving basics

Before you start cutting

How do I decide where to place the contour lines without a reference?

Think of the mask as a simplified human face and place contours where shadows naturally fall: below the cheekbones, at the sides of the nose, and along the jaw line. You do not need precise anatomy; you need visual interest at a distance. Mark the positions lightly with a chalk pencil before scoring and step back to check they look balanced.

Can I add more scoring detail after the pumpkin has been lit to see what is missing?

Yes, though work carefully with a lit pumpkin nearby. Turn the light off while the gouge is inside the design area. You can score additional lines after the initial session; the rind stays workable for one to two days after cutting. Add detail in passes and check with the light after each addition.

The eye sockets are supposed to be broad but I am worried about weakening the rind. How wide is too wide?

Keep the bridge between the eyes and the top edge of the pumpkin face at least one inch. Keep the bridge between the eye sockets at least half an inch wide. As long as those bridges are solid, the sockets can be quite broad without structural risk. Wider sockets actually make the mask look more cinematic and blank.

Your take belongs here, too.

Changed a detail? Made it simpler? Share a photo of your version and tell the community what worked.

Share your pumpkin

More pumpkins like this

You've reached the end · 8 pumpkins
The Patch Report

Fresh pumpkins, in your inbox.

The best new carvings, ideas worth stealing, and how-tos for carving season. Short, seasonal, and gone by November.

A short email during carving season. Unsubscribe anytime. See our privacy policy.