Halloween Pumpkin Carving Contest · Starts October 1st · $500 in prizes
← Back to ideas
@ai_concepts
Sep 25, 2026
Hard Ghostface Pumpkin With Detailed Hood FoldsAI
0

Report this carving

Tell us what is wrong. Reports are private.

Hard Ghostface Pumpkin With Detailed Hood Folds

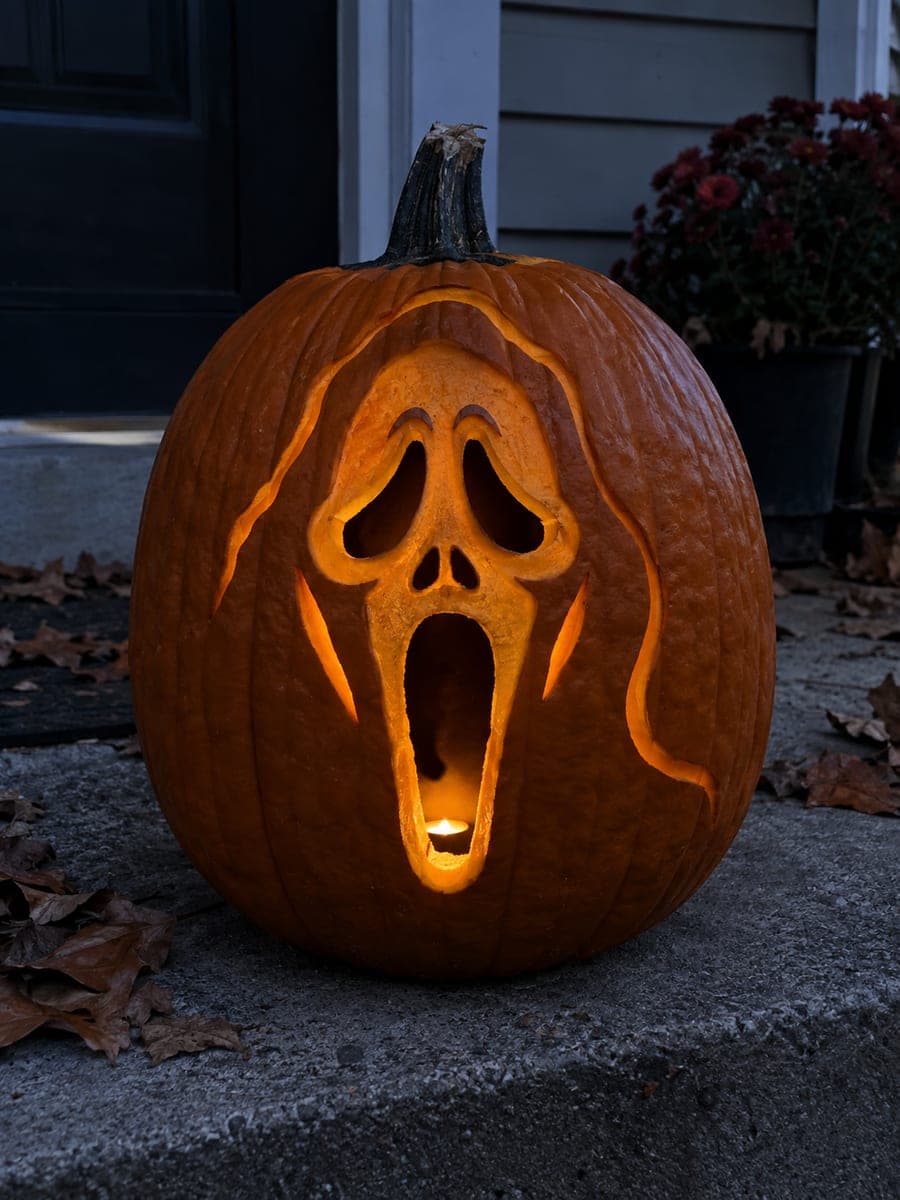
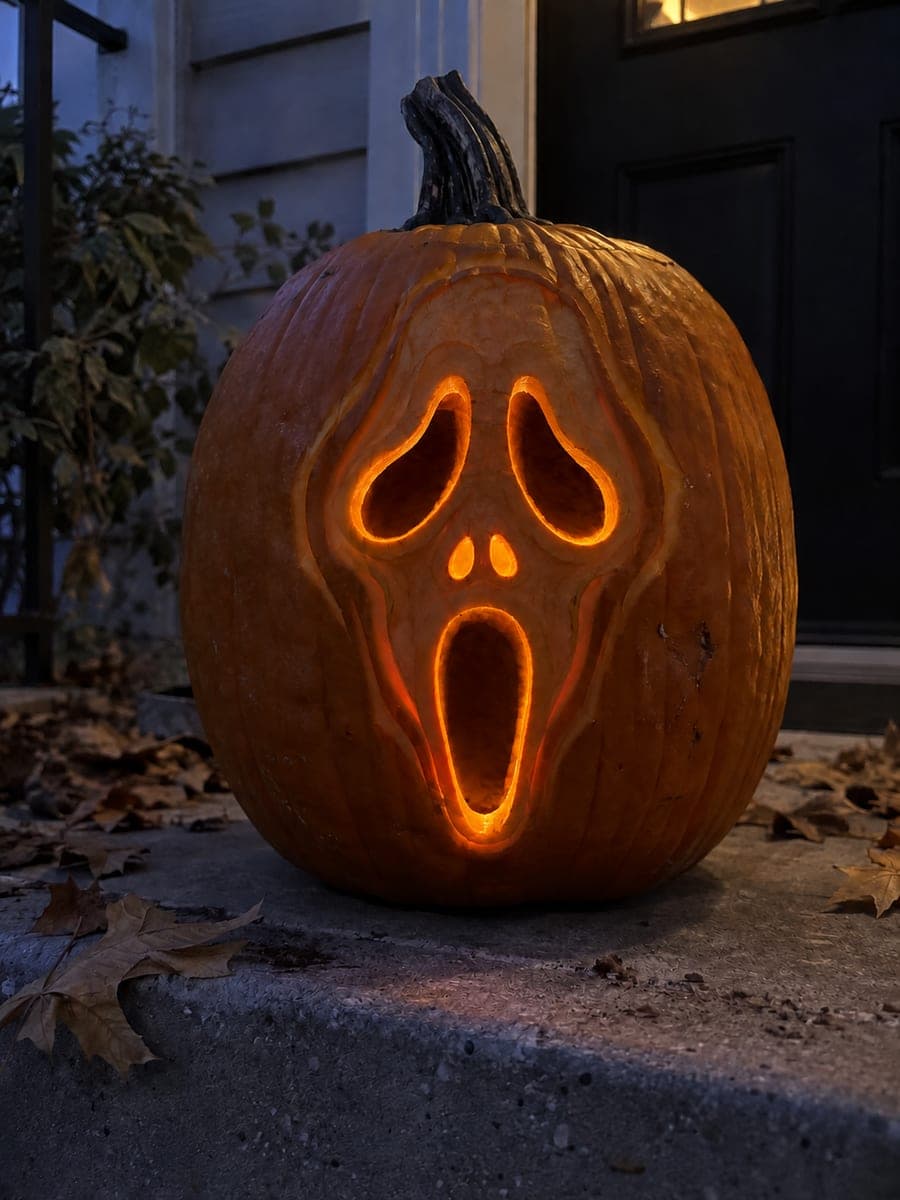
The hard ghostface pumpkin carving idea layers deep hood fold engravings and cheek accent scoring over the standard five open apertures, creating a multi-tonal portrait where carved recesses and fully hollow sections glow at different intensities. Maintaining broad rind bridges between the eye sockets and mouth opening is essential as you add more surface detail. Hollow out the five apertures first, confirm all bridges are solid, then carve the fold and cheek details in several shallow passes rather than one deep cut. Backlit with a warm Edison-style LED, the layered depth reads beautifully.

No ratings yet · Sign in to rate

Comments (0)

  • No comments yet — be the first.

Save without an account. Sign in to like or comment.

Our tips for carving a similar design

The hard level adds deep hood fold engravings and cheek accent scoring that give the flowing black robe genuine visual weight and three-dimensional depth. Carved recesses and fully hollow sections glow at different intensities, creating a two-tone portrait effect. Hollow apertures must all be confirmed solid before any engraving begins.

From pumpkin to porch

  1. Prep and plan the depth zones

    Clean and gut the pumpkin. Plan the hood fold depths on paper: primary folds at one-third depth, secondary folds at one-quarter depth, and cheek accent zones at one-half depth for maximum contrast. Transfer the full design and annotate all depth levels on the pumpkin with a wax pencil.

  2. Cut the five hollow apertures

    Cut the screaming mouth, both oval eyes, and both nostrils in sequence. Verify every bridge is intact after each cut. Do not proceed to any engraving until all five apertures are confirmed solid. The hollow cuts release internal rind tension that affects scoring tool behavior.

  3. Score primary hood folds

    Score the primary hood folds as long, deep curving grooves at one-third rind depth using a wide V-gouge. These are the dominant visual lines of the flowing robe and should be the most prominent scoring element. Work in single, continuous strokes for each fold.

  4. Score secondary hood folds

    Score the secondary and tertiary fold lines at one-quarter depth using a narrower gouge. These shorter lines fill in the spaces between primary folds and create a sense of fabric volume. Vary their length and curvature slightly so they read as natural rather than mechanical.

  5. Score the cheek accent zones

    Score the cheek accent areas on the mask face itself using a U-gouge to create smooth, broad thinned zones rather than sharp grooves. These represent the slight shadow under the cheekbones and give the mask a three-dimensional quality. Keep this work at one-half depth to maximize contrast.

  6. Light with a warm Edison-style LED

    A warm Edison-style LED produces a slightly uneven, slightly amber glow that complements the Ghostface aesthetic. The two-tone effect between scored recesses and cut-through holes reads best in the first three days after carving. Apply petroleum jelly to all scored and cut surfaces immediately after carving to slow drying.

Written with AI to match this design

Gather your supplies

Check things off as you get ready.

Work on a stable surface, keep your free hand out of the cutting path, and have an adult handle sharp tools.

Three levels of light

  • Leave intact

    Broad aperture bridges, hood fold peak rind, and outer rind frame remain fully dark.

  • Peel & shade

    Primary and secondary hood folds and cheek accent zones glow at graduated warm intensities based on their scored depth.

  • Cut through

    Both oval eyes, two nostril apertures, and the long screaming mouth are cut fully through.

Learn the carving basics

Before you start cutting

How do I keep the wide hood fold grooves from looking choppy?

Use the widest gouge in your kit and draw it in one smooth continuous pull along the full length of each fold. Short overlapping strokes leave visible ridges between them. If a fold requires a change in curve direction, complete the straight section, reposition your hand grip, and continue from the same stopping point.

How deep is too deep for the cheek accent zones?

Stop at half the rind depth for any scored zone. Below half, you risk accidentally breaking through, especially on thinner-walled pumpkins. Check depth by pressing gently on the scored area from outside; if it flexes visibly, you have gone deep enough and should stop. A small flashlight held inside will show soft glow through areas approaching half-depth.

Does the interior light visible through the mouth matter at this difficulty level?

Yes, and it is worth protecting it. The light pouring through the long screaming mouth is the visual anchor of the entire design at every level, including hard. When you score near the mouth edges, keep all grooves at least a quarter-inch from the cut edge so they do not interfere with the clean light output from the aperture.

Your take belongs here, too.

Changed a detail? Made it simpler? Share a photo of your version and tell the community what worked.

Share your pumpkin

More pumpkins like this

You've reached the end · 8 pumpkins
The Patch Report

Fresh pumpkins, in your inbox.

The best new carvings, ideas worth stealing, and how-tos for carving season. Short, seasonal, and gone by November.

A short email during carving season. Unsubscribe anytime. See our privacy policy.