Halloween Pumpkin Carving Contest · Starts October 1st · $500 in prizes
← Back to ideas
@ai_concepts
Sep 25, 2026
Ghostface Mask Easy Horror Movie PumpkinAI
0

Report this carving

Tell us what is wrong. Reports are private.

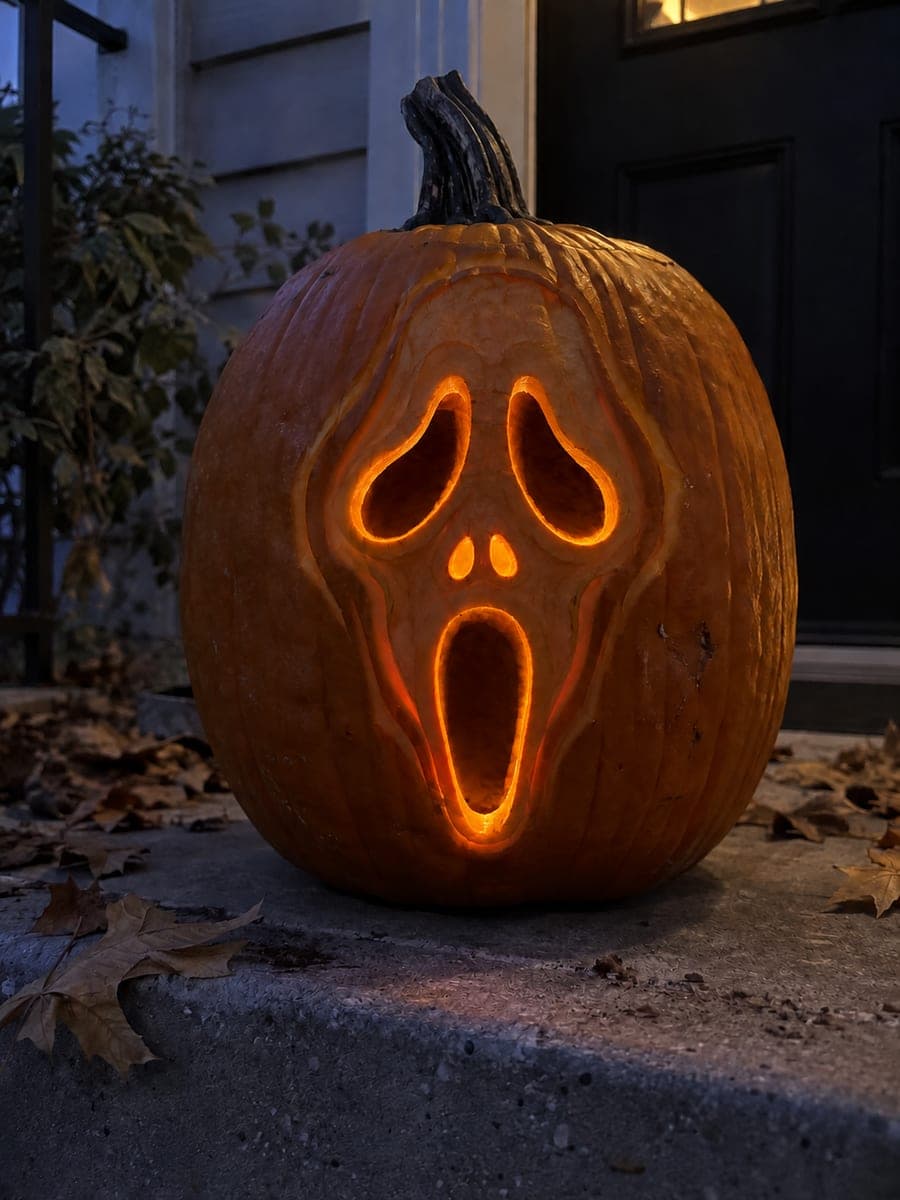
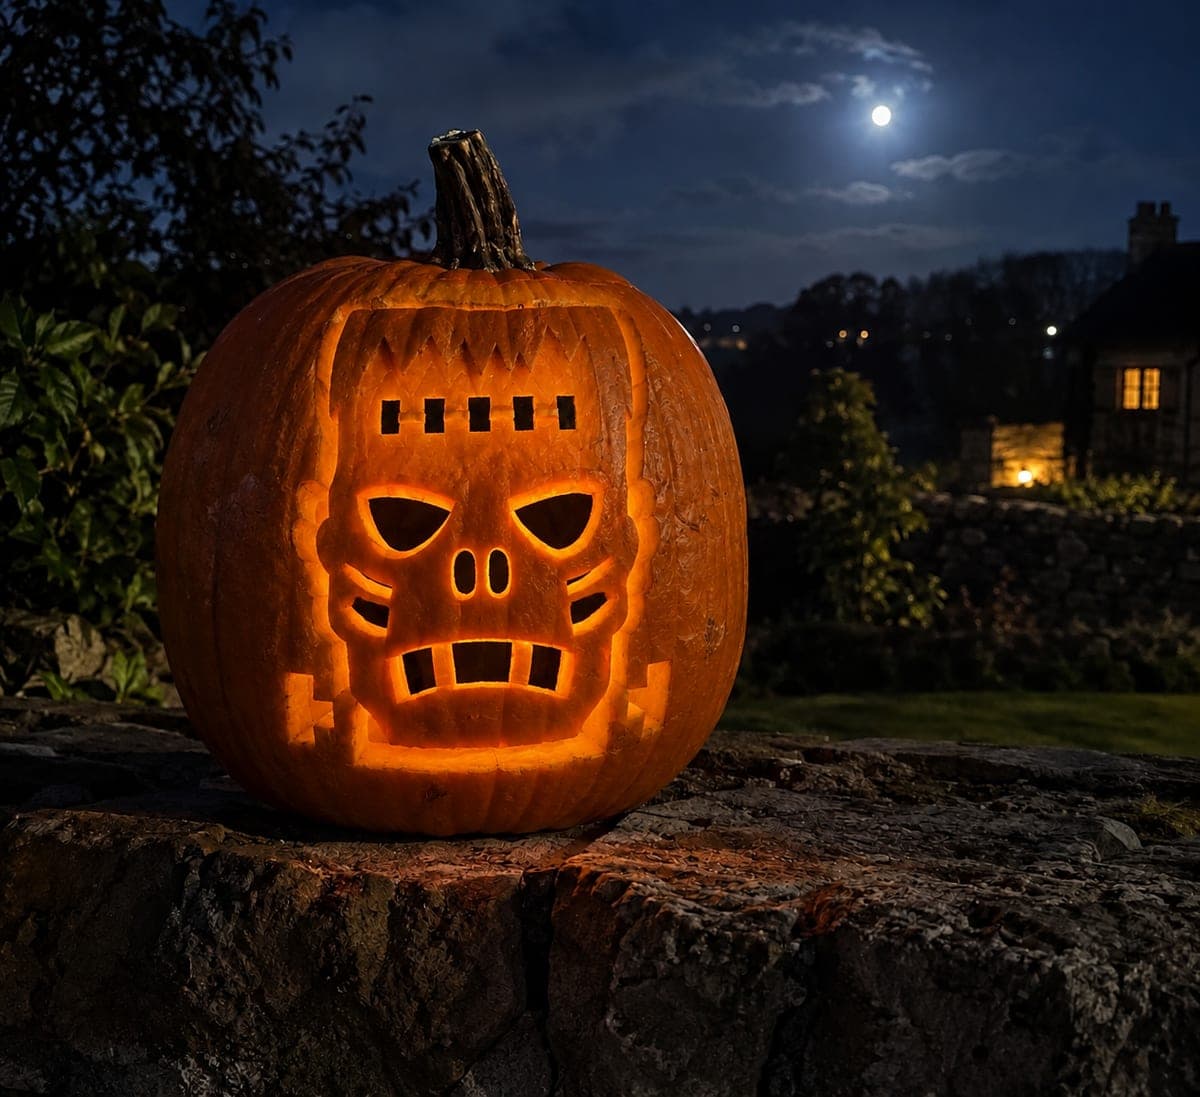
Ghostface Mask Easy Horror Movie Pumpkin

The Ghostface mask's hollow eyes and long open mouth glow warmly through a pumpkin in this easy horror movie pumpkin carving idea, with nostrils and pale mask surface kept as shallow-backed scoring. Cutting the eyes and mouth as fully open apertures keeps the structure simple, while the scored surface detail gives the mask its personality without weakening the rind. Work the larger mouth opening first, then move to the eyes before finishing the shallow nostril accents. Soft candlelight from inside makes the screaming expression especially unsettling in a dark entryway.

No ratings yet · Sign in to rate
Comments (0)

  • No comments yet — be the first.

Save without an account. Sign in to like or comment.

Our tips for carving a similar design

The hollow eyes and long open mouth are cut fully through the rind, while nostrils and the mask surface details stay as shallow-backed scoring. Keeping the face openings as simple full cuts makes this design structurally easy while the scored accents give it the character of the iconic Ghostface mask. Tackle the large mouth first so the proportions are anchored.

From pumpkin to porch

  1. Gut and prep the pumpkin

    Cut and remove the lid, clean out all seeds and pulp, and scrape the inner wall to a consistent thickness of about three-quarters of an inch behind the carving area. This keeps the glow even across the eyes and mouth without hot spots. Transfer the Ghostface mask design with a pin tool and marker.

  2. Score the nostril and mask surface accents

    Using a V-gouge or linoleum cutter, lightly score the nostrils and any cheekbone highlights as shallow grooves. Go no more than one-third through the rind. These marks define the mask's pale surface without creating structural weakness around the eye and mouth cuts you will make next.

  3. Cut the long open mouth

    The mouth is the widest aperture and anchors the whole composition. Cut it first using a thin pumpkin saw in short, controlled strokes, following the curved lower edge of the screaming expression. The top lip edge of the mouth should remain a solid connected strip of rind between the two eye openings above.

  4. Cut the eye openings

    Cut the two hollow oval eyes individually, using a narrow detail blade for tight inner curves. Keep the bridge of rind between the eyes and between each eye and the mouth edge at least half an inch wide. Push cut pieces inward to free them without tearing the surrounding rind.

  5. Check structure and smooth edges

    Press gently on the area between the eyes and mouth to confirm the bridge is solid. Smooth any jagged edges with a small file or the side of a paring knife. Wipe all carved surfaces with a damp cloth to remove loose pulp.

  6. Light and display

    Place a warm candle or amber LED inside near the back of the pumpkin. The light through the mouth and eyes creates the expected Ghostface glow while the scored nostrils add a subtle shadowed detail. Display near the front door at eye level for maximum impact.

Written with AI to match this design

Gather your supplies

Check things off as you get ready.

Work on a stable surface, keep your free hand out of the cutting path, and have an adult handle sharp tools.

Three levels of light

  • Leave intact

    The full mask face, cheekbones, and outer rind remain solid and dark.

  • Peel & shade

    The scored nostrils and pale mask surface accents glow faintly as shallow backed grooves.

  • Cut through

    The hollow oval eyes and the long open screaming mouth are cut fully through.

Learn the carving basics

Before you start cutting

How do I keep the strip of rind between the eyes and mouth from cracking?

Keep that horizontal bridge at least half an inch tall from the top of the mouth to the bottom of the eye openings. If your template places them closer, scale the design up slightly or widen the bridge. Rub petroleum jelly on the bridge after carving to keep it hydrated and slow drying.

The mask design is very pale on the actual movie prop. Should I thin the rind to match?

Thinning the rind behind the solid face area to about a half-inch lets the candlelight create a faint pale glow across the mask surface, which mimics the ghostly pallor of the prop. Scrape the interior behind the mask face with a spoon before cutting the apertures. Do not go thinner than a half-inch or the rind will become fragile.

What if my mouth opening comes out wider than expected?

A slightly wider mouth still reads as the screaming expression and is actually more dramatic at night. If the shape looks wrong, add a thin carved lip line along the lower edge using a gouge to define the shape more precisely. Embrace the slightly imprecise look, as the Ghostface expression is naturally exaggerated.

Your take belongs here, too.

Changed a detail? Made it simpler? Share a photo of your version and tell the community what worked.

Share your pumpkin

More pumpkins like this

You've reached the end · 8 pumpkins
The Patch Report

Fresh pumpkins, in your inbox.

The best new carvings, ideas worth stealing, and how-tos for carving season. Short, seasonal, and gone by November.

A short email during carving season. Unsubscribe anytime. See our privacy policy.