Halloween Pumpkin Carving Contest · Starts October 1st · $500 in prizes
← Back to ideas
@ai_concepts
Sep 25, 2026
Expert Chucky Pumpkin Carving With Rooted TeethAI
0

Report this carving

Tell us what is wrong. Reports are private.

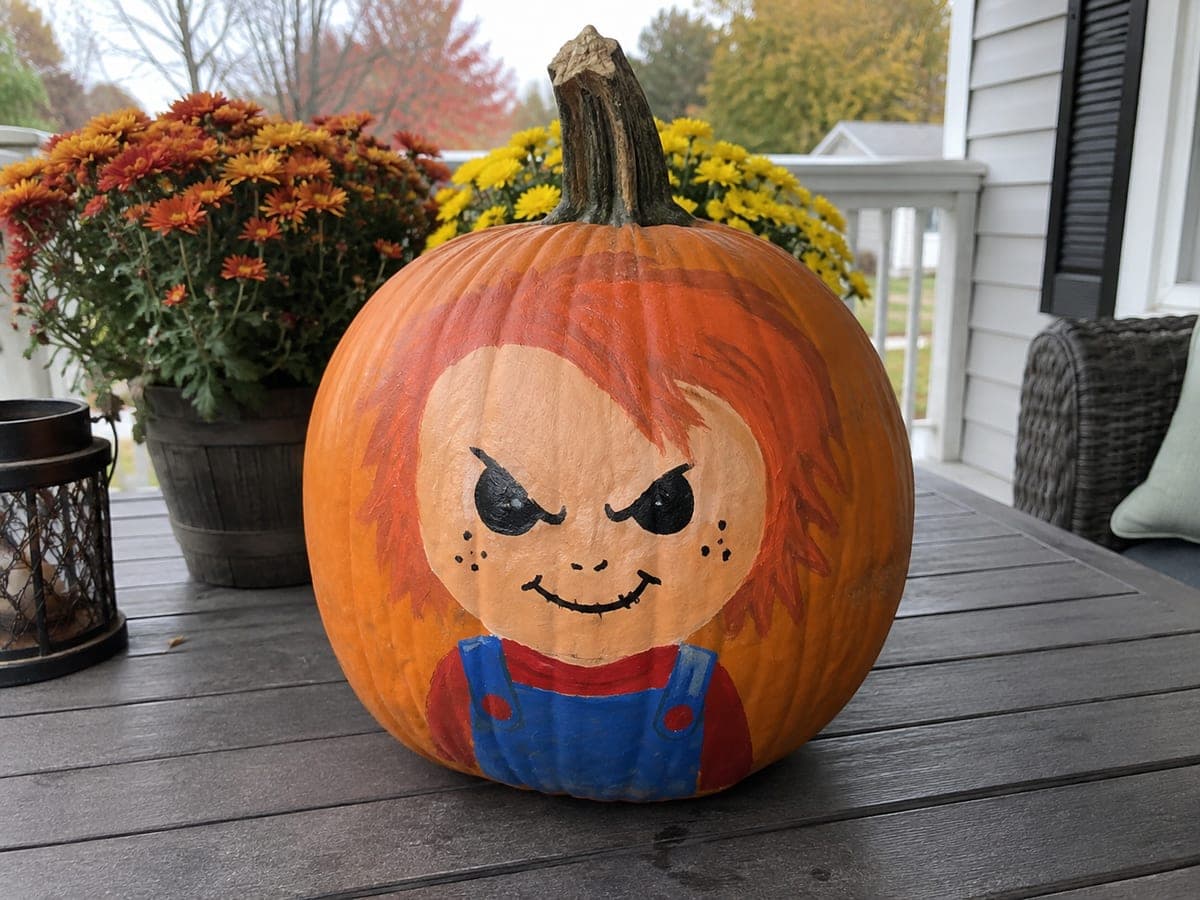
Expert Chucky Pumpkin Carving With Rooted Teeth

At expert level this chucky pumpkin carving idea cuts fully through the eye and mouth apertures with two short teeth rooted into the upper lip, then layers face texture, freckle dots, hair detail, and overall accents as shallow-backed engraving across the entire face. The rooted teeth are the most fragile element, so confirm each root is wide and secure before cutting the grin opening around them. Use a flex-shaft engraving tool for the freckle dots to keep them uniform in depth and size. A single warm candle placed close to the back wall brings out every layer of the portrait.

No ratings yet · Sign in to rate

Comments (0)

  • No comments yet — be the first.

Save without an account. Sign in to like or comment.

Our tips for carving a similar design

At expert level, this Chucky design pushes two fully open eye apertures and a rooted-tooth grin alongside a comprehensive engraving pass covering face texture, freckle dots, hair detail, and overall accents across the entire front face. The two short rooted teeth in the upper lip are the most fragile single elements and must be confirmed as secure before any grin material is removed around them. A flex-shaft engraving tool keeps the freckle dots uniform, and a single warm LED positioned close to the back wall brings out every carved layer simultaneously.

From pumpkin to porch

  1. Hollow to precise thickness

    Cut a back opening and hollow the pumpkin to a consistent 1 inch throughout, checking with a skewer at ten or more points across the face. The teeth and fine engraving demand even wall thickness to prevent structural surprise. Mark any thin spots and compensate by engraving more shallowly in those zones.

  2. Full design transfer

    Transfer the complete design with a stylus, marking hollow areas, tooth roots, scoring zones, and freckle dot positions separately. Use three different perforation patterns, single dots for freckles, short dashes for scoring lines, and solid outlines for cutouts, so each zone is immediately recognizable during carving.

  3. Cut the eye apertures

    Carve both angry angular eye shapes first with a thin detail saw. Confirm the nose bridge rind is solid on both sides before moving to the grin. The eyes are the most straightforward hollow cuts in this design and establish the face's proportions for everything that follows.

  4. Carve the grin with rooted teeth

    Mark each tooth's root points clearly with permanent marker. Cut the upper lip line first, then the lower, leaving the tooth nubs intact. Cut between each tooth pair from the outer corners of the grin inward, removing material in small pieces and never prying against a tooth. Confirm both roots of each tooth are solid before moving to the next gap.

  5. Engrave face, freckles, hair, and overalls

    Attach a fine ball-tip bit to the flex-shaft tool and work the freckle dots in a consistent depth pass across both cheeks. Switch to a V-gouge for the hair grooves at the crown and the overall strap channels. For the face texture, use short irregular hatching strokes at slightly varied depths so the surface reads as skin. Work from the outer edges of the face inward to avoid crowding the rooted teeth.

  6. Light and fine-tune

    Place a warm LED close to the back wall and evaluate the entire face in a dark room. Any engraved element that is not glowing can be deepened one pass at a time. Photograph with a slight upward angle so the rooted teeth, freckles, and hair texture all appear in the same frame.

Written with AI to match this design

Gather your supplies

Check things off as you get ready.

Work on a stable surface, keep your free hand out of the cutting path, and have an adult handle sharp tools.

Three levels of light

  • Leave intact

    Tooth root strips, nose bridge, outer cheeks, and unscored forehead, remaining dark to anchor the portrait

  • Peel & shade

    Freckle dots, hair grooves, facial texture strokes, and overall strap channels, glowing at warm mid-level amber

  • Cut through

    Both eye apertures and the full grin opening including the two tooth gaps, blazing with the brightest light

Learn the carving basics

Before you start cutting

How do I keep all 60-plus freckle dots a consistent depth?

Set the flex-shaft tool to a fixed medium speed and use a light, even pressure for each dot, letting the bit do the work rather than pushing. Practice on the back of the pumpkin first until your hand learns the motion. Consistent speed and pressure across all dots means consistent depth without measuring each one individually.

Is it safe to engrave right up to the rooted teeth?

Yes, but work the engraving passes from the outer face inward, stopping about 5 mm from each tooth root. That margin keeps the tool away from the fragile root zone. If there is significant engraving detail close to a tooth, carve those strokes by hand with a V-gouge rather than a spinning bit to maximize control.

How long will an expert-level carving like this last before the detail starts to shrink?

An expert carving typically looks its best for four to seven days after cutting. Keep it cool, mist the rind lightly with water daily, and apply petroleum jelly to all cut edges to slow dehydration. Plan your carving date so the pumpkin peaks on Halloween night.

Your take belongs here, too.

Changed a detail? Made it simpler? Share a photo of your version and tell the community what worked.

Share your pumpkin

More pumpkins like this

You've reached the end · 8 pumpkins
The Patch Report

Fresh pumpkins, in your inbox.

The best new carvings, ideas worth stealing, and how-tos for carving season. Short, seasonal, and gone by November.

A short email during carving season. Unsubscribe anytime. See our privacy policy.