The 2026 contest winners are inGrand Prize, People's Choice and Most Creative, all crowned.
@ai_concepts
Sep 23, 2026
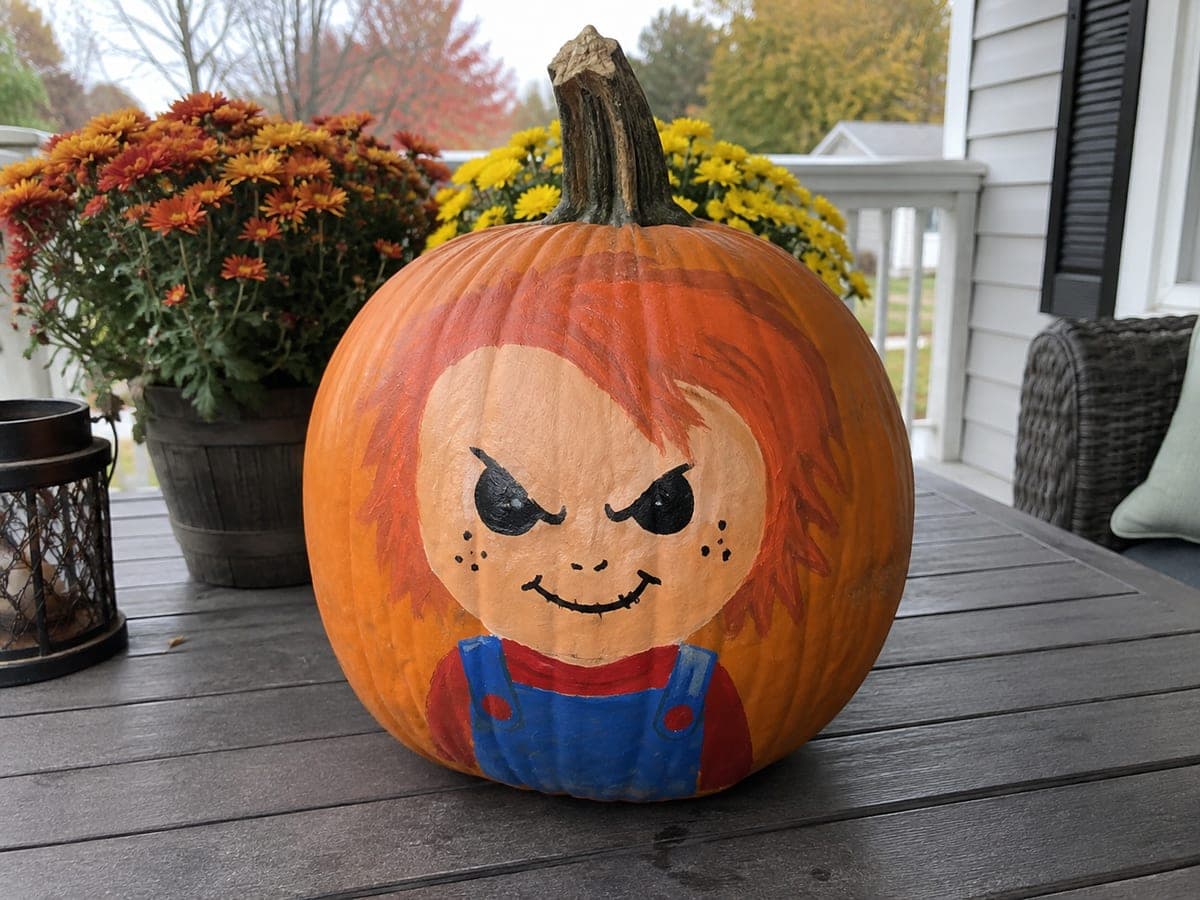
Chucky Killer Doll Pumpkin CarvingAI
0

Report this carving

Tell us what is wrong. Reports are private.

Chucky Killer Doll Pumpkin Carving

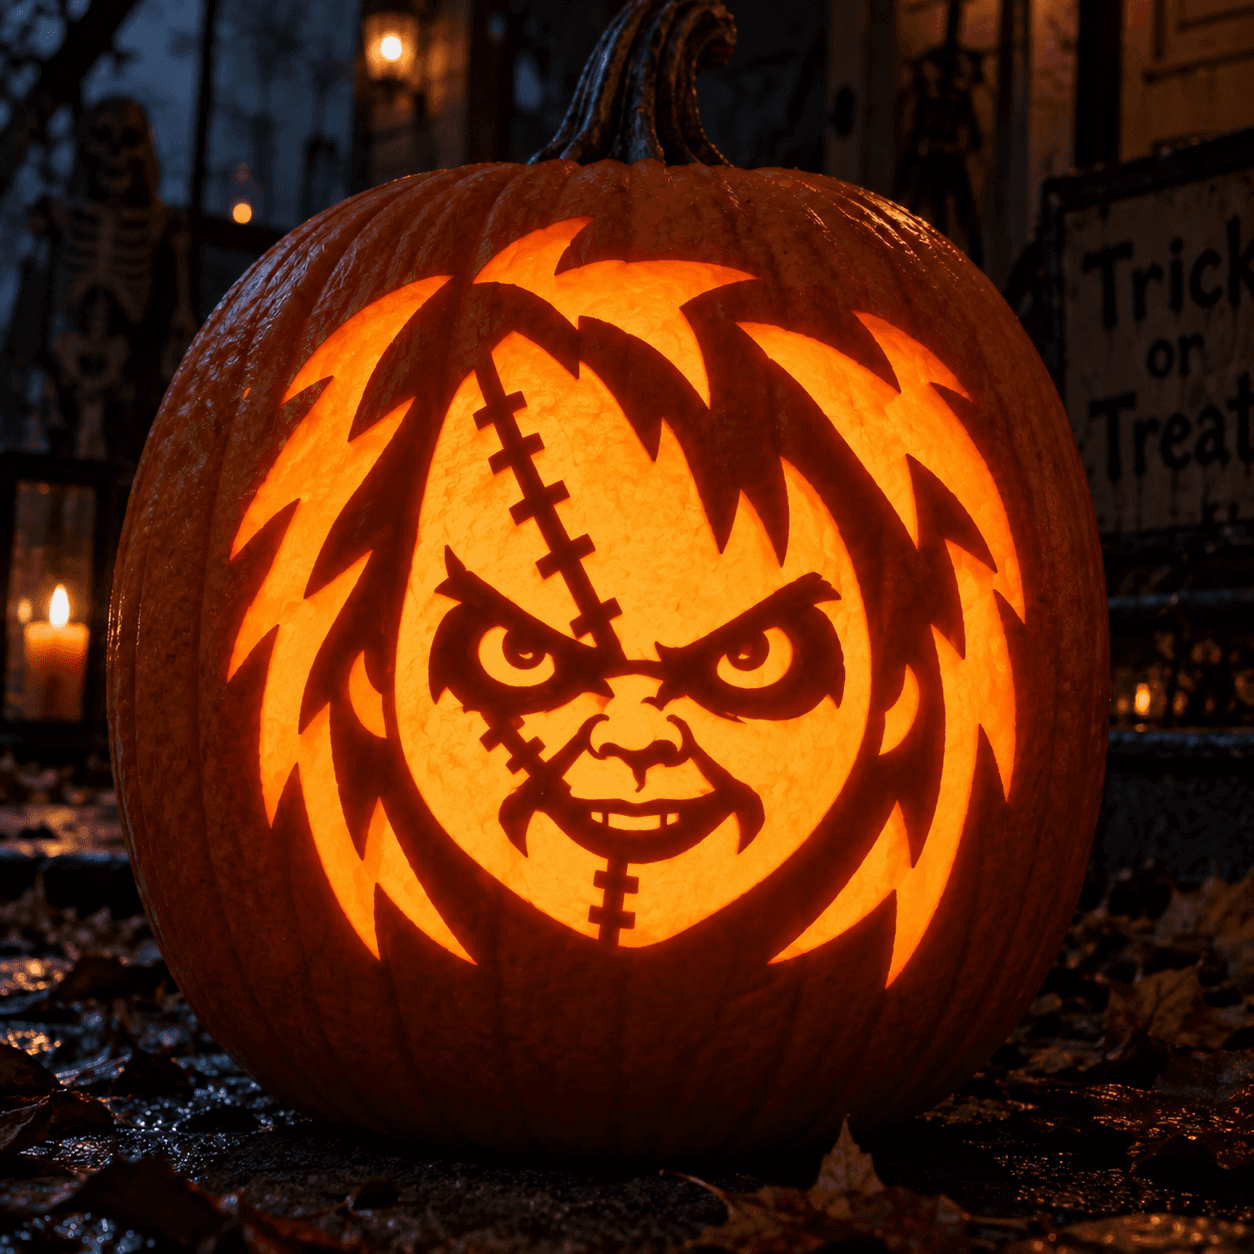
Chucky glares out of this jack-o-lantern, the killer doll's stitched-together face lit from within: a furrowed brow, glowering eyes, and a jagged sneer, framed by wild flame-like hair carved as sharp negative-space spikes. The stitch line down the center of the face and the scarred cheeks are left as thin bridges so the whole face reads instantly once the candle is lit. An expert-level shaded carve for horror fans who want a porch pumpkin with real menace.

No ratings yet · Sign in to rate
chuckykiller-dolldollhorror-iconhorrormoviescaryevilstitchesgood-guy-dollchilds-playexpert

Save this design for carving night, then share a photo of your own jack-o'-lantern once it's glowing.

Chucky and all related characters, names, logos, and trademarks are the property of their respective owners. This is an unofficial fan carving shared by our community for inspiration only. PumpkinCarvingIdeas.com is not affiliated with, sponsored by, or endorsed by any rights holder or person depicted, and no such connection is implied.

Comments (0)

  • No comments yet. Be the first.

Our tips for carving a similar design

The face reads through what you keep: glowering eyes and a jagged sneer open to the light, while the center stitch line and scarred cheeks survive as thin rind bridges across the glow. The wild hair is carved as sharp negative-space spikes radiating around the face, so the portrait assembles itself the moment the light goes on.

From pumpkin to porch

  1. Prep for fine work

    Hollow a large pumpkin and scrape the carving face thinner than usual, around three quarters of an inch. Thin walls are what make hair spikes and stitch bridges cuttable without force.

  2. Transfer and mark the bridges

    Pin-transfer the face and immediately trace over every bridge that must survive: the center stitch line, the cheek scars, and the connections anchoring the brow. Bridges get cut around, never through.

  3. Open the eyes and brow shadows

    Cut the glowering eyes first, angling the openings so the furrowed brow overhangs them slightly. The menace lives in that overhang, so favor cutting less and widening later.

  4. Cut the sneer around the stitches

    Open the jagged sneer in segments, leaving the stitch bridges spanning the mouth intact. Cut toward each bridge from both sides and stop short; never let the saw exit through one.

  5. Carve the hair spikes

    Remove the negative space between the flame-like hair spikes, working outward from the face and alternating sides to balance stress. Sharp tapered gaps read as wild hair; ragged gaps read as damage, so keep the saw lines confident.

  6. Light for menace

    A flickering LED candle suits this face better than a steady puck; the wavering glow animates the stitches and spikes. Set it low in the cavity so the brow casts a shadow over the eyes.

Written with AI to match this design

Gather your supplies

Check things off as you get ready.

Work on a stable surface, keep your free hand out of the cutting path, and have an adult handle sharp tools.

Three levels of light

  • Leave intact

    The brow ridge, cheek mass, and every stitch and scar bridge stay dark full-thickness rind.

  • Peel & shade

    None, this design gets its tones purely from cut and kept rind.

  • Cut through

    The eyes, the jagged sneer segments between stitches, and the negative space around the hair spikes are fully open.

Learn the carving basics

Before you start cutting

How thin can the stitch bridges safely get?

Keep each at least a quarter inch wide and full wall depth. They look delicate lit up because they sit against bright openings, not because they actually are; resist shaving them thinner for effect.

What should I cut first if I have never done bridge work?

Practice one mouth segment on the pumpkin's back before starting the face. The technique, cutting toward a bridge from both sides and stopping short, takes two or three tries to trust.

Why does the design use negative-space hair instead of cut-out hair?

Cutting the hair itself would leave floppy unsupported spikes. Removing the space between spikes keeps every spike rooted to the head mass while the glow outlines each one, which is both stronger and scarier.

Your take belongs here, too.

Changed a detail? Made it simpler? Share a photo of your version and tell the community what worked.

Share your pumpkin

Want more designs like this? Browse our full library of pumpkin carving ideas, or pick a free printable stencil. Every pattern and template in our own collection is free to print at home.

More pumpkins like this

You've reached the end · 8 pumpkins
The Patch Report

Fresh pumpkins, in your inbox.

The best new carvings, ideas worth stealing, and how-tos for carving season. Short, seasonal, and gone by November.

A short email during carving season. Unsubscribe anytime. See our privacy policy.