Halloween Pumpkin Carving Contest · Starts October 1st · $500 in prizes
← Back to ideas
@ai_concepts
Sep 25, 2026
Easy Chucky Doll Face Pumpkin CarvingAI
0

Report this carving

Tell us what is wrong. Reports are private.

Easy Chucky Doll Face Pumpkin Carving

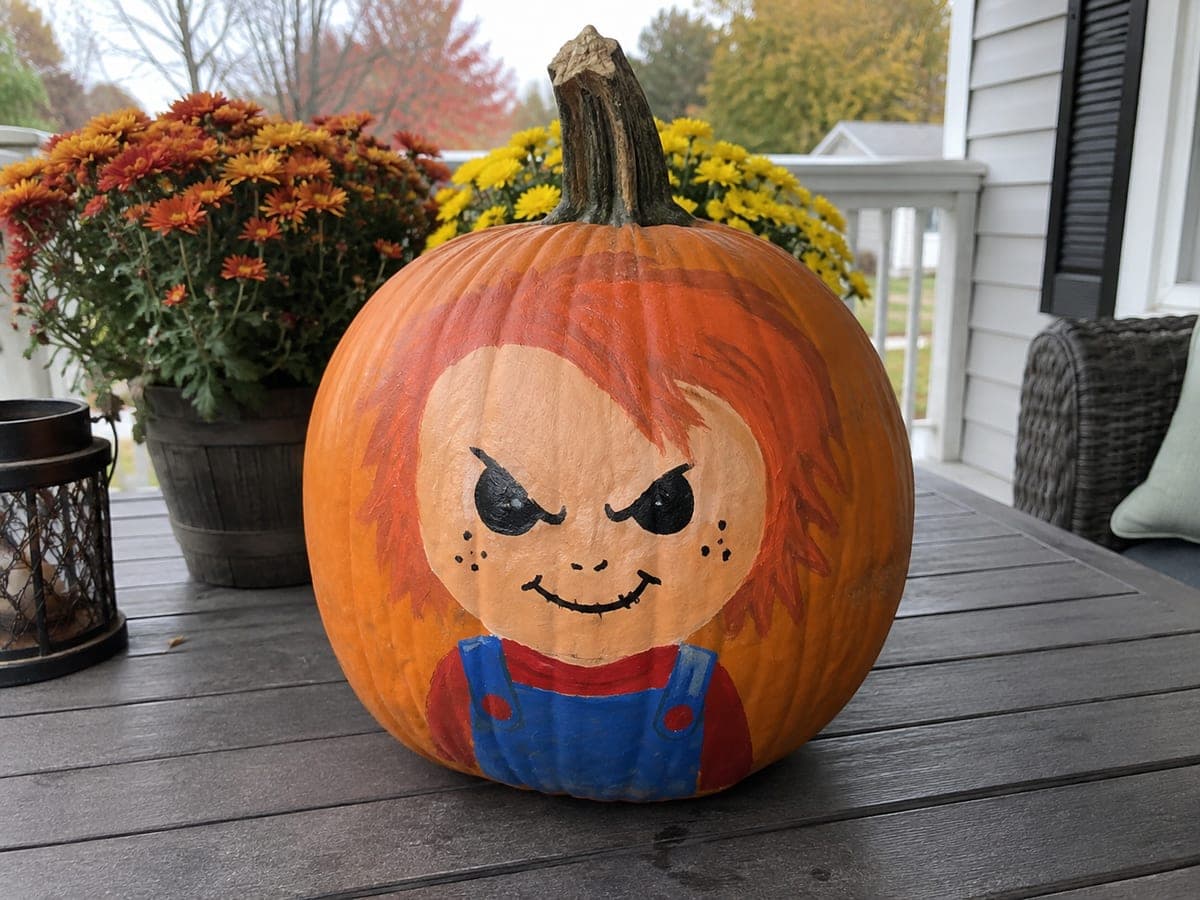
Chucky's angry eyes and open grin glow through a pumpkin in this easy chucky pumpkin carving idea, with a broad attached facial rind keeping everything stable and shallow back-carved grooves for the hair, freckles, and overalls adding character. The wide facial rind means even the backed details are low-risk. Complete all the hollow eye and grin cuts first, then score the freckle dots and hair texture in controlled shallow passes. A warm LED inside makes the freckle scoring visible at night for a playfully creepy display.

No ratings yet · Sign in to rate

Comments (0)

  • No comments yet — be the first.

Save without an account. Sign in to like or comment.

Our tips for carving a similar design

The key to this easy Chucky design is the broad connected facial rind that spans between every open section, making the structure forgiving even with added surface scoring for hair, freckles, and overalls. Fully hollow the angry eyes and open grin first to get the most structurally demanding cuts out of the way, then add the shallow freckle and hair scoring as a second low-risk pass. A warm LED inside makes every scored detail visible at night without any extra effort.

From pumpkin to porch

  1. Hollow and prep

    Cut a back or bottom opening and hollow the pumpkin, leaving about 1 inch of wall throughout. A rounded scoop gets most of the pulp, and a flat scraper evens the wall on the front face where the carving will sit. Pat the interior dry before beginning the design transfer.

  2. Transfer the Chucky face

    Print or sketch the Chucky face, placing the eyes in the upper third of the front face and the grin in the lower third. Perforate the outline with a stylus, marking the eye openings, the grin outer boundary, and the positions of the hair and freckle scoring zones. Double-check that the rind between each eye and the top of the grin is at least 1.5 cm wide.

  3. Carve the eye openings

    Use a thin pumpkin saw to cut the two angry eye shapes. Angry eyes are typically angular triangles or thick downward-slanting rectangles. Keep each cut clean and remove the eye pieces in one motion. The broad rind at the nose bridge should remain fully intact after both eyes are cut.

  4. Carve the grin

    Cut the outer grin line in small segments, staying just outside the perforated outline. Remove grin material in pieces rather than pulling or prying, which could crack the lip edge. At easy difficulty there are no separate teeth to preserve, so the opening is a single wide smile-shaped hole.

  5. Score hair, freckles, and overalls

    Using a linoleum cutter, small V-gouge, or the back of a thin saw blade, score shallow lines across the top of the face for the hair and short curved marks for the freckles on each cheek. For the overall straps, score two shallow parallel lines angling from the shoulders down to the grin sides. Keep all scoring to about one-third of the rind depth.

  6. Light and display

    Place a warm amber LED inside and turn off room lights to check that the freckle scoring glows as intended. Adjust the LED position so the light spreads toward the front face. Display on a porch or step at a height where viewers see the face straight on rather than from above.

Written with AI to match this design

Gather your supplies

Check things off as you get ready.

Work on a stable surface, keep your free hand out of the cutting path, and have an adult handle sharp tools.

Three levels of light

  • Leave intact

    Broad rind at the nose bridge, cheeks, and forehead, which stays dark to frame the face

  • Peel & shade

    Shallow hair grooves at the top and freckle dots on the cheeks, which glow softly at a warm mid-level

  • Cut through

    Hollow eye apertures and the wide open grin, which blaze with full warm light

Learn the carving basics

Before you start cutting

How deep should the freckle scoring be so it glows at night?

Aim for roughly one-third of the rind's thickness, deep enough that the thinner rind transmits warm light but not so deep that you risk puncturing through. Test one freckle first by holding a flashlight against the outside of the scored mark in a dim room. If you can see a faint warm glow, the depth is right.

My grin looks lopsided after cutting. Can I fix it?

Small asymmetries are easy to correct by shaving a little extra material off the shorter side with a detail saw or craft knife, working in thin passes. Chucky has a naturally off-kilter grin anyway, so a slight asymmetry actually suits the character. Avoid overcorrecting and widening the gap past the marked outline.

What is the best LED for a beginner Chucky pumpkin?

A battery-operated LED tea light with an amber flicker mode is the easiest option. It sits flat on the pumpkin floor, needs no cords, and the flicker makes the scored freckles look animated. Avoid real candles near carved pumpkins, especially if children will be handling it.

Your take belongs here, too.

Changed a detail? Made it simpler? Share a photo of your version and tell the community what worked.

Share your pumpkin

More pumpkins like this

You've reached the end · 8 pumpkins
The Patch Report

Fresh pumpkins, in your inbox.

The best new carvings, ideas worth stealing, and how-tos for carving season. Short, seasonal, and gone by November.

A short email during carving season. Unsubscribe anytime. See our privacy policy.