Halloween Pumpkin Carving Contest · Starts October 1st · $500 in prizes
← Back to ideas
@ai_concepts
Sep 25, 2026
Chucky Pumpkin Carving With Overall DetailsAI
0

Report this carving

Tell us what is wrong. Reports are private.

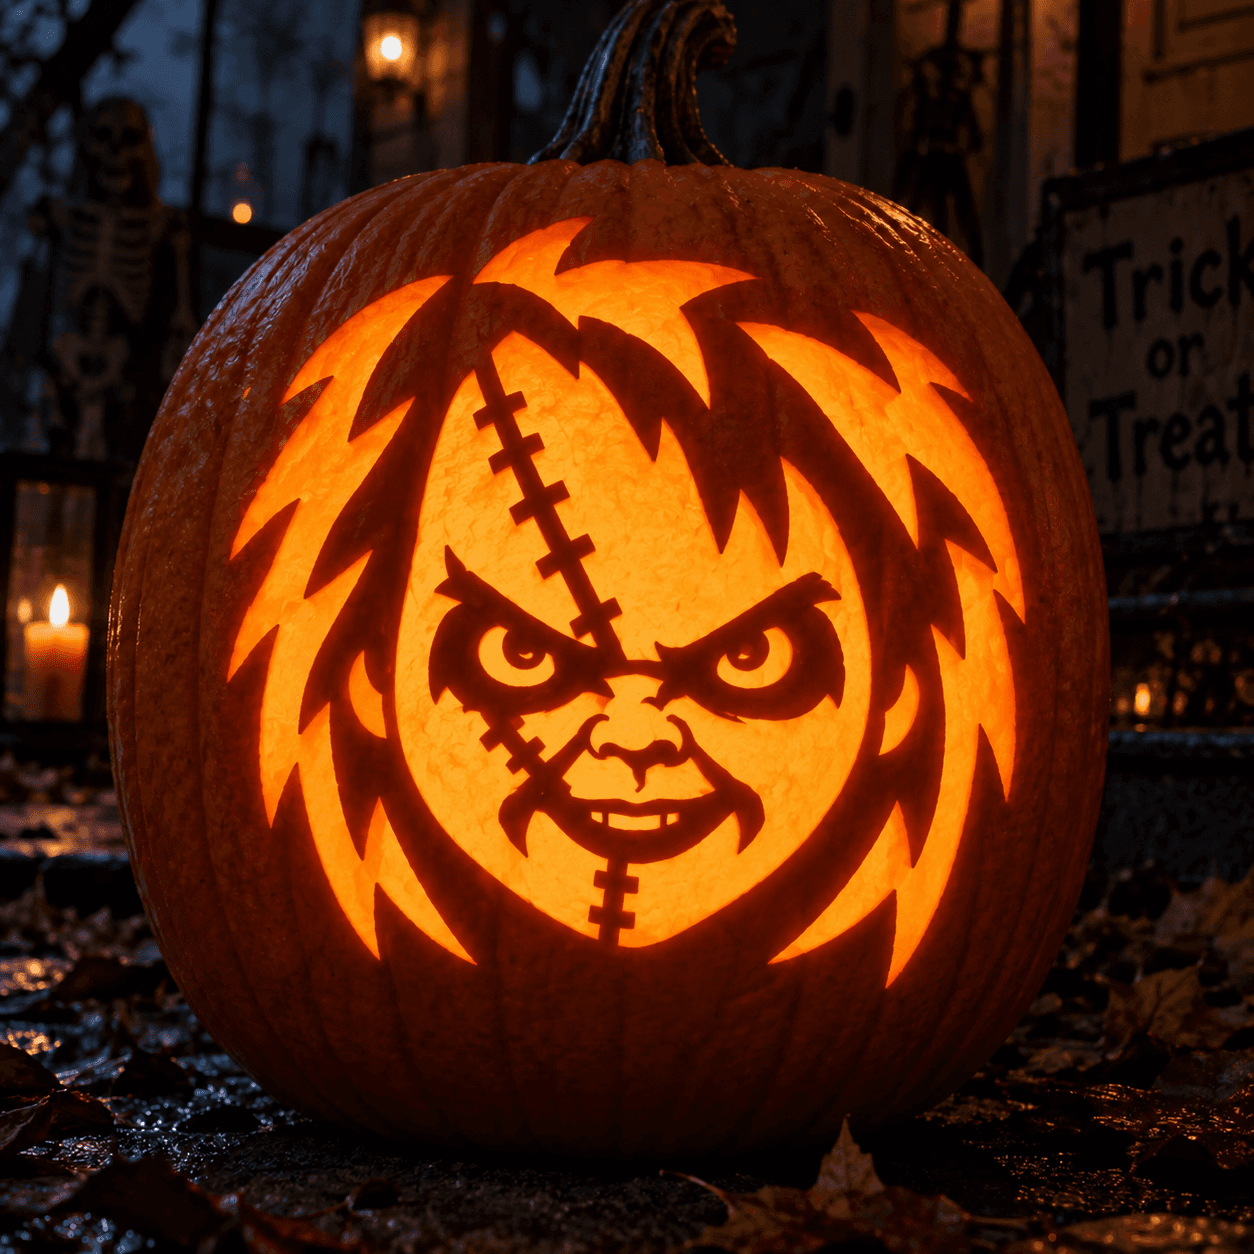
Chucky Pumpkin Carving With Overall Details

This intermediate chucky pumpkin carving idea builds on the angry eye and grin openings by adding more defined shallow back-carved scoring for the overall bib straps, hair, and cheek contours, giving the doll portrait a richer surface texture. The broad attached rind between every open section keeps the design structurally sound even with the additional surface work. Hollow out the eyes and grin first, then work the shallow overalls and hair detail in separate passes. Displayed on a porch at night, the backed details read as subtle shadows against the warm interior glow.

No ratings yet · Sign in to rate

Comments (0)

  • No comments yet — be the first.

Save without an account. Sign in to like or comment.

Our tips for carving a similar design

This intermediate Chucky design uses the same hollow eye and grin apertures as the easy version but adds more defined shallow scoring for the overall bib straps, hair, and cheek contours, giving the portrait a richer surface that reads clearly at night. The broad attached rind between every open section is what makes the additional surface work possible without raising the structural risk. Cutting the hollow sections first and then adding the surface detail as a separate pass is the safest workflow.

From pumpkin to porch

  1. Hollow and prepare walls

    Remove the pumpkin top or cut a back opening and hollow to a consistent 1-inch wall on the front face. A thicker wall in the cheek areas gives the scoring passes more depth to work with. Pat the interior dry and let it air briefly before beginning.

  2. Transfer the intermediate design

    Transfer the full Chucky face including the eye openings, grin boundary, hair zone at the top, freckle positions, and the two overall strap lines running from the shoulders toward the grin. Mark the scoring zones in a separate color so you can clearly distinguish what gets cut through from what stays shallow.

  3. Carve the hollow sections

    Cut both angular eye apertures first, then the grin, working in small segments and confirming the nose bridge stays fully intact after each cut. At intermediate level the grin is still a single opening with no rooted teeth, so the mouth area cuts cleanly without fragile elements.

  4. Score the overall straps

    Using a linoleum cutter or V-gouge, carve the two overall bib strap lines as defined channels running from the upper shoulder area diagonally toward the outer grin corners. Make two parallel passes per strap to create a channel rather than a single thin groove, which will glow more visibly.

  5. Score hair and facial contours

    Work the hair texture at the top with a series of parallel curved grooves following the direction Chucky's orange hair would sweep. Add cheek contour lines as gentle arcs below the eye openings. Use a V-gouge or the edge of a Dremel ball bit for crisp line definition.

  6. Light and review

    Insert a warm LED, dim the room, and look for any scoring that is not transmitting light. Deepen those marks slightly with one more V-gouge pass. Position the pumpkin at eye level so viewers see the full face and bib strap detail simultaneously.

Written with AI to match this design

Gather your supplies

Check things off as you get ready.

Work on a stable surface, keep your free hand out of the cutting path, and have an adult handle sharp tools.

Three levels of light

  • Leave intact

    Solid rind on the forehead, nose bridge, and outer cheeks, forming the dark portrait base

  • Peel & shade

    Overall strap channels, hair grooves, and cheek contour lines, glowing at a warm mid-level amber

  • Cut through

    Hollow eye sockets and the open grin, providing full warm light through the face

Learn the carving basics

Before you start cutting

How do I keep the overall strap channels straight on a curved surface?

Lightly score the strap boundary lines with a stylus before carving. You can also use a strip of painter's tape along one edge of each strap as a cutting guide. Work the channel in two thin passes rather than one deep cut to maintain consistent depth on the curved rind.

Can I deepen the scoring after the pumpkin is lit?

Yes. Turn on the LED, observe which grooves are not glowing enough, and mark those spots lightly with a pencil. Turn the light off, add one shallow pass with the V-gouge, then recheck. Working iteratively like this avoids over-carving. Keep the pumpkin braced stably on a non-slip surface any time a tool is in hand.

How far apart should the two overall strap lines be?

Each strap looks most convincing when the two parallel channel lines are about 4 to 6 mm apart, wide enough to glow as a visible band but narrow enough to stay recognizably strap-like. Wider channels start to read as collar elements rather than straps. Test the width with a pencil sketch on paper before committing to the rind.

Your take belongs here, too.

Changed a detail? Made it simpler? Share a photo of your version and tell the community what worked.

Share your pumpkin

More pumpkins like this

You've reached the end · 8 pumpkins
The Patch Report

Fresh pumpkins, in your inbox.

The best new carvings, ideas worth stealing, and how-tos for carving season. Short, seasonal, and gone by November.

A short email during carving season. Unsubscribe anytime. See our privacy policy.