Halloween Pumpkin Carving Contest · Starts October 1st · $500 in prizes
← Back to ideas
@ai_concepts
Jul 27, 2026
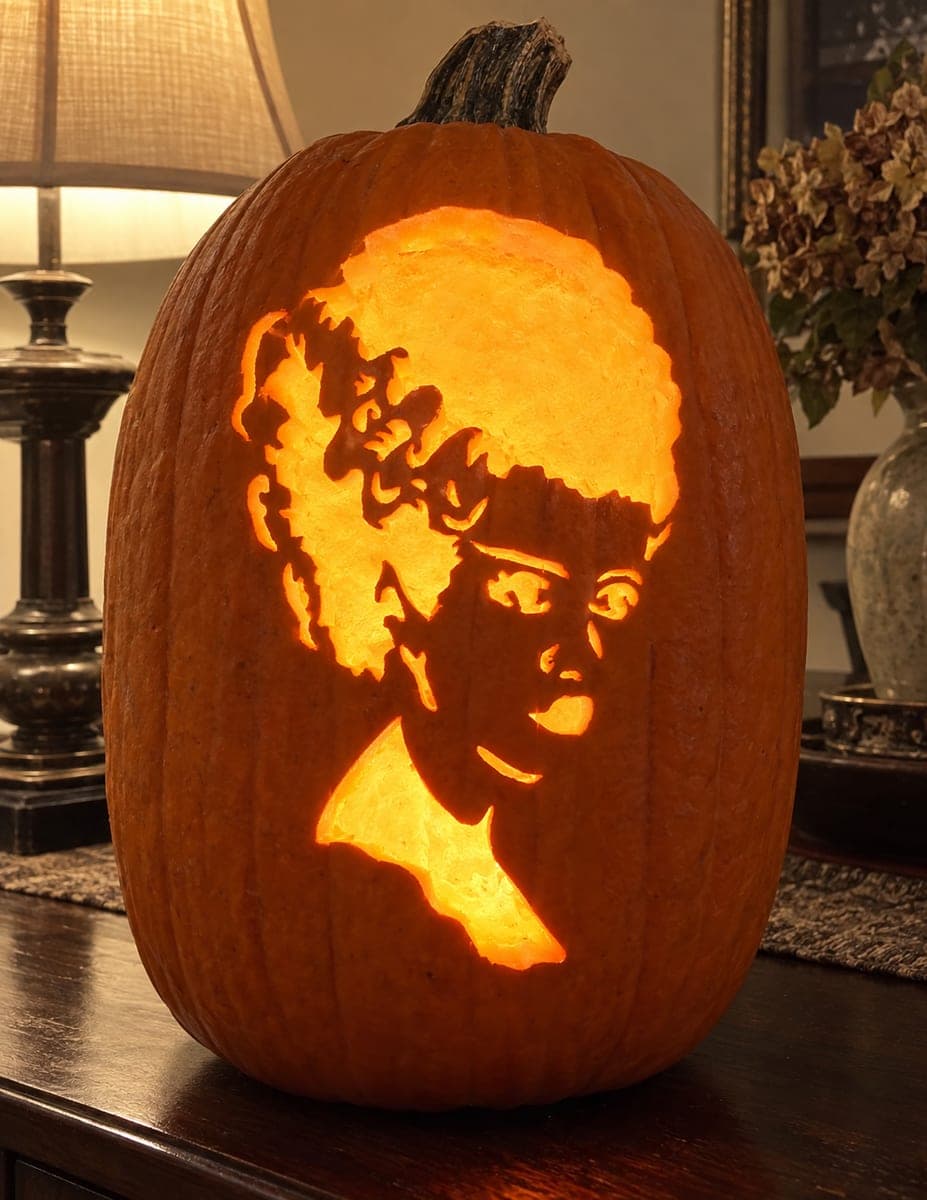
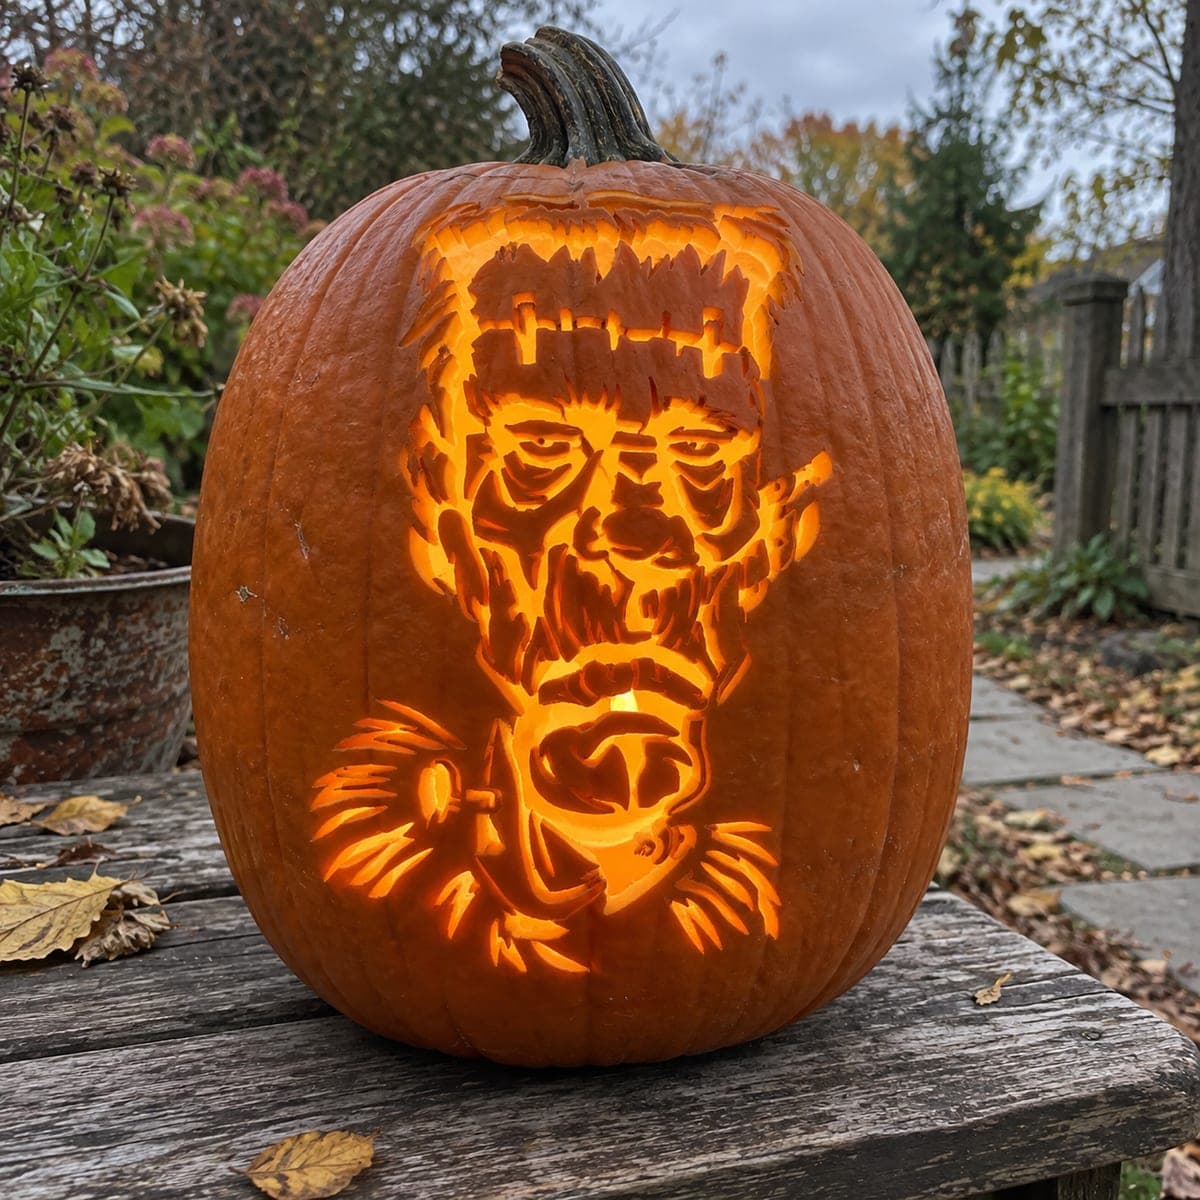
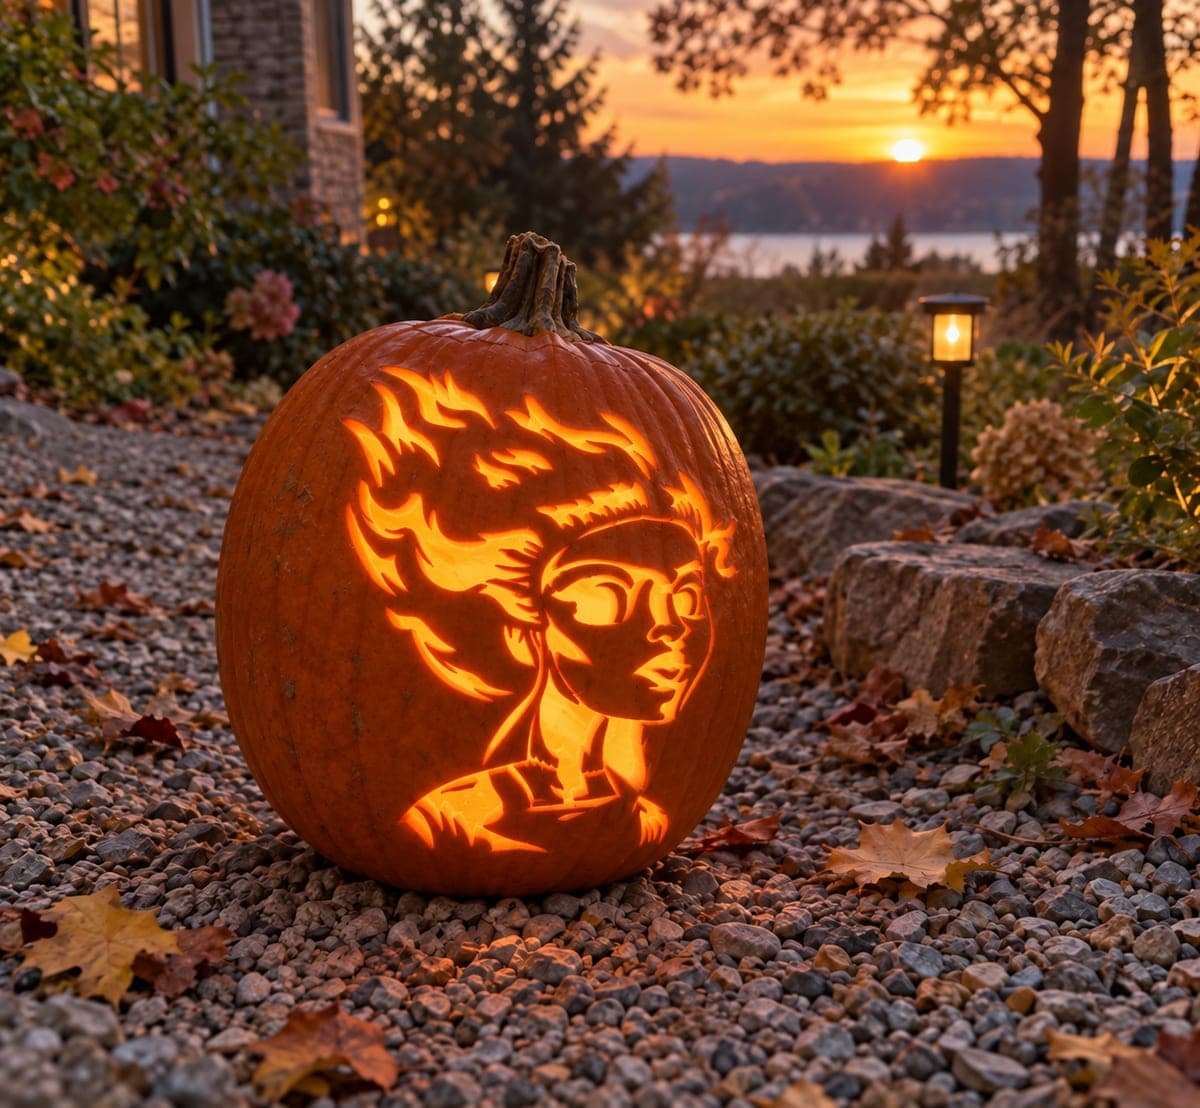
Frankenstein Monster Portrait Shaded Jack-O-LanternAI
0

Frankenstein Monster Portrait Shaded Jack-O-Lantern

Frankenstein's flat-topped head, neck bolts, and stitched forehead are captured in remarkable depth through surface etching that creates true highlights and shadow across the monster's brooding face. The shading technique removes the outer skin at varying depths rather than cutting all the way through, producing warm amber tones that glow when a candle is placed inside. Use a Dremel with a ball-tip bit to build up gradual tonal transitions, starting with the deepest shadows around the eye sockets. This horror pumpkin carving idea is a showstopper on an outdoor bench or front steps.

This is an AI-generated concept image: a realistic, carvable design idea rather than a photo of a finished carve. AI concepts are always labeled and sit out the leaderboard and the contest.
No ratings yet · Sign in to rate

Comments (0)

  • No comments yet — be the first.

Save without an account. Sign in to like or comment.

Our tips for carving a similar design

The whole effect here comes from shaving the skin at different depths so light passes through as amber tones instead of open holes. You build the flat-topped head, sunken eyes, and heavy brow by carving deeper where you want more glow and leaving skin where you want dark. Plan for a mostly etched surface with only a few true cutouts to keep the monster looking solid and three-dimensional.

Written by PumpkinCarvingIdeas.com, inspired by the image above. These are our suggestions, not instructions from the uploader. This approach to the AI concept has not been tested on a real pumpkin.

From pumpkin to porch

  1. Prep and transfer the portrait

    Pick a large pumpkin with a broad, fairly flat front face to hold all the detail. Cut a wide lid from the bottom or the back rather than the top so the stem stays intact and the front stays smooth. Scrape the inside wall down to about one inch thick behind the face so light can pass through the shaded areas. Tape your stencil in place and poke or trace the main outlines: the hairline, brow, eyes, nose, mouth, and neck bolts.

  2. Map your light zones before cutting

    Study the reference and decide what stays dark, what gets a dim glow, and what opens fully. The forehead, cheeks, and jaw stay near the surface as mid tones, while the deep eye sockets and under-nose shadows go darkest. Mark the brightest spots lightly in pencil so you do not over-carve. This planning is the difference between a flat mask and a face with real depth.

  3. Shade the deepest shadows first

    Fit a rotary tool with a ball-tip bit and start with the eye hollows, the sides of the nose, and the shadow under the lower lip. Work slowly and remove skin gradually, checking often with a light held behind the wall. Keep transitions smooth by feathering the edges of each area instead of leaving hard steps. Wear eye protection and a dust mask, and let an adult handle the rotary tool.

  4. Build the mid-tone highlights

    Move to the forehead, the flat top of the head, the cheeks, and the brow ridge. Shave these more lightly so they glow softer than the eye sockets. The heavy brow and the bridge of the nose should stay thicker so they read as raised, catching a subtle highlight against the darker hollows. Step back frequently to judge the whole face rather than one spot at a time.

  5. Add the stitches, bolts, and final cutouts

    Etch the forehead stitch line and the seams around the neck bolts as fine shallow grooves, keeping thin bridges of skin so nothing crumbles. Save any true cutouts for last, such as narrow slivers where you want the brightest pop of light. Cutting big openings last keeps the surrounding face strong while you work. Clean up any rough edges with a small loop tool.

  6. Light it and photograph

    Set a battery LED light or a small LED puck inside, never a candle, since shaded walls are thin and can scorch. Warm-white LEDs bring out the amber tones best. Place the pumpkin on a bench or front step at dusk and shoot slightly to the side so the raised brow and nose cast shadow. Mist the surface with water to slow drying and keep the detail sharp for a few extra days.

Gather your supplies

Check things off as you get ready.

Work on a stable surface, keep your free hand out of the cutting path, and have an adult handle sharp tools.

Three levels of light

  • Leave intact

    The heavy brow ridge, the raised nose bridge, and the darkest edges of the hairline stay as untouched skin for deep shadow.

  • Peel & shade

    The forehead, flat crown, cheeks, jaw, and neck bolts get shaved to varying depths for the warm amber mid glow.

  • Cut through

    Only a few narrow slivers, such as the brightest catch-light spots, get cut fully through for peak light.

Learn the carving basics

Before you start cutting

Do I really need a rotary tool, or can I do this with knives?

For smooth tonal transitions a rotary tool with a ball-tip bit is the reliable choice, since it lets you shave skin gradually and blend one depth into the next. You can rough in the shadows with loop tools, but hand tools make it hard to feather edges cleanly. If you do not own a rotary tool, expect a more stepped, less photo-realistic result.

How thin should the shaded areas be?

Aim to leave the brightest shaded zones around an eighth of an inch and keep untouched dark areas full thickness. Check constantly by holding a light behind the wall as you work. Go too thin and the skin tears or dries out fast, so stop shaving the moment the glow looks right.

This is shown as a concept image. Can a real pumpkin actually hold this much detail?

Yes, a portrait like this is achievable on a large, fresh pumpkin with a thick, even wall. The key is keeping the stitch lines and bolt seams as shallow grooves with skin bridges rather than open cuts so nothing collapses. Work in one session while the flesh is firm, since detailed shading dries and distorts within a couple of days.

Your take belongs here, too.

Changed a detail? Made it simpler? Share a photo of your version and tell the community what worked.

Share your pumpkin

More pumpkins like this

You've reached the end · 8 pumpkins
The Patch Report

Fresh pumpkins, in your inbox.

The best new carvings, ideas worth stealing, and how-tos for carving season. Short, seasonal, and gone by November.

A short email during carving season. Unsubscribe anytime. See our privacy policy.