Halloween Pumpkin Carving Contest · Starts October 1st · $500 in prizes
← Back to ideas
@ai_concepts
Jul 31, 2026
Giant Sprinkle Donut Carved Pumpkin DesignAI
0

Giant Sprinkle Donut Carved Pumpkin Design

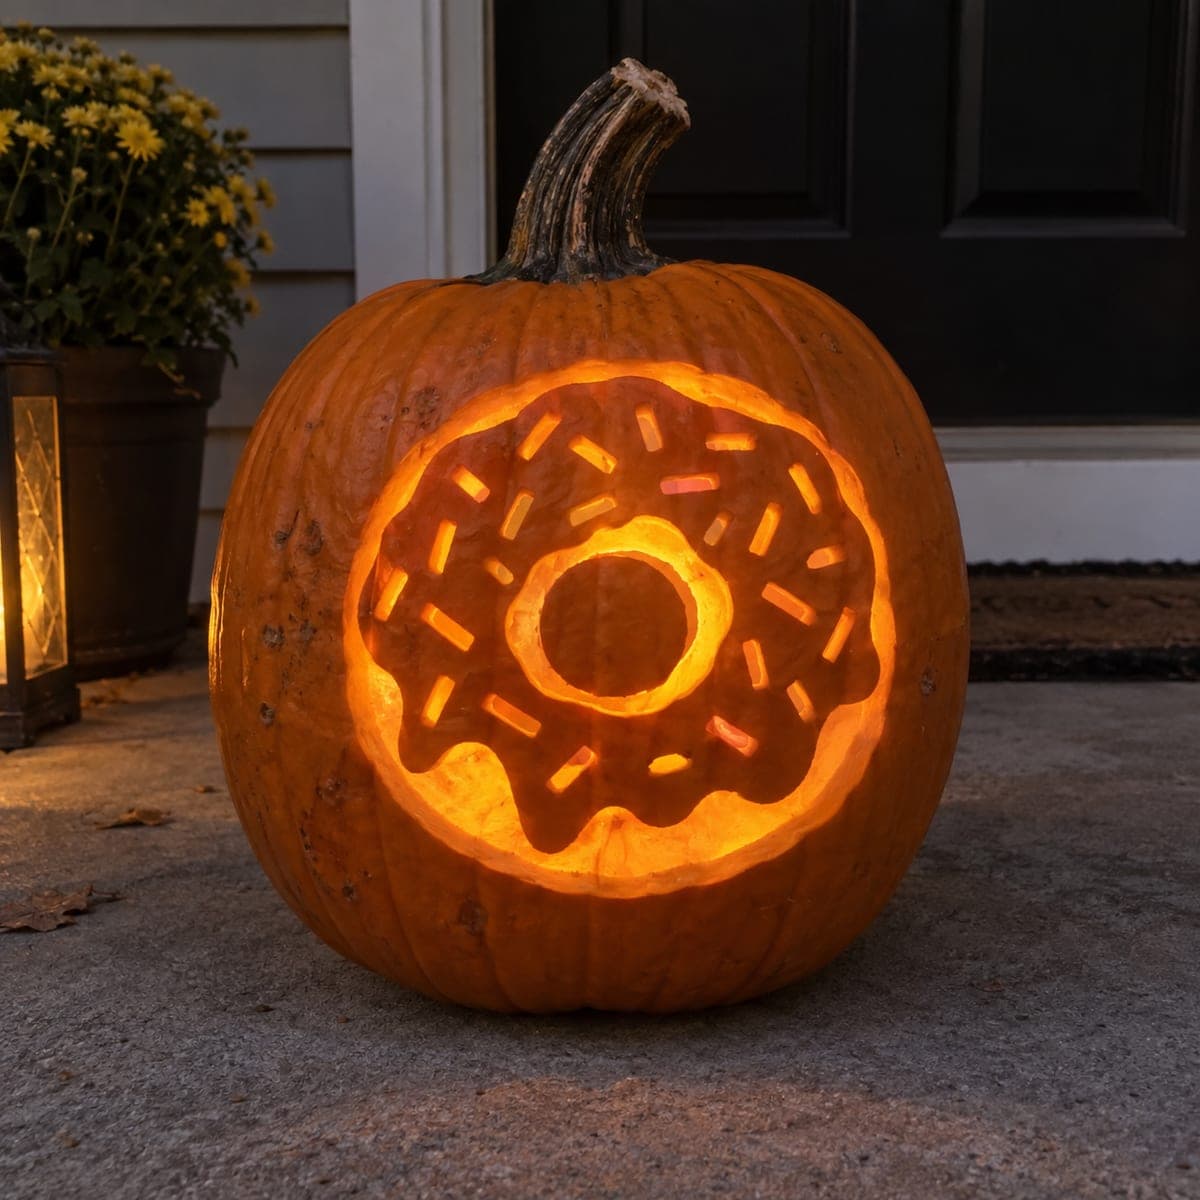
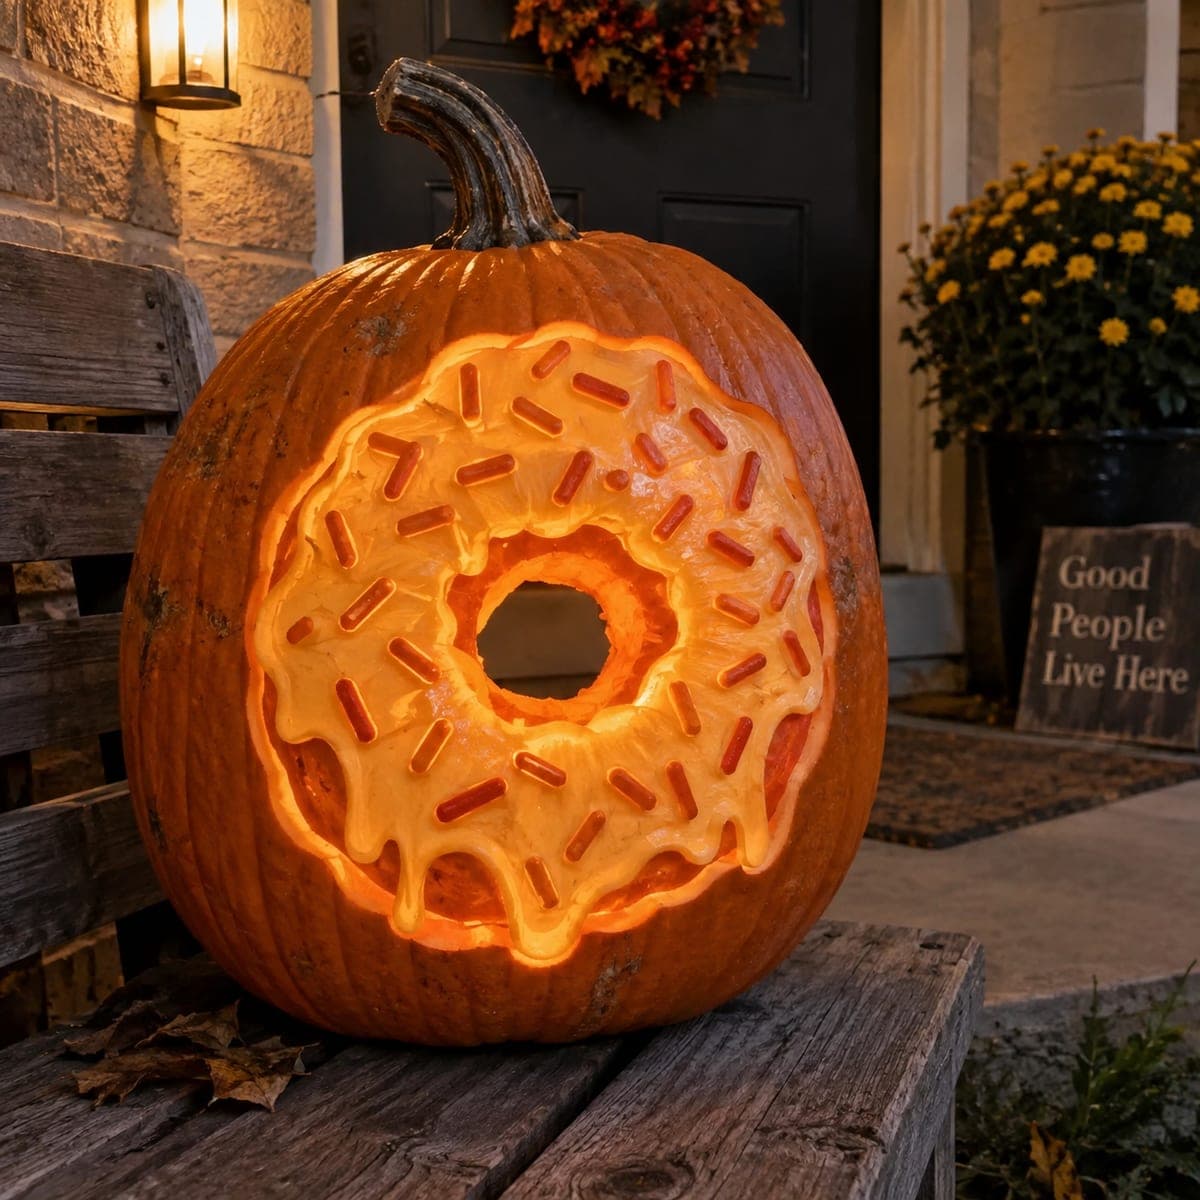
A giant frosted donut covered in glowing sprinkles takes over this pumpkin, with drippy icing edges and a light blazing through the center hole. The frosting is peeled to a translucent layer, the sprinkles are shallow etched dashes left a bit thicker, and the donut hole is the only full cutout. Cut the hole first for hand access, then peel outward, letting the icing drips fall naturally.

This is an AI-generated concept image: a realistic, carvable design idea rather than a photo of a finished carve. AI concepts are always labeled and sit out the leaderboard and the contest.

No ratings yet · Sign in to rate
Comments (0)

  • No comments yet — be the first.

Save without an account. Sign in to like or comment.

Our tips for carving a similar design

The whole design rides on one trick: peeling the frosting area down to a thin translucent layer so it glows a warm creamy orange, while the sprinkles stay a touch thicker to read as darker dashes. The donut hole is the only true cutout, letting a bright beam blaze through the center. Plan your drippy icing edge before you start so the frosting can spill down the pumpkin in irregular, natural runs.

Written by PumpkinCarvingIdeas.com, inspired by the image above. These are our suggestions, not instructions from the uploader. This approach to the AI concept has not been tested on a real pumpkin.

From pumpkin to porch

  1. Pick a round pumpkin and transfer the design

    Choose a wide, round pumpkin with a smooth flat front, since a donut wants a full circle. Tape your stencil or sketch the outer donut ring, the inner ring around the hole, the drippy icing edge, and a scatter of sprinkle dashes with a marker. Keep the sprinkles spread evenly but slightly random so they look tossed on. Step back and check the circle looks balanced before any cutting.

  2. Open the lid and clean out the pumpkin

    Cut a lid from the back rather than the top so the front stays clean for your donut, or use a bottom cut so the pumpkin sits flat on the LED. Scoop out all the seeds and pulp, then scrape the inside of the front wall down to about one inch thick with a loop tool. A thinner wall is much easier to peel and lets more light through. Take your time here, since even walls make even glow.

  3. Cut the donut hole first

    Have an adult cut the small center hole all the way through with a fine carving saw. Doing this first gives you a finger hole for support and clears sawdust and scraps as you work. Keep the opening modest and round, roughly the proportions of a real donut hole. This is your one full cutout, so make the edge clean since it will be the brightest spot.

  4. Peel the frosting to a glowing layer

    Using a lino or ribbon tool, shave the skin off the entire frosting ring, working outward from the center toward the drippy edge. Aim for a thin, even translucent layer so it glows creamy orange, checking thickness by holding a light behind it. Leave the drips a little varied so the icing looks like it is running down. Go slow near the edges so you do not tear through the thin wall.

  5. Etch the sprinkles a bit thicker

    Leave each sprinkle dash slightly thicker than the frosting around it so they read as darker orange marks against the pale glow. Lightly outline and shallow-etch each dash rather than cutting through, keeping them short and blunt like real sprinkles. Vary their angles so they scatter naturally across the frosting. Do not carve so deep that a sprinkle detaches, since these thin bits need pumpkin behind them.

  6. Light it and photograph

    Drop in a bright LED puck or a string of LED lights, never a candle, and set the pumpkin on a flat surface. Test the glow in a dark room and touch up any spots that read too dark by peeling a hair thinner. Wipe the cut edges and spray them with a little lemon water to slow browning. Shoot it at dusk on the porch so the center hole and frosting really pop.

Gather your supplies

Check things off as you get ready.

Work on a stable surface, keep your free hand out of the cutting path, and have an adult handle sharp tools.

Three levels of light

  • Leave intact

    The bare pumpkin skin around the outside of the donut and the raw stem stay untouched and dark.

  • Peel & shade

    The full frosting ring, drippy icing edges, and the sprinkles are peeled, with sprinkles left thicker so they glow a bit dimmer than the icing.

  • Cut through

    Only the center donut hole is cut clean through for the brightest beam of light.

Learn the carving basics

Before you start cutting

How do I keep the sprinkles from looking mushy against the glowing frosting?

Leave each sprinkle noticeably thicker than the peeled frosting around it, so light comes through the icing but the sprinkles stay darker. Keep the dashes short, blunt, and clearly separated. If two sprinkles blur together under the light, shave the frosting between them a touch thinner to sharpen the contrast.

Should I cut the donut hole all the way through or just peel it?

Cut it fully through, since it is meant to be the single bright cutout and the focal point. Doing it first also gives you a handhold and a place for scraps to fall while you peel. Keep it round and modestly sized so it reads as a real donut hole, not a giant window.

This is shown as a concept image, so can a real pumpkin actually glow like this?

Yes, though the pictured pumpkin is an AI concept and no real one was carved. Thin the front wall to about an inch and peel the frosting to a consistent translucent layer to get that creamy glow. Use a bright LED rather than a candle, and expect a real pumpkin to look a little more textured than the smooth render.

Your take belongs here, too.

Changed a detail? Made it simpler? Share a photo of your version and tell the community what worked.

Share your pumpkin

More pumpkins like this

You've reached the end · 8 pumpkins
The Patch Report

Fresh pumpkins, in your inbox.

The best new carvings, ideas worth stealing, and how-tos for carving season. Short, seasonal, and gone by November.

A short email during carving season. Unsubscribe anytime. See our privacy policy.