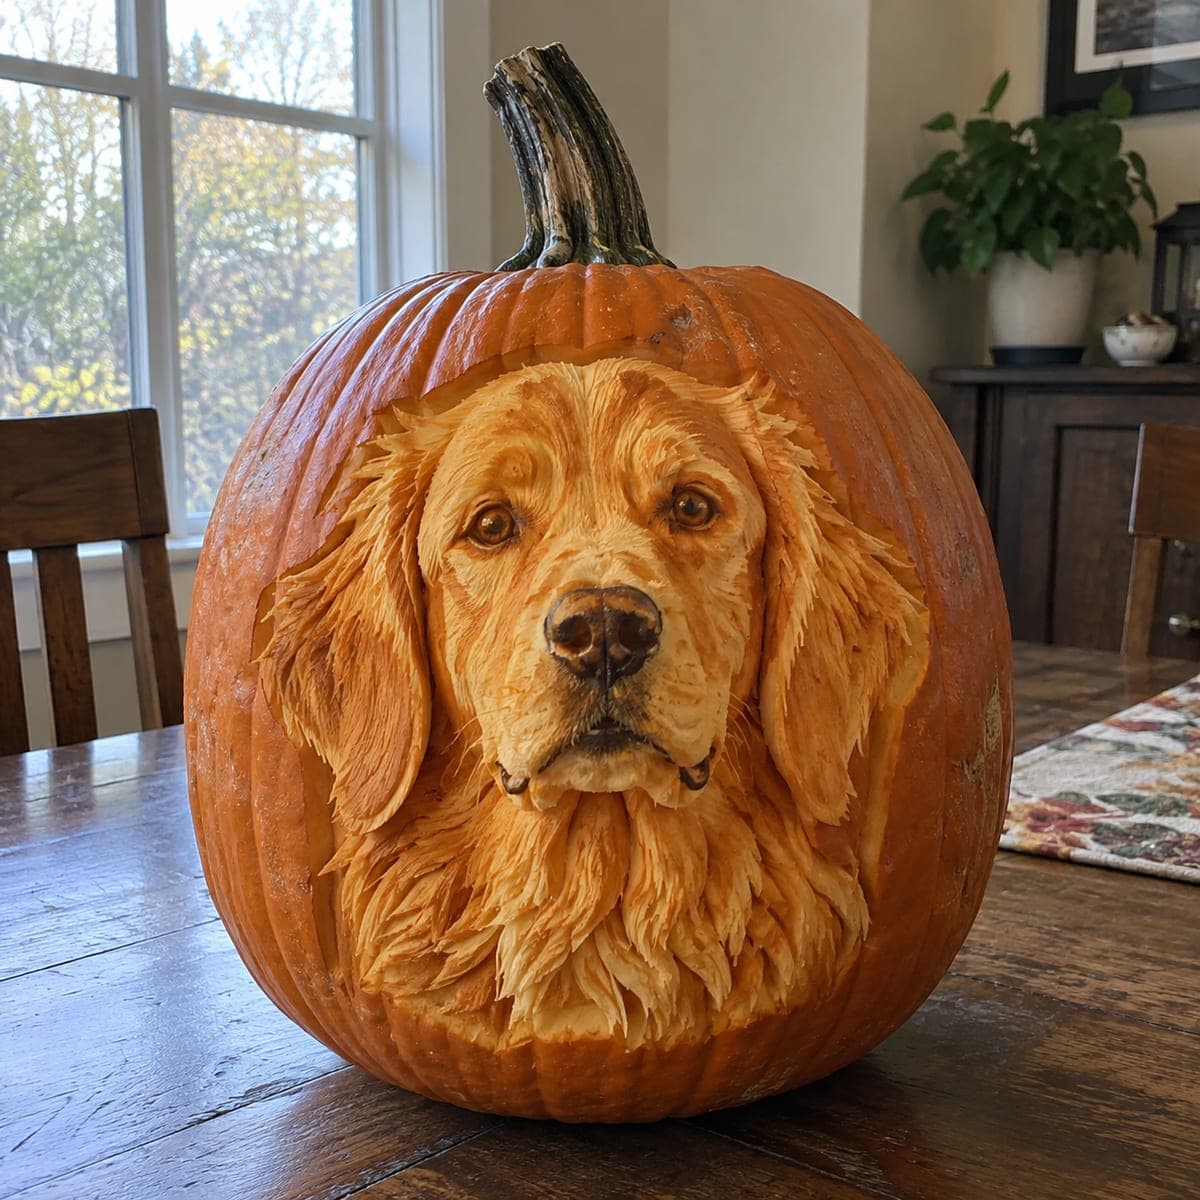
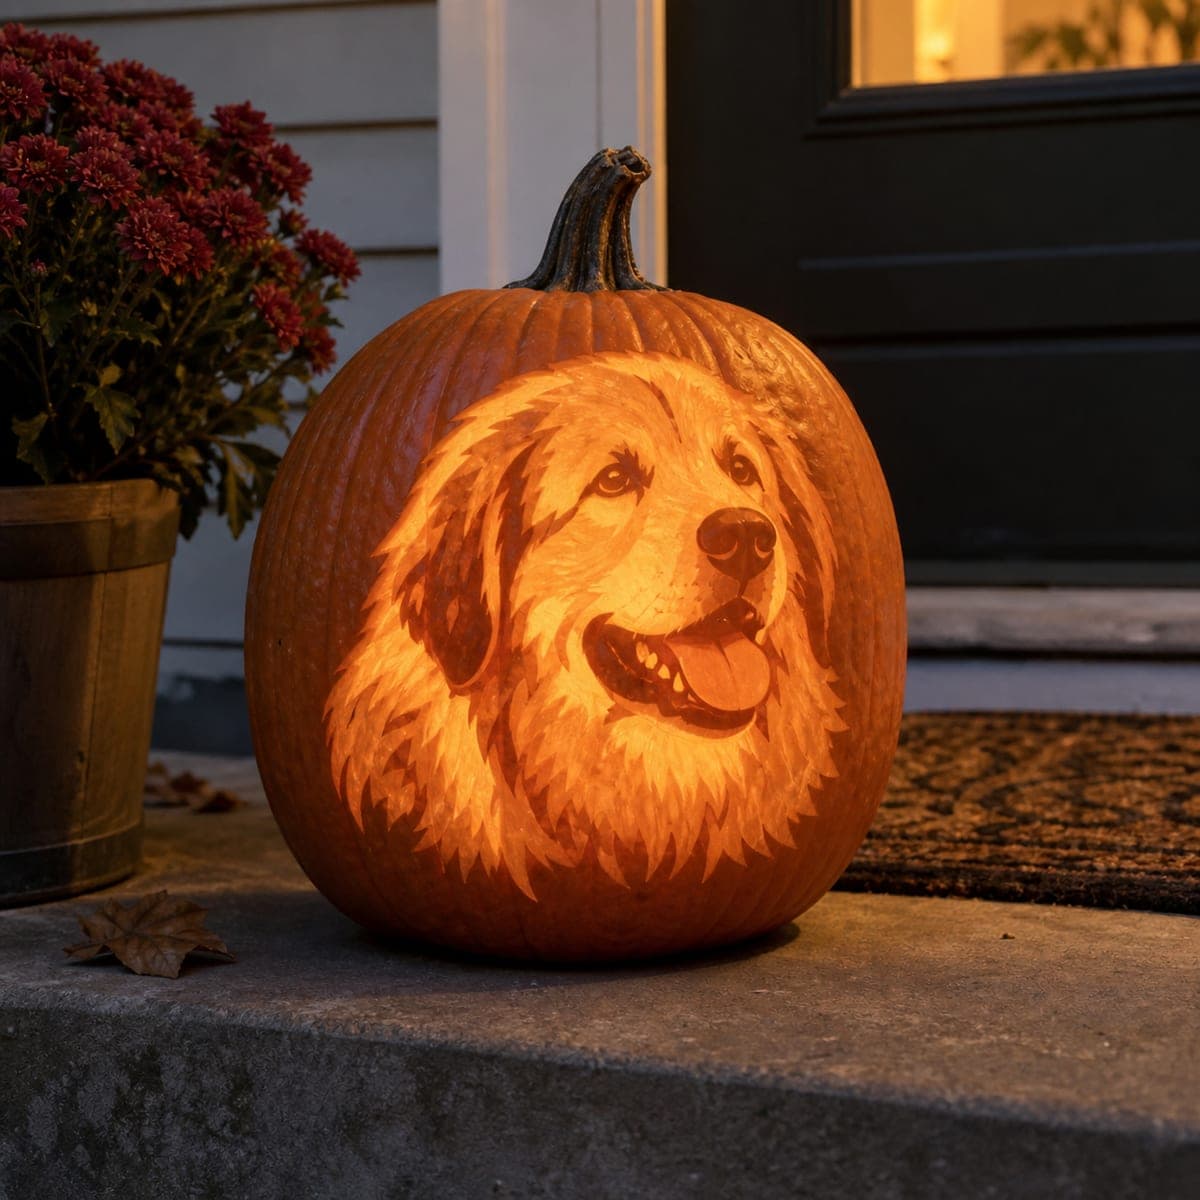
A golden retriever's head is sculpted from the pumpkin in astonishing three-dimensional relief, with feathered ears, a wet-looking nose, and individually carved locks of chest fur. This is hours of ribbon-tool and clay-loop work, roughing the big planes of the skull before refining fur in overlapping strokes. Photograph it the same day you finish, since deep sculpted pumpkins brown quickly, and a wipe of lemon juice slows the discoloration.
This is an AI-generated concept image: a realistic, carvable design idea rather than a photo of a finished carve. AI concepts are always labeled and sit out the leaderboard and the contest.
The core trick here is relief sculpting, where you shave away depth instead of cutting all the way through, so the dog's face rises out of the pumpkin wall in three dimensions. The plan is to rough in the big skull planes first, then carve the ears, muzzle, and eyes to different depths, and finish with overlapping strokes of fur texture. Nothing needs to be cut through, so the pumpkin stays strong throughout.
Written by PumpkinCarvingIdeas.com, inspired by the image above. These are our suggestions, not instructions from the uploader. This approach to the AI concept has not been tested on a real pumpkin.
From pumpkin to porch
1
Pick a fat pumpkin and plan the face
Choose a tall, wide pumpkin with a smooth, blemish-free front and thick walls, since you need material to sculpt into. Cut a lid or a bottom access hole and scrape the inside of the front wall down to about an inch and a half thick so light can pass later. Transfer a golden retriever reference photo onto the surface with a marker, marking the outline of the head, ears, muzzle, and chest fur. Keep the eyes and nose centered where the wall is thickest.
2
Rough in the big planes
Using a clay loop or ribbon tool, shave away the skin and a shallow layer of flesh across the whole face area, leaving the outer pumpkin as the dark background. Establish the basic dome of the skull, the raised bridge of the muzzle, and the lower cheeks and chest. Work in broad passes and step back often to check that the proportions read like a dog. Do not worry about detail yet, just get the big shapes and depth differences established.
3
Set the depth of ears, muzzle, and eyes
Carve the ears so they sit slightly forward of the background but behind the face, giving that layered feathered look. Push the muzzle and nose forward as the highest point, and recess the eye sockets so the eyes sit deep and shadowed. Round the nose into a smooth raised bump and define the two nostrils with a small U-gouge. Keeping these depth layers distinct is what makes the portrait look three-dimensional.
4
Carve the fur texture
Switch to a small U-gouge or detail loop and carve the fur in short, overlapping strokes that follow the direction the hair grows. Start at the top of the head and work down and outward on the ears, then flow the chest locks in long downward sweeps. Vary the depth of your strokes so some catch more light than others, which reads as individual clumps of fur. Take your time here, since this texture is what sells the whole piece.
5
Refine eyes, nose, and highlights
Peel the eyes to a thin, smooth surface so they glow warmer and softer than the surrounding fur, and leave a tiny untouched dot of skin as a catchlight in each. Smooth the nose surface and keep it slightly darker than the muzzle for that wet look. Go back over the fur and deepen a few strokes near the cheeks and ear edges to add shadow and separation. Small contrast tweaks make the face pop.
6
Light it and photograph fast
Set a warm LED puck or string inside so the light bleeds through the thinned face and glows through the peeled areas. Wipe all cut surfaces with lemon juice or a water and vinegar mix to slow browning. Deep sculpted pumpkins discolor within hours, so photograph it the same day you finish, ideally near soft window light. Store it somewhere cool between showings to buy a little extra time.
Gather your supplies
Check things off as you get ready.
Work on a stable surface, keep your free hand out of the cutting path, and have an adult handle sharp tools.
Three levels of light
Leave intact
The outer pumpkin skin around the head stays untouched and dark as the background.
Peel & shade
The face, ears, and chest fur are peeled to different depths for a warm midtone glow, with the eyes thinned smooth to read brighter.
Cut through
No full cutouts are needed, but you can gently thin the inner wall behind the face so backlight bleeds through the fur.
No, this is a relief carving, so almost everything is shaved to depth rather than cut through. Keeping the wall intact is what lets you sculpt three-dimensional form and keeps the pumpkin structurally strong. You may thin the inner wall behind the face so a little light glows through, but avoid open holes.
How thick should I leave the front wall?
Aim for about an inch and a half before you start sculpting, since you will be carving depth into that thickness. The nose and muzzle should sit at the thickest, most forward point. Thin the eye areas a bit more so they glow, but stop before you break through.
How do I keep it from browning before I show it off?
Sculpted pumpkins expose a lot of flesh, so they brown fast. Wipe every cut surface with lemon juice or a water and vinegar mix right after carving, and store the pumpkin somewhere cool and out of direct sun. Realistically plan to display and photograph it the same day you finish.
Your take belongs here, too.
Changed a detail? Made it simpler? Share a photo of your version and tell the community what worked.
 AI
AI
Comments (0)