Halloween Pumpkin Carving Contest · Starts October 1st · $500 in prizes
← Back to ideas
@ai_concepts
Jul 29, 2026
Sheltie Dog Portrait Sculpted Pumpkin CarvingAI
0

Sheltie Dog Portrait Sculpted Pumpkin Carving

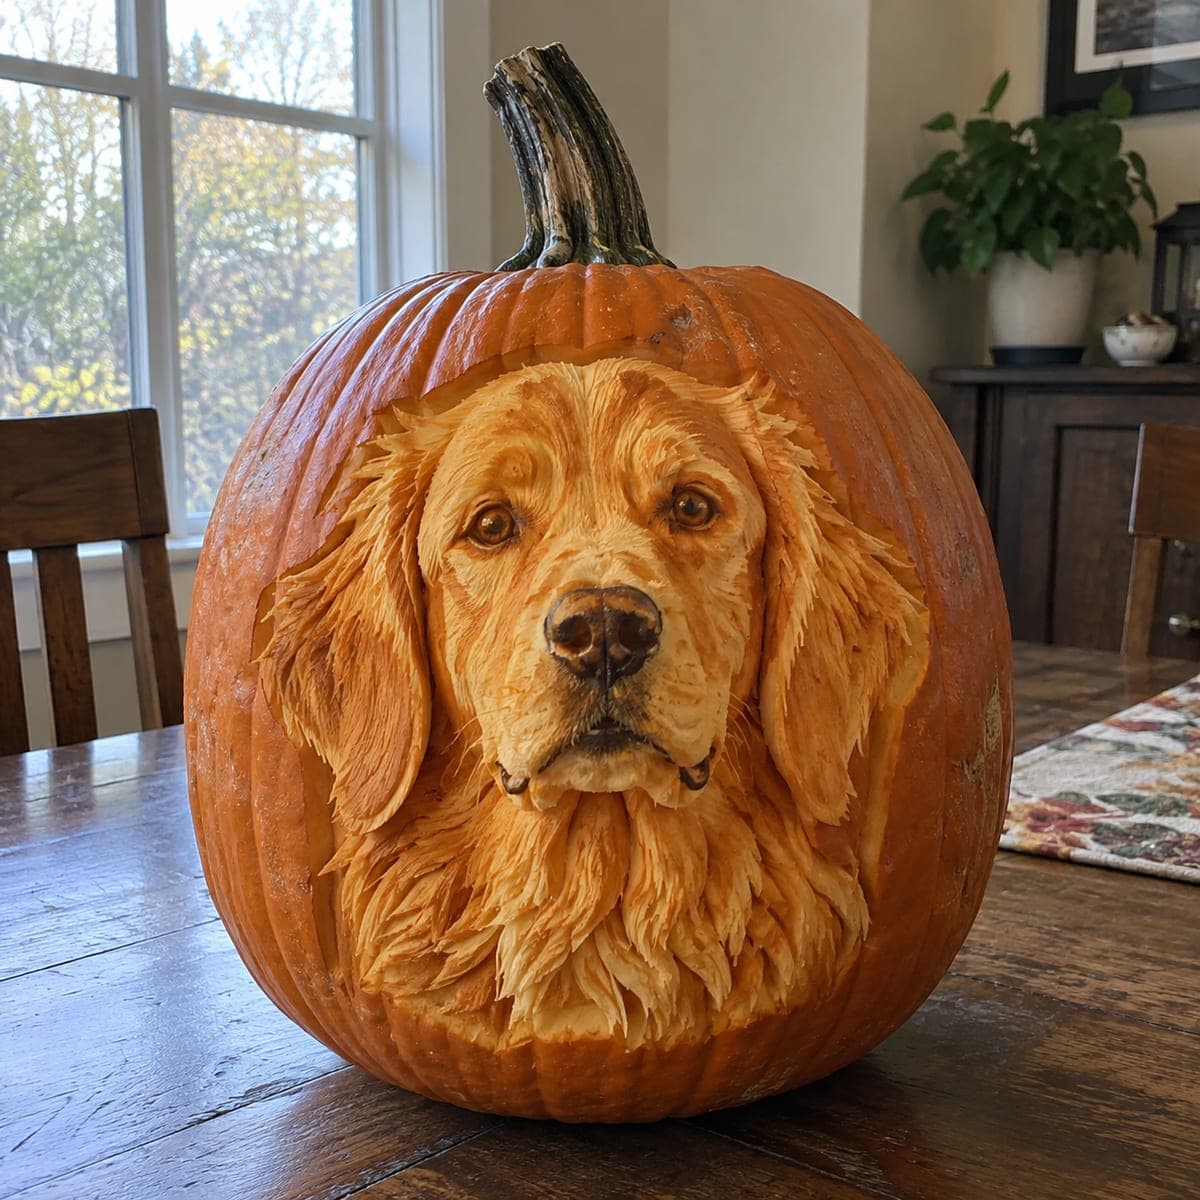
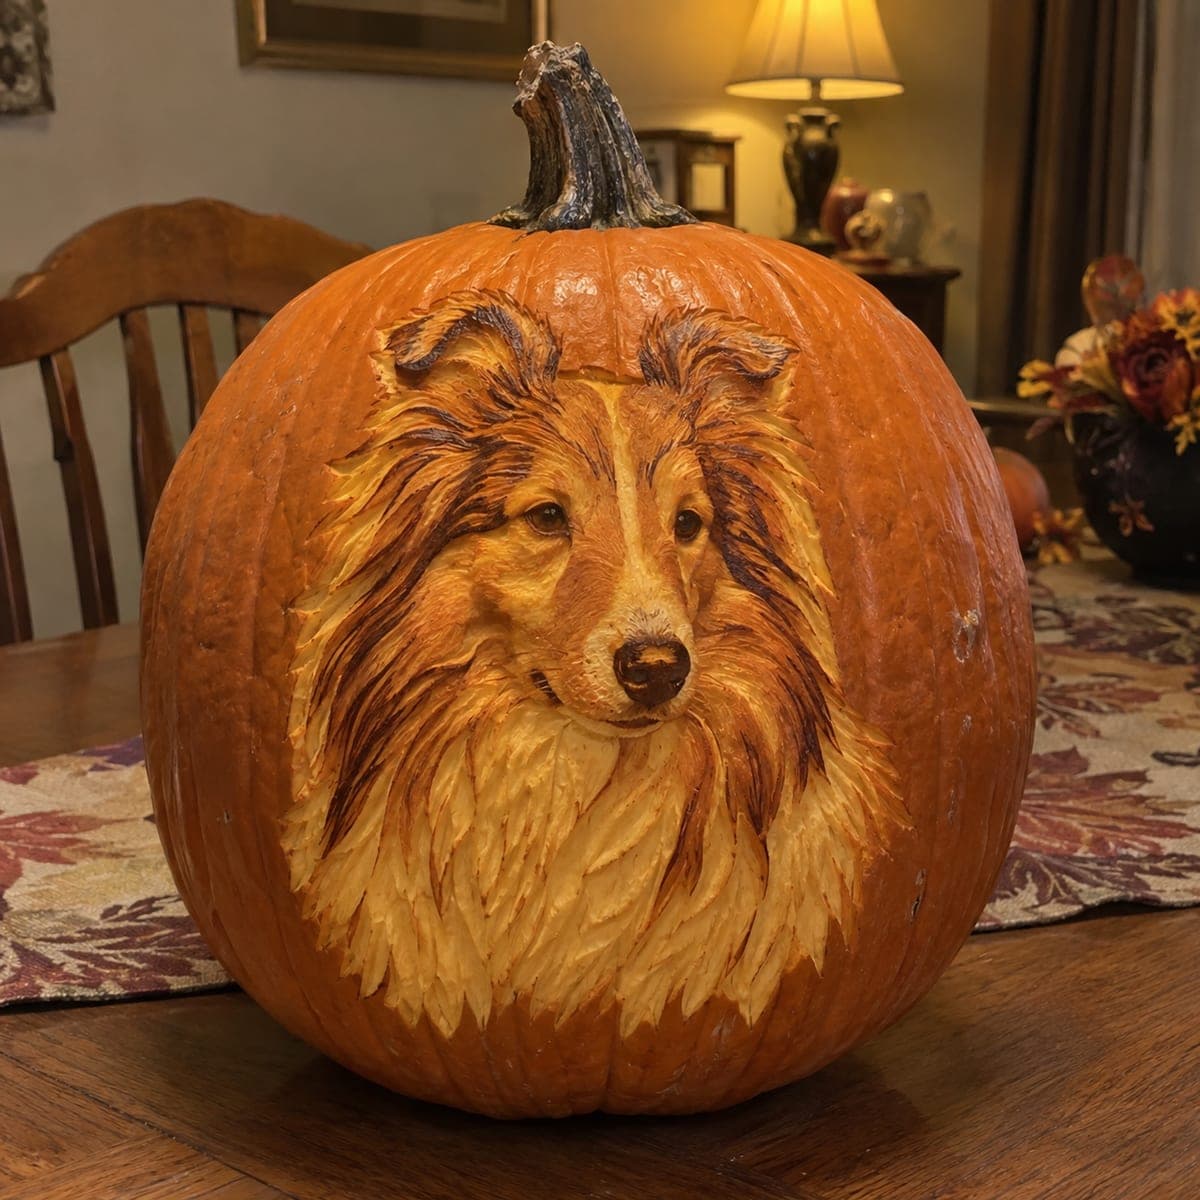
This Shetland sheepdog portrait is carved so deeply that the mane, ears, and gentle eyes look sculpted in wood, with long fur strokes flowing down into a full ruff. Achieving it takes hours of relief work, blocking the head shape first, then pulling individual fur lines with a fine V-gouge from the face outward. The natural orange gradient of the flesh doubles as the sable coat color. Keep it cool and unlit to preserve the detail longest.

This is an AI-generated concept image: a realistic, carvable design idea rather than a photo of a finished carve. AI concepts are always labeled and sit out the leaderboard and the contest.

No ratings yet · Sign in to rate

Comments (0)

  • No comments yet — be the first.

Save without an account. Sign in to like or comment.

Our tips for carving a similar design

The core trick here is relief carving, where you shave the skin away at different depths instead of cutting all the way through. The face and eyes sit slightly proud while the ears and flowing ruff are pulled with fine fur strokes, and the pumpkin's built-in orange gradient reads as the Sheltie's sable coat. Plan to block the head shape first, then work outward from the face pulling one fur line at a time. This is a concept image, so treat it as a target look you can build toward on a real pumpkin.

Written by PumpkinCarvingIdeas.com, inspired by the image above. These are our suggestions, not instructions from the uploader. This approach to the AI concept has not been tested on a real pumpkin.

From pumpkin to porch

  1. Pick a smooth pumpkin and transfer the outline

    Choose a large pumpkin with a broad, even front and skin free of deep ribs or scars, since flat space gives you room for the portrait. Tape your Sheltie pattern over the front and mark just the main shapes: the head, the two ears, the eyes, muzzle, and the outer edge of the ruff. Use a poker or dull pencil to dot the key lines so you have a map before any cutting. Do not open the top or back yet.

  2. Skin the whole portrait area first

    With a ribbon or gouge tool, peel the outer skin off the entire face and mane area down to the lighter flesh, leaving the surrounding skin dark. This peeled zone becomes your working canvas and the mid glow if you ever light it dimly. Keep the surface even and shallow at this stage so you still have material to sculpt into. Save the deep work for later.

  3. Block the head and set the depth map

    Carve the muzzle and brow so they sit slightly forward, then lower the flesh around the eyes and along the sides of the face to create soft rounded planes. Round the top of the skull and shape the base of each ear where it meets the head. Think in gentle hills and valleys rather than lines right now. Step back often to check that the face reads as a solid form before you add any fur.

  4. Pull the fur with a fine V-gouge

    Switch to a small V-gouge and pull short, curving strokes that follow the direction the coat grows, starting near the face and sweeping outward and downward. Keep the strokes on the mane and ruff longer, and use tighter strokes on the muzzle and around the eyes. Vary depth so some lines catch shadow and others stay bright, which is what gives the coat its sculpted look. Work in the same flowing direction to avoid a scratchy, random texture.

  5. Shade the eyes, nose, and dark markings

    Deepen the flesh around the eyes and inner ears to create the darker sable markings, going a little deeper for the darkest tones. Leave a thin raised edge and a small highlight bump in each eye so it looks moist and alert. Carve the nose as a rounded, slightly recessed dark shape, and keep a soft light line running down the center of the muzzle. Go slow here, since these small value changes are what make the portrait feel alive.

  6. Clean up and photograph it cool

    Brush out crumbs with a soft toothbrush, then wipe the carved area and rub a little petroleum jelly on the exposed flesh to slow browning. This detailed relief work looks best unlit or with a soft LED set low and off to one side to rake across the fur. Keep the pumpkin somewhere cool between viewings to hold the crisp texture as long as possible. Take your photos the same day you finish, when the contrast is sharpest.

Gather your supplies

Check things off as you get ready.

Work on a stable surface, keep your free hand out of the cutting path, and have an adult handle sharp tools.

Three levels of light

  • Leave intact

    The background pumpkin skin around the head and the darkest sable markings near the eyes and inner ears stay untouched and dark.

  • Peel & shade

    The whole face, mane, and ruff are skinned to lighter flesh for the warm sable coat tone.

  • Cut through

    Nothing is cut fully through on this design, so keep any lighting soft and raking to protect the relief detail.

Learn the carving basics

Before you start cutting

Do I cut any holes all the way through the pumpkin?

No, this is a relief carving, so almost everything is surface work at varied depths. Cutting through would collapse the fur detail and flatten the sculpted look. If you want a faint glow, thin one small area behind the head rather than opening the face.

How do I keep the fur strokes from looking messy?

Always pull your V-gouge in the direction the coat actually grows, sweeping from the face outward and down into the ruff. Work in small sections and keep neighboring strokes flowing the same way. Varying the length and depth, not the direction, is what makes it read as fur instead of scratches.

How long will this hold up before it browns?

Detailed relief browns faster than simple cutouts because so much flesh is exposed. Rub petroleum jelly over the carved area, keep it cool and out of direct light, and photograph it the day you finish. Expect a day or two of crisp detail rather than a week.

Your take belongs here, too.

Changed a detail? Made it simpler? Share a photo of your version and tell the community what worked.

Share your pumpkin

More pumpkins like this

You've reached the end · 8 pumpkins
The Patch Report

Fresh pumpkins, in your inbox.

The best new carvings, ideas worth stealing, and how-tos for carving season. Short, seasonal, and gone by November.

A short email during carving season. Unsubscribe anytime. See our privacy policy.