Halloween Pumpkin Carving Contest · Starts October 1st · $500 in prizes
← Back to ideas
@ai_concepts
Sep 25, 2026
Hard Healthcare Pumpkin Carving With AccentsAI
0

Report this carving

Tell us what is wrong. Reports are private.

Hard Healthcare Pumpkin Carving With Accents

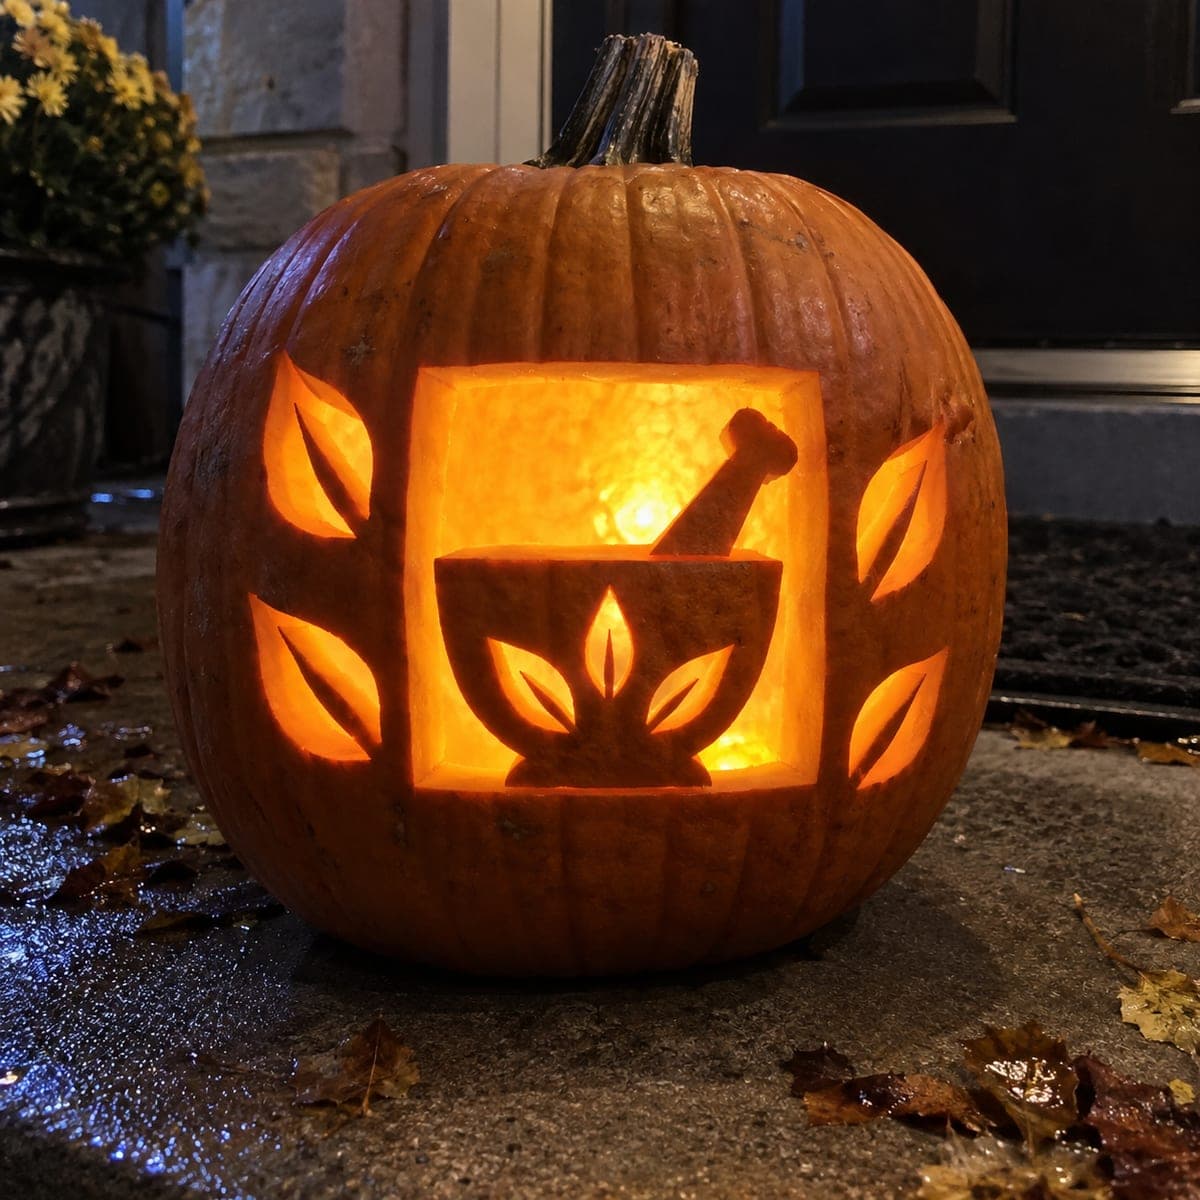
Detailed healthcare motifs with closely spaced retained rind and backed accent details make this a rewarding hard-level healthcare pumpkin carving idea for an experienced carver. Confirm every structural bridge is fat enough before removing surrounding negative space, as thin bridges can crack under the rind's natural tension. Backed shallow details are best added last with a linoleum gouge held nearly flat against the surface. The finished design glows with a rich layered warmth that looks impressive in any healthcare setting.

No ratings yet · Sign in to rate

Comments (0)

  • No comments yet — be the first.

Save without an account. Sign in to like or comment.

Our tips for carving a similar design

The hard difficulty here comes from healthcare motifs that sit close together, leaving narrow rind bridges that must be confirmed as structurally sound before any cut is made. The overall plan is to verify every bridge is at minimum three-quarters of an inch wide, cut all through-openings in outside-to-inside order, and then finish with a linoleum gouge held nearly flat for the backed accent layer. Slow and deliberate cutting protects the bridges; rushing is the main cause of breakage on designs at this level.

From pumpkin to porch

  1. Bridge width verification

    Print the pattern and measure every planned bridge with a ruler before transferring it to the pumpkin. Any bridge under three-quarters of an inch should be widened now, while adjustment is easy. Mark approved bridges with a green marker and flagged ones with red so you can adjust the pattern before committing.

  2. Gut and prepare

    Scoop the pumpkin interior to a consistent one-inch wall in the carving area. For areas planned for backed accents, leave the wall slightly thicker, around one and a quarter inches, so you have enough depth to carve without breakthrough risk. Wipe the outer surface dry before transferring the pattern.

  3. Transfer and mark retained areas

    Pin-tool the full pattern, then shade each retained rind island lightly with pencil on the pumpkin surface as a visual reminder not to cut those areas. Confirm the shaded islands each have at least two connection points to the outer shell. This step prevents the most common mistake at hard level: accidentally cutting into a retained piece.

  4. Cut outer openings first

    Begin with the outermost, widest apertures and progress inward. Work with a fine-toothed saw and rotate the pumpkin on the mat so the blade always faces the direction you are cutting rather than angling awkwardly. Pause after each cut to check all nearby bridges before proceeding.

  5. Cut inner and detail openings

    Progress to smaller interior openings with measured, deliberate strokes. For tight curves, a pointed craft knife scoring the line first, followed by the saw, gives cleaner results. Keep a craft glue pen nearby in case a narrow bridge develops a crack; address cracks immediately rather than continuing past them.

  6. Add backed accents with linoleum gouge

    Hold the linoleum gouge nearly parallel to the rind surface and make smooth, overlapping passes over the accent areas. The nearly flat angle keeps cuts shallow and consistent. After each accent area, hold a flashlight behind the pumpkin to check the glow; aim for a translucent amber appearance rather than a bright spot.

Written with AI to match this design

Gather your supplies

Check things off as you get ready.

Work on a stable surface, keep your free hand out of the cutting path, and have an adult handle sharp tools.

Three levels of light

  • Leave intact

    Outer shell and all narrow bridges between close-set motifs remain fully dark and form the design's structural silhouette.

  • Peel & shade

    Backed accent shapes carved nearly flat with the gouge glow warm amber between the fully cut openings.

  • Cut through

    Healthcare motif apertures cut fully through deliver the brightest light output in the layered design.

Learn the carving basics

Before you start cutting

What is the minimum bridge width I should accept before redesigning the pattern?

For a hard-level carving, three-quarters of an inch is the practical minimum for bridges of average length. Shorter bridges can be slightly narrower because they span less distance, but as a general rule do not go below half an inch anywhere. Bridges are always harder to preserve than they look on a flat pattern, because rind fibers run in all directions and can crack along grain lines unpredictably.

How do I carve tight healthcare motif curves without the saw binding?

Rather than forcing the saw through a tight curve, make a series of radial relief cuts from the interior of the opening outward to the curve line. These short relief cuts allow the blade to pivot freely when it reaches each one, letting you navigate the curve in small controlled arcs. Clean up any jagged edges with a craft knife after the piece falls free.

If a bridge cracks, is the pumpkin ruined?

Usually not. Apply craft glue or a dab of wood glue immediately into the crack and hold the bridge in place for one to two minutes. Once cured, the repair is strong enough to continue carving and survive the full display period. The crack line will be faintly visible as a dark seam when the pumpkin is lit, but this reads as a detail rather than an obvious flaw.

Your take belongs here, too.

Changed a detail? Made it simpler? Share a photo of your version and tell the community what worked.

Share your pumpkin

More pumpkins like this

You've reached the end · 8 pumpkins
The Patch Report

Fresh pumpkins, in your inbox.

The best new carvings, ideas worth stealing, and how-tos for carving season. Short, seasonal, and gone by November.

A short email during carving season. Unsubscribe anytime. See our privacy policy.