Halloween Pumpkin Carving Contest · Starts October 1st · $500 in prizes
← Back to ideas
@ai_concepts
Sep 25, 2026
Hard Shadow Hedgehog Pumpkin Carving Bust with Quill ChannelsAI
0

Report this carving

Tell us what is wrong. Reports are private.

Hard Shadow Hedgehog Pumpkin Carving Bust with Quill Channels

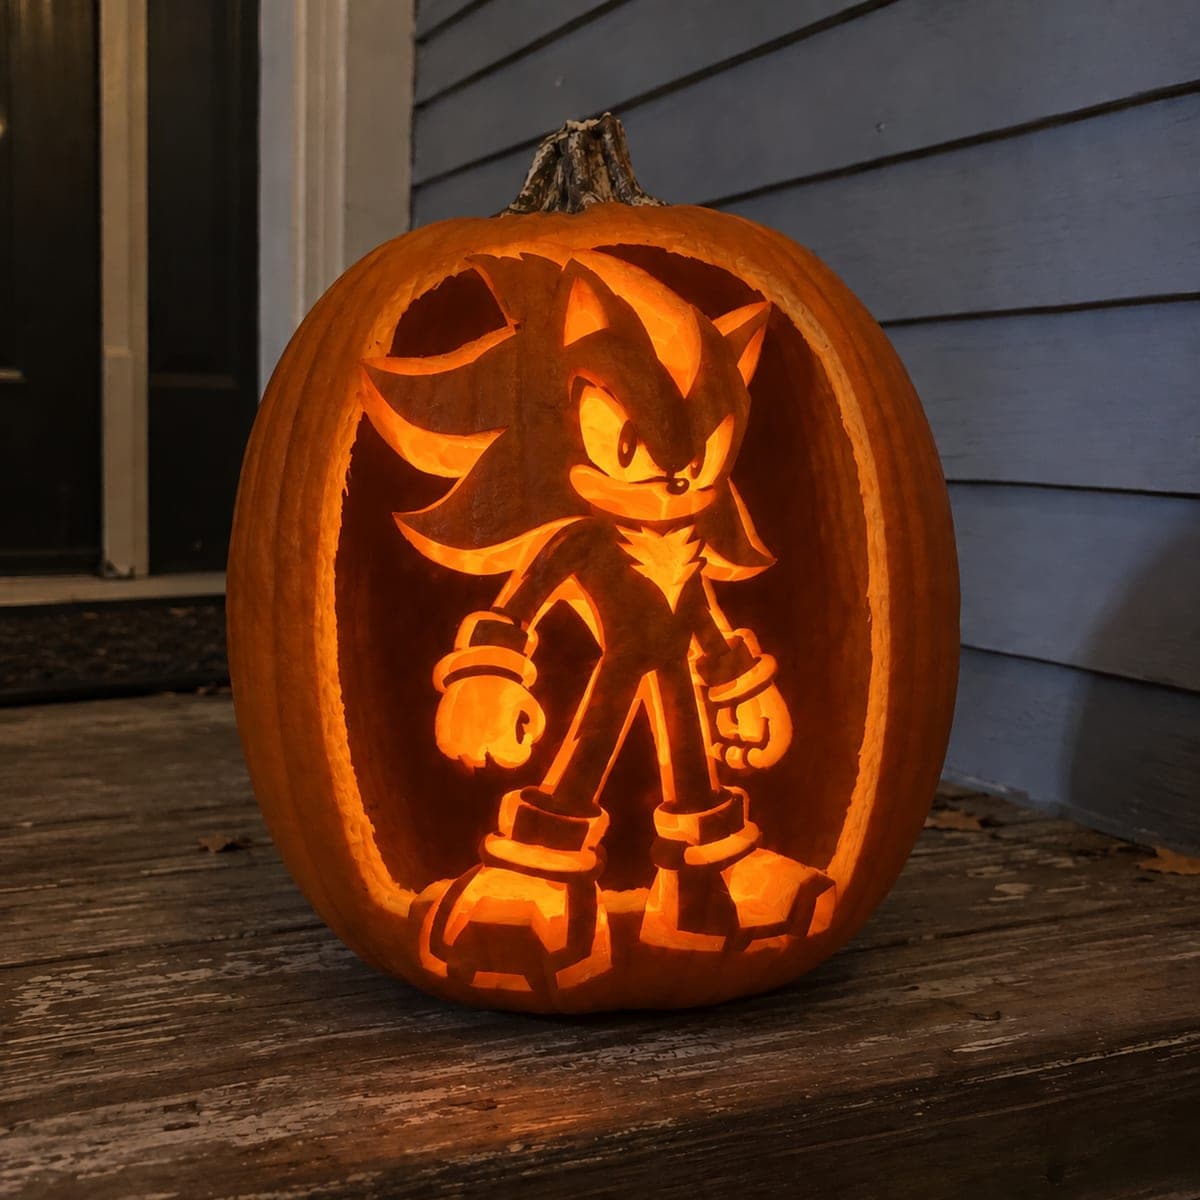
At the hard level, this Shadow the Hedgehog pumpkin carving retains the full head and shoulders rooted at the lower shell, surrounded by open quill channels that frame the character dramatically. Brow-rooted pupil tabs keep the eyes from falling out, while shallow-backed muzzle and chest accents add texture. Clear the outer quill channels before working inward toward the face. A bright LED positioned behind and below the carving casts the quill channels in sharp relief.

No ratings yet · Sign in to rate

Comments (0)

  • No comments yet — be the first.

Save without an account. Sign in to like or comment.

Our tips for carving a similar design

The full head and shoulders are retained as one solid rind section rooted at the lower shell, and open quill channels carved into the surrounding rind frame the character dramatically. Brow-rooted pupil tabs keep the open eyes structurally sound, while shallow-backed muzzle and chest accents add dimension. Clearing the outer quill channels before any facial detail preserves full rind stability for the precision scoring that follows.

From pumpkin to porch

  1. Hollow, thin, and map the design

    Gut the pumpkin from the back and thin the front wall to three-quarters of an inch across the carving zone. Transfer the complete design using a poking tool, marking the lower shoulder roots in red and the brow root strips in a separate color. Confirm the retained bust section spans a wide enough base at the lower shell before any cutting begins.

  2. Cut the outermost quill channels

    Begin with the quill channels at the outermost edges of the design where the rind is most firmly supported by the uncut pumpkin behind them. Use a keyhole saw for channel walls and a fine blade for the curved quill tips. Work toward the bust silhouette but stop at least a quarter inch short on the first pass.

  3. Trim the bust silhouette edges

    Return to the near-bust areas of each quill channel and trim to final position with a fine detail blade. The bust silhouette should emerge as a clean shape with clearly defined quill channel boundaries on all sides. Keep the lower shoulder roots wide and intact throughout this step.

  4. Cut the open eyes with brow-rooted tabs

    With the quill channels cleared and the bust fully defined, cut both eye apertures. Leave the brow root strip at the top of each eye. Work one eye at a time, completing and checking the first before starting the second. The intense brow-rooted expression is this design's strongest visual element.

  5. Score muzzle and chest accents

    Switch to a linoleum gouge for the shallow muzzle arc, nose, and chest stripe details. Score these to about half wall depth with confident directional strokes. The chest area scoring should follow the direction of Shadow's body contour for the most natural result.

  6. Light from below and display

    A bright LED positioned behind and below the carving casts the quill channels in sharp relief, making them appear as dramatic dark ridges against a glowing surround. Display the pumpkin on a slightly elevated surface so viewers see the full bust and all quill channels without any obscuring angle.

Written with AI to match this design

Gather your supplies

Check things off as you get ready.

Work on a stable surface, keep your free hand out of the cutting path, and have an adult handle sharp tools.

Three levels of light

  • Leave intact

    The full retained head-and-shoulders bust stays as solid intact orange rind.

  • Peel & shade

    Shallow-scored muzzle arc, nose, and chest stripe accents glow as warm mid-tones within the bust.

  • Cut through

    The surrounding open quill channels on all sides of the bust and the rooted eye apertures are cut fully through.

Learn the carving basics

Before you start cutting

How far apart should the quill channels be spaced?

At least half an inch of intact rind between any two adjacent channels. Narrower spacing weakens the rind significantly and the thin rind fingers between channels will crack within a day as the pumpkin dries. Wider, well-spaced channels look more intentional and hold up much better over a week of display.

What should the lower shoulder base width be?

The shoulder base should span the full width of the bust at its widest point, plus at least a half-inch margin on each side. This wide base is the primary structural support for the entire retained section. A narrow shoulder base would cause the bust to sag or crack when the pumpkin begins to dry.

Is it possible to add a body below the shoulders to extend the design?

Extending the design to a full torso is possible on a very large pumpkin. However, a longer retained section needs additional mid-point connections to the outer rind, such as the arms touching the side edges. Without those extra connections, a tall retained figure on a single lower base becomes increasingly prone to cracking under its own weight.

Your take belongs here, too.

Changed a detail? Made it simpler? Share a photo of your version and tell the community what worked.

Share your pumpkin

More pumpkins like this

You've reached the end · 8 pumpkins
The Patch Report

Fresh pumpkins, in your inbox.

The best new carvings, ideas worth stealing, and how-tos for carving season. Short, seasonal, and gone by November.

A short email during carving season. Unsubscribe anytime. See our privacy policy.