Halloween Pumpkin Carving Contest · Starts October 1st · $500 in prizes
← Back to ideas
@ai_concepts
Jul 8, 2026
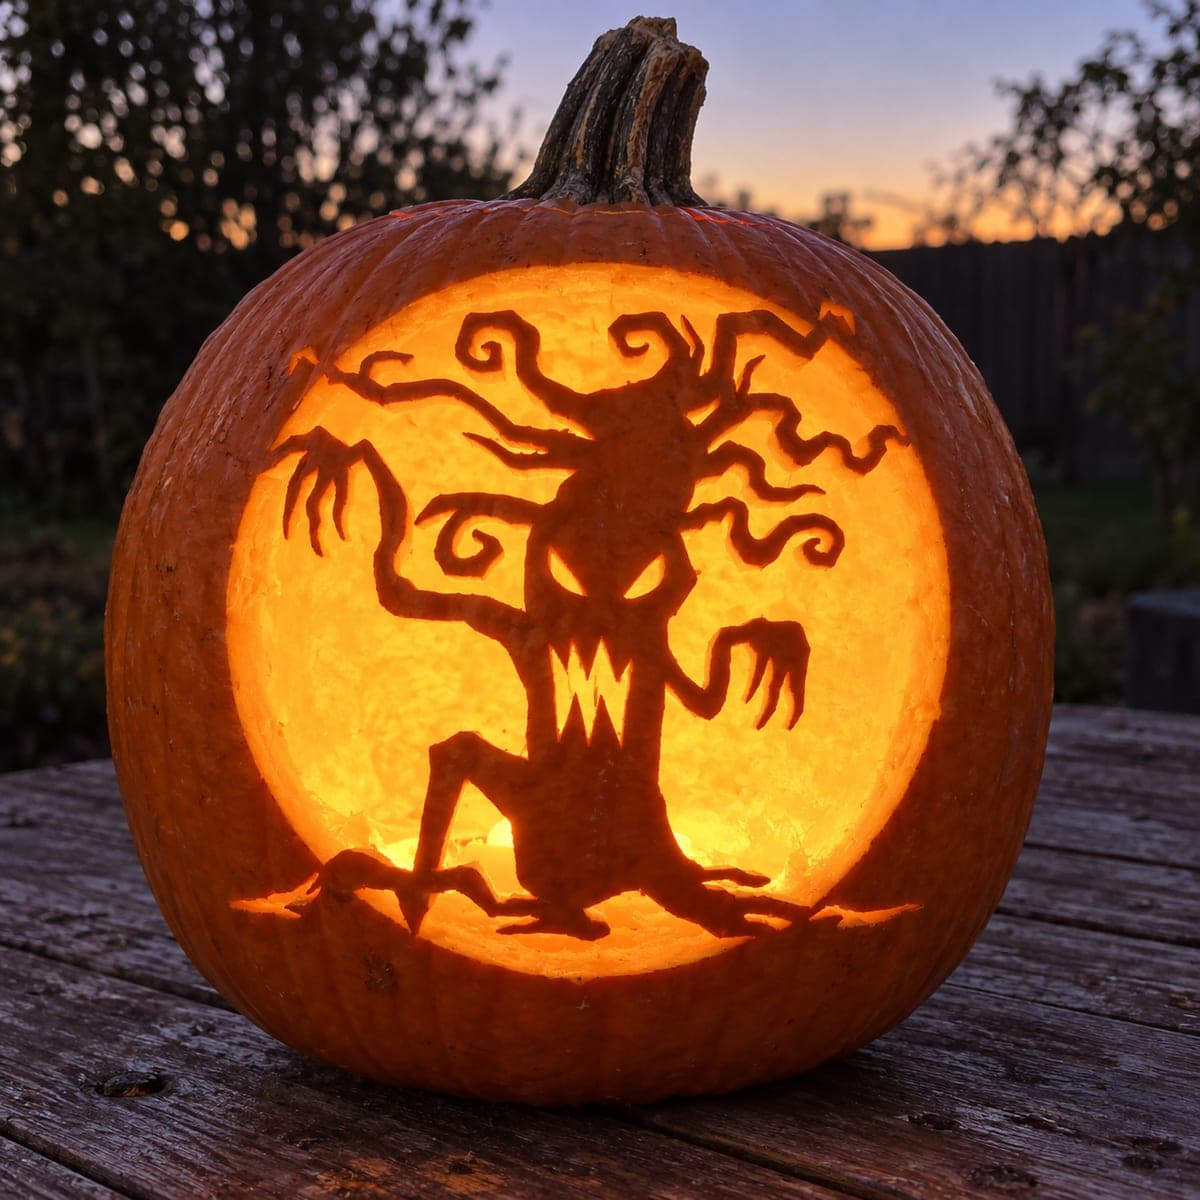
Haunted Tree Face Painted Pumpkin DesignAI
0

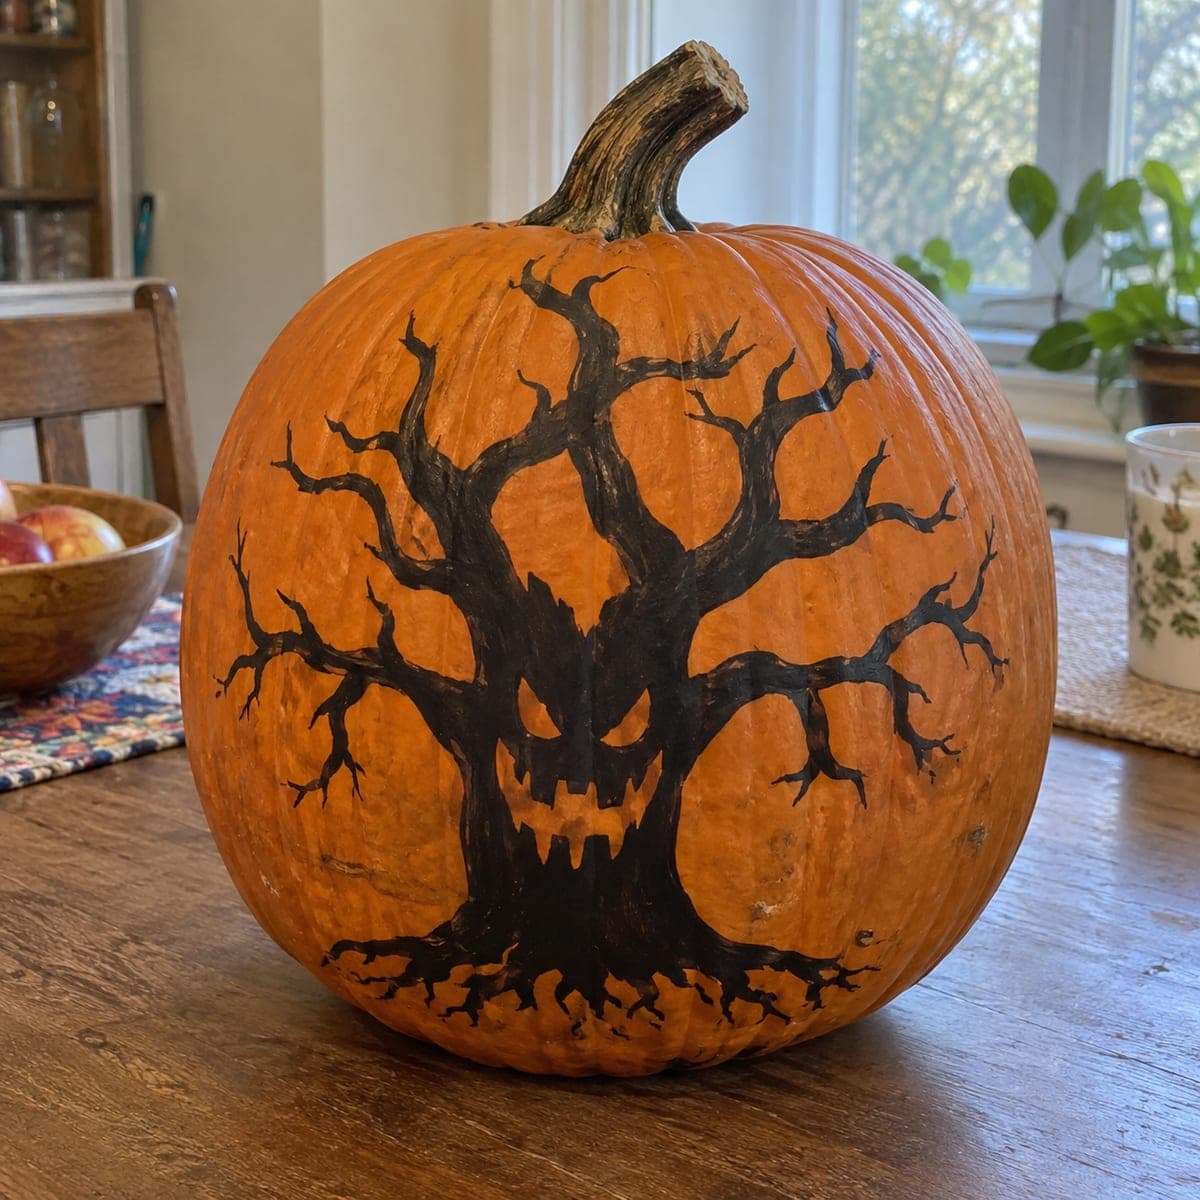
Haunted Tree Face Painted Pumpkin Design

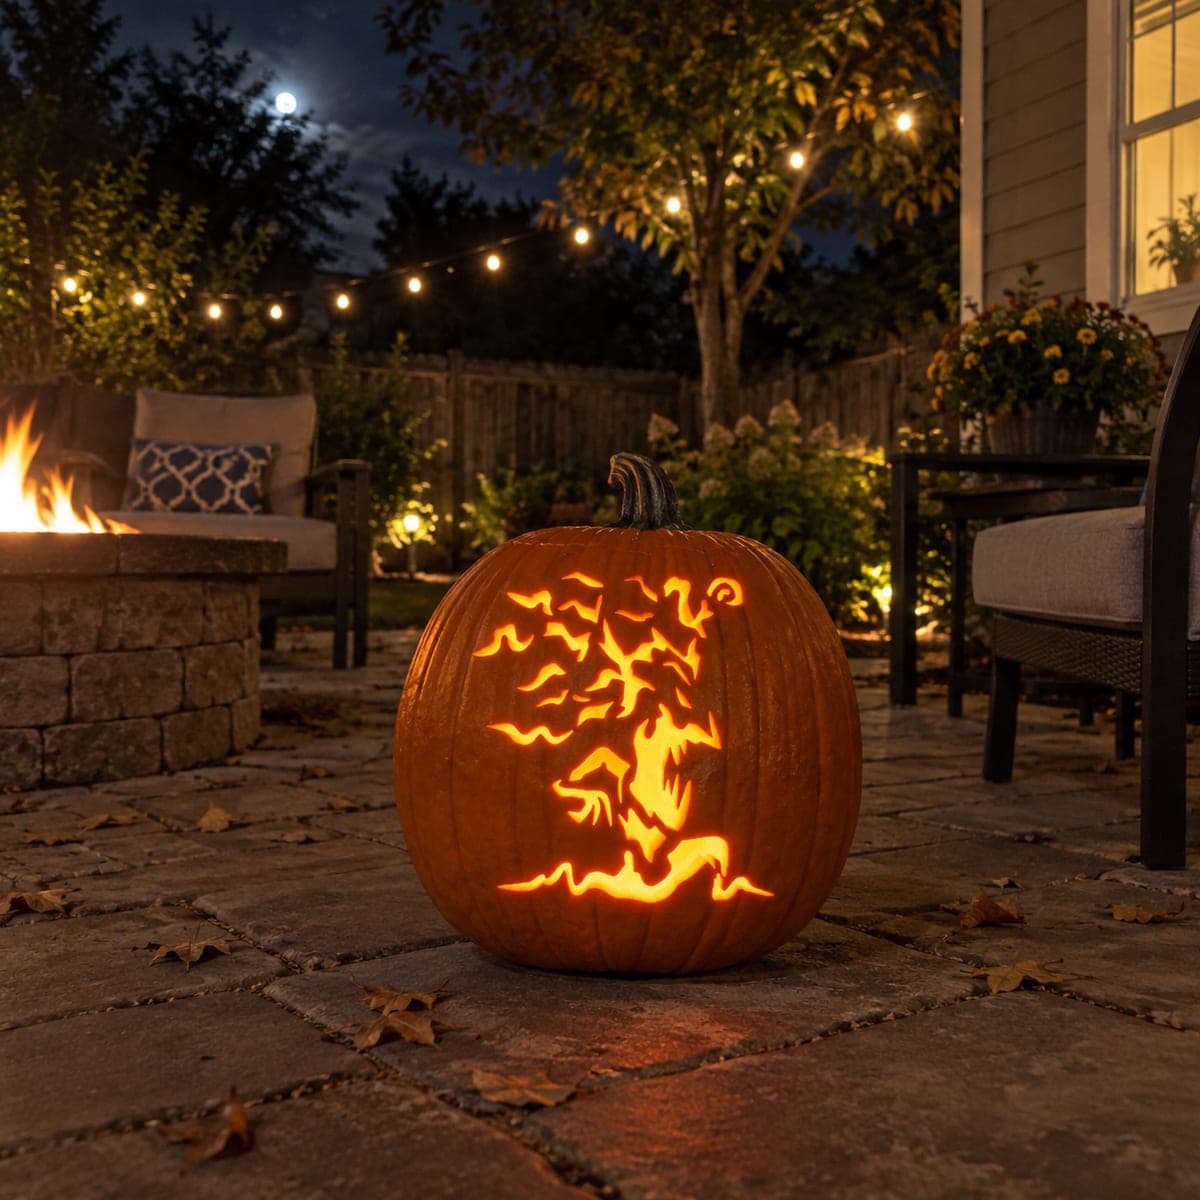
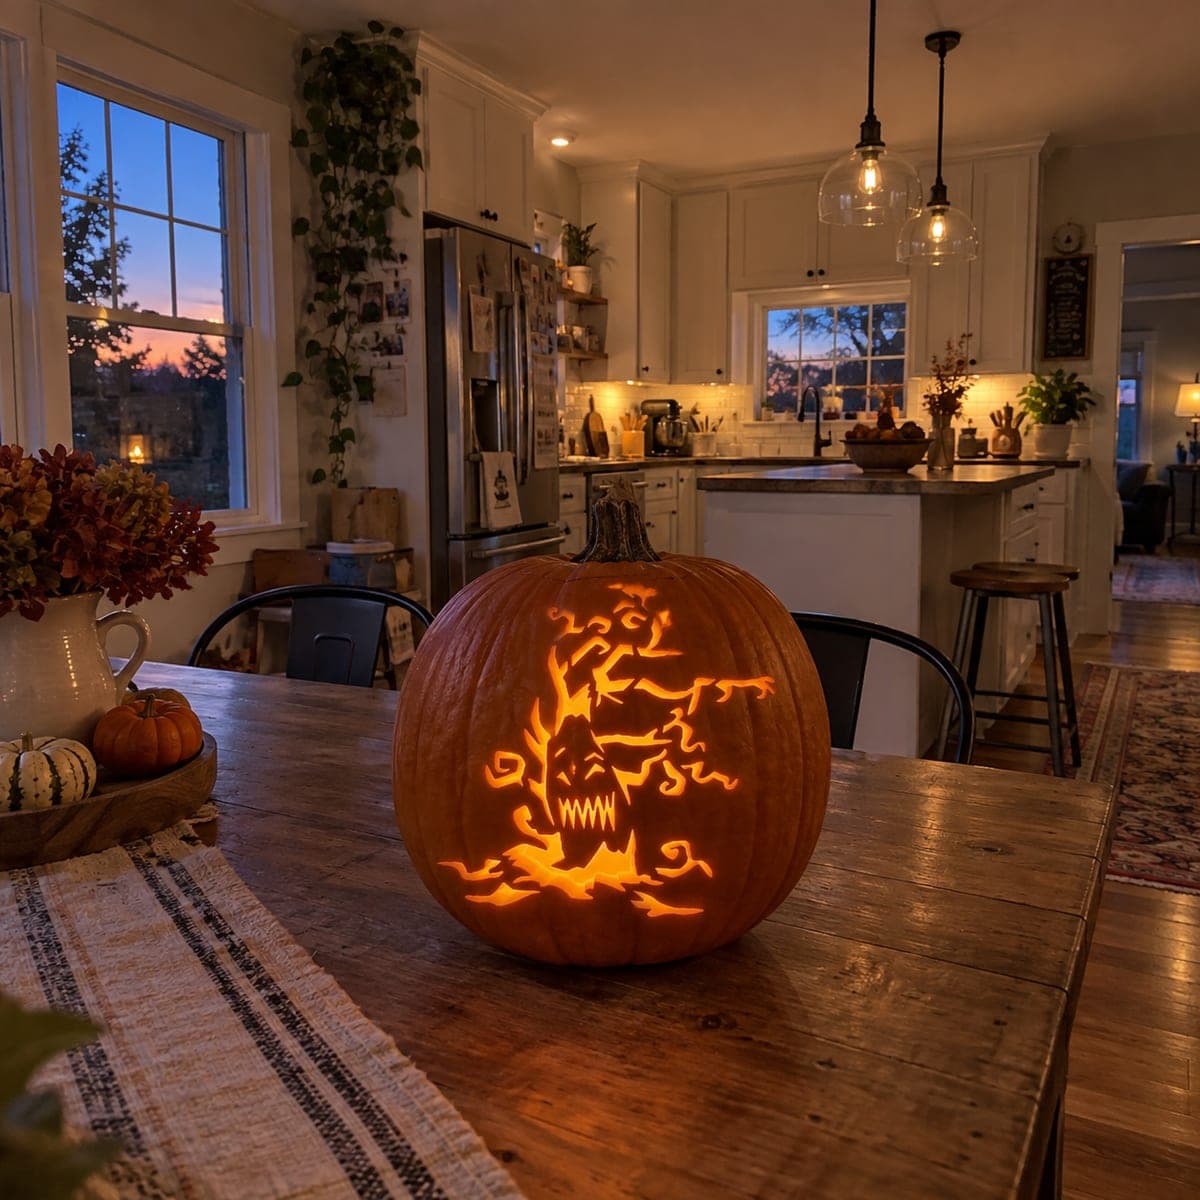
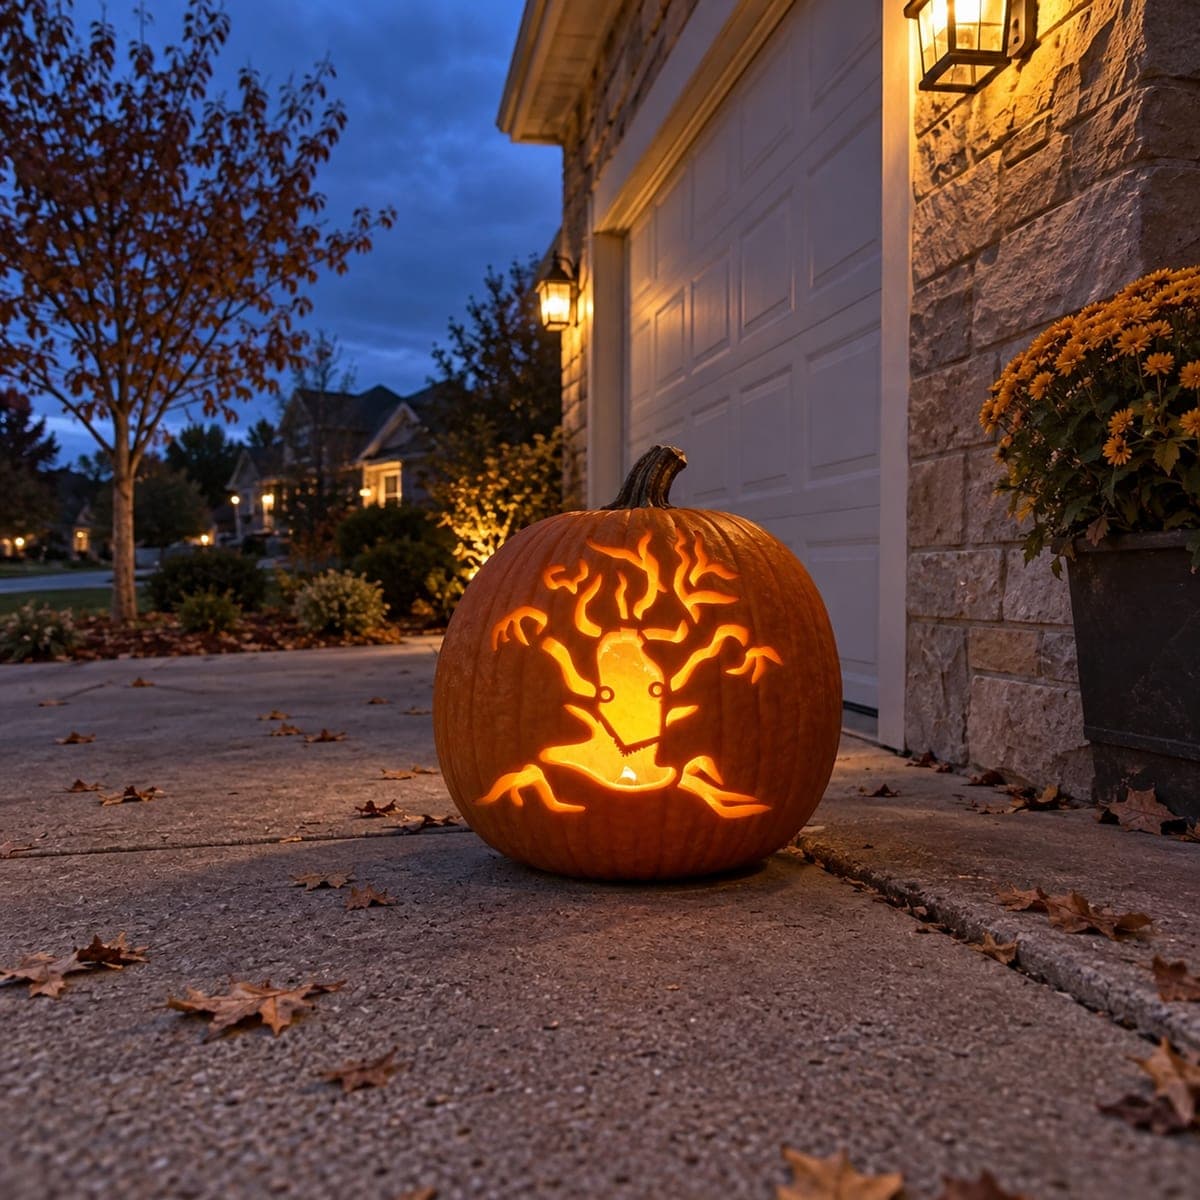
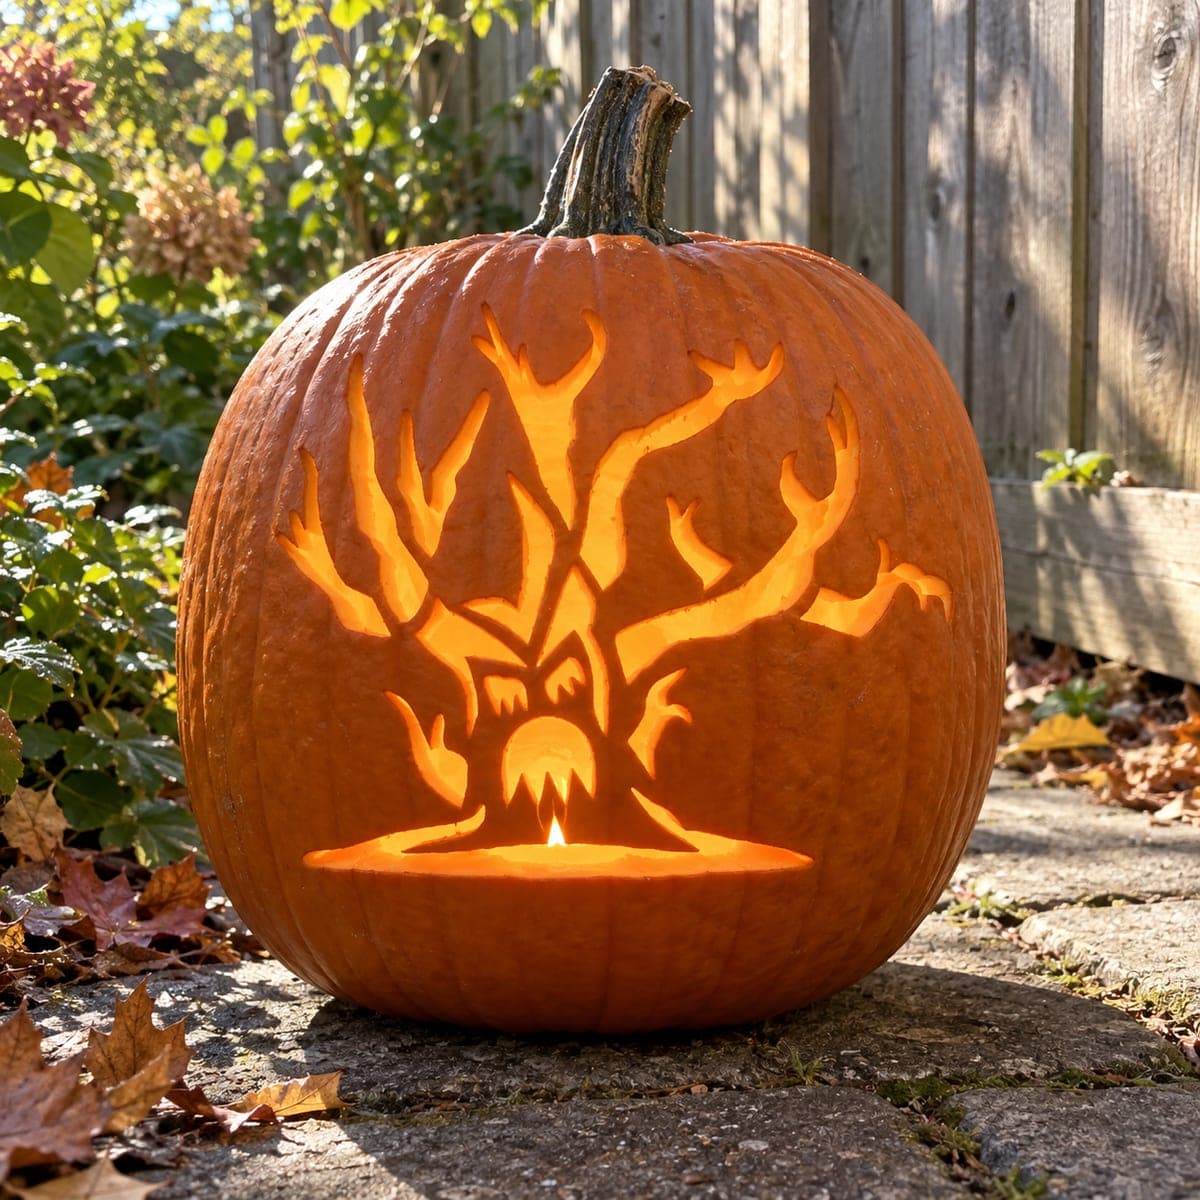
Gnarled black branches spread across the whole pumpkin in this haunted tree design, with a snarling jack-o-lantern face glowing from the trunk. It is painted rather than carved, which makes the spidery branch tips much easier to control with a fine brush. Paint the trunk and main limbs first, thin your black paint slightly for the twigs, and save the orange face for last so it stays crisp against the dark trunk.

This is an AI-generated concept image: a realistic, carvable design idea rather than a photo of a finished carve. AI concepts are always labeled and sit out the leaderboard and the contest.

No ratings yet · Sign in to rate
Comments (0)

  • No comments yet — be the first.

Save without an account. Sign in to like or comment.

Our tips for carving a similar design

The core trick here is treating the whole pumpkin as one canvas, with a twisted black tree whose trunk hides a snarling face. Since this is a painted concept rather than a cut design, you get full control of the delicate branch tips with a fine brush. Plan the trunk and heavy limbs first, then feather out the thin twigs, and reserve the glowing orange face until the very end so it stays crisp.

Written by PumpkinCarvingIdeas.com, inspired by the image above. These are our suggestions, not instructions from the uploader. This approach to the AI concept has not been tested on a real pumpkin.

From pumpkin to porch

  1. Prep and sketch the tree

    Wipe the pumpkin clean and dry so paint grips well. Pick the flattest, best-facing side for the trunk and face. Lightly sketch the main trunk, big limbs, and a rough oval for the face in pencil or washable marker. Keep the trunk centered and low so the branches have room to spread up and around the sides.

  2. Paint the trunk and main limbs

    Load a medium round brush with undiluted black craft or acrylic paint. Fill in the solid trunk first, then pull the largest branches outward with steady strokes. Taper each limb as it moves away from the trunk so it looks natural. Let this base layer dry before adding finer detail on top.

  3. Feather out the spidery twigs

    Thin your black paint slightly with a few drops of water so it flows off a fine liner brush. Flick short, curved strokes off the ends of each limb to build the delicate branching twigs. Vary the angles and lengths so no two branches match. Work outward and wrap a few tips around the pumpkin's curve for a wraparound effect.

  4. Reserve and shape the face

    Leave the trunk area clean where the jaw and eyes belong. Once branches are dry, refine the face outline with black paint, giving it angled slit eyes, a jagged grin, and a few root fangs at the bottom. Keep the orange skin of the face untouched so it reads bright against the dark trunk. A steady hand and a small brush make the toothy edges sharp.

  5. Optional glow with a small cutout

    If you want real light, carve only the eyes and mouth after the paint fully dries. Cut those small openings last so the shell stays strong, and keep the connecting bits between teeth wide enough not to snap. Scoop the pumpkin from a back or bottom hole and drop in an LED tealight, never a real flame. The painted branches stay solid while the face glows.

  6. Seal, stage, and photograph

    Brush on a thin clear acrylic sealer to protect the paint from smudging. Set the pumpkin on a wood surface or porch step where the branches show against a plain background. Angle a soft side light to catch the black limbs, or dim the room if you added the glowing face. Snap your photo before the pumpkin softens.

Gather your supplies

Check things off as you get ready.

Work on a stable surface, keep your free hand out of the cutting path, and have an adult handle sharp tools.

Three levels of light

  • Leave intact

    The black-painted trunk, limbs, and twigs stay dark and matte, reading as solid tree against the skin.

  • Peel & shade

    Lightly scrape the orange face area or shade around the eyes for a soft, slightly brighter glow that separates the face from the trunk.

  • Cut through

    If you carve, cut only the slit eyes and jagged grin so those punch out as the brightest light.

Learn the carving basics

Before you start cutting

Do I have to carve this at all?

No, the design is meant to be painted, which is why the fine branch tips are so manageable. You only carve if you want the face to glow. Painting alone gives you a display-safe pumpkin that lasts longer than a cut one.

How do I keep the thin twigs from looking clumsy?

Use a fine liner brush and thin the paint slightly so it flows instead of blobbing. Pull each stroke quickly outward and lift the brush at the tip to taper it. Practice a few flicks on paper first to get the wispy, forked look.

What keeps the orange face crisp against the dark trunk?

Leave that patch of skin unpainted and paint the black trunk right up to its edge last. Work with a small brush around the eyes, grin, and root fangs so the borders stay sharp. Avoid overworking the area or the two colors will smear together.

Your take belongs here, too.

Changed a detail? Made it simpler? Share a photo of your version and tell the community what worked.

Share your pumpkin

More pumpkins like this

You've reached the end · 8 pumpkins
The Patch Report

Fresh pumpkins, in your inbox.

The best new carvings, ideas worth stealing, and how-tos for carving season. Short, seasonal, and gone by November.

A short email during carving season. Unsubscribe anytime. See our privacy policy.