Halloween Pumpkin Carving Contest · Starts October 1st · $500 in prizes
← Back to ideas
@ai_concepts
Jul 7, 2026
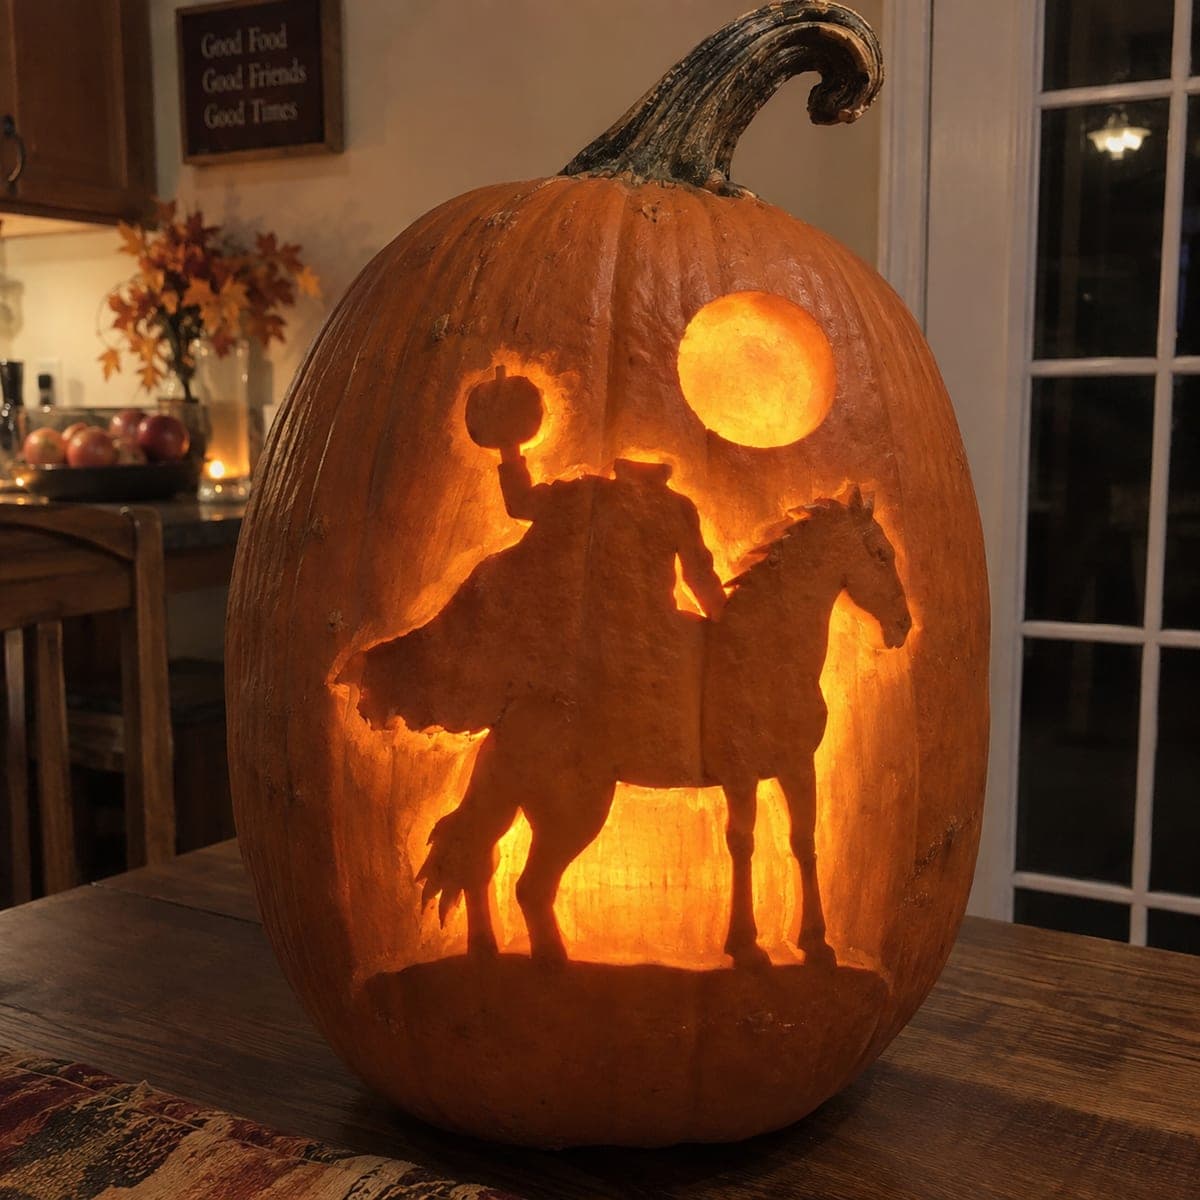
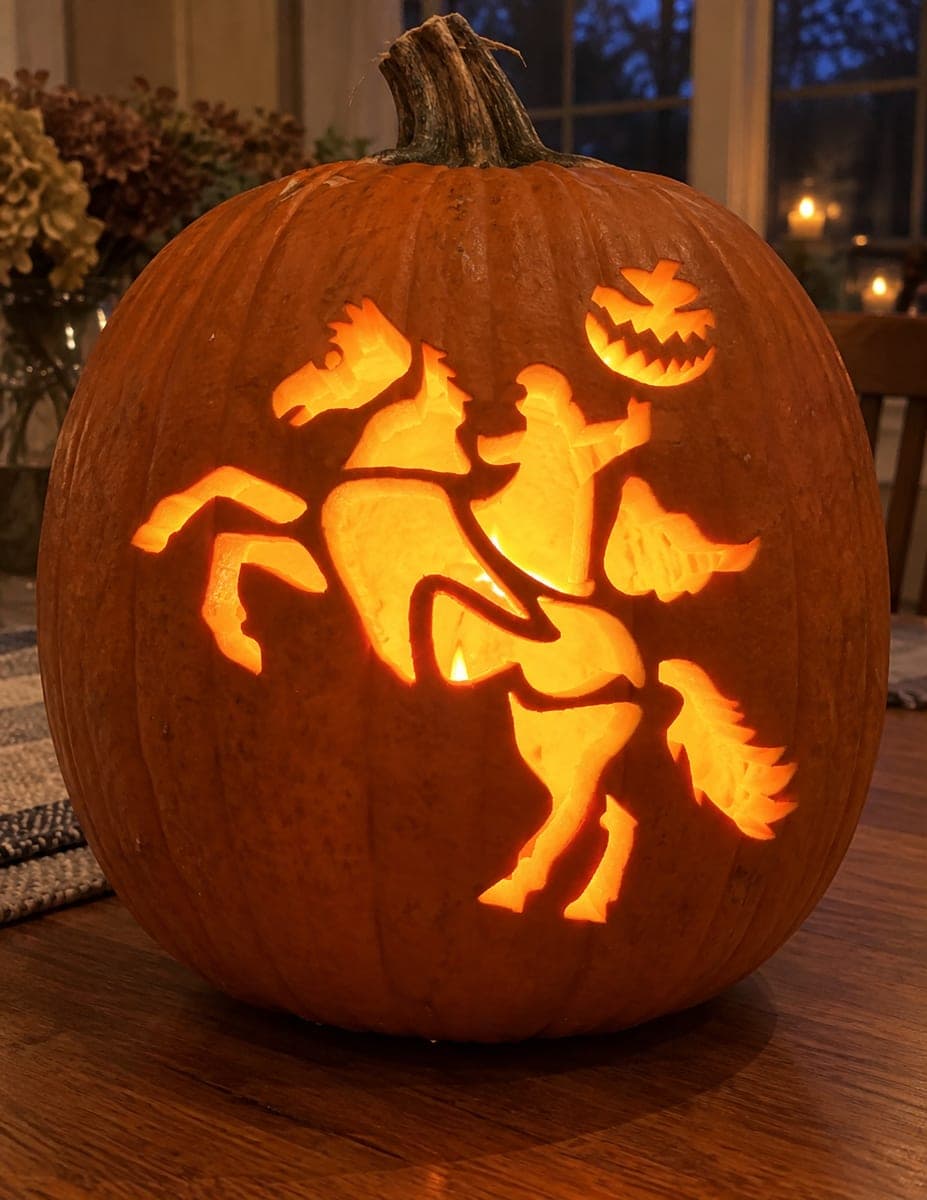
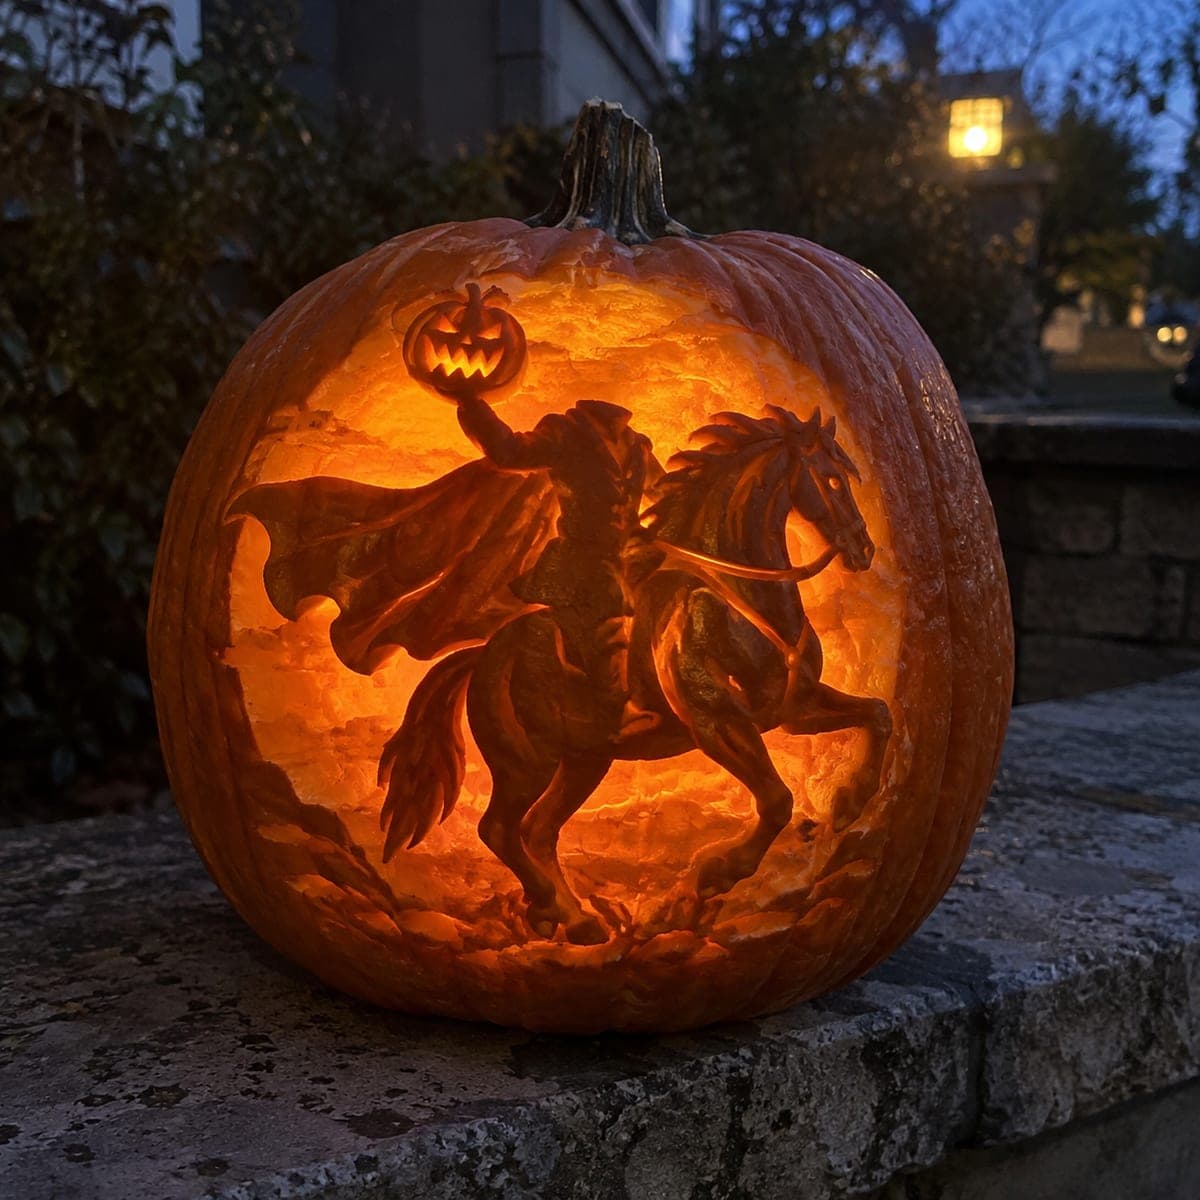
Headless Horseman Silhouette Pumpkin Under a Full MoonAI
0

Headless Horseman Silhouette Pumpkin Under a Full Moon

The Headless Horseman rides in dark silhouette across a glowing carved sky, jack-o-lantern raised high beneath a full moon. Everything behind the rider is etched thin so the figure stays in dramatic shadow, a classic Sleepy Hollow scene for the front window. Etch the entire sky panel to an even brightness first, carve the moon nearly through, and leave the horse and rider completely untouched for maximum contrast.

This is an AI-generated concept image: a realistic, carvable design idea rather than a photo of a finished carve. AI concepts are always labeled and sit out the leaderboard and the contest.

No ratings yet · Sign in to rate
Comments (0)

  • No comments yet — be the first.

Save without an account. Sign in to like or comment.

Our tips for carving a similar design

The whole trick here is reverse silhouette: the horse and rider stay as solid, untouched skin so they read as pure black shadow, while everything behind them is etched thin to glow. Plan the sky as one large panel of even shading, keep the moon as your one true cutout, and protect the figure at every step. Because this is a concept image, treat it as a target look you can build with a good stencil and patience.

Written by PumpkinCarvingIdeas.com, inspired by the image above. These are our suggestions, not instructions from the uploader. This approach to the AI concept has not been tested on a real pumpkin.

From pumpkin to porch

  1. Prep the pumpkin and cut the lid

    Pick a tall, smooth-fronted pumpkin so the sky panel has room to glow. Cut a lid from the bottom or back rather than the top so the stem stays intact for looks, and scoop the inside until the front wall is about one inch thick. Thinning the wall evenly is what lets the etched sky light up. Save the scooped pulp and wipe the inside dry.

  2. Transfer the stencil

    Tape your headless horseman and moon stencil flat against the front, easing out wrinkles so the horse legs and rider stay crisp. Poke the outlines with a transfer tool or pin, spacing dots close together on curves like the horse's neck and the raised jack-o-lantern. Peel the paper and connect the dots lightly with a marker if it helps you see the shapes. Double check that the figure outline is clear before any blade touches the skin.

  3. Outline and protect the figure

    Score the full outline of the horse and rider with a fine detail saw, just breaking the skin so you have a clean edge to shade up to. Do not touch the surface inside that outline at all. This solid skin is your shadow, and any scratch will let light leak and weaken the effect. Take your time around thin spots like the legs and the pumpkin the rider holds high.

  4. Etch the sky panel

    Using a shallow ribbon or lino tool, peel away just the top skin across the entire background, working right up to the figure edge. Aim for one even depth so the whole sky glows the same soft orange with no blotches. Sweep in one consistent direction to keep the texture smooth. Go slow near the horse and rider so you do not undercut the silhouette.

  5. Carve the moon last

    Save the moon for the end since it is your only full cutout and the biggest opening. Carve it nearly through, or all the way through if you want it brightest, keeping the circle clean with steady overlapping cuts. Cutting it last means the surrounding wall stays strong while you etch everything else. Clear the plug and smooth the inside edge.

  6. Light it and photograph

    Set one or two bright LED lights inside and spread them so the sky panel lights evenly. Test in a dark room and add a small piece of foil behind the light to bounce more glow toward dim corners. The horse and rider should stay black while the sky and moon carry the light. Shoot your photo straight on in the dark for that classic legend look.

Gather your supplies

Check things off as you get ready.

Work on a stable surface, keep your free hand out of the cutting path, and have an adult handle sharp tools.

Three levels of light

  • Leave intact

    The horse, the rider, his raised jack-o-lantern, and the cape stay as untouched skin for solid black shadow.

  • Peel & shade

    The entire sky behind the figure gets skin-peeled to an even mid glow.

  • Cut through

    The full moon is carved nearly or fully through for the brightest spot in the scene.

Learn the carving basics

Before you start cutting

How do I keep the sky glowing evenly instead of blotchy?

Etch the whole background to one consistent depth with a ribbon tool, sweeping in the same direction. Uneven pressure leaves dark and bright patches, so check it against a light as you go. Thinning the wall to about one inch first makes the even glow much easier.

The horse legs and the raised pumpkin look fragile. How do I protect them?

Those thin shapes are untouched skin, not cutouts, so they are actually stronger than they look. The key is to never etch into them and to score their edges carefully with a fine saw. If a stencil bridge crosses a leg, keep it in place so the shape does not get undercut.

Should the moon be cut all the way through or just thinned?

Either works. Cutting fully through gives the brightest, sharpest disc, while leaving a thin skin softens it into a hazy full moon. Carve it last so the wall stays sturdy while you etch the rest, and test both looks with your LED before deciding.

Your take belongs here, too.

Changed a detail? Made it simpler? Share a photo of your version and tell the community what worked.

Share your pumpkin

More pumpkins like this

You've reached the end · 8 pumpkins
The Patch Report

Fresh pumpkins, in your inbox.

The best new carvings, ideas worth stealing, and how-tos for carving season. Short, seasonal, and gone by November.

A short email during carving season. Unsubscribe anytime. See our privacy policy.