Halloween Pumpkin Carving Contest · Starts October 1st · $500 in prizes
← Back to ideas
@ai_concepts
Aug 20, 2026
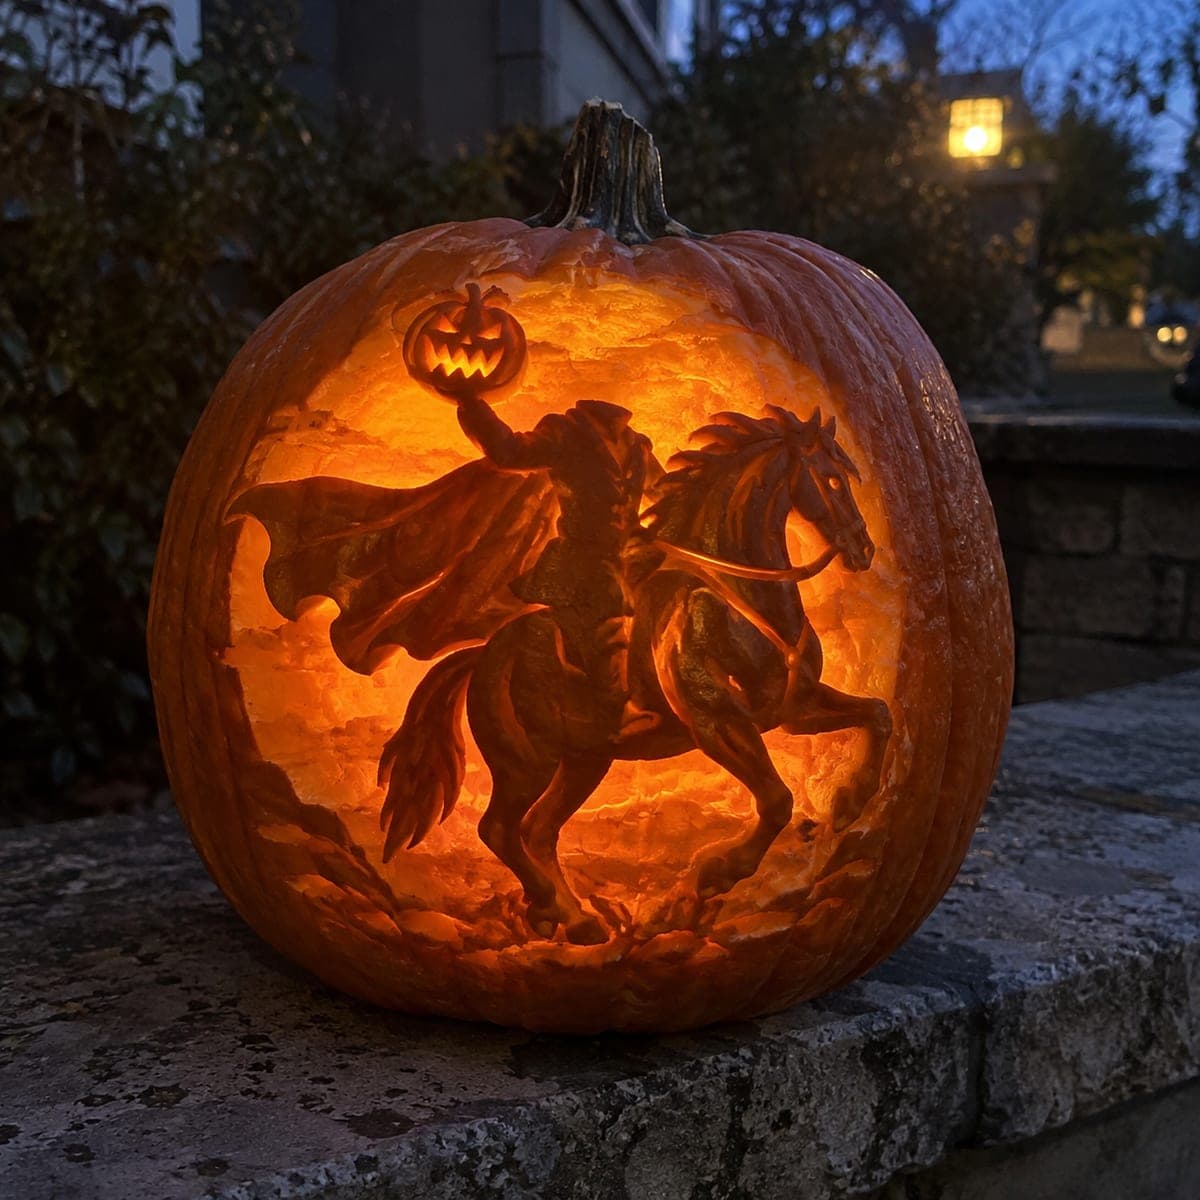
Headless Horseman Riding at Dusk Pumpkin SceneAI
0

Headless Horseman Riding at Dusk Pumpkin Scene

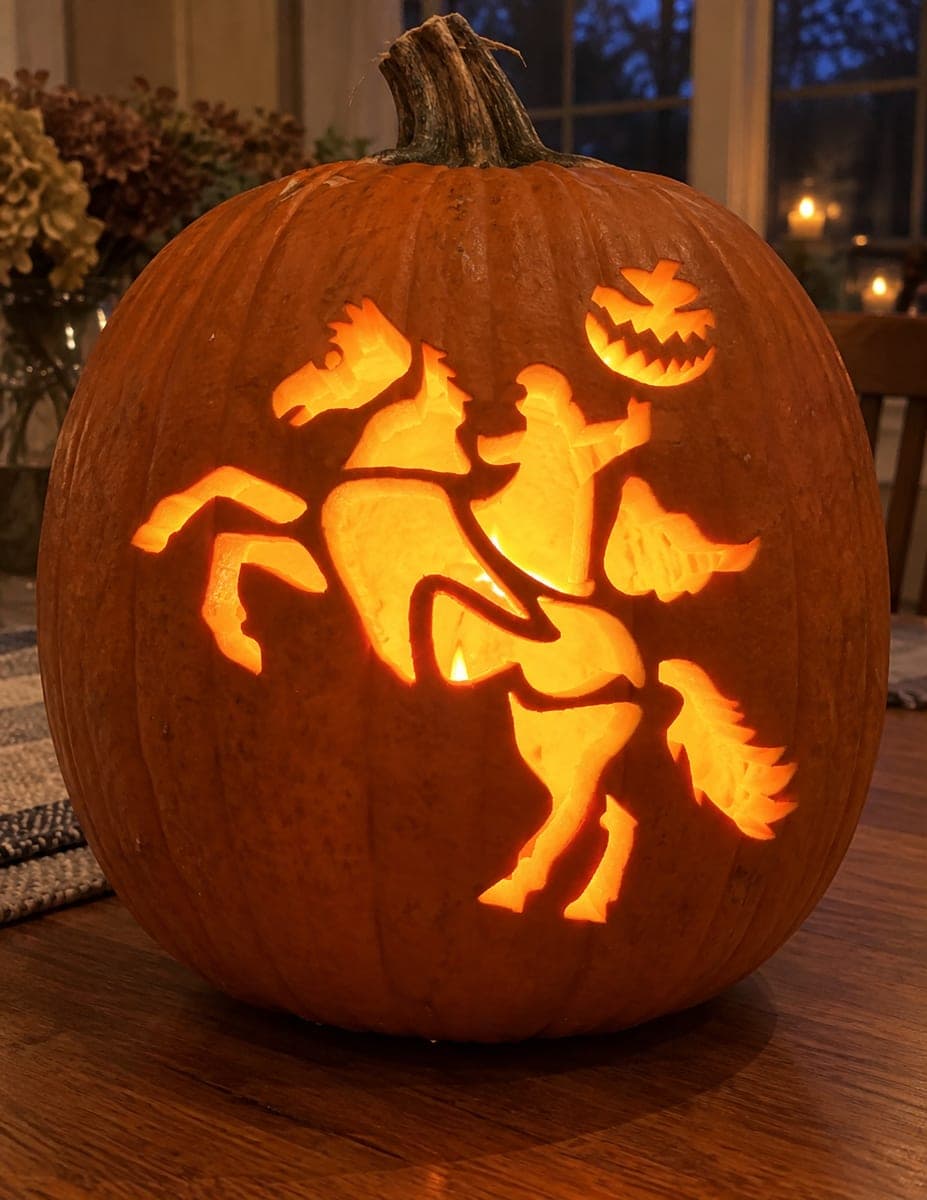
The Headless Horseman gallops across this glowing panel, cape streaming behind him as he raises a tiny jack-o-lantern head above a rearing horse. It is an ambitious etched scene where the sky is shaved thinnest for brightness and the horse and rider keep more flesh for shadow. Transfer a printed pattern with a pounce wheel and carve the sky background before detailing the figure.

This is an AI-generated concept image: a realistic, carvable design idea rather than a photo of a finished carve. AI concepts are always labeled and sit out the leaderboard and the contest.

No ratings yet · Sign in to rate
Comments (0)

  • No comments yet — be the first.

Save without an account. Sign in to like or comment.

Our tips for carving a similar design

The core trick here is depth through contrast: the sky is shaved to the thinnest skin so it blazes bright, while the horse and rider stay nearly full thickness to read as dark shadow. You are essentially carving a glowing background around a solid figure rather than cutting the figure itself. Plan your shading in three tones before you touch a blade so the horse pops against the light.

Written by PumpkinCarvingIdeas.com, inspired by the image above. These are our suggestions, not instructions from the uploader. This approach to the AI concept has not been tested on a real pumpkin.

From pumpkin to porch

  1. Prep and hollow the pumpkin

    Pick a tall pumpkin with a wide, smooth front panel and few ribs. Cut a lid from the bottom or back so the front stays uninterrupted, then scoop the wall behind your design down to about one inch. A thinner wall makes shaving and etching far easier later. Let an adult handle all the cutting tools.

  2. Transfer the pattern

    Print the horseman scene sized to fit your panel and tape it flat, smoothing out wrinkles. Trace every line with a pounce wheel or poke closely spaced holes along the outlines. Peel the paper and rub a little flour or cornstarch over the dots so the design shows clearly. Double check that the horse, rider, cape, and tiny jack-o-lantern are all mapped.

  3. Shave the bright sky first

    Using a ribbon or gouge tool, scrape away only the outer skin across all the sky areas around the figure. Go slowly and keep the depth even so the glow reads as one smooth field. Work from the center outward and stop before you break through, since the goal is a bright translucent wall, not an opening. This is the largest area, so pace yourself.

  4. Detail the figure with mid tones

    Leave the horse and rider mostly full thickness for the darkest shadow. Lightly peel select edges, the cape folds, the mane, and muscle lines to suggest form with a dim orange glow. Keep the reins and thin cape wisps attached to surrounding flesh so nothing snaps off. Take your time here, as these small shading choices give the scene its motion.

  5. Carve the tiny jack-o-lantern last

    The little raised pumpkin head is the one spot that should punch through fully. Cut its small triangle eyes and grinning mouth all the way through so they read as the brightest points in the whole scene. Save these true cutouts for the end because open holes weaken the wall. Steady your hand and use a small detail blade.

  6. Light it and photograph at dusk

    Drop in a bright LED puck or two, never a candle, since steady electric light shows the shading best. Set the pumpkin at eye level and dim the surroundings. Shoot in the blue evening light so the warm glow contrasts with the cool sky. Rotate the light to find the angle where the horse reads darkest.

Gather your supplies

Check things off as you get ready.

Work on a stable surface, keep your free hand out of the cutting path, and have an adult handle sharp tools.

Three levels of light

  • Leave intact

    The horse body and rider torso stay untouched for the darkest silhouette.

  • Peel & shade

    The sky field, cape folds, mane, and muscle lines are shaved to skin for a soft mid glow.

  • Cut through

    Only the tiny jack-o-lantern's eyes and mouth are cut through for the brightest points.

Learn the carving basics

Before you start cutting

How do I keep the thin cape and reins from breaking?

Do not cut all the way through these thin shapes. Instead shave them at the skin level so they glow softly while staying backed by full pumpkin wall. Where a rein crosses open sky, leave small bridges of flesh to hold everything together.

Why shave the sky instead of cutting it out?

Cutting the whole sky away would leave the horse floating with no support and let harsh light wash out the details. Shaving to a thin translucent wall gives you an even bright field while keeping the pumpkin structurally sound. It also lets the horse read as a crisp dark shape against the glow.

This looks like a concept image, can a real pumpkin do this?

Yes, the scene is achievable but it is an expert etched project that takes hours. Focus on consistent shaving depth for the sky and restrained shading on the figure. Keep the only true cutouts small, like the tiny lantern face, so the wall stays strong.

Your take belongs here, too.

Changed a detail? Made it simpler? Share a photo of your version and tell the community what worked.

Share your pumpkin

More pumpkins like this

You've reached the end · 8 pumpkins
The Patch Report

Fresh pumpkins, in your inbox.

The best new carvings, ideas worth stealing, and how-tos for carving season. Short, seasonal, and gone by November.

A short email during carving season. Unsubscribe anytime. See our privacy policy.