Halloween Pumpkin Carving Contest · Starts October 1st · $500 in prizes
← Back to ideas
@ai_concepts
Jul 10, 2026
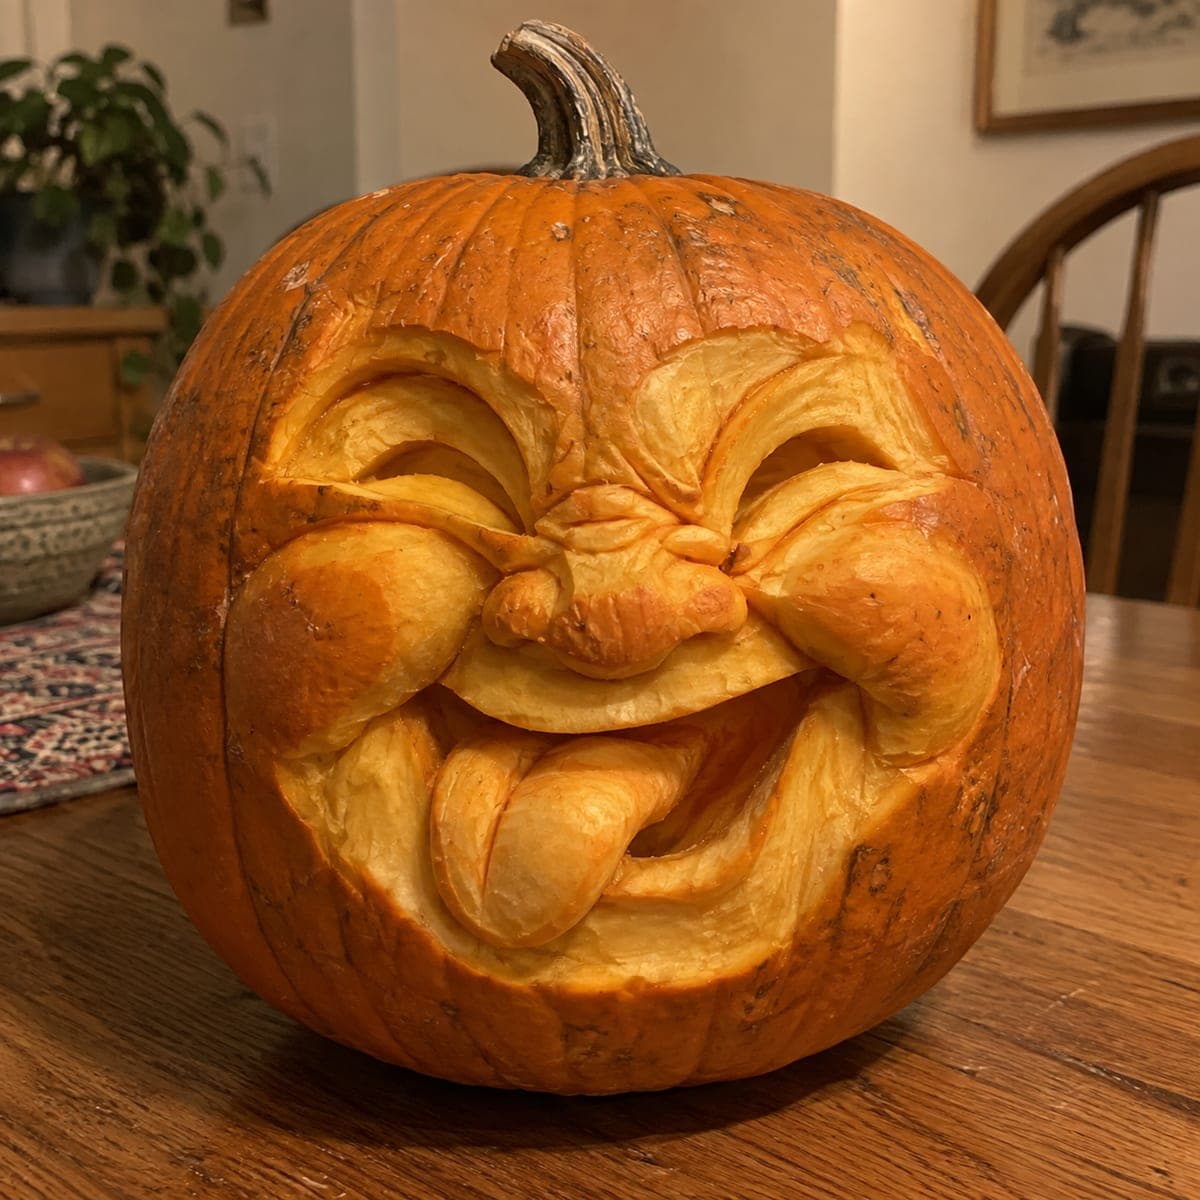
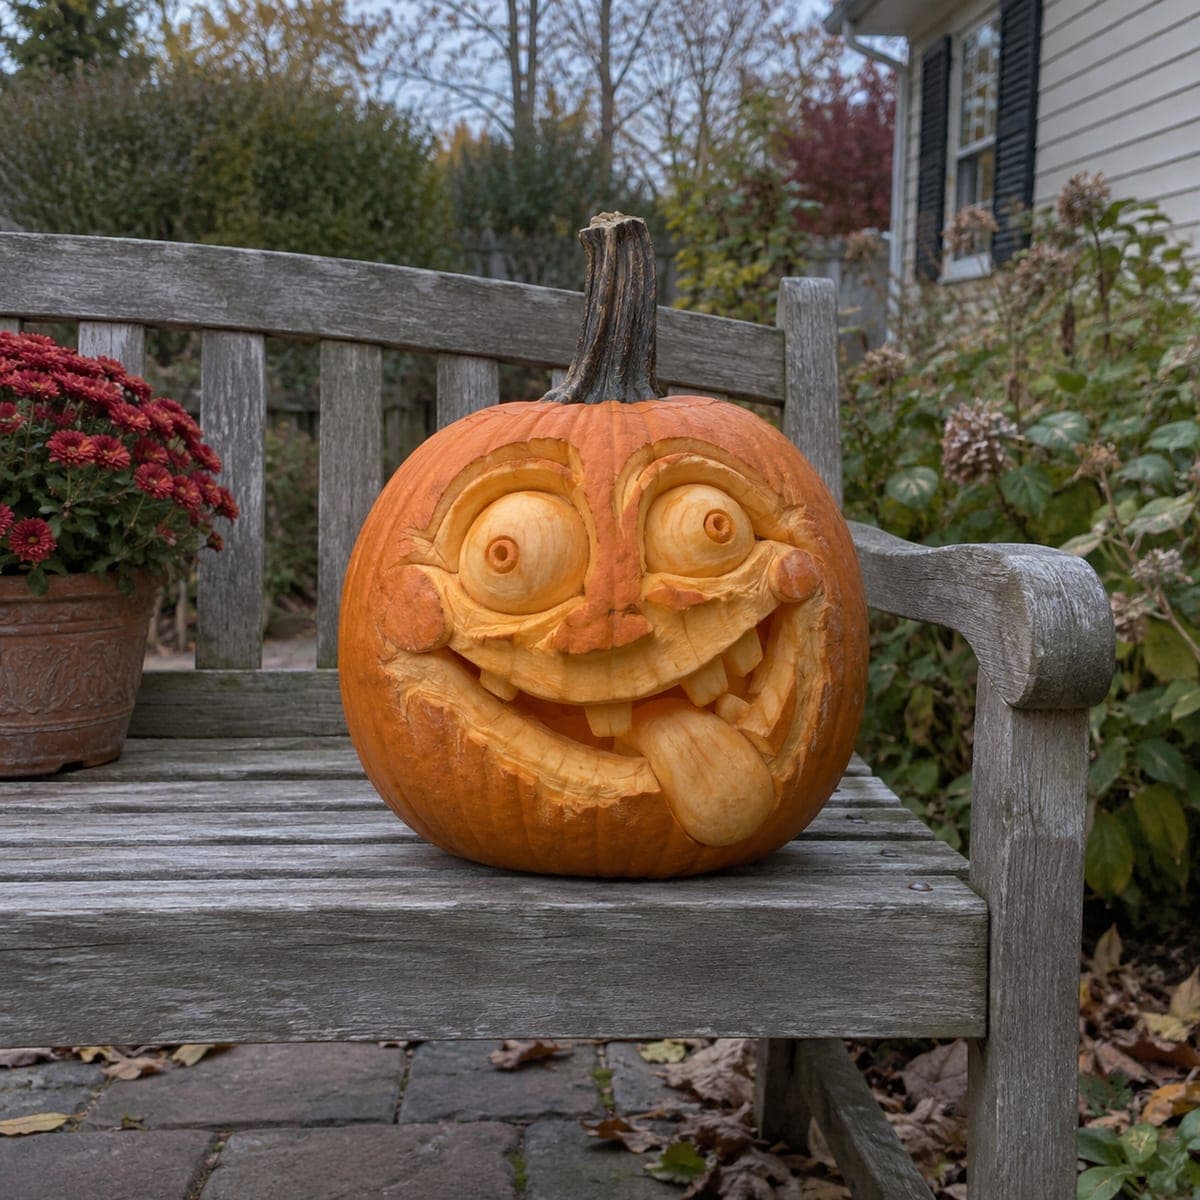
Laughing Face Jack-O-Lantern With Tongue OutAI
0

Laughing Face Jack-O-Lantern With Tongue Out

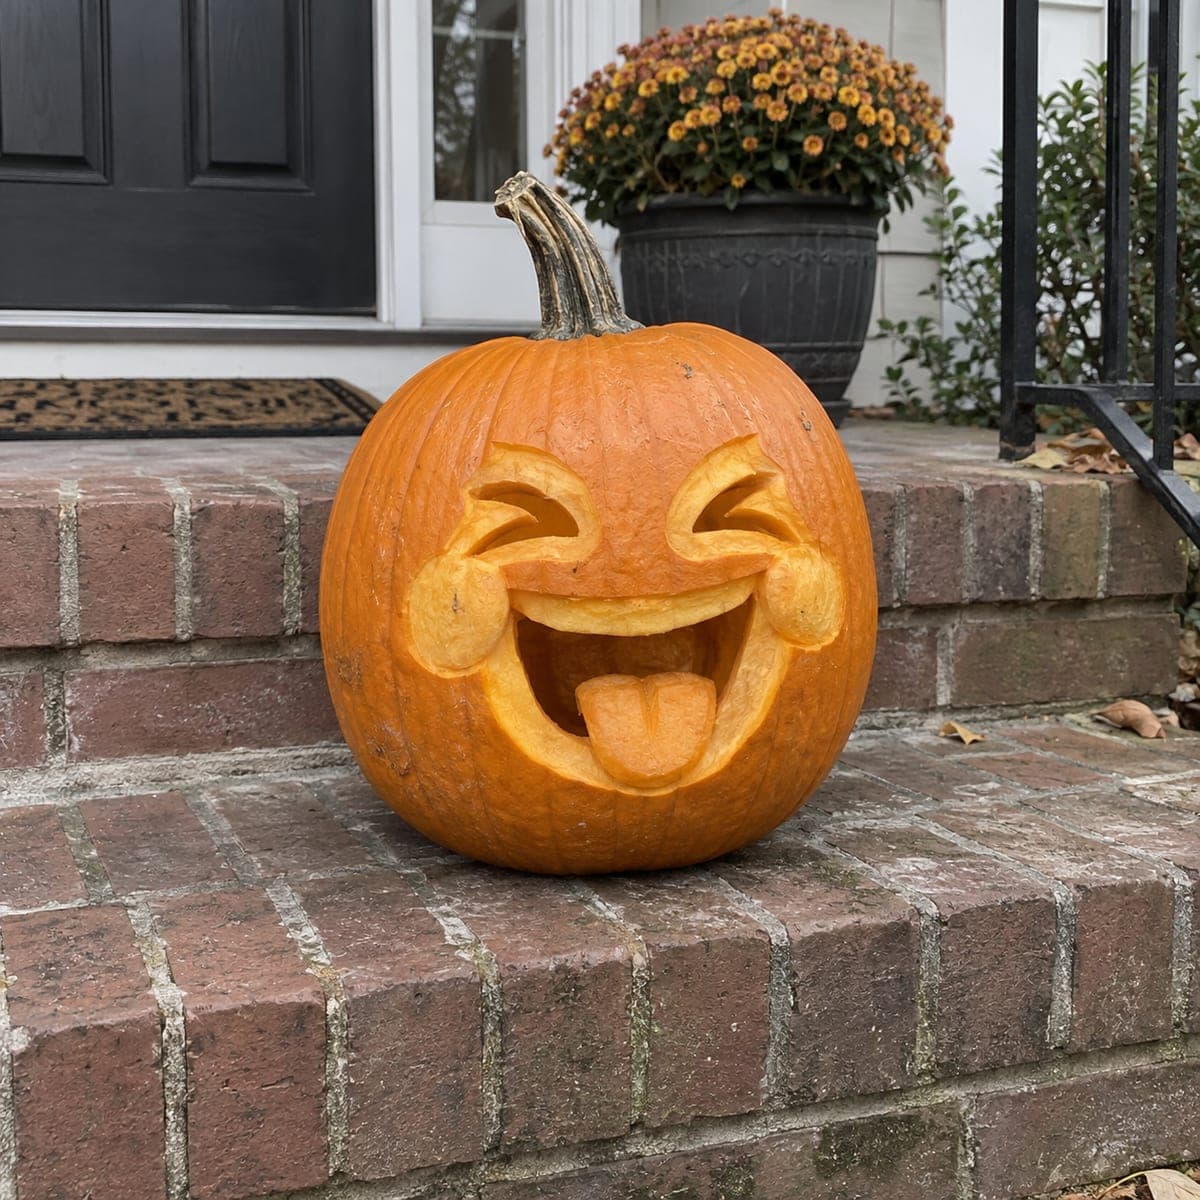
Squinted-shut eyes, ballooning cheeks, and a giant tongue lolling out of a wide grin make this sculpted pumpkin face impossible not to smile at. The features are carved in full 3D from the pumpkin flesh, with the cheeks and tongue left as rounded raised masses. Rough out the big volumes first with a knife, then smooth everything with a spoon or rasp so the highlights read as skin.

This is an AI-generated concept image: a realistic, carvable design idea rather than a photo of a finished carve. AI concepts are always labeled and sit out the leaderboard and the contest.

No ratings yet · Sign in to rate

Comments (0)

  • No comments yet — be the first.

Save without an account. Sign in to like or comment.

Our tips for carving a similar design

This design is a full 3D sculpture rather than a cut-through pattern, so the whole personality comes from carving the flesh at different depths. The trick is contrast between raised rounded masses, the puffy cheeks, the bulging tongue, and the squinted eyes, and the shadowy recesses carved down around them. Rough out the big volumes first, then refine slowly so the light rakes across the highlights and reads like real skin.

Written by PumpkinCarvingIdeas.com, inspired by the image above. These are our suggestions, not instructions from the uploader. This approach to the AI concept has not been tested on a real pumpkin.

From pumpkin to porch

  1. Plan the face and open a back door

    Sketch the squinted eyes, ballooning cheeks, wrinkled nose, and lolling tongue on the pumpkin with a washable marker before you cut anything. Cut a hatch in the back rather than the top so the front face stays one solid canvas. Scoop the inside wall down to about an inch thick where you plan to sculpt, leaving it thicker across the cheeks and tongue where you want raised mass. Keep the marker lines light so you can adjust as the shapes develop.

  2. Score the outlines and shave off the skin

    With a small detail knife, score along every feature outline just through the orange skin. Peel the skin away from the whole face area so you are working in the pale flesh, which is what catches the light. Take your time and keep the blade shallow here, since these outline cuts set the boundaries for everything that follows. An adult should handle all knife work and cut away from the hand.

  3. Rough out the big volumes

    Use the knife to carve down the flat background around the cheeks, tongue, and brow so those shapes stand proud. Aim for gentle slopes, not vertical walls, so light will wrap around each mound. Leave the cheeks and the tongue as the highest, roundest masses, then carve the eye sockets and the deep grin line lower. Step back often to check the volumes look balanced from a few feet away.

  4. Smooth and shade with a spoon and rasp

    Switch to a loop tool, spoon edge, or rasp to smooth every rough facet into soft curves. Rounding the highlights is what makes the flesh look like puffed skin instead of chipped pumpkin. Carve the crescent eye slits, the nose wrinkles, and the crease down the middle of the tongue as fine shallow grooves. Work in thin passes so you can deepen a shadow gradually instead of gouging too far.

  5. Deepen the mouth and refine the tongue

    Carve the inside corners of the grin deeper so they fall into dark shadow and the tongue reads as coming forward. Undercut slightly beneath the tongue tip and the lower lip so those edges catch a rim of light. Add the last details now, the smile lines beside the cheeks and the fold under each eye, keeping every ridge attached to the surrounding flesh for strength. Avoid cutting fully through anywhere on the face so the sculpture stays solid.

  6. Light it and photograph

    Set a battery LED puck or string inside so the glow rises through the thinned flesh and warms the whole face. Because this is a sculpted design, the drama comes from side lighting and thin walls, not open holes, so try both a light inside and a lamp raking across the front. Wipe crumbs off the carved surface and rub a little petroleum jelly on cut edges to slow drying. Shoot your photo in a dim room to let the shading pop.

Gather your supplies

Check things off as you get ready.

Work on a stable surface, keep your free hand out of the cutting path, and have an adult handle sharp tools.

Three levels of light

  • Leave intact

    The uncarved orange skin on the upper rind and back stays dark and frames the pale face.

  • Peel & shade

    The skinned cheeks, tongue, and brow glow a soft mid orange where the flesh is thinned.

  • Cut through

    No full cutouts are needed here, so keep the deep mouth corners and eye slits as the darkest recesses rather than open holes.

Learn the carving basics

Before you start cutting

This is a concept image, so can a real pumpkin actually hold these shapes?

Yes, with the right pumpkin. Choose a big, thick-walled variety so you have enough flesh to sculpt raised cheeks and a bulging tongue. Keep every mass connected to the wall and avoid undercutting so deeply that a piece snaps off.

How thick should I leave the wall for shading to work?

Thin the areas you want to glow to roughly an inch, and leave the cheeks and tongue thicker where they should stay bright and solid. Thinner flesh lets more light through, so vary the thickness to control which parts read light and which stay in shadow. Test with your LED as you go.

How do I keep the tongue from looking flat?

Carve the background of the mouth deeper than the tongue so it clearly stands forward, then round the tongue on all sides. A single shallow groove down the center and a slight undercut at the tip give it dimension. Smooth it fully with a spoon so the highlight is unbroken.

Your take belongs here, too.

Changed a detail? Made it simpler? Share a photo of your version and tell the community what worked.

Share your pumpkin

More pumpkins like this

You've reached the end · 8 pumpkins
The Patch Report

Fresh pumpkins, in your inbox.

The best new carvings, ideas worth stealing, and how-tos for carving season. Short, seasonal, and gone by November.

A short email during carving season. Unsubscribe anytime. See our privacy policy.