Halloween Pumpkin Carving Contest · Starts October 1st · $500 in prizes
← Back to ideas
@ai_concepts
Jul 26, 2026
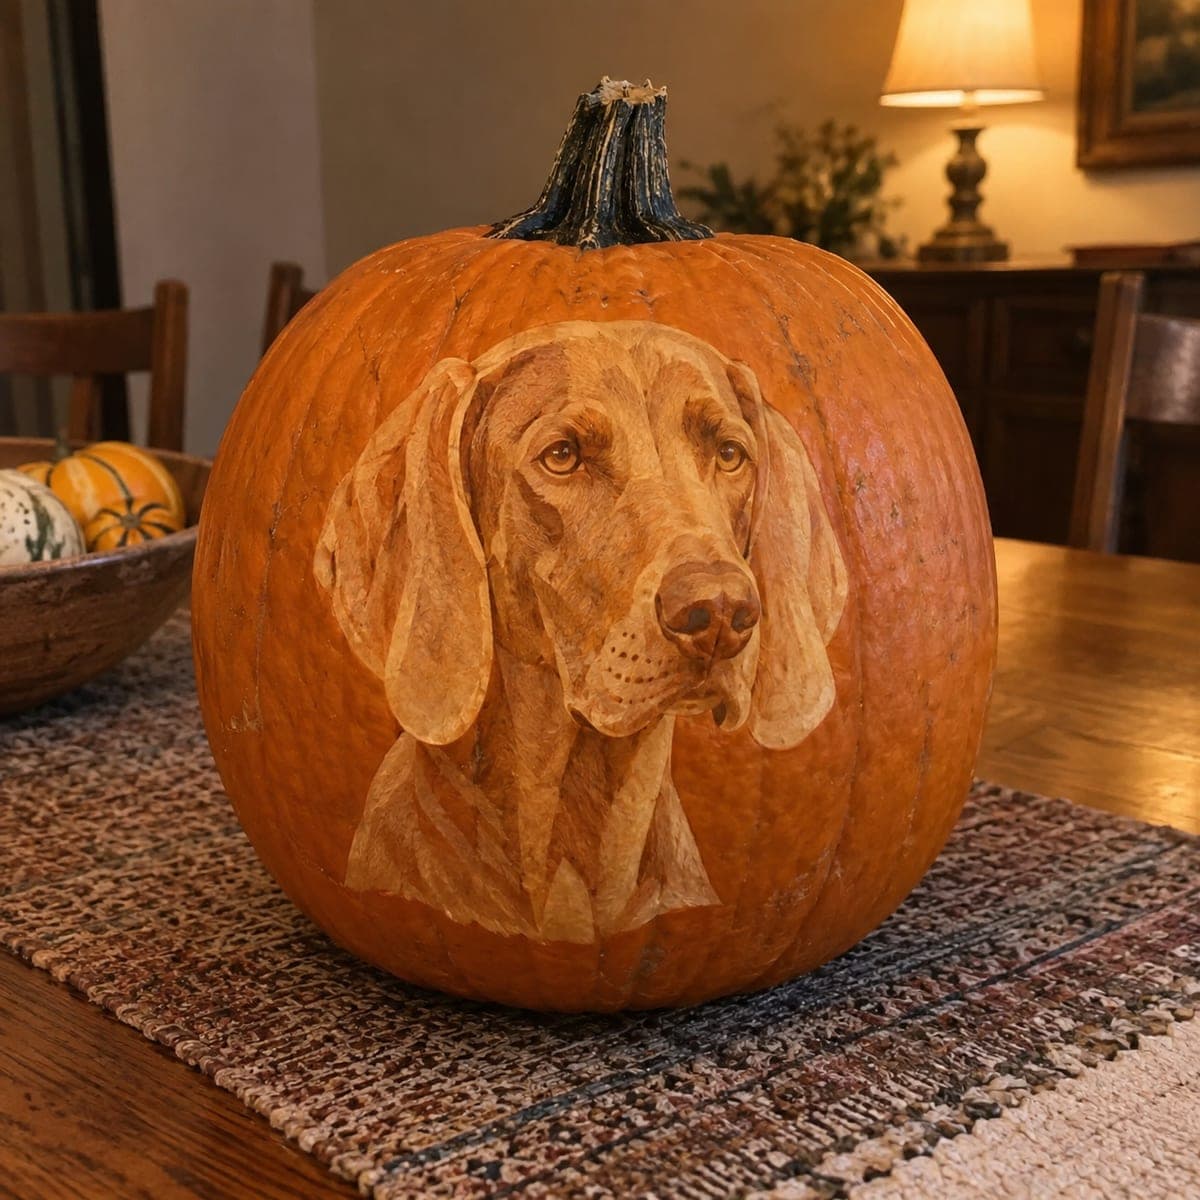
Lifelike Vizsla Dog Portrait Etched PumpkinAI
0

Lifelike Vizsla Dog Portrait Etched Pumpkin

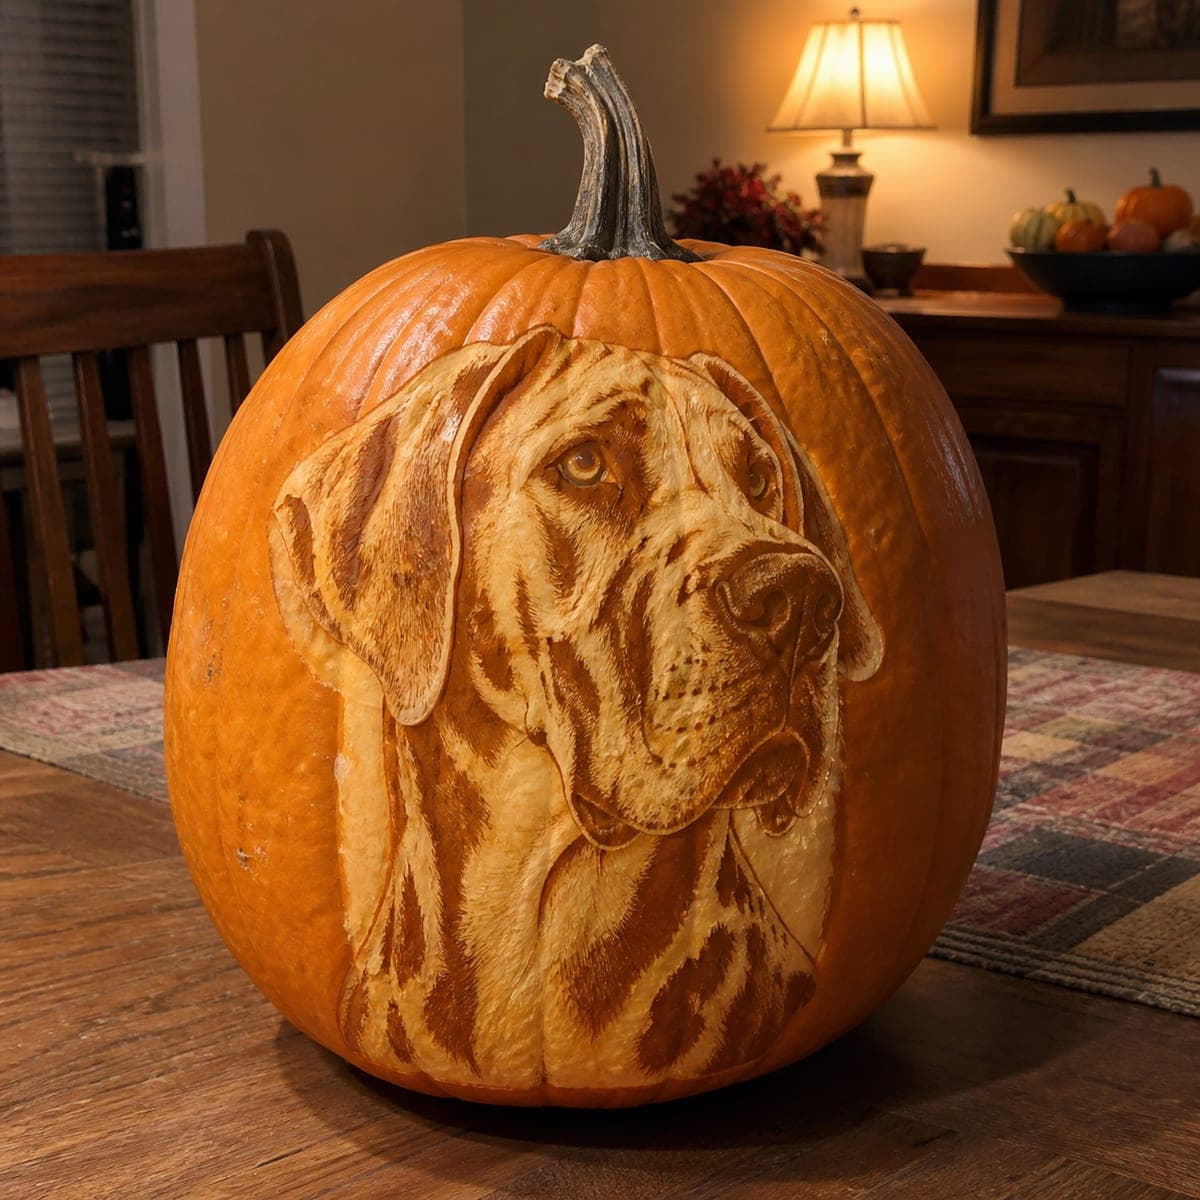
A lifelike Vizsla portrait covers the front of this pumpkin, with soft floppy ears, gentle eyes, and every fold of the coat rendered in peeled layers of rind. The effect comes from shading, shaving the skin to different depths with a loop tool so lighter areas read as highlights. Print a photo of your own dog, tape it on, and pounce the outline before you start peeling. Skip the candle; this one looks best in daylight.

This is an AI-generated concept image: a realistic, carvable design idea rather than a photo of a finished carve. AI concepts are always labeled and sit out the leaderboard and the contest.

No ratings yet · Sign in to rate
Comments (0)

  • No comments yet — be the first.

Save without an account. Sign in to like or comment.

Our tips for carving a similar design

This design is a pure shading portrait, meaning almost nothing is cut all the way through. The whole Vizsla is built by shaving the rind to different depths so lighter shavings read as highlights and untouched skin stays dark. Plan it as a relief drawing in the pumpkin wall, working from your reference photo and lighting it in daylight rather than from within.

Written by PumpkinCarvingIdeas.com, inspired by the image above. These are our suggestions, not instructions from the uploader. This approach to the AI concept has not been tested on a real pumpkin.

From pumpkin to porch

  1. Pick a smooth, wide-faced pumpkin

    Choose a pumpkin with a large, flat, blemish-free area on one side for the portrait. A firm, fresh wall holds shaved detail far better than a soft older one. Wipe the surface clean and dry before you transfer anything. Keep the stem intact for a natural top.

  2. Transfer the portrait outline

    Print a photo of a Vizsla, or your own short-haired dog, sized to fit the front panel. Tape it flat and pounce along the major shapes with a poking tool: the head outline, ears, eyes, muzzle, and the darkest shadow lines. Remove the paper and connect the dots lightly with a washable marker. This map keeps you oriented once you start shaving.

  3. Skin the whole portrait area first

    With a loop or ribbon tool, remove only the tough outer skin across every part of the dog you want to glow. This first shallow pass gives you a uniform mid tone to work against. Keep the leftover green skin outside the portrait untouched so the dog pops from a dark background. Go slowly and keep both hands behind the cutting edge.

  4. Build the shading in layers

    Now shave deeper where you want highlights: the bridge of the muzzle, the brow ridges, the top of the ears, and the lit side of the neck. The thinner the wall gets, the lighter it looks, so save the deepest shaving for the brightest spots. Leave the eye rims, nostrils, and shadow folds barely touched so they stay dark. Step back often to read the values from a few feet away.

  5. Refine eyes, nose, and coat texture

    Use a small detail loop to sculpt the gentle eyes and the soft catchlights, keeping the pupils dark and untouched. Stipple the nose leather with tiny shallow dots and shave the ear edges thin so they feel floppy and soft. Add short directional strokes to suggest the smooth coat. Do not cut clear through anywhere; this portrait lives entirely in the rind.

  6. Seal, light, and photograph

    Coat all shaved surfaces with petroleum jelly or a spray sealer to slow browning and keep the tones bright. Since there are no cutouts, display it in daylight or under a soft lamp rather than with an interior light. If you want a faint inner glow, add a small LED and keep the walls a bit thicker. Snap your photo the first day, when the contrast is sharpest.

Gather your supplies

Check things off as you get ready.

Work on a stable surface, keep your free hand out of the cutting path, and have an adult handle sharp tools.

Three levels of light

  • Leave intact

    Untouched dark rind forms the background around the dog, the pupils, nostrils, and the deep shadow folds of the ears and neck.

  • Peel & shade

    A shallow skin-shave across the whole face and body gives the mid orange tone that reads as the coat.

  • Cut through

    There are no full cutouts here; the deepest shavings on the muzzle, brow, and ear tops act as the brightest highlights.

Learn the carving basics

Before you start cutting

Do I cut any holes all the way through?

No, this is a shaded relief portrait, so you keep the pumpkin wall intact everywhere. Depth alone creates the light and dark values. If you accidentally break through, patch it from behind with a toothpick and pumpkin scrap and shade around it.

Can I use my own dog instead of a Vizsla?

Absolutely, any short-haired breed with clear features works well. Print a high-contrast photo, size it to the front panel, and pounce the outline the same way. Smooth coats are easier than fluffy ones because you shade broad areas rather than thousands of hairs.

Why skip the candle?

Because a shaded portrait has no cutouts, an internal flame or even a bright LED washes out the subtle depth you worked to build. This design looks best in soft daylight or lamp light that rakes across the surface. Never use an open flame anyway; an LED is the only safe choice if you want any glow.

Your take belongs here, too.

Changed a detail? Made it simpler? Share a photo of your version and tell the community what worked.

Share your pumpkin

More pumpkins like this

You've reached the end · 8 pumpkins
The Patch Report

Fresh pumpkins, in your inbox.

The best new carvings, ideas worth stealing, and how-tos for carving season. Short, seasonal, and gone by November.

A short email during carving season. Unsubscribe anytime. See our privacy policy.