Halloween Pumpkin Carving Contest Β· Starts October 1st Β· $500 in prizes
← Back to ideas
@ai_concepts
Sep 14, 2026
Little Bow-Tie Vampire PumpkinAI
0

Little Bow-Tie Vampire Pumpkin

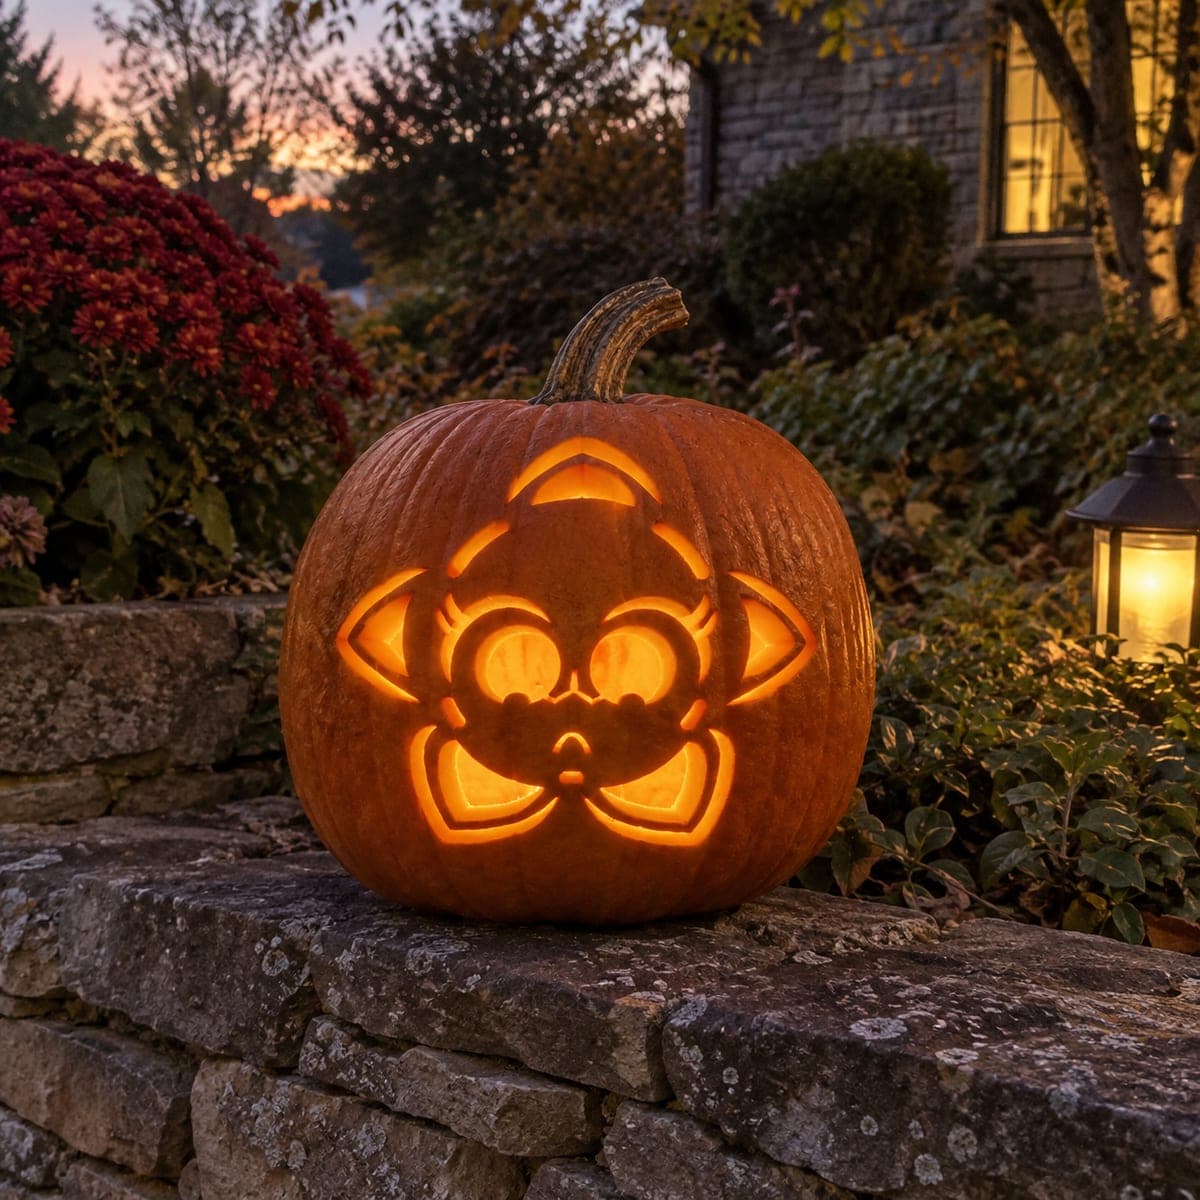
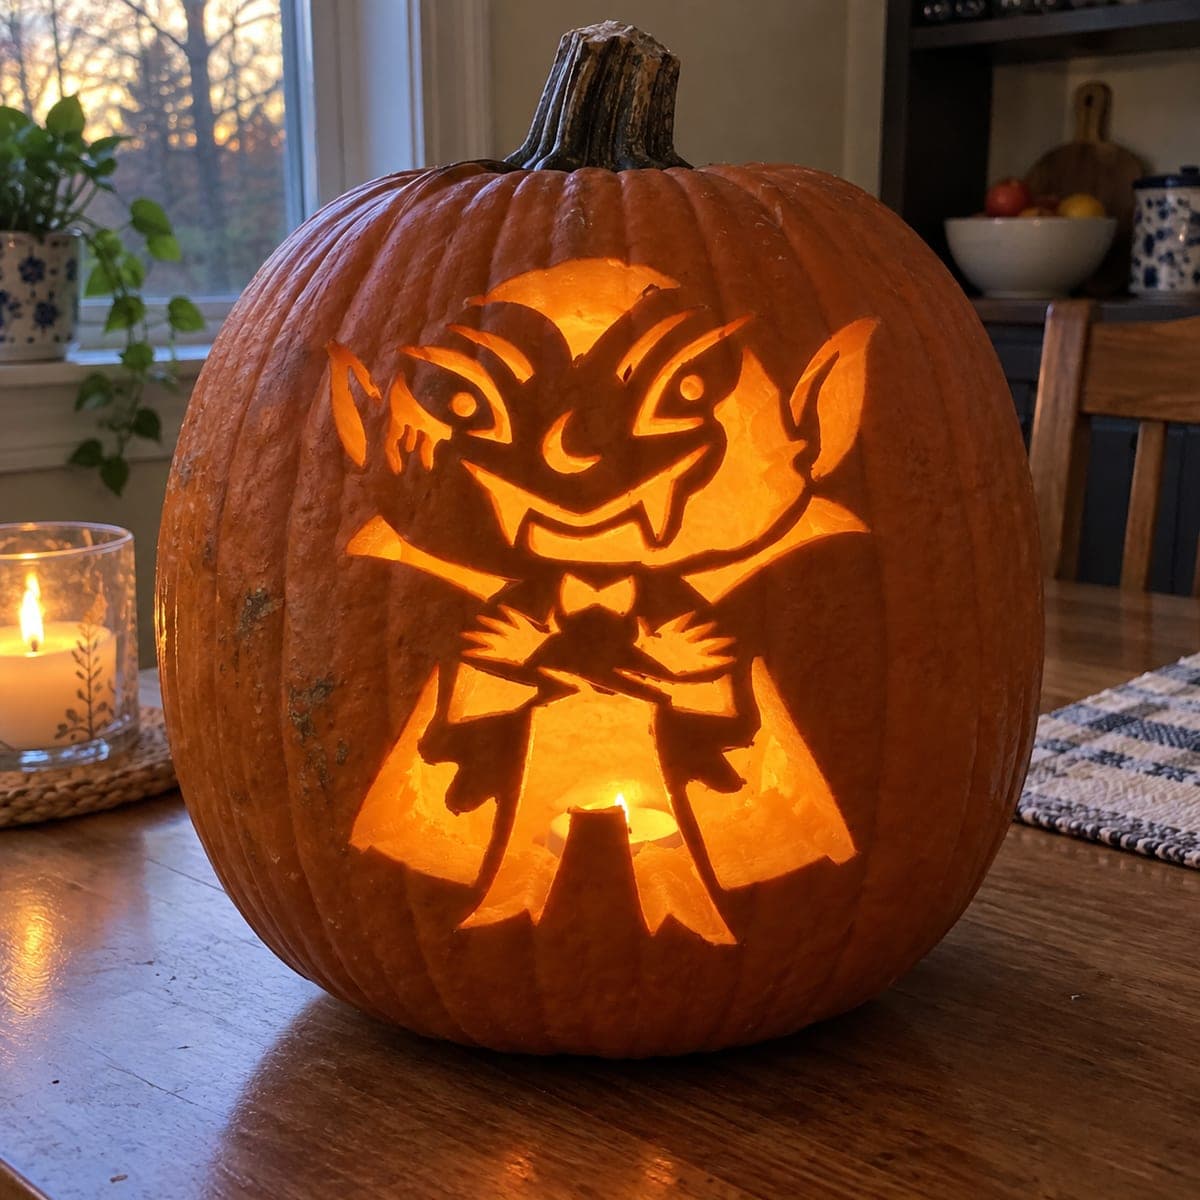
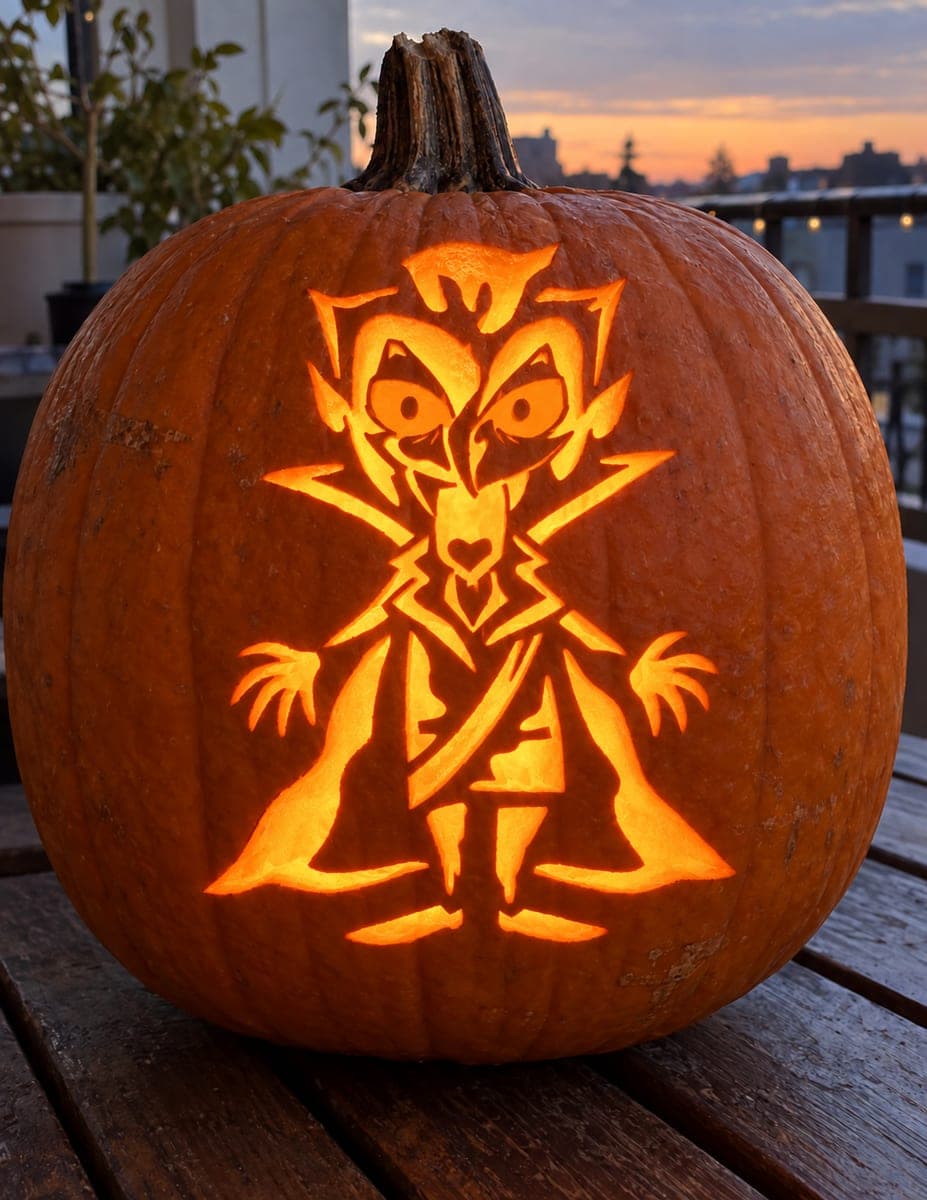
A wide-eyed imp with tall pointed ears, a mischievous grin showing tiny fangs, and a bow tie at its chest spreads its arms to display a flowing cape in this cute pumpkin carving cutout design. The glowing shapes are pierced fully through, with dark rind forming the facial features, ear tips, and the intricate bow tie outline. Carve the bow tie knot and the face detail cuts before removing the larger cape sections, since those small openings stabilize the center of the design. An LED light low and centered inside keeps the bow tie readable without washing out the narrow dark lines of the imp's face.

This is an AI-generated concept image: a realistic, carvable design idea rather than a photo of a finished carve. AI concepts are always labeled and sit out the leaderboard and the contest.
No ratings yet Β· Sign in to rate

Comments (0)

  • No comments yet β€” be the first.

Save without an account. Sign in to like or comment.

Our tips for carving a similar design

The whole charm of this design rests on the negative space, with the bright cutouts forming the imp while thin strips of dark rind draw the eyes, fang tips, ear points, and bow tie. The plan is to work small to large, locking in the delicate face and bow tie lines first so the center stays supported, then opening the roomy cape sections last. Keeping every dark line connected to solid rind is what holds the picture together.

Written by PumpkinCarvingIdeas.com, inspired by the image above. These are our suggestions, not instructions from the uploader. This approach to the AI concept has not been tested on a real pumpkin.

From pumpkin to porch

  1. Transfer the pattern and plan your bridges

    Print or draw the imp at a size that fits the flattest front face of your pumpkin, then tape it in place and poke the outlines with a transfer tool or pushpin. Before you cut anything, mark which slivers must stay as dark rind: the face lines, the fang tips, the bow tie knot, and the ear edges. These skinny pieces need solid pumpkin on both sides to survive. Sketch light guide lines so you always know what stays and what goes.

  2. Open the pulp and thin the front wall

    An adult should cut a wide access hole in the bottom of the pumpkin, not the top, so it can sit down over an LED later. Scoop the inside clean and scrape the carving wall down to about one inch thick where the face will be. A thinner wall makes the fine cuts easier and lets more light through. Work in good light on a stable, non-slip surface.

  3. Carve the fine face and bow tie details first

    Start with the smallest openings: the eyes, the curved grin, the little fang gaps, and the shapes around the bow tie knot. Use a fine saw or a craft knife and take slow, shallow passes rather than forcing the blade. Cutting these first, while the surrounding rind is still solid, keeps the center of the design stable. Leave the narrow dark lines between shapes untouched so the features stay crisp.

  4. Cut the ears, arms, and mid-size shapes

    Move outward to the pointed ears, the spread arms, and the hands near the bow tie. Keep the ear tips and finger gaps connected to solid rind so they do not snap. If a piece feels wobbly, stop and leave a small bridge to hold it. Clear the loose bits as you go so you can see your progress.

  5. Open the large cape sections last

    Save the big flowing cape openings for the end, since they remove the most material and weaken the shell. Cut them cleanly along your lines, supporting the pumpkin with your free hand away from the blade. With the large panels gone, gently push out any pieces from the inside to avoid cracking the thin dark lines. Tidy rough edges with a small detail tool.

  6. Light it and take your photo

    Set a battery LED low and centered inside so the glow fills the cape and keeps the bow tie readable without blowing out the face lines. Skip real candles, since the thin walls and pointed ears can scorch. Try the light slightly forward to brighten the grin, then shoot in a dim room for the best contrast. Mist the cut edges with water and refrigerate overnight to keep it fresh.

Gather your supplies

Check things off as you get ready.

Work on a stable surface, keep your free hand out of the cutting path, and have an adult handle sharp tools.

Three levels of light

  • Leave intact

    The narrow face lines, ear tips, fang points, and the outline of the bow tie knot stay as untouched dark rind.

  • Peel & shade

    Optional light shading on the cape edges or cheeks, skin-peeled for a soft dim glow that adds depth.

  • Cut through

    The eyes, grin, arms, ear openings, and the big cape panels are cut fully through for the brightest light.

Learn the carving basics

Before you start cutting

How do I keep the bow tie and fangs from breaking?

Carve them before the large cape openings while the surrounding rind is still solid and supportive. Keep each thin dark line attached to full-thickness pumpkin on both sides, and leave small bridges anywhere a piece feels loose. Slow, shallow cuts put far less stress on the delicate shapes.

Should I cut the lid from the top like usual?

For this design an access hole in the bottom works better, so the pumpkin sits down over the LED and the light stays centered. It also keeps the stem intact for a cleaner look. Just make the hole wide enough to reach in and scoop comfortably.

Where should the light go so the face still reads?

Place the LED low and centered inside, roughly under the bow tie. That fills the cape with glow while keeping the thin dark face lines from washing out. If the grin looks dim, nudge the light slightly forward toward the front wall.

Your take belongs here, too.

Changed a detail? Made it simpler? Share a photo of your version and tell the community what worked.

Share your pumpkin

More pumpkins like this

You've reached the end Β· 8 pumpkins
The Patch Report

Fresh pumpkins, in your inbox.

The best new carvings, ideas worth stealing, and how-tos for carving season. Short, seasonal, and gone by November.

A short email during carving season. Unsubscribe anytime. See our privacy policy.