Halloween Pumpkin Carving Contest · Starts October 1st · $500 in prizes
← Back to ideas
@ai_concepts
Sep 14, 2026
Waving Cartoon Vampire PumpkinAI
0

Waving Cartoon Vampire Pumpkin

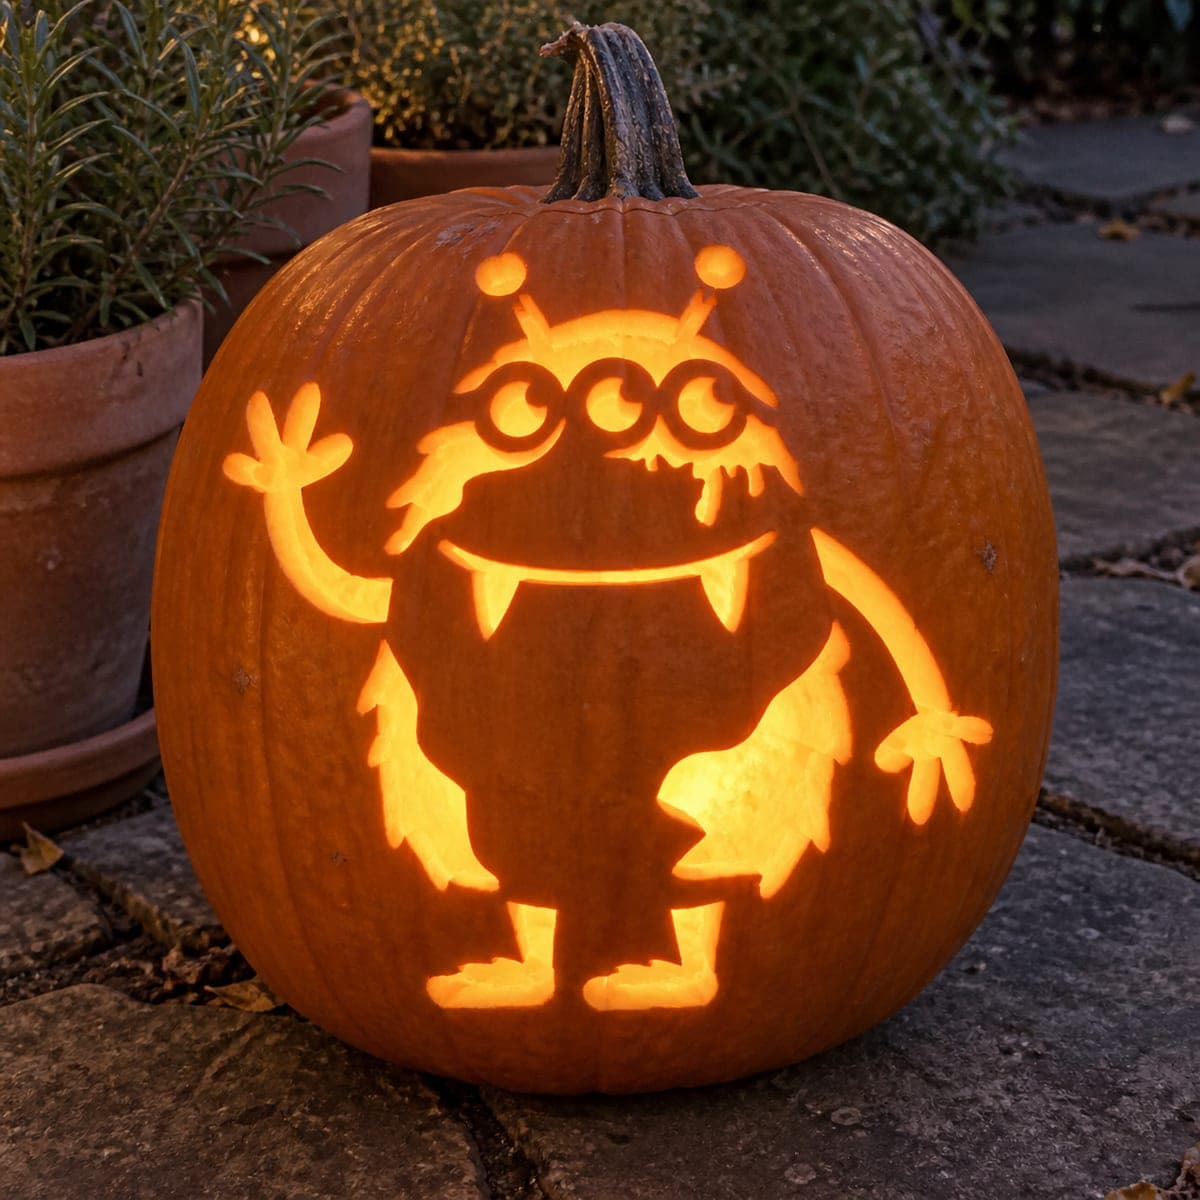
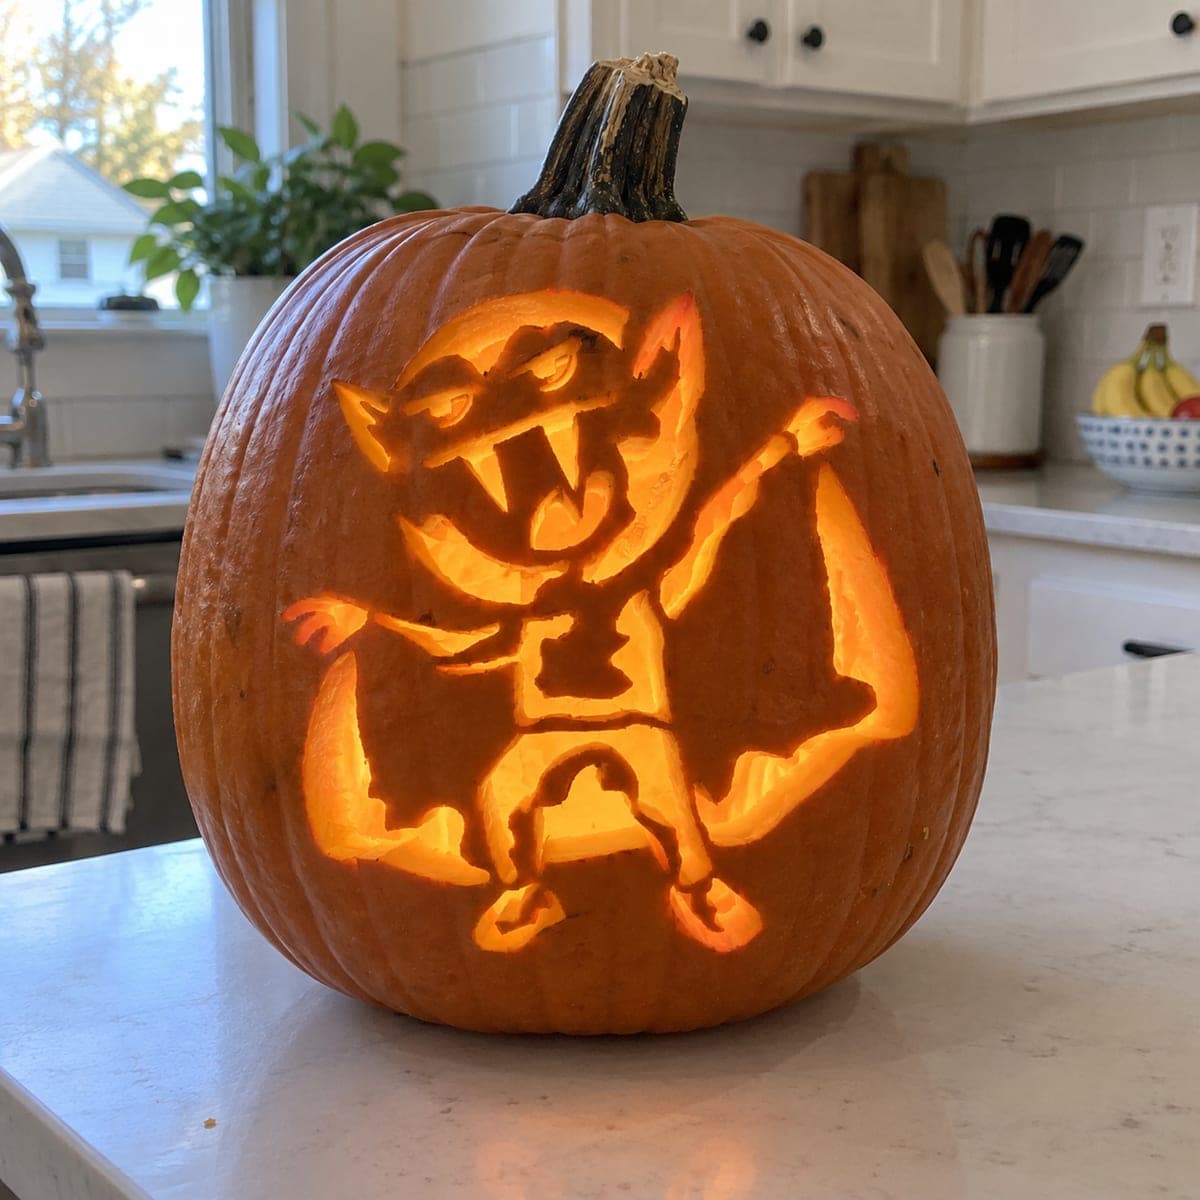
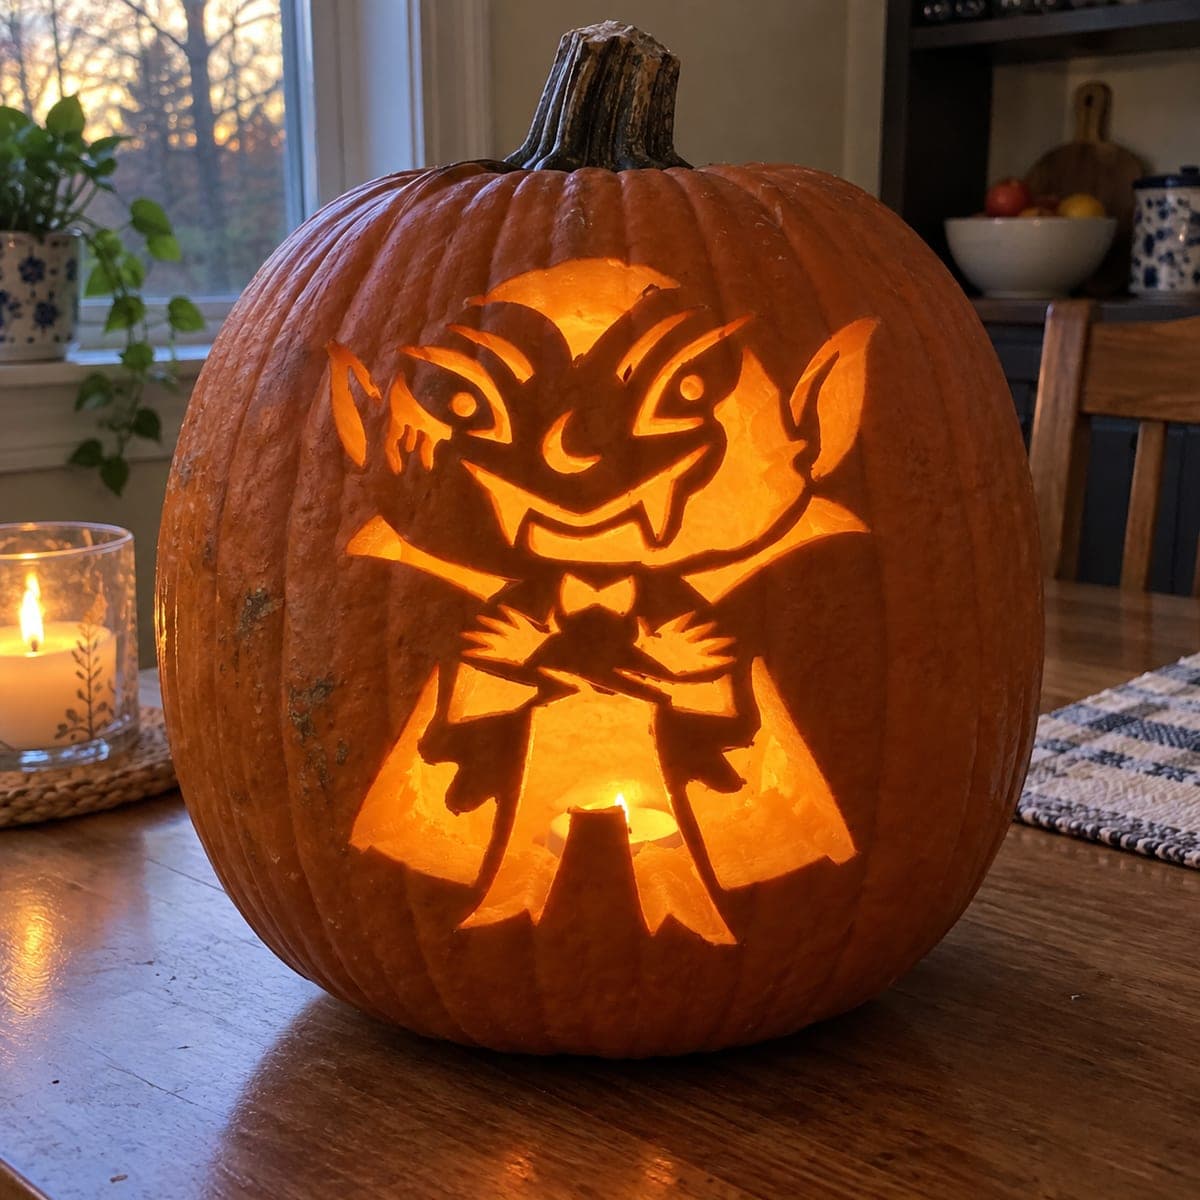
A crouching clawed creature with sharp pointed ears, a wide fang-filled open mouth, and clawed feet spread low along the bottom raises both arms in a menacing pose on this pumpkin carving cutout design. The lit sections -- the body interior, the open mouth, and the surrounding arm panels -- are all pierced through, with dark rind defining the claws, ears, and face details. Cut the claw tips at the ends of each finger first, since those narrow points will fracture if larger adjacent sections are removed while they are still attached. A ground-level LED inside throws the raised claws into dramatic shadow for a display that reads well from a distance.

This is an AI-generated concept image: a realistic, carvable design idea rather than a photo of a finished carve. AI concepts are always labeled and sit out the leaderboard and the contest.
No ratings yet · Sign in to rate

Comments (0)

  • No comments yet — be the first.

Save without an account. Sign in to like or comment.

Our tips for carving a similar design

This is a full-body cartoon silhouette: the crouching vampire, its raised arms, cape, and open fanged mouth all glow as cutouts, with dark rind holding the ears, claws, and face details. The trick is the thin points, the claw tips, ear points, and fangs, which you cut first and keep chunky so they do not fracture.

Written by PumpkinCarvingIdeas.com, inspired by the image above. These are our suggestions, not instructions from the uploader. This approach to the AI concept has not been tested on a real pumpkin.

From pumpkin to porch

  1. Pick a tall pumpkin and hollow it

    The figure is upright, so choose a taller pumpkin with a broad front panel. Open it from the bottom so it sits flat, scoop it out, and thin the front wall. A flatter, thinner panel makes the many small cuts easier.

  2. Transfer the full-body vampire

    Print the character to fill your pumpkin and tape it on, snipping the paper so it hugs the curve. Poke the outline with a pin tool, then mark clearly which areas are glowing gaps and which thin bits (ears, claws, fangs) stay as dark rind. Planning this now prevents cutting away a piece you meant to keep.

  3. Cut the thin points first

    Start with the fingertip claws, the pointed ears, and the fangs while the pumpkin is still solid. Keep these tips a little wider at the base than they look on paper so they survive. Removing them first means no big opening is flexing the wall while you carve them.

  4. Open the body, arms, and cape panels

    Cut the larger lit areas, the body interior, the raised arm gaps, and the cape shapes, leaving bridges where the design needs a dark line. Make short strokes and take out big waste pieces in sections so they do not pull on the thin points you already cut. Work from the center outward.

  5. Carve the open mouth last and light it

    Save the wide fanged mouth for last, keeping the fangs connected to the upper lip with broad bases. Bevel inside edges so the light spreads. Set a ground-level LED inside and check that the claws and ears throw good shadow from a distance.

Gather your supplies

Check things off as you get ready.

Work on a stable surface, keep your free hand out of the cutting path, and have an adult handle sharp tools.

Three levels of light

  • Leave intact

    Dark rind forms the ears, claws, cape edges, and face lines.

  • Peel & shade

    Optional: shave a thin halo around the body for a soft outer glow.

  • Cut through

    The body, arms, cape panels, and open mouth are cut through to glow.

Learn the carving basics

Before you start cutting

How do I keep the claws and fangs from snapping?

Cut them first while the wall is solid, and make each point a bit wider at the base than it looks. Keep the fangs joined to the upper mouth rather than floating free.

The design has a lot of pieces. Where do I start?

Start with the smallest, most fragile cuts (claws, ears, fangs), then open the medium panels, and cut the largest opening (the mouth) last. Going small-to-large keeps the pumpkin rigid the whole time.

Is there a tested stencil for this?

This concept does not include one, but any full-body cartoon vampire stencil will give the same look. Choose one that already marks the bridges and dark lines.

Your take belongs here, too.

Changed a detail? Made it simpler? Share a photo of your version and tell the community what worked.

Share your pumpkin

More pumpkins like this

You've reached the end · 8 pumpkins
The Patch Report

Fresh pumpkins, in your inbox.

The best new carvings, ideas worth stealing, and how-tos for carving season. Short, seasonal, and gone by November.

A short email during carving season. Unsubscribe anytime. See our privacy policy.