Halloween Pumpkin Carving Contest Β· Starts October 1st Β· $500 in prizes
← Back to ideas
@ai_concepts
Sep 14, 2026
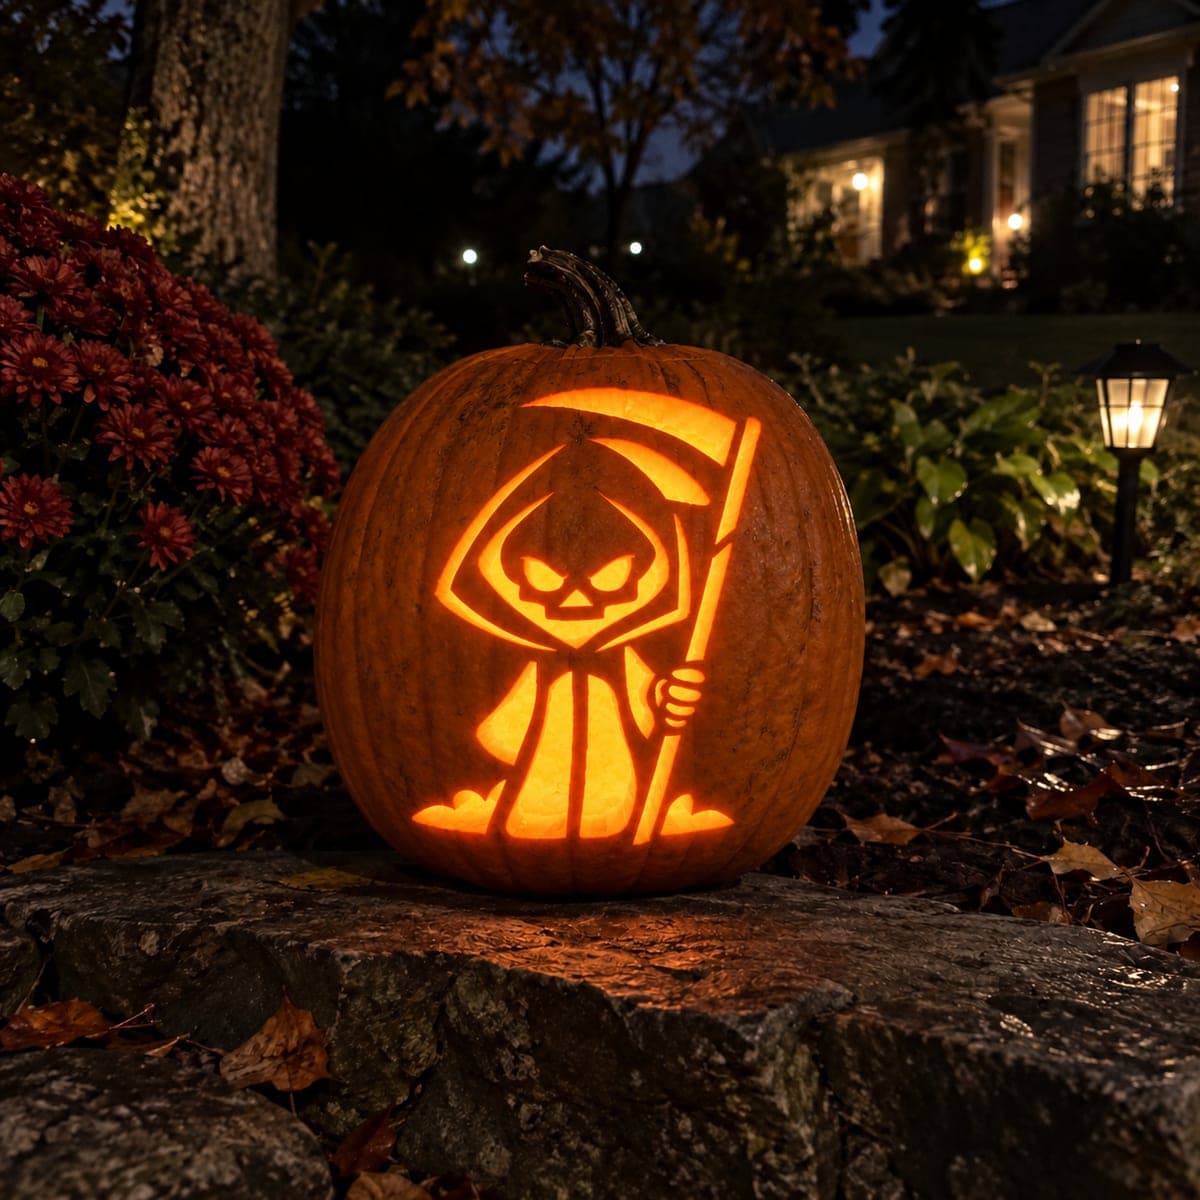
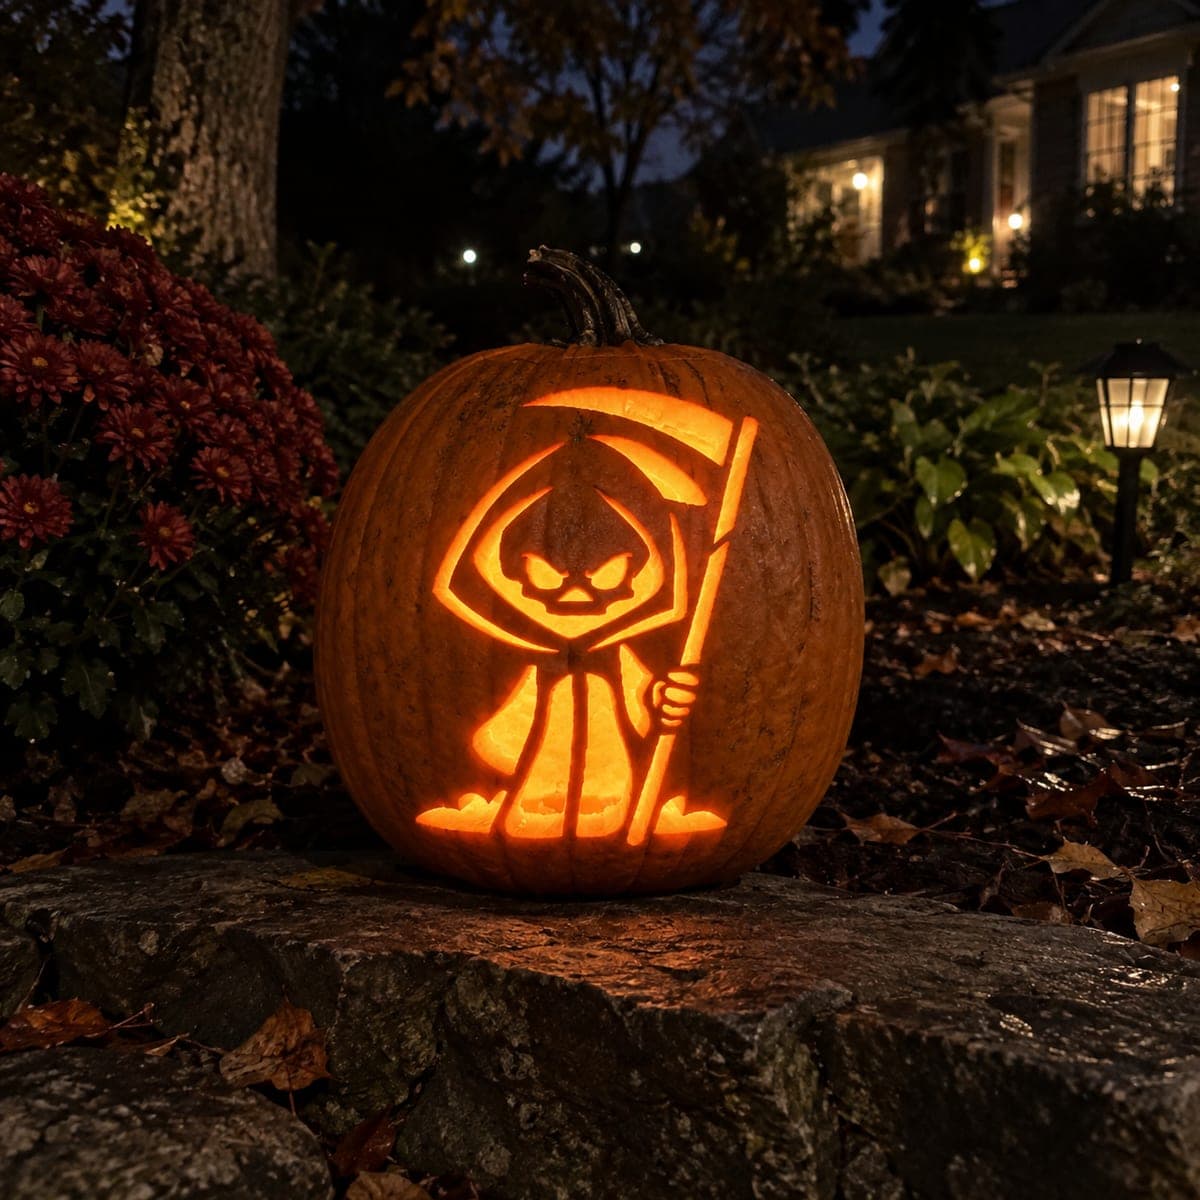
Little Grim Reaper With Tall Scythe Pumpkin
1/2
AI
0

Little Grim Reaper With Tall Scythe Pumpkin

A small robed reaper with angular glowing eyes clutches a tall upright scythe that rises beside its hooded head in this cute jack-o-lantern pumpkin carving idea. The scythe handle runs nearly the full height of the design, so choose a pumpkin with a flat face to keep the long line from bending around a curve. Carve the scythe shaft as a single continuous cut and leave the blade as an uncut dark shape attached to the top of the shaft so it does not separate.

This is an AI-generated concept image: a realistic, carvable design idea rather than a photo of a finished carve. AI concepts are always labeled and sit out the leaderboard and the contest.

No ratings yet Β· Sign in to rate

Comments (0)

  • No comments yet β€” be the first.

Save without an account. Sign in to like or comment.

Our tips for carving a similar design

The core trick here is treating the whole robed reaper as a glowing cutout held together by thin dark bridges, with the scythe blade left as an uncut dark shape so it never falls free. Pick a pumpkin with a flat, tall face so the long scythe shaft reads as one straight line instead of curving away. Plan the shaft as a single continuous cut and keep the blade attached at its top edge.

Written by PumpkinCarvingIdeas.com, inspired by the image above. These are our suggestions, not instructions from the uploader. This approach to the AI concept has not been tested on a real pumpkin.

From pumpkin to porch

  1. Pick a flat-faced pumpkin and prep it

    Choose a tall pumpkin with the flattest front panel you can find so the scythe handle stays straight. Cut a lid from the bottom or the back rather than the top, which keeps the tall face uninterrupted and makes it easy to seat an LED. Scrape the inside wall behind the design down to about one inch so light passes through evenly. A thinner wall also makes the long shaft cut much easier to control.

  2. Transfer the stencil squarely

    Tape the stencil flat and centered, smoothing out wrinkles so the scythe line does not skew. Poke through the outlines with a transfer tool or pin at close, even spacing. Pay special attention to marking the eyes, the hood opening, the scythe shaft, and the outline of the blade. Peel the paper and connect any faint dots with a marker before you cut.

  3. Cut the small details first

    Start with the two angular eyes and any narrow gaps around the hood using a fine saw. Working small to large keeps the pumpkin strong while you handle it. Keep the thin bridges that separate the eyes from the hood edge intact, since those dark lines are what make the face read. Let an adult handle every sharp tool and cut slowly with light pressure.

  4. Carve the long scythe shaft as one line

    Draw the blade with your saw from the bottom of the shaft upward in a single, continuous pass, resetting your grip as needed rather than restarting the line. Keep the width consistent so it looks like one clean pole. Stop the cut where the shaft meets the blade and do not cut around the blade itself. This is the make-or-break line, so go slow and let the saw do the work.

  5. Open the robe body and hand last

    Cut the largest openings, the glowing robe and the little clutching hand, only after the fine work is done. Removing these big pieces first would weaken the face and could crack the scythe bridge. Push each freed piece gently inward and out. Trim any ragged edges and test-fit your light.

  6. Light it and photograph

    Drop in a battery LED, warm white or amber, and set the pumpkin at eye level for a photo. A single light usually fills the robe nicely; add a second small LED near the top if the hood looks dim. Shoot at dusk with the background dark so the glowing shape pops. Mist the cut edges lightly if you photograph over a couple of nights to keep them fresh.

Gather your supplies

Check things off as you get ready.

Work on a stable surface, keep your free hand out of the cutting path, and have an adult handle sharp tools.

Three levels of light

  • Leave intact

    The scythe blade, the hood outline, the bridges around the eyes, and the thin lines that define the robe folds stay as untouched dark skin.

  • Peel & shade

    Skin-peel the little ground mounds at the base and any robe shadow areas for a soft, dim orange glow that adds depth.

  • Cut through

    Cut fully through the angular eyes, the open robe body, the clutching hand, and the long scythe shaft for the brightest light.

Learn the carving basics

Before you start cutting

How do I keep the tall scythe shaft from wandering off line?

Choose a pumpkin with the flattest face possible so the line does not bend around a curve. Draw the full shaft before cutting and make it one continuous pass, resetting your hand rather than starting fresh cuts. A thinner inner wall makes the saw glide more predictably.

Won't the scythe blade fall out?

It will not if you leave it as an uncut dark shape attached to the top of the shaft. Only cut the shaft itself and stop where it meets the blade. The blade reads as a dark silhouette against the lit pumpkin, which is exactly the look you want.

Since this is a concept image, can a real pumpkin look like this?

Yes, the design is built entirely from sound cutouts and dark bridges, so it holds up on a real pumpkin. Keep the eye bridges and hood outlines at least a quarter inch wide so nothing tears. Thin the wall behind the face and use an LED for an even glow.

Your take belongs here, too.

Changed a detail? Made it simpler? Share a photo of your version and tell the community what worked.

Share your pumpkin

More pumpkins like this

You've reached the end Β· 8 pumpkins
The Patch Report

Fresh pumpkins, in your inbox.

The best new carvings, ideas worth stealing, and how-tos for carving season. Short, seasonal, and gone by November.

A short email during carving season. Unsubscribe anytime. See our privacy policy.