Halloween Pumpkin Carving Contest · Starts October 1st · $500 in prizes
← Back to ideas
@ai_concepts
Aug 4, 2026
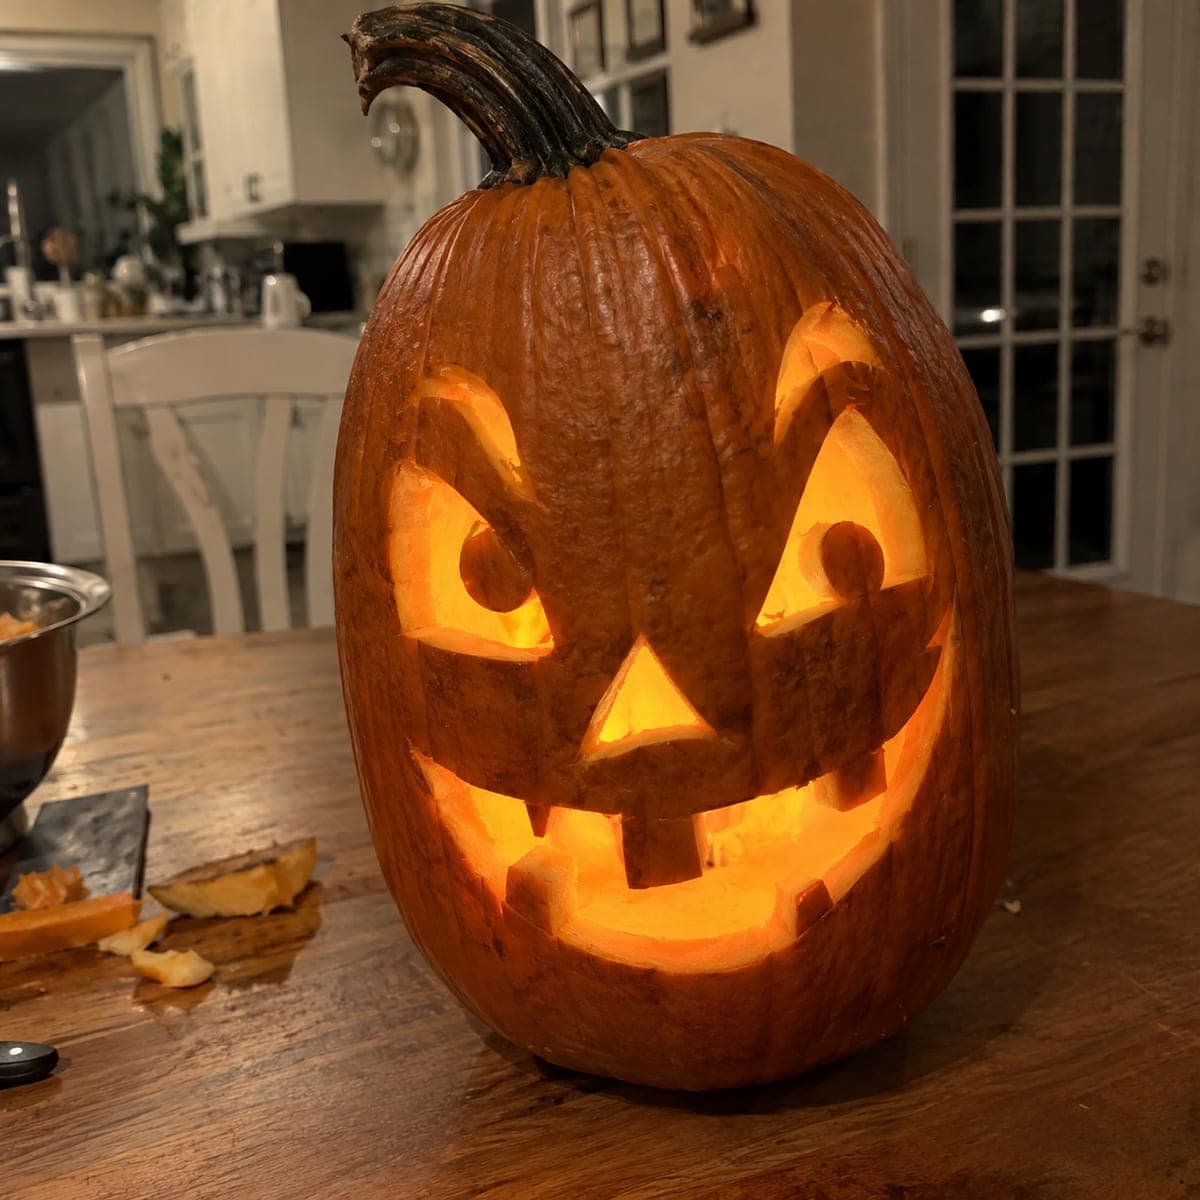
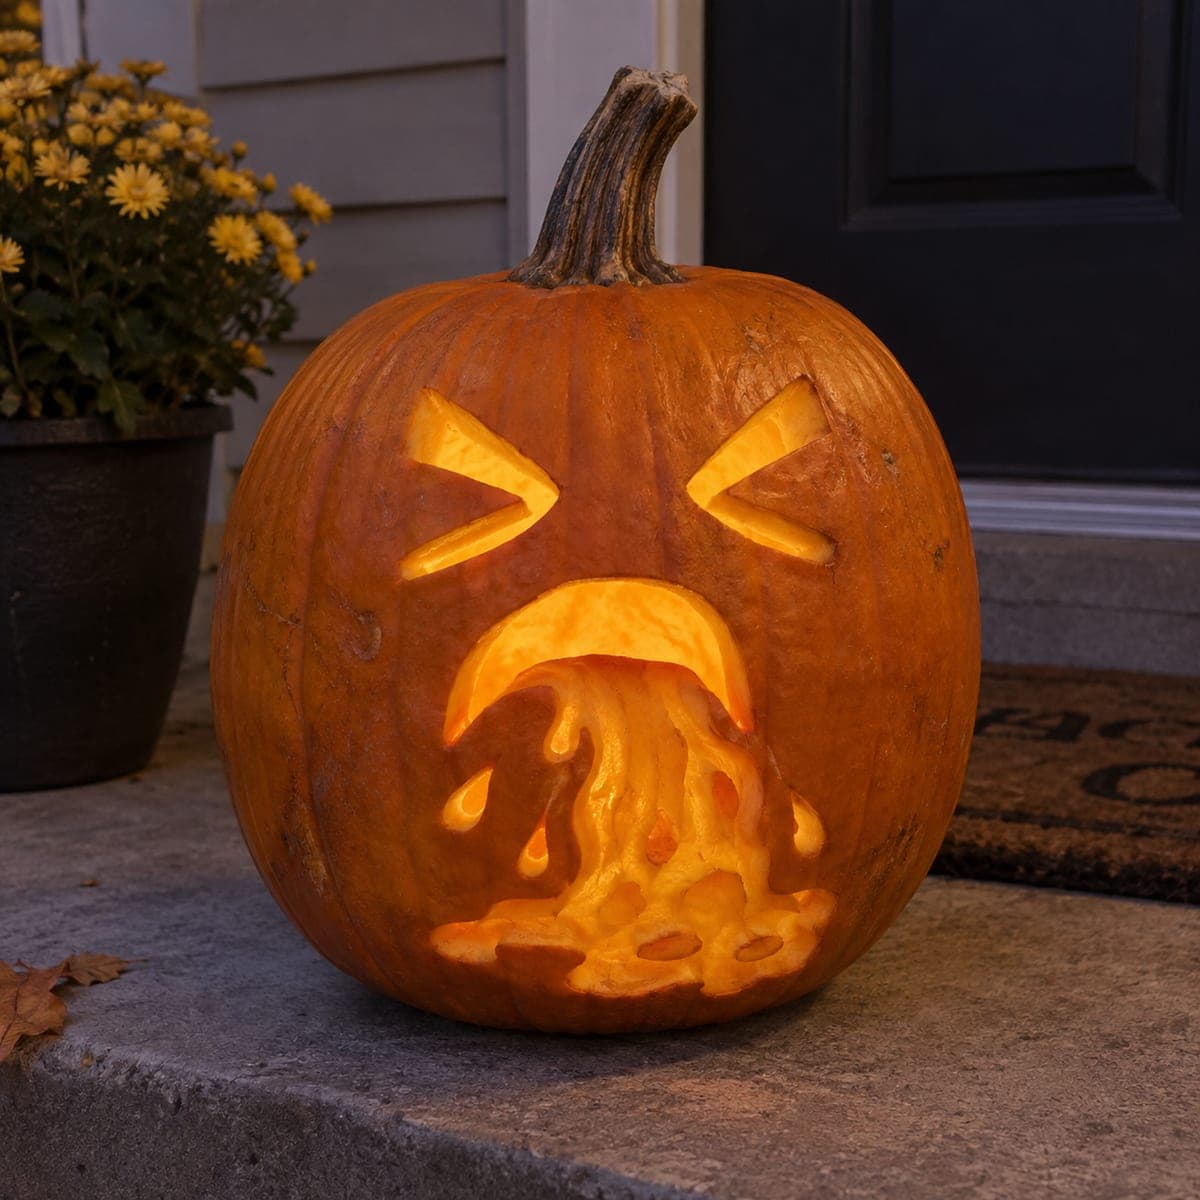
Lopsided Goofy Jack-O-Lantern with Uneven EyesAI
0

Lopsided Goofy Jack-O-Lantern with Uneven Eyes

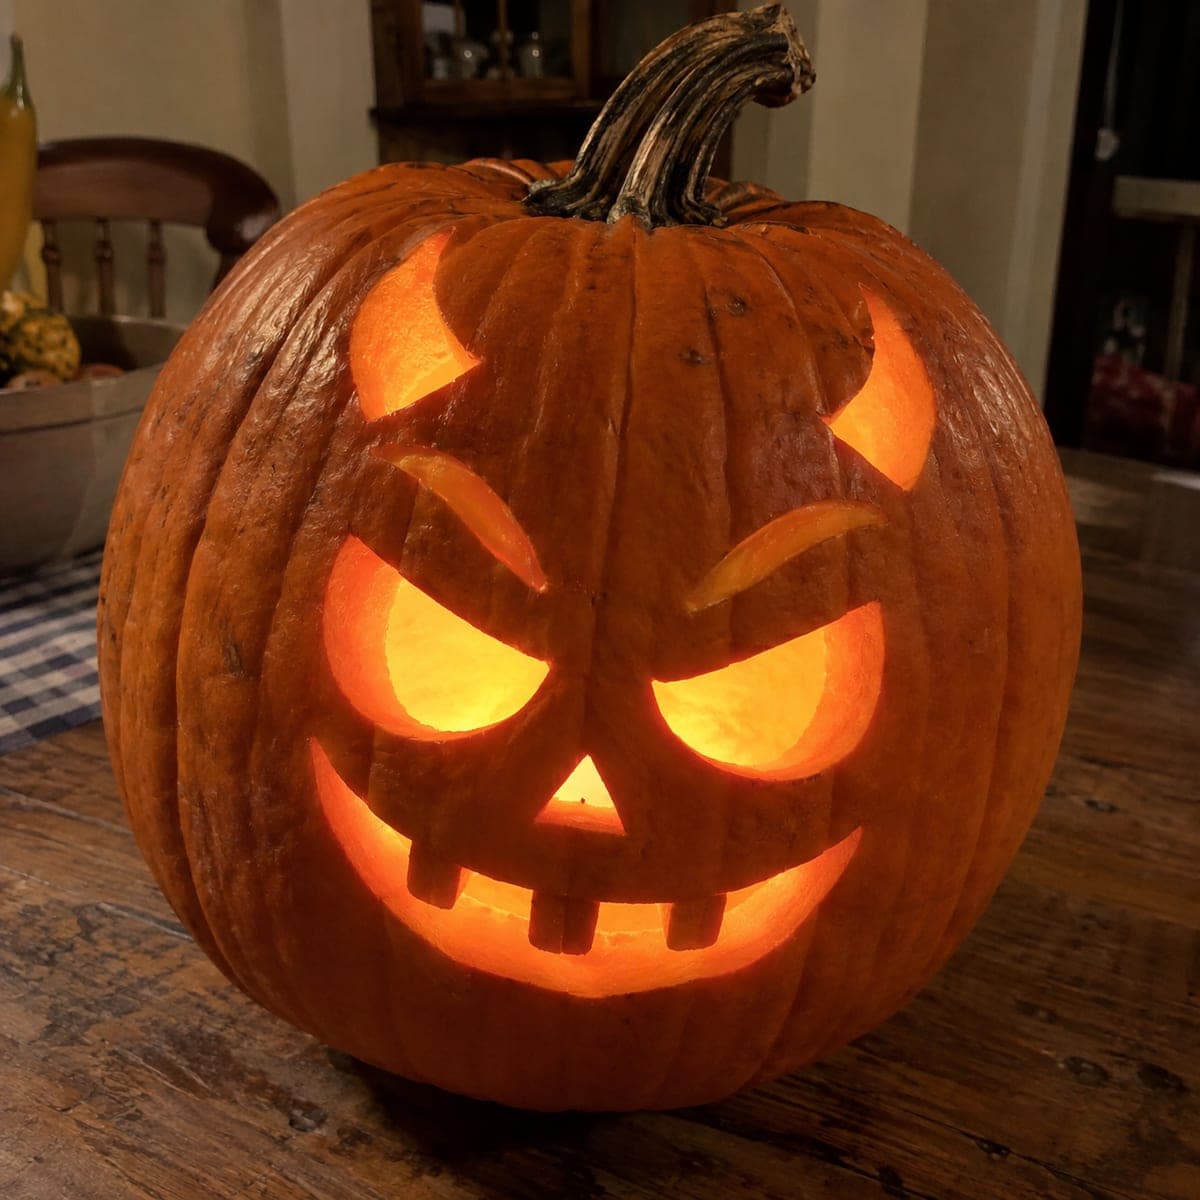
An asymmetrical face with mismatched angry eyebrows, a small triangular nose, and a square-toothed grin makes this Jack-O-Lantern look more mischievous than terrifying. The slight tilt of the whole design and the mismatched brow heights add personality without requiring advanced technique. Carve each feature slightly off-center by design, then cut two rectangular teeth and a small gap rather than the traditional pointed variety. A flickering candle inside a warm kitchen or on a table brings out the impish charm of this easy pumpkin carving idea.

This is an AI-generated concept image: a realistic, carvable design idea rather than a photo of a finished carve. AI concepts are always labeled and sit out the leaderboard and the contest.

No ratings yet · Sign in to rate
Comments (0)

  • No comments yet — be the first.

Save without an account. Sign in to like or comment.

Our tips for carving a similar design

The whole charm here is deliberate imperfection: mismatched brow heights, curled eye shapes at slightly different sizes, and a blocky grin instead of pointed teeth. The core trick is letting each feature sit a little off-center on purpose so the face reads mischievous rather than scary. Everything is a straight cutout job, so it is a great design for a first or second-time carver.

Written by PumpkinCarvingIdeas.com, inspired by the image above. These are our suggestions, not instructions from the uploader. This approach to the AI concept has not been tested on a real pumpkin.

From pumpkin to porch

  1. Pick your pumpkin and plan the tilt

    Choose a tall, slightly oval pumpkin with a smooth front and pick the flattest side as your face. Since the design is intentionally lopsided, you do not need perfect symmetry, which takes the pressure off. Sketch the two eyes, a small triangle nose, and a wide square-toothed grin with a washable marker, setting one eyebrow higher than the other. Step back and check the balance before you cut anything.

  2. Open the pumpkin from the bottom

    Instead of a top lid, cut a wide circular hole in the base so the pumpkin sits stable and can be set down over an LED light. Angle your knife inward so the cut piece does not fall through. Scoop out all the seeds and pulp, then scrape the inside of the face wall down to about one inch thick. A thinner wall makes the cutouts much easier and lets more light through.

  3. Cut the eyes and brows

    Start with the eyes since they carry most of the personality. Use a small serrated carving saw to cut the two curled, comma-like eye shapes, keeping one a touch larger than the other. Cut the angled eyebrow slots as separate openings above the eyes at mismatched heights. Make gentle sawing passes and let the tool do the work rather than forcing it.

  4. Add the nose and mouth

    Cut the small triangular nose next, keeping it modest so it does not crowd the grin. For the mouth, saw the wide smile outline first, then remove two rectangular teeth and leave a small gap so it reads blocky and goofy. Cut the largest mouth opening last, since a big early cutout weakens the face wall. Push the pieces out gently from the inside to avoid cracking the edges.

  5. Peel a few soft glow accents

    For extra depth, use a lino or clay-shaping tool to skin-peel a thin shallow area just inside one eyebrow or along the cheeks. Removing only the outer skin lets that spot glow dim orange without cutting all the way through. Keep these peeled zones small so the face stays clean and readable. This step is optional but adds a nice warm halo around the features.

  6. Light it and photograph

    Set a battery LED tealight or a small puck light inside and lower the pumpkin over it. Avoid real candles, since the heat and open flame are a fire risk and can scorch the thin walls. Dim the room and shoot slightly off to one side to show off the lopsided grin. If any edge looks ragged, tidy it with a paring knife before the photo.

Gather your supplies

Check things off as you get ready.

Work on a stable surface, keep your free hand out of the cutting path, and have an adult handle sharp tools.

Three levels of light

  • Leave intact

    The whole outer face skin stays dark, including the tilted forehead and cheeks that frame the features.

  • Peel & shade

    Thin shallow areas just inside a brow or along the cheeks glow soft orange for gentle depth.

  • Cut through

    The eyes, brows, triangle nose, and square-toothed grin punch through for the brightest light.

Learn the carving basics

Before you start cutting

This is a concept image, so can a face like this really be carved?

Yes. The picture is an AI-generated concept, but every feature here is a simple cutout that works fine on a real pumpkin. Keep the walls around one inch thick and leave a small gap between the two square teeth so nothing snaps.

How lopsided should I make it before it looks like a mistake?

Aim for small, confident differences rather than wild ones. Raise one brow maybe half an inch above the other and make one eye slightly larger. If every feature is only a little off, the face reads as intentional and goofy instead of accidental.

Do I need a stencil or can I freehand this?

You can freehand it easily since the shapes are loose by design. Sketch with a washable marker first so you can wipe away and adjust the tilt before cutting. If you want a guide, a goofy-face stencil gives you clean eye curls to trace.

Your take belongs here, too.

Changed a detail? Made it simpler? Share a photo of your version and tell the community what worked.

Share your pumpkin

More pumpkins like this

You've reached the end · 8 pumpkins
The Patch Report

Fresh pumpkins, in your inbox.

The best new carvings, ideas worth stealing, and how-tos for carving season. Short, seasonal, and gone by November.

A short email during carving season. Unsubscribe anytime. See our privacy policy.