Halloween Pumpkin Carving Contest · Starts October 1st · $500 in prizes
← Back to ideas
@ai_concepts
Sep 25, 2026
Oak Leaf Wreath Crescent Moon Expert Adult PumpkinAI
0

Report this carving

Tell us what is wrong. Reports are private.

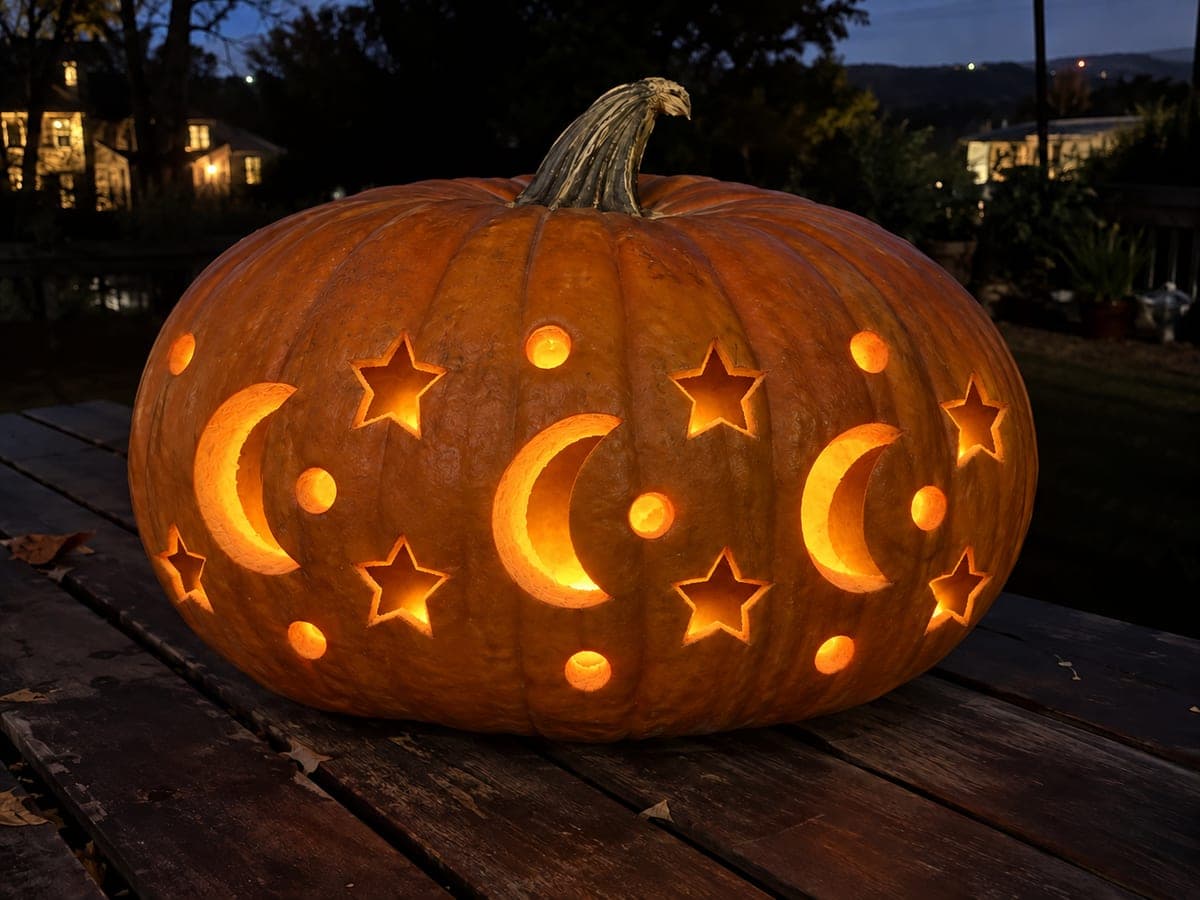
Oak Leaf Wreath Crescent Moon Expert Adult Pumpkin

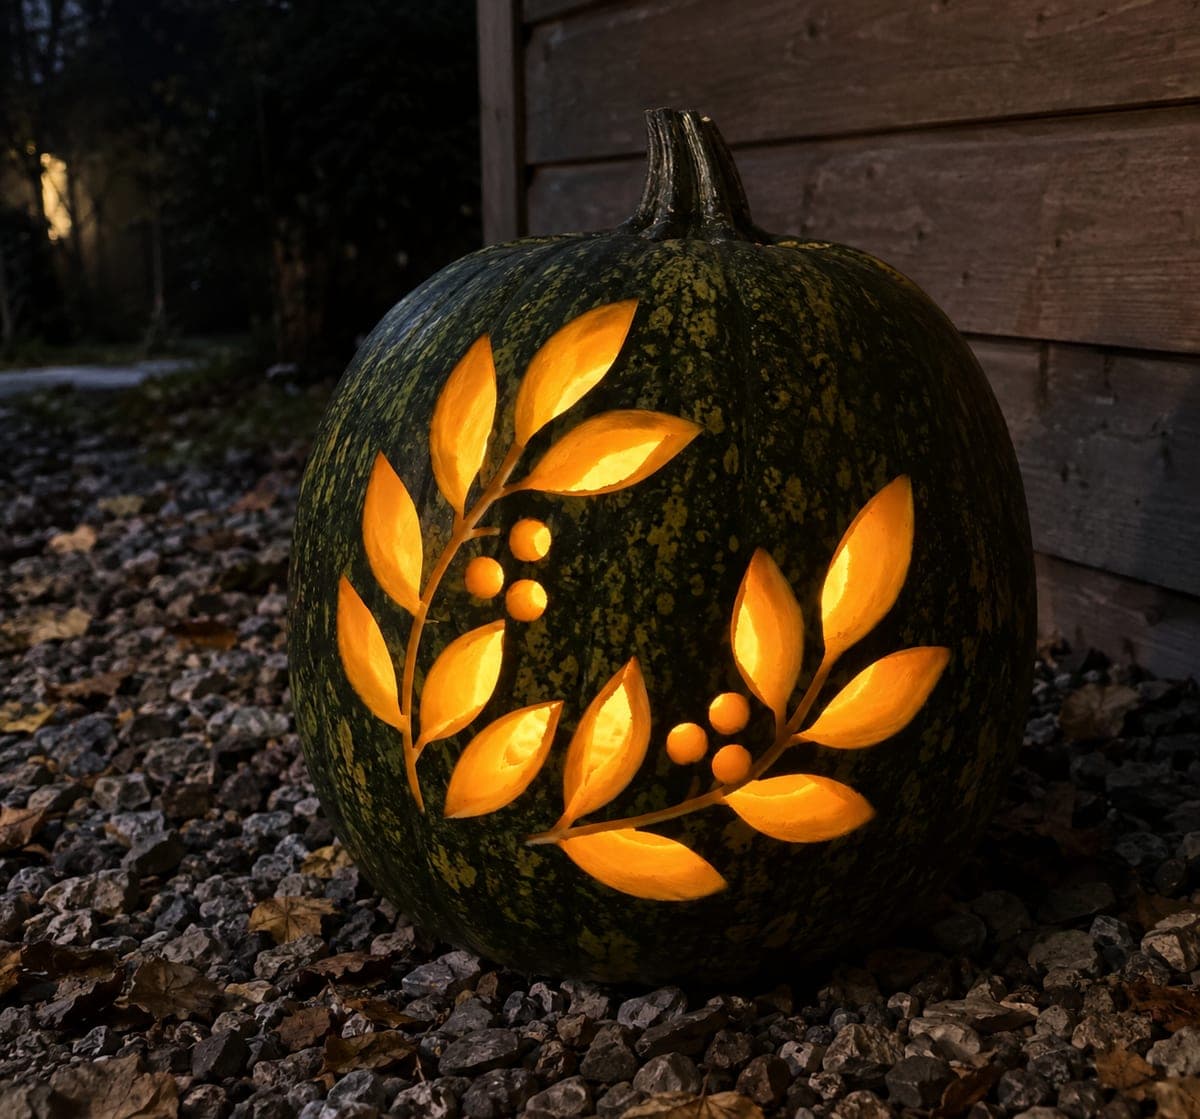
Twenty individually cut lobed leaf holes and small berry holes form a circular wreath around a central empty crescent moon cutout in this expert pumpkin carving idea for adults. Each leaf aperture is completely open rather than a leaf retained inside a larger hole, and 10mm bridges connect every element back to the intact rind. Lay out the wreath circle with compass and chalk before cutting, and alternate leaf sizes around the ring so the pattern reads as organic rather than mechanical.

No ratings yet · Sign in to rate
Comments (0)

  • No comments yet — be the first.

Save without an account. Sign in to like or comment.

Our tips for carving a similar design

This design is a wreath of negative space: every leaf and berry is a completely open aperture cut into solid rind, with 10mm bridges keeping each element attached to its neighbors and to the outer shell. The crescent moon at the center is the compositional anchor and the largest single cutout. Laying out the full wreath circle with a compass before cutting is essential so the twenty leaf holes distribute evenly and the moon sits centered within the ring.

From pumpkin to porch

  1. Plan and transfer the full design

    Draw a circle on paper scaled to your pumpkin face, place the crescent moon at center, and arrange twenty lobed leaf outlines with small berry dots around the circle. Print and transfer the design using a transfer stylus, pricking through the paper onto the rind. Connect the prick marks before removing the template.

  2. Hollow and thin the face panel

    Scoop the interior from a back plug to about three-quarters of an inch on the face panel. Precision cutting at this level requires a wall thin enough for the saw to navigate the lobed leaf curves without excessive resistance. Keep the outer edges and the area outside the wreath circle thicker for structural support.

  3. Cut the crescent moon first

    The crescent moon is the largest opening and removing it relieves the center of the face panel early. Cut the outer arc, then the inner concave arc, meeting cleanly at both crescent tips. Use a detail knife for the pointed tips to prevent cracking.

  4. Cut the leaf holes, alternating sizes

    Work around the wreath ring in sequence, cutting adjacent leaves in alternating larger and smaller sizes. Cut each lobed leaf as a single fully open aperture, navigating the convex lobes with short saw strokes. Leave every 10mm bridge between leaves intact.

  5. Add berry holes

    Punch or drill small circular berry holes in the gaps between leaf holes around the wreath ring. These fill the negative space and prevent the bridges between leaves from looking too wide. A leather punch or small drill bit produces cleaner circles than a saw for these tiny openings.

  6. Light and display

    Place a focused LED inside so the moon and all wreath apertures glow simultaneously. Display on a table or mantel where viewers can appreciate the fine bridgework. Outdoors in wind, the many small holes make this design vulnerable to moisture, so bring it inside after display.

Written with AI to match this design

Gather your supplies

Check things off as you get ready.

Work on a stable surface, keep your free hand out of the cutting path, and have an adult handle sharp tools.

Three levels of light

  • Leave intact

    All solid rind between leaf holes, berry holes, and the moon forms the wreath body, staying dark

  • Peel & shade

    None

  • Cut through

    The crescent moon cutout, all twenty lobed leaf holes, and all berry holes glow at full brightness

Learn the carving basics

Before you start cutting

How do I navigate the concave dips between lobes on each oak leaf without cracking?

Enter each concave dip from one adjacent lobe, cutting toward the dip center and stopping before you exit the other side. Then approach from the other adjacent lobe to meet the first cut. This two-direction technique prevents the saw from jumping and cracking the narrow dip point.

What does a 10mm bridge actually look like in practice?

Ten millimeters is roughly the width of a thumbnail. It is wide enough to hold under normal handling but narrow enough to be visually unobtrusive between leaf holes. Use a small ruler to spot-check bridge widths as you cut, especially between leaves that are close together on the tighter parts of the wreath ring.

Can I reduce this to ten or twelve leaves for a medium-difficulty version?

Yes, halving the leaf count while keeping the moon and berry holes intact still reads as a recognizable wreath and drops the project to hard rather than expert. Space the fewer leaves evenly around the ring and increase the berry holes to fill the larger gaps.

Your take belongs here, too.

Changed a detail? Made it simpler? Share a photo of your version and tell the community what worked.

Share your pumpkin

More pumpkins like this

You've reached the end · 8 pumpkins
The Patch Report

Fresh pumpkins, in your inbox.

The best new carvings, ideas worth stealing, and how-tos for carving season. Short, seasonal, and gone by November.

A short email during carving season. Unsubscribe anytime. See our privacy policy.