Halloween Pumpkin Carving Contest · Starts October 1st · $500 in prizes
← Back to ideas
@ai_concepts
Sep 25, 2026
Triple Crescent Moon Pumpkin With Six Scattered Star HolesAI
0

Report this carving

Tell us what is wrong. Reports are private.

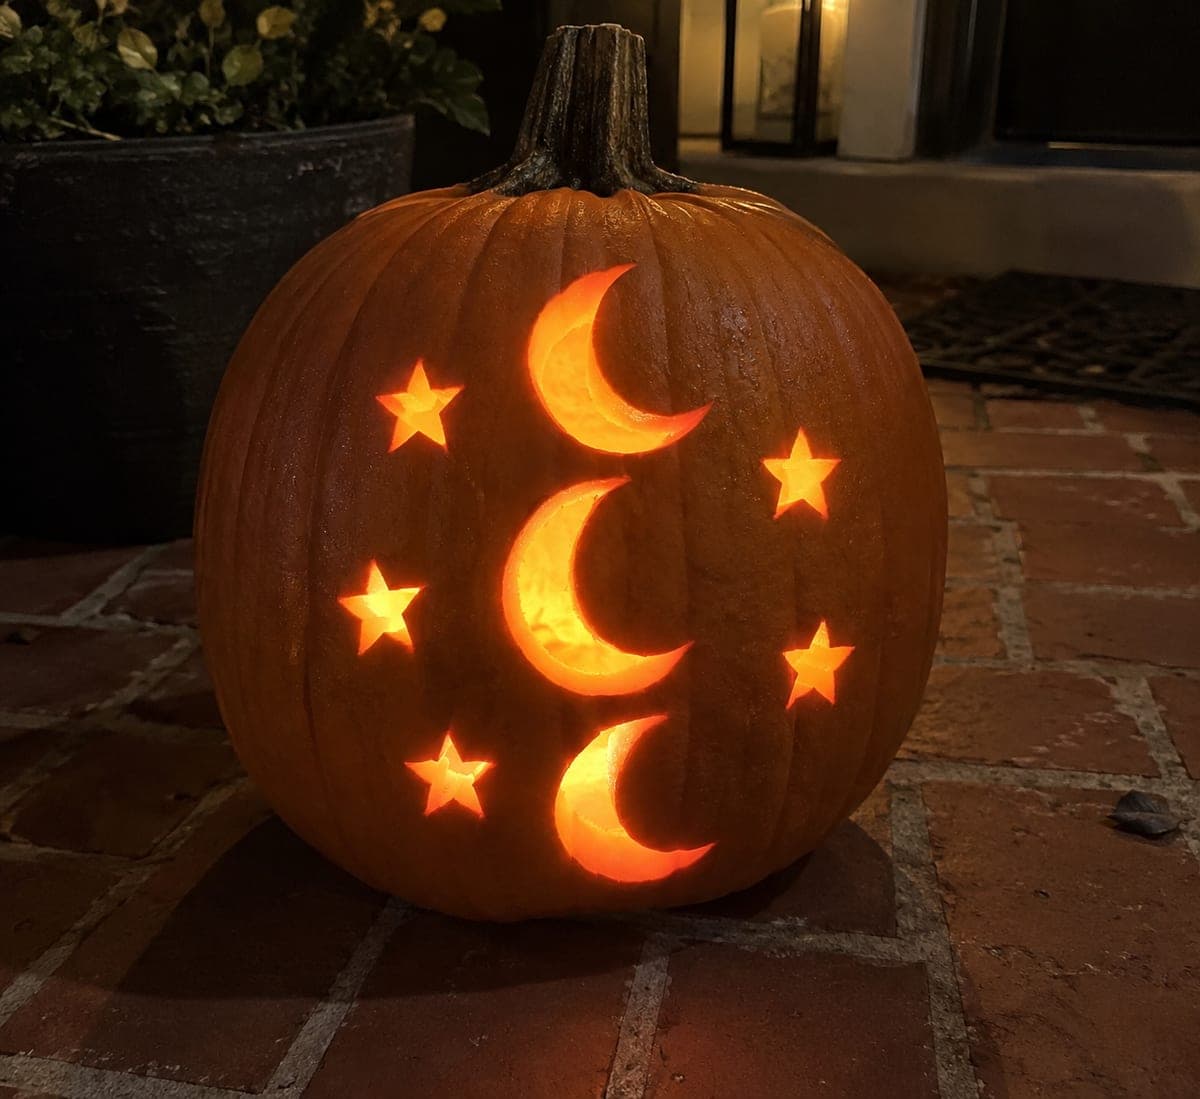
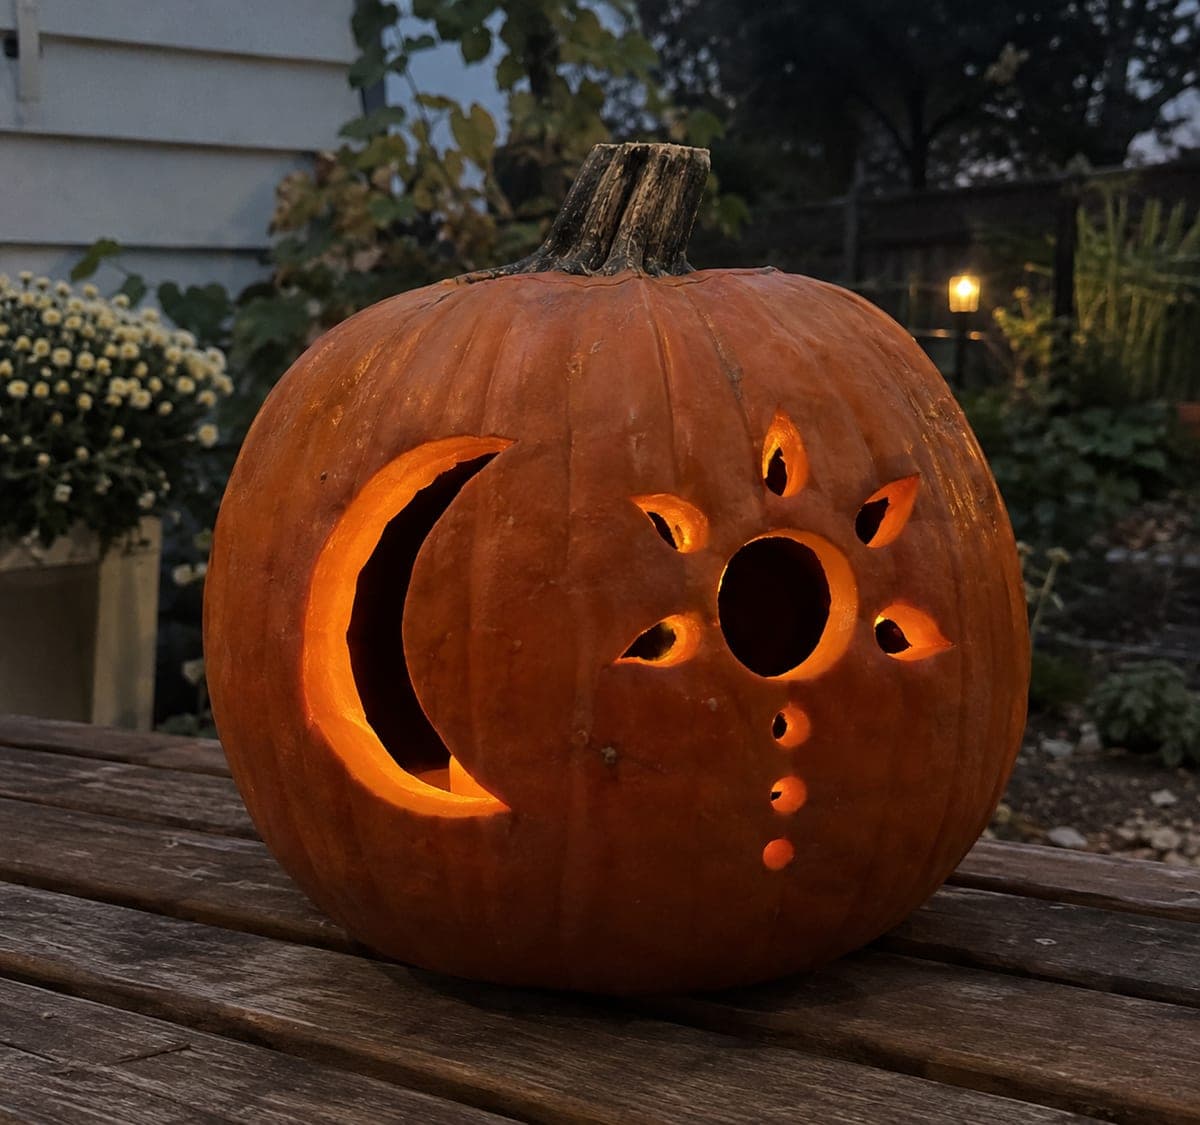
Triple Crescent Moon Pumpkin With Six Scattered Star Holes

Three vertically stacked crescent moon openings and six separate star holes scattered on either side create a layered celestial display in this hard pumpkin carving idea at intermediate difficulty. Cut the three crescents in order from largest to smallest, maintaining at least 10mm of rind between each opening so the vertical arrangement stays stable. Add the six star holes last, distributing them evenly on both sides for visual balance. A bright LED inside makes the three moon shapes and scattered stars glow with distinct intensity against the orange rind.

No ratings yet · Sign in to rate
Comments (0)

  • No comments yet — be the first.

Save without an account. Sign in to like or comment.

Our tips for carving a similar design

Three vertically stacked crescent openings of graduated sizes create the layered moon motif, while six independent star holes scattered to both sides add depth without complicating the structure. Because all shapes are isolated from one another, the main technical challenge is maintaining at least 10 mm of rind between any two openings to keep the shell strong. Cutting from largest to smallest crescent then adding the stars last makes the structural logic easy to follow.

From pumpkin to porch

  1. Scoop and measure walls

    Cut a bottom cap and scoop the interior to about three-quarters of an inch of wall thickness. Thin walls let the crescent shapes glow with sharp definition and make star holes easier to cut cleanly. Mark the center vertical axis of the pumpkin face with a vertical marker line as a reference for positioning the three moons symmetrically.

  2. Lay out the three crescents

    Draw the three crescent shapes along the vertical axis, with the largest at the bottom, medium in the middle, and smallest at the top. Ensure each crescent is a proper arc shape, widest at its center and tapering at both horns. Measure the gap between crescents and confirm at least 10 mm of rind separates them at their closest points.

  3. Position the star holes

    Place three star outlines on the left side and three on the right, distributing them at different heights to mirror each other loosely. Keep all stars at least 15 mm from the crescent openings and from the outer edge of the pumpkin. Small five-pointed stars with slightly rounded points are structurally sounder than razor-sharp tips.

  4. Cut crescents from largest to smallest

    Begin with the largest crescent at the bottom. Use a thin pumpkin saw to follow the arc, keeping the blade perpendicular so the edge is clean and does not undercut the rind. Complete all three crescents before moving to the stars.

  5. Cut the star holes and light

    Work through all six star holes, pressing each piece inward after cutting. Insert a bright LED lantern and rotate the pumpkin slowly to check that each moon and star reads evenly. Place it on an elevated surface so the vertical moon stack reads correctly from below.

Written with AI to match this design

Gather your supplies

Check things off as you get ready.

Work on a stable surface, keep your free hand out of the cutting path, and have an adult handle sharp tools.

Three levels of light

  • Leave intact

    All rind between the three crescents, between the star holes, and along the outer wall stays solid and dark.

  • Peel & shade

    None for this design.

  • Cut through

    All three crescent moon openings and all six star holes are cut through completely for full bright light.

Learn the carving basics

Before you start cutting

How do I cut a clean crescent arc shape?

Draw the inner and outer curves of each crescent separately, then cut the outer arc first and the inner arc second. Working in two distinct passes gives you more control than trying to follow a crescent outline in one continuous cut. A flexible pumpkin saw blade helps it track the curve without binding.

Can I make the three crescents all the same size?

You can, but graduated sizes give the design a more dynamic feel and make the vertical spacing easier to manage without shapes overlapping. If you prefer uniform crescents, add extra spacing between them to compensate for the larger combined footprint.

How do I get the six stars evenly distributed?

Print a simple template with three stars on each side at staggered heights, tape it to the pumpkin, and poke through the outline with a nail or poking tool before removing the paper. This transfers the star positions accurately without relying on freehand judgment while the saw is in your hand.

Your take belongs here, too.

Changed a detail? Made it simpler? Share a photo of your version and tell the community what worked.

Share your pumpkin

More pumpkins like this

You've reached the end · 8 pumpkins
The Patch Report

Fresh pumpkins, in your inbox.

The best new carvings, ideas worth stealing, and how-tos for carving season. Short, seasonal, and gone by November.

A short email during carving season. Unsubscribe anytime. See our privacy policy.