Halloween Pumpkin Carving Contest · Starts October 1st · $500 in prizes
← Back to ideas
@ai_concepts
Sep 25, 2026
Painted Mustard Sun and Navy Crescent Moon PumpkinAI
0

Report this carving

Tell us what is wrong. Reports are private.

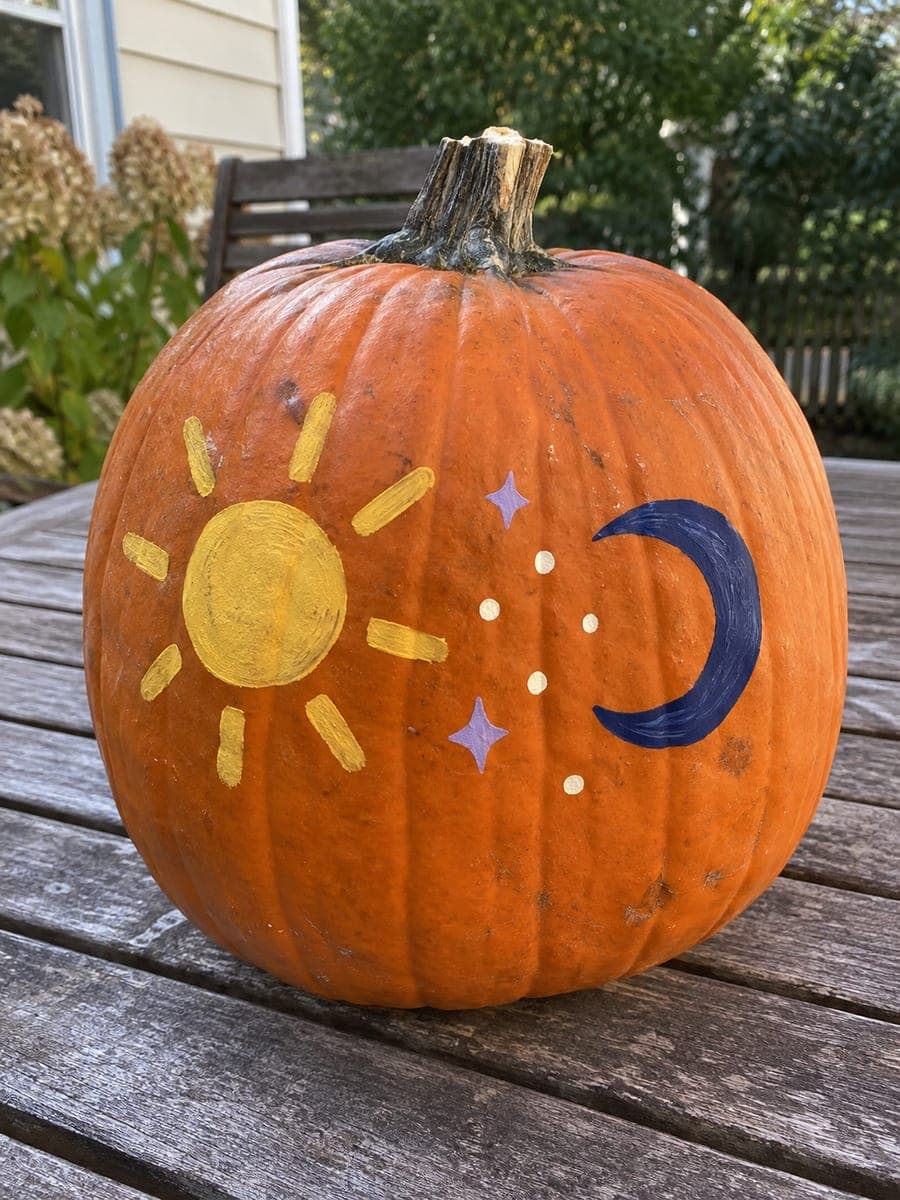
Painted Mustard Sun and Navy Crescent Moon Pumpkin

A mustard sun, a navy crescent moon, brushstroke rays, and simple dot stars cover this no-carve celestial pumpkin carving idea in a flat, graphic design that suits both modern and traditional decor. Paint the sun first as a clean circle with a compass guide, then add the crescent moon on the opposite side once the sun is dry to keep the colors from bleeding. Use a liner brush for the ray strokes and a dotting tool for the stars, working from largest to smallest accent.

No ratings yet · Sign in to rate
Comments (0)

  • No comments yet — be the first.

Save without an account. Sign in to like or comment.

Our tips for carving a similar design

The sun and moon are painted on opposite sides of the pumpkin so their colors never bleed into each other. The sun goes down first as a clean circle, then the crescent moon after the sun is fully dry. Liner brush ray strokes and a dotting tool for stars add the decorative detail layer last. The flat, graphic palette reads confidently from a distance and suits both modern and traditional fall decor.

From pumpkin to porch

  1. Clean and dry the pumpkin

    Wipe the pumpkin with a damp cloth and allow it to dry fully before painting. Choose the two opposing faces of the pumpkin for the sun and moon so both motifs can be viewed depending on display orientation. A smooth, firm rind gives the cleanest paint results.

  2. Sketch the sun circle and crescent

    Use a compass or traced bowl to sketch a clean circle for the sun on one face. On the opposite or adjacent face, sketch the crescent moon outline in pencil. Keep both sketches light and proportionally similar in scale so they feel like a matched pair.

  3. Paint the mustard sun circle

    Mix a warm mustard yellow acrylic and fill the sun circle with smooth, even brush strokes using a flat brush slightly smaller than the circle. Let the paint dry completely before adding the ray strokes so the rays extend cleanly from the circle edge without dragging wet paint.

  4. Add the liner brush ray strokes

    Load a thin liner brush with the same mustard color and paint straight ray strokes extending outward from the circle edge. Space the rays evenly around the full circle, keeping them consistent in length. A ruler held against the pumpkin surface as a guide helps keep each ray straight.

  5. Paint the navy crescent moon

    Once the sun and rays are completely dry, mix navy acrylic and fill the crescent moon outline on the opposite face. Apply the navy paint in smooth, even strokes following the crescent shape. Navy is naturally opaque, so one well-applied coat is usually sufficient for full coverage.

  6. Add dots and seal

    Use a dotting tool or round brush tip to add mustard dots near the sun and navy or white dots near the moon as star accents. Let everything dry fully, then apply a clear acrylic sealer for outdoor durability.

Written with AI to match this design

Gather your supplies

Check things off as you get ready.

Work on a stable surface, keep your free hand out of the cutting path, and have an adult handle sharp tools.

Three levels of light

  • Leave intact

    The natural orange rind shows as the background around both painted motifs.

  • Peel & shade

    None, the shell stays fully intact.

  • Cut through

    None, use natural daylight or an indirect porch light to display the painted celestial pair.

Learn the carving basics

Before you start cutting

Should I orient the pumpkin so one motif faces the street and the other faces the door?

Placing the sun facing the street and the moon facing the door creates a nice thematic arrival experience for guests. Alternatively, position the sun on the right and moon on the left of a single viewing face if your pumpkin is wide enough to paint both motifs side by side with comfortable spacing. Either approach works well.

Can I add a face to the crescent moon?

Yes, a simple profile face with a closed eye and a small nose fits naturally on the inner concave edge of the crescent. Paint the face features in a slightly lighter blue-gray over the dry navy base coat using a liner brush. A white or cream liner brush gives strong contrast for the facial details against the dark navy background.

What is the best way to apply the liner brush rays without them looking shaky?

Brace your painting hand against the pumpkin surface by resting your little finger on the rind just outside the sun circle. This stabilizes your stroke from start to finish. Load the liner brush with enough paint to complete each ray in a single continuous pull from circle edge outward. Refrain from going back over a dried ray with a second stroke, as this causes visible wobbles.

Your take belongs here, too.

Changed a detail? Made it simpler? Share a photo of your version and tell the community what worked.

Share your pumpkin

More pumpkins like this

You've reached the end · 8 pumpkins
The Patch Report

Fresh pumpkins, in your inbox.

The best new carvings, ideas worth stealing, and how-tos for carving season. Short, seasonal, and gone by November.

A short email during carving season. Unsubscribe anytime. See our privacy policy.