Halloween Pumpkin Carving Contest · Starts October 1st · $500 in prizes
← Back to ideas
@ai_concepts
Sep 14, 2026
Outlined Skull and Crossbones PumpkinAI
0

Outlined Skull and Crossbones Pumpkin

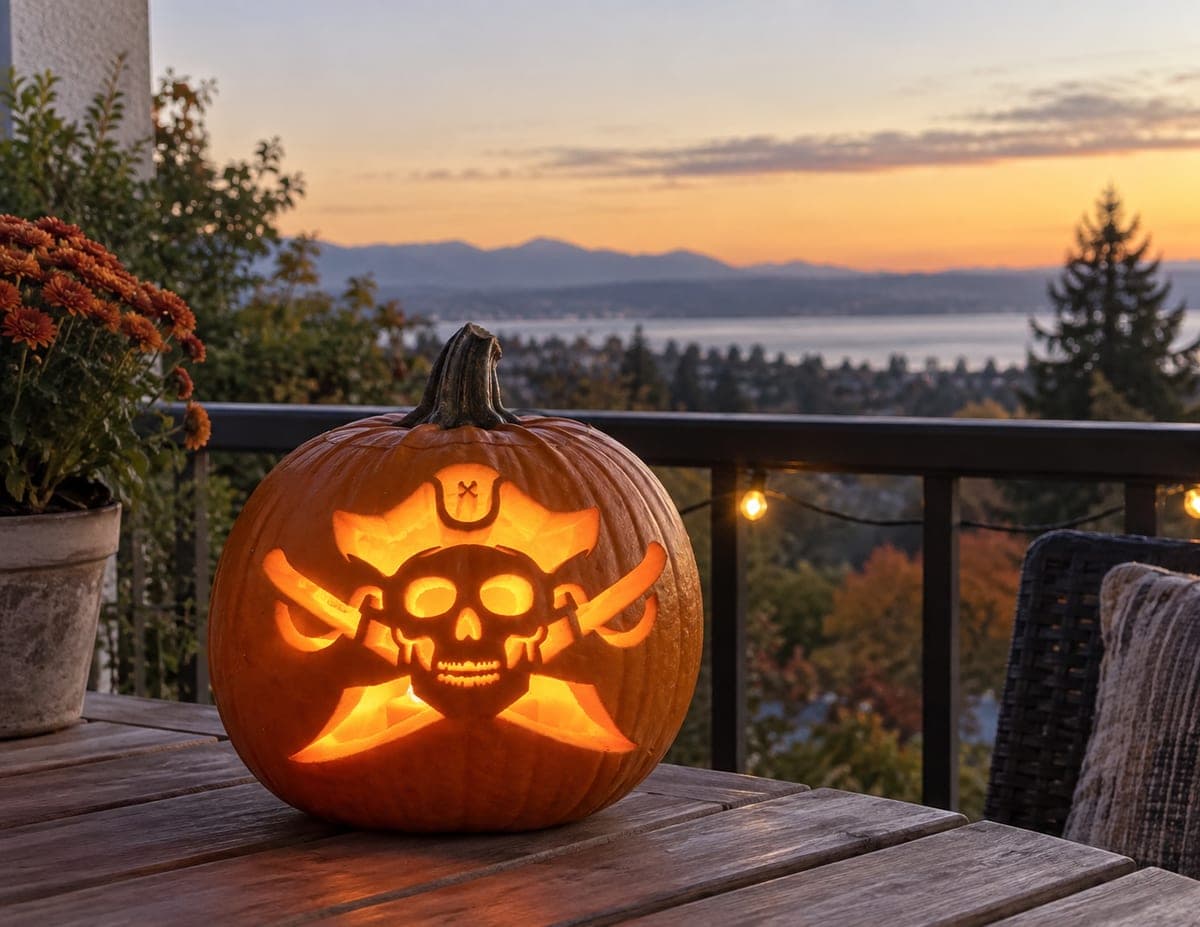
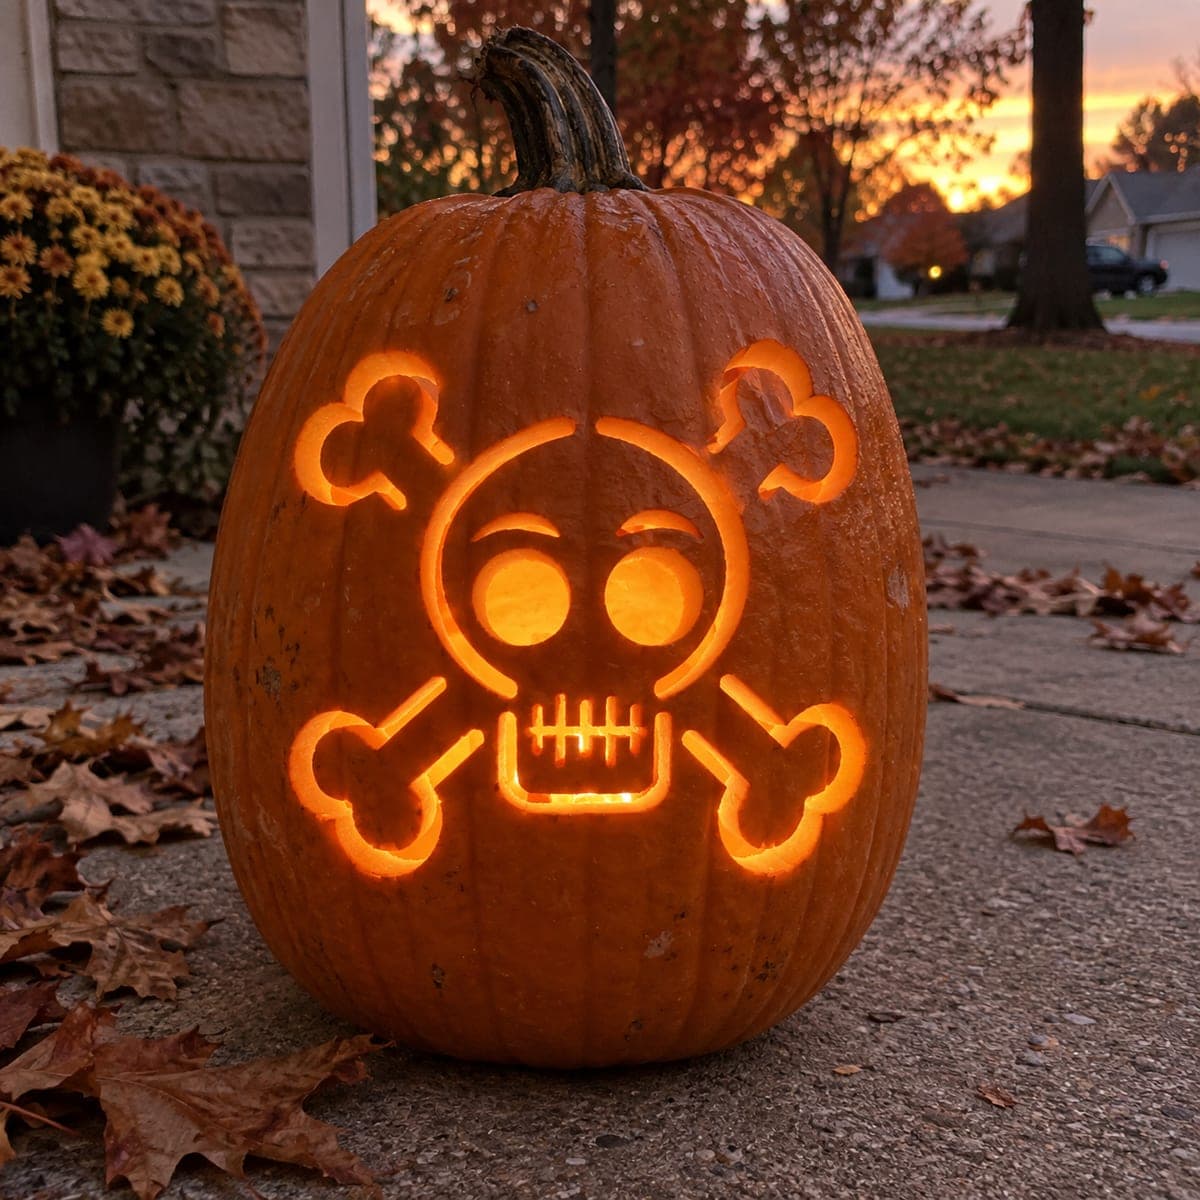
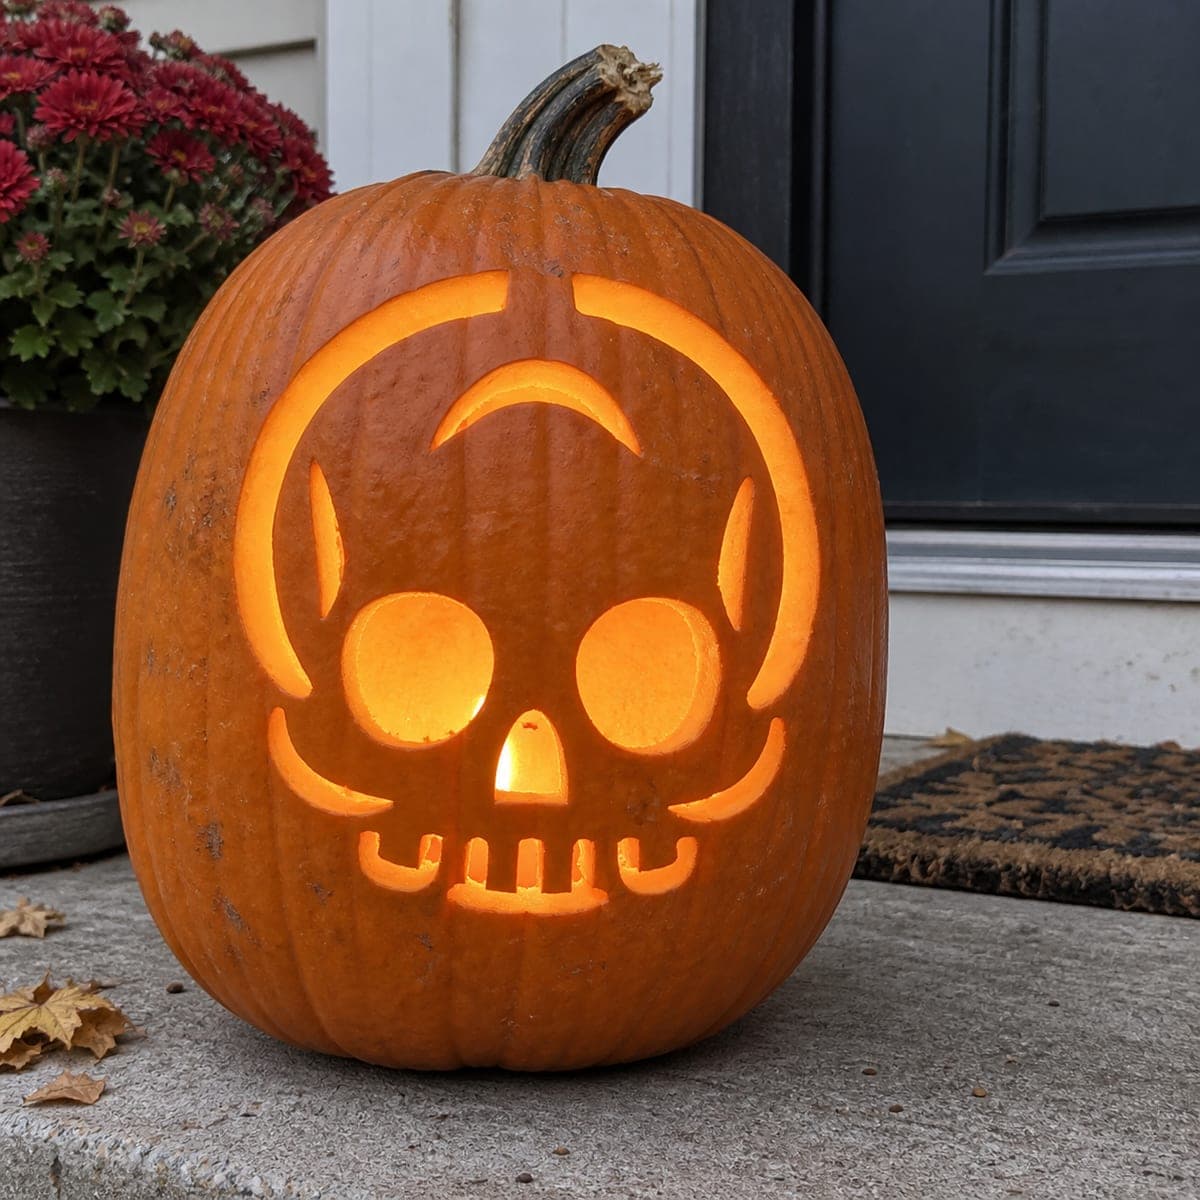
A round cartoon skull with oversized circular eyes, stitched teeth, and a cheerful expression sits centered on two crossed bones with rounded, knobby ends in this cute skull-and-crossbones pumpkin carving idea. All shapes are carved through, so the bones and skull glow together as a classic Halloween symbol that reads easily from the street. Carve the bone knobs at the outer edges first since they are isolated from the rest of the design, then open the eye sockets and the skull outline before joining the crossbones in the center. Leave the skin between where the bones cross the skull's chin thick enough to support both elements without cracking under the weight of the wall above.

This is an AI-generated concept image: a realistic, carvable design idea rather than a photo of a finished carve. AI concepts are always labeled and sit out the leaderboard and the contest.
No ratings yet · Sign in to rate

Comments (0)

  • No comments yet — be the first.

Save without an account. Sign in to like or comment.

Our tips for carving a similar design

The core trick here is that everything is an outline cutout, so the skull, eyes, and bones all glow as bright lines against the dark skin. The plan is to open the isolated pieces first, then the eyes and skull outline, and finally join the crossbones in the center where the design carries the most weight. Keeping the skin thick where the bones cross the chin is what holds the whole thing together.

Written by PumpkinCarvingIdeas.com, inspired by the image above. These are our suggestions, not instructions from the uploader. This approach to the AI concept has not been tested on a real pumpkin.

From pumpkin to porch

  1. Prep the pumpkin and transfer the design

    Pick a tall pumpkin with a smooth, flat front face so the round skull sits centered and undistorted. Cut a lid from the bottom or the back rather than the top so the stem stays intact and the wall above the design stays strong. Scrape the inside of the front wall down to about one inch so light passes through evenly. Tape your printed pattern in place and poke the outlines with a pin or a transfer tool so the dots guide your cuts.

  2. Carve the four bone knobs first

    Start with the rounded knobby ends of the crossbones at the outer corners, since they are separated from the rest of the design. Use a small serrated saw and take slow, straight in-and-out strokes rather than angling the blade. Cutting these isolated shapes first lets you build confidence before you reach the fragile center. Push each piece gently inward to free it, and clean the edges from the inside.

  3. Open the round eyes and skull outline

    Cut the two big circular eye sockets next so the skull's face comes to life early. Then carve the thin outline that forms the round skull shape, working in short sections and leaving small bridges where the outline meets the eye area. Keep the blade perpendicular so the glowing line stays crisp. Take your time on the curves, since smooth circles are what give this design its cheerful cartoon look.

  4. Add the stitched teeth and mouth

    Carve the small open rectangle for the mouth, then add the short vertical stitch lines above it as narrow slits. Leave plenty of skin between each stitch so the teeth stay attached and do not collapse into one big hole. Cut the mouth opening cleanly but avoid making it too wide, or you will weaken the chin. This small detail area rewards patience, so switch to your smallest tool here.

  5. Join the crossbones through the center last

    Connect the bone shafts across the skull to complete the crossed pattern, saving this join for last since it is the most load-bearing part. Leave the skin between the bones and the skull's chin thick enough to support both elements, so nothing cracks under the wall above. Cut the largest openings gradually and support the pieces with your free hand as you free them. Step back often to check that both bones read as one continuous shape behind the skull.

  6. Light it and photograph at dusk

    Drop in a battery LED puck or two, not a candle, so the fine outlines and stitched teeth stay safe from heat. Set the pumpkin on a step or table and rotate it until the glow spreads evenly across the skull and bones. Photograph it right at sunset when the sky still has warm color, like the scene shown here. If any line looks dim, scrape a little more from the inside wall behind it.

Gather your supplies

Check things off as you get ready.

Work on a stable surface, keep your free hand out of the cutting path, and have an adult handle sharp tools.

Three levels of light

  • Leave intact

    The full face of the skull, the bone shafts, and the background skin stay untouched and dark for contrast.

  • Peel & shade

    Thin the inside wall behind the outlines and eyes so those glowing lines read a touch softer and warmer up close.

  • Cut through

    The eye circles, skull outline, mouth, stitch slits, and the crossbone shapes are cut through for the brightest glow.

Learn the carving basics

Before you start cutting

How do I keep the skull from cracking where the bones cross the chin?

Leave the strip of skin between the crossbones and the skull's chin thick and uncut, since it supports the weight of the wall above. Cut the big bone openings last so the pumpkin stays rigid while you work the rest of the design. If you feel the area flexing, stop and leave a little more material in place.

This is a concept image, so can a real pumpkin actually hold all these outlines?

Yes, as long as you keep the outline lines a consistent width and leave small bridges where shapes meet. The stitched teeth in particular need solid skin between each slit so they do not tear into one gap. Work the isolated bone knobs first and save the connected center for last.

Should I cut the lid from the top like usual?

For this design a bottom or back opening works better, because it keeps the stem and the top wall intact above the carving. That extra strength matters since the skull outline and crossbones remove a lot of material from the front. A bottom cut also lets you set the pumpkin down right over the light.

Your take belongs here, too.

Changed a detail? Made it simpler? Share a photo of your version and tell the community what worked.

Share your pumpkin

More pumpkins like this

You've reached the end · 8 pumpkins
The Patch Report

Fresh pumpkins, in your inbox.

The best new carvings, ideas worth stealing, and how-tos for carving season. Short, seasonal, and gone by November.

A short email during carving season. Unsubscribe anytime. See our privacy policy.