Halloween Pumpkin Carving Contest · Starts October 1st · $500 in prizes
← Back to ideas
@ai_concepts
Sep 25, 2026
Painted Zoey KPop No-Carve Pumpkin DesignAI
0

Report this carving

Tell us what is wrong. Reports are private.

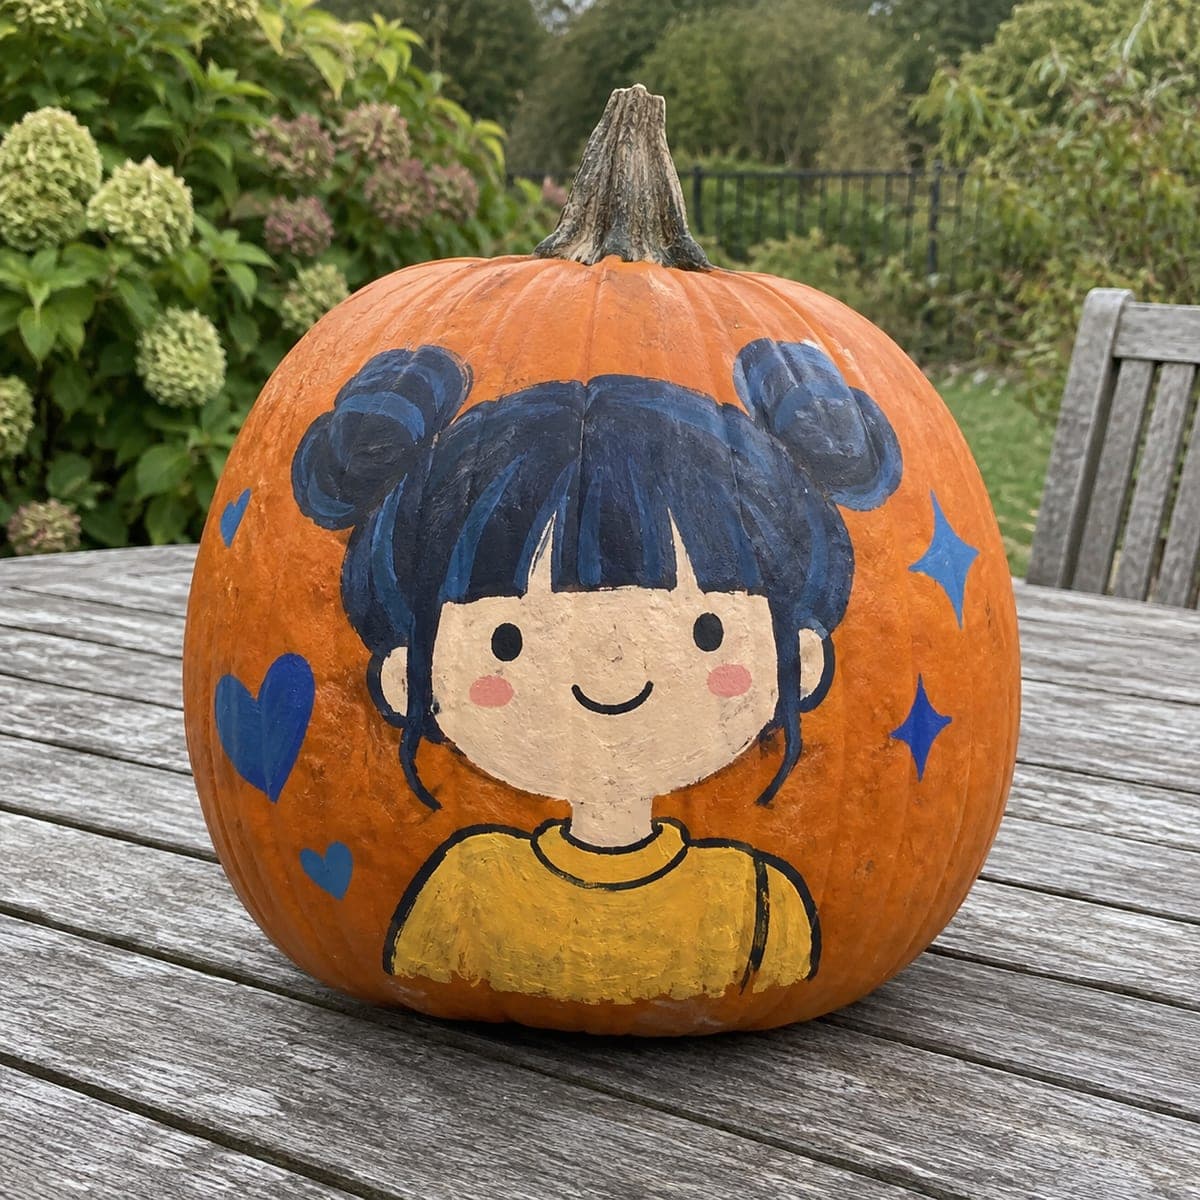
Painted Zoey KPop No-Carve Pumpkin Design

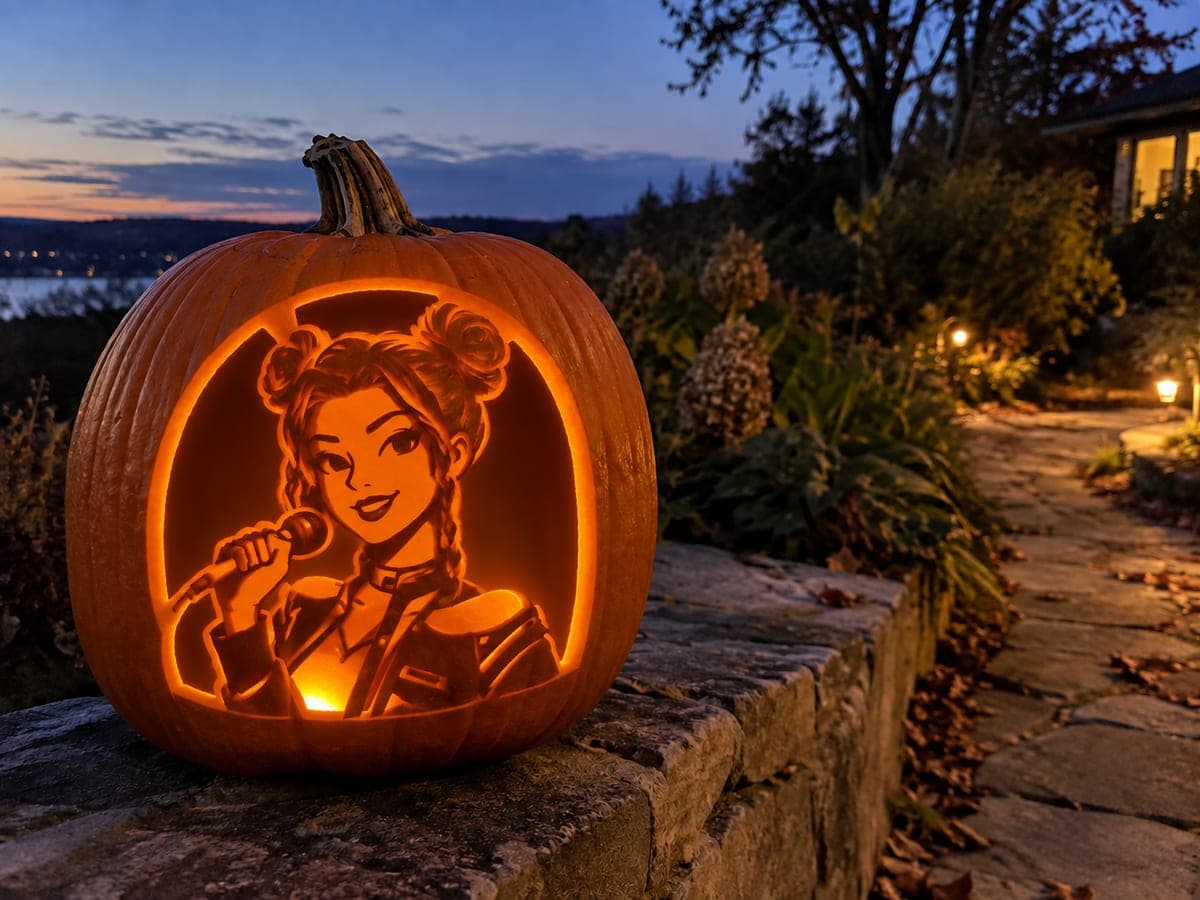
Flat acrylic shapes on an intact rind capture Zoey from KPop Demon Hunters in this no-carve zoey pumpkin carving idea, photographed in a natural home setting that fits perfectly in a fan's seasonal display. Sketch the twin space bun shapes in pencil first, as their proportional roundness is what makes the character immediately recognizable. Block in the hair and costume colors, let them dry fully, then add facial features and accessory details with a fine liner brush. Seal the finished piece with a matte spray varnish to protect the paint through the full October season.

No ratings yet · Sign in to rate
Comments (0)

  • No comments yet — be the first.

Save without an account. Sign in to like or comment.

Our tips for carving a similar design

This no-carve design builds Zoey's look entirely from flat acrylic shapes painted on an untouched rind, making it safe and accessible for all ages. The twin space buns are the visual anchor of the character, so getting their size and position right early is the key to a recognizable result. Layers of paint build from background colors up to fine facial details, and a matte sealer locks everything in for the season.

From pumpkin to porch

  1. Clean and dry

    Wipe the pumpkin surface with a damp cloth to remove dust and field residue, then let it dry completely. A clean, dry rind takes acrylic paint much more evenly than a damp one. If the skin feels waxy, a light pass with rubbing alcohol helps the first paint layer adhere.

  2. Sketch the layout

    Use a soft pencil to lightly sketch the oval face, the two circular space bun shapes, and the general costume outline. Double-check that both buns are the same size and sit symmetrically before you pick up a brush. These proportions are what makes the character immediately recognizable, so spend a moment adjusting the pencil lines until they feel balanced.

  3. Block in background and hair

    Paint the space buns and hair color first using a medium flat brush, then fill in the costume shapes. Use bold, confident strokes and let the paint dry fully before moving to the next color. Two thin coats are more reliable than one thick coat, which can crack as the pumpkin ages.

  4. Add the face and skin tones

    Paint the face oval in a skin-tone color, staying inside your pencil outline. Once dry, add the eyes, brows, and mouth with a fine liner brush. Work from the largest features to the smallest so minor corrections are easier to make.

  5. Detail the costume and accessories

    Use a liner brush to add collar edges, any insignia, and other costume details. Keep lines steady by bracing your painting hand against the pumpkin. Let each pass dry before adding a color on top of it.

  6. Seal and display

    Once the paint is fully dry, apply two light coats of matte acrylic spray sealer, letting the first coat dry before the second. This protects the design from autumn dew and handling. Display on a covered porch or indoors near a window for best results.

Written with AI to match this design

Gather your supplies

Check things off as you get ready.

Work on a stable surface, keep your free hand out of the cutting path, and have an adult handle sharp tools.

Three levels of light

  • Leave intact

    The entire intact rind forms the painting surface, with unpainted areas showing as natural pumpkin orange

  • Peel & shade

    None, this design leaves the shell completely intact

  • Cut through

    None. Use an exterior spotlight or porch light to illuminate the finished painted surface instead

Learn the carving basics

Before you start cutting

My acrylic paint is beading up on the pumpkin skin. What should I do?

This usually means the surface has a waxy coating. Wipe it down with a cotton ball dampened in rubbing alcohol and let it dry fully before repainting. You can also lightly scuff the area with fine-grit sandpaper, which gives the paint something to grip.

How do I get the space buns to look symmetrical?

Pencil a light center line from the stem to the base of the pumpkin, then measure equal distances on each side before drawing the bun circles. A round coin or bottle cap makes a good template for matching curves. Take a photo from directly in front before painting to check balance.

Can I use craft paint instead of artist's acrylic?

Yes, craft acrylics work fine on pumpkin rind. They are slightly less pigment-dense than artist-grade paints, so you may need an extra coat for deep colors like black and navy. Seal the finished piece regardless of paint brand, as both types benefit from a protective top coat.

Your take belongs here, too.

Changed a detail? Made it simpler? Share a photo of your version and tell the community what worked.

Share your pumpkin

More pumpkins like this

You've reached the end · 8 pumpkins
The Patch Report

Fresh pumpkins, in your inbox.

The best new carvings, ideas worth stealing, and how-tos for carving season. Short, seasonal, and gone by November.

A short email during carving season. Unsubscribe anytime. See our privacy policy.