Halloween Pumpkin Carving Contest · Starts October 1st · $500 in prizes
← Back to ideas
@ai_concepts
Sep 25, 2026
Painted Mira KPop No-Carve Pumpkin DesignAI
0

Report this carving

Tell us what is wrong. Reports are private.

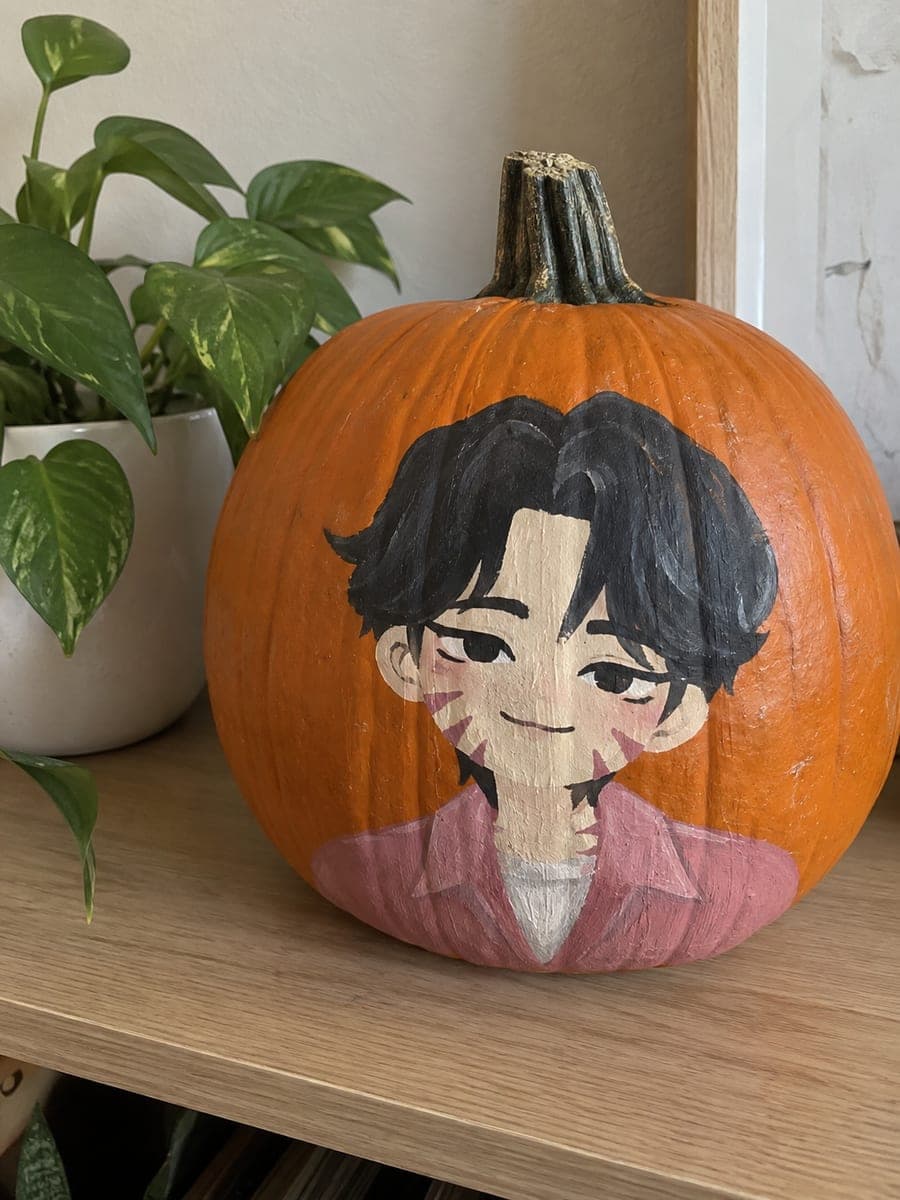
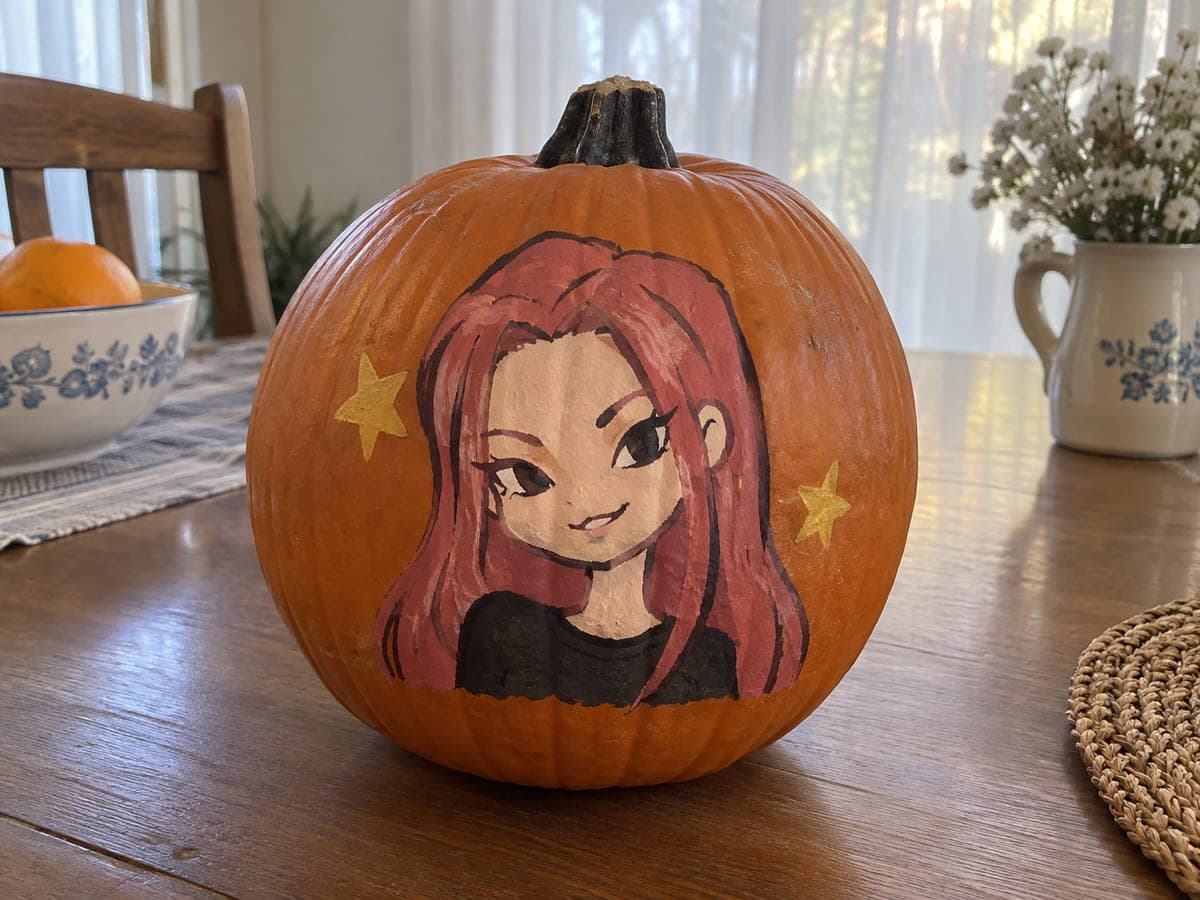
Painted Mira KPop No-Carve Pumpkin Design

Flat acrylic shapes on an intact rind depict Mira from KPop Demon Hunters in this no-carve mira pumpkin carving idea, photographed in a natural home setting that showcases the painted design at its best. Lightly sketch the character's sweeping hair and costume proportions in pencil before painting to keep the composition balanced. Build up the design starting with the largest color blocks, then refine with a fine liner brush for the hair detail and angular eye shapes. A matte topcoat seals the finished surface and keeps colors vivid for the full Halloween season.

No ratings yet · Sign in to rate
Comments (0)

  • No comments yet — be the first.

Save without an account. Sign in to like or comment.

Our tips for carving a similar design

This no-carve Mira design captures the character's sweeping hair and costume in flat acrylics on an intact rind, building from the largest costume color blocks up to the finest hair detail and facial features. A pencil sketch before painting keeps Mira's proportions correct and makes sure the sweeping hair sits at the right angle on the curved pumpkin surface. Matte topcoat at the end protects all layers for the full season.

From pumpkin to porch

  1. Clean and prep the surface

    Wipe the pumpkin with a damp cloth and let it dry fully for 30 minutes. Wipe the front face with a cotton pad and a small amount of rubbing alcohol if the rind has a waxy surface, which improves how well the first acrylic coat adheres.

  2. Sketch the character layout

    Use a soft pencil to sketch the head and upper body position, the direction and extent of the sweeping hair, and the costume boundary. Mark the angular eye positions lightly in the face zone. The sweeping hair is the most distinctive element, so spend extra time getting its angle and volume right in the sketch.

  3. Apply the costume color blocks

    Paint the main costume colors as flat opaque blocks, letting each color cure before applying an adjacent color. Work from the largest areas to smaller costume details. The costume base establishes the overall composition before the face and hair are added.

  4. Paint the face and sweeping hair

    Add the skin tone across the face area, then apply the hair color in long sweeping strokes that follow the direction of Mira's hair. Use a broad round brush for the hair sweep and a flat brush for any straight hair sections near the top of the head. Keep the hair color consistent rather than blended.

  5. Add features, hair lines, and details

    Using a fine liner brush, paint the angular almond eyes, nose, and smirk. Add fine hair line detail within the sweeping hair mass using a slightly darker tone. Add any costume accessory details or collar lines with the same fine liner. Keep each stroke precise and thin.

  6. Seal and display

    Apply two coats of matte spray varnish once all paint is fully dry. Display the pumpkin with the painted side facing the main viewing direction and a front light source illuminating the design after dark.

Written with AI to match this design

Gather your supplies

Check things off as you get ready.

Work on a stable surface, keep your free hand out of the cutting path, and have an adult handle sharp tools.

Three levels of light

  • Leave intact

    Natural orange rind on the back and sides

  • Peel & shade

    None, the shell stays completely intact

  • Cut through

    None. Position the pumpkin under a porch light or small front spotlight to illuminate the painted design after dark.

Learn the carving basics

Before you start cutting

How do I paint the sweeping hair so it looks like flowing hair rather than a flat blob?

Load a medium round brush and use long pull strokes following the direction of the hair flow, overlapping each stroke slightly. Leave a small amount of the base color or the pumpkin rind visible as thin gaps between strokes. Those gaps add a sense of individual strands without requiring fine liner work across the entire hair mass.

Mira's angular eyes are a distinctive design feature. How do I reproduce them accurately?

Sketch both eyes at the same time in pencil so they are symmetrically placed. Then use a flat shader brush for the angular portions, pressing the flat edge of the brush against the eye corner to create a hard-angle point. A fine liner adds the upper lid line once the base shape is dry.

Can I add a metallic accent to the curved blade detail if I want to include the weapon?

Yes. Once the costume is fully dry, use a fine liner brush loaded with metallic silver or gold acrylic to paint the curved blade shape along the lower section of the design. A thin metallic line picks up front lighting well and adds an extra dimension to the painted display.

Your take belongs here, too.

Changed a detail? Made it simpler? Share a photo of your version and tell the community what worked.

Share your pumpkin

More pumpkins like this

You've reached the end · 8 pumpkins
The Patch Report

Fresh pumpkins, in your inbox.

The best new carvings, ideas worth stealing, and how-tos for carving season. Short, seasonal, and gone by November.

A short email during carving season. Unsubscribe anytime. See our privacy policy.