Halloween Pumpkin Carving Contest · Starts October 1st · $500 in prizes
← Back to ideas
@ai_concepts
Sep 25, 2026
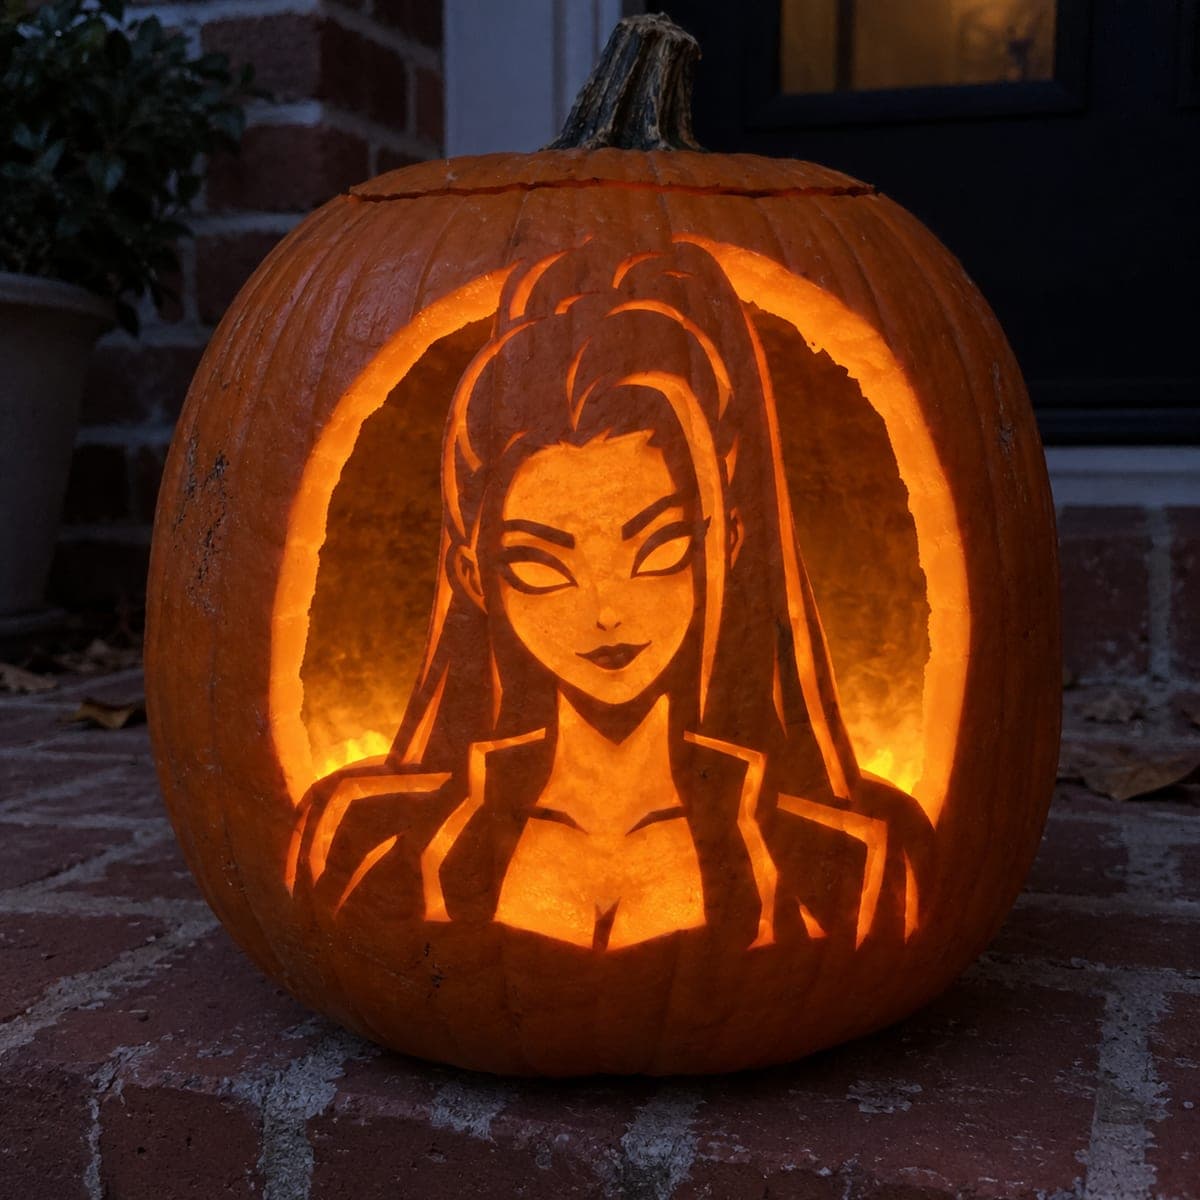
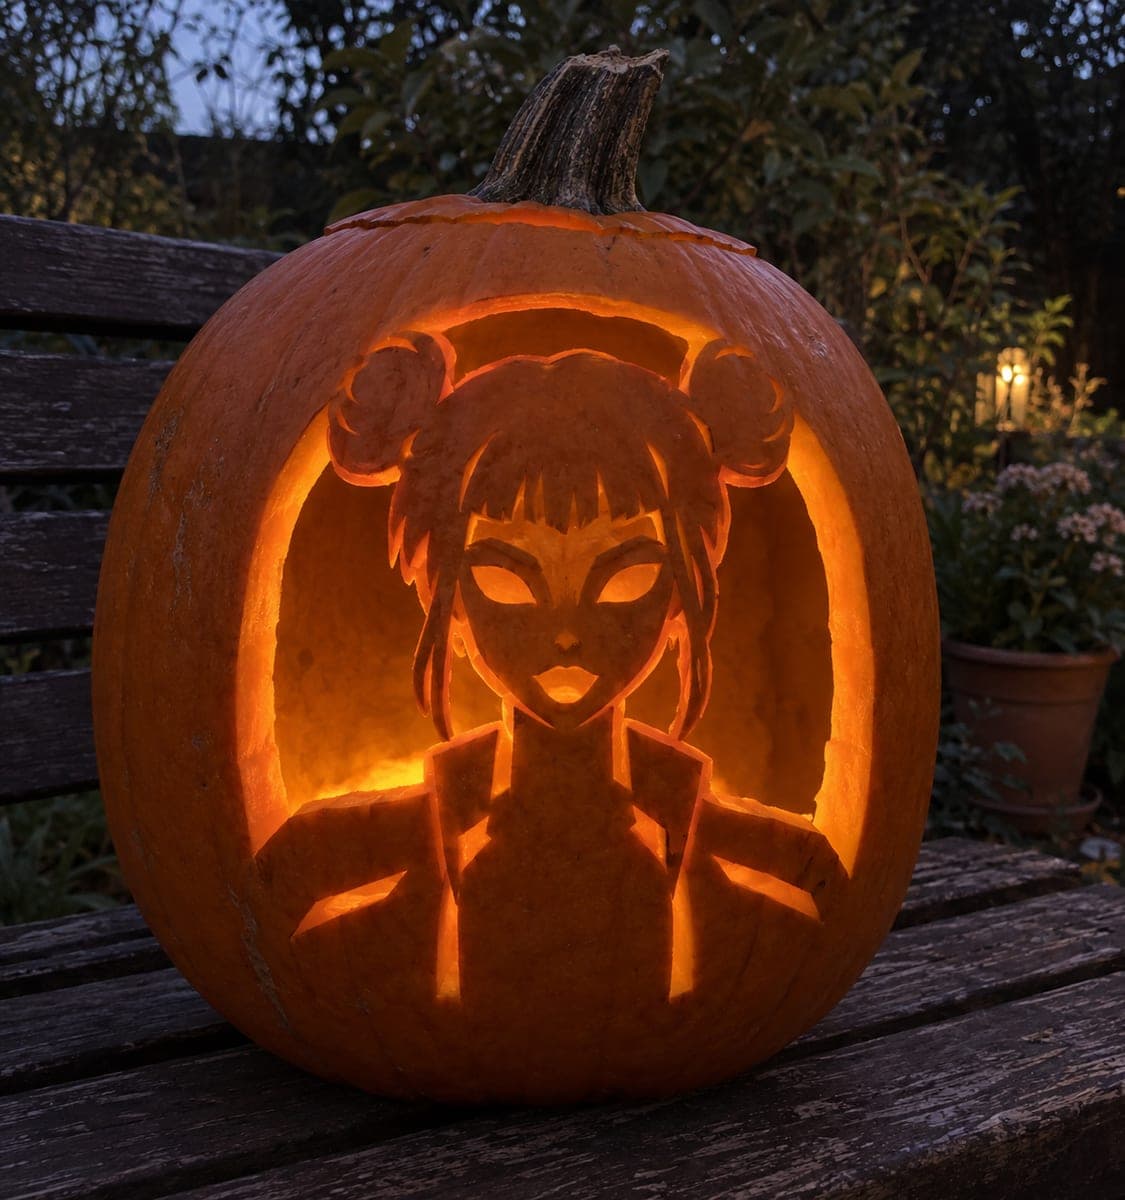
Hard Mira KPop Demon Hunters Pumpkin PortraitAI
0

Report this carving

Tell us what is wrong. Reports are private.

Hard Mira KPop Demon Hunters Pumpkin Portrait

An open arched background frames Mira's retained bust in this hard mira pumpkin carving idea, with the figure rooted along the full lower edge and the hair crown bridging to the top frame for support, while face and fine costume details are added as shallow-backed engraving throughout the retained area. The large arch cutout removes significant rind at once, so confirm all root connections are wide before beginning. Remove the arch background sections first, then carve the engraved portrait detail from the outer edges of the face inward.

No ratings yet · Sign in to rate
Comments (0)

  • No comments yet — be the first.

Save without an account. Sign in to like or comment.

Our tips for carving a similar design

The hard Mira design uses a large open arched background to surround a retained bust, with Mira's figure rooted along the full lower edge and the hair crown bridging to the top frame. Face and costume features inside the retained area are rendered in shallow-backed engraving. Removing the large arch background sections is the most physically demanding step, and confirming all root connections are wide and solid before beginning is the most important structural check.

From pumpkin to porch

  1. Hollow and verify roots

    Cut a back opening and hollow to a consistent 1 inch throughout. Sketch the arch outline and the two structural connection zones on the front face before transferring: the full lower edge root and the hair crown bridge at the top. Confirm both connections measure at least 1.5 cm wide.

  2. Transfer the full design

    Transfer the arch boundary, the retained bust outline, and all engraving zones with a stylus. Mark the two structural connections explicitly. The engraving zones include the face features, hair texture down the sides of the bust, and costume neckline and any accessory detail.

  3. Cut the arch background sections

    Remove the arch background in sections starting from the outer curved top of the arch and working down each side toward the lower root. Cut each section in small pieces and check that the retained bust is still firmly attached after every removal. Leave at least 5 mm beyond the bust boundary until all other arch sections are removed.

  4. Refine the bust boundary

    Once all arch sections are removed, clean up the bust boundary line with careful detail saw passes. The hair crown bridge should now be clearly visible as a thin strip connecting the top of the hair to the upper frame. Confirm it is still solid and not stressed by the arch cutting.

  5. Engrave the portrait detail

    Working from the outer edges of the retained bust inward, score the facial features, hair texture, and costume lines using a V-gouge for defined linear elements and a Dremel ball-tip bit for organic facial texture. Keep all scoring at half the rind depth or less.

  6. Light and display

    Place a warm LED close to the back wall and evaluate the design in a dark room. The arch opening blazes with full light while the retained bust glows through its engraving. Position the pumpkin at eye level so both the crown bridge and the lower root read as part of the intentional composition.

Written with AI to match this design

Gather your supplies

Check things off as you get ready.

Work on a stable surface, keep your free hand out of the cutting path, and have an adult handle sharp tools.

Three levels of light

  • Leave intact

    Retained dark bust body, hair surface before engraving, lower root strip, and crown bridge connection

  • Peel & shade

    Engraved face features, hair texture lines, and costume detail channels inside the retained bust, glowing at mid-level

  • Cut through

    The fully open arch background surrounding the bust, blazing at full brightness

Learn the carving basics

Before you start cutting

How wide should the hair crown bridge be to support the bust safely?

The crown bridge should be at least 1.5 cm wide and ideally 2 cm or more if the retained bust is large. A narrower bridge will support the bust in the short term but may crack over three to four days as the pumpkin dries and the rind contracts. A wider bridge also looks more compositionally intentional as a framing element.

Can I add Mira's flowing hair detail beyond the retained bust boundary?

Not without adding additional bridge connections. Any rind element that extends beyond the bust boundary into the arch opening needs its own structural connection to the arch frame or it will break away. If you want flowing hair strands visible within the arch opening, design them as connections from the bust to the frame rather than as free-floating elements.

The arch opening is very large. Will the pumpkin stay structurally sound?

A large arch opening is fine as long as the lower root spans the full width of the bust and the crown bridge is solid. The pumpkin shell above and below the arch remains intact, providing overall rigidity. The retained bust itself acts as an internal brace across the arch opening.

Your take belongs here, too.

Changed a detail? Made it simpler? Share a photo of your version and tell the community what worked.

Share your pumpkin

More pumpkins like this

You've reached the end · 8 pumpkins
The Patch Report

Fresh pumpkins, in your inbox.

The best new carvings, ideas worth stealing, and how-tos for carving season. Short, seasonal, and gone by November.

A short email during carving season. Unsubscribe anytime. See our privacy policy.