Halloween Pumpkin Carving Contest · Starts October 1st · $500 in prizes
← Back to ideas
@ai_concepts
Sep 25, 2026
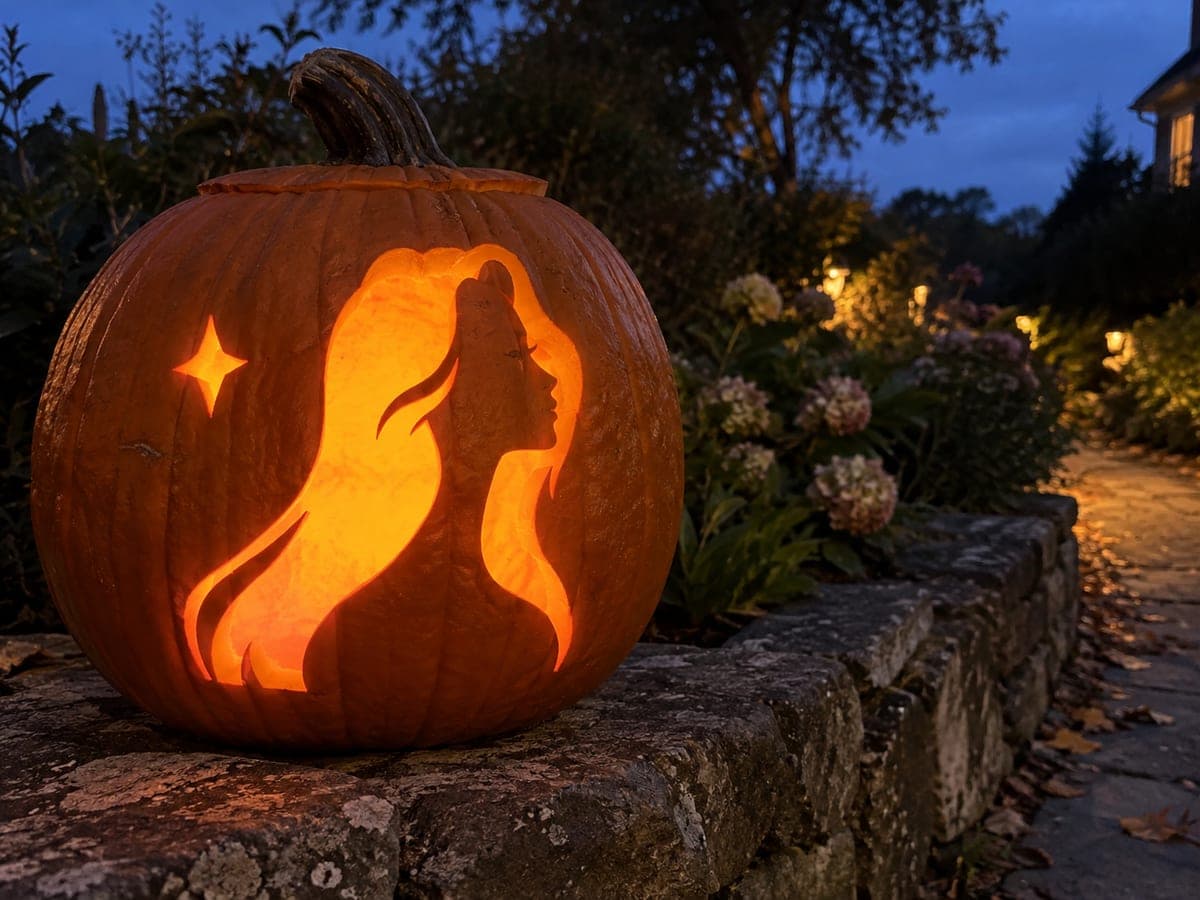
Mira KPop Pumpkin With Long Hair ChannelsAI
0

Report this carving

Tell us what is wrong. Reports are private.

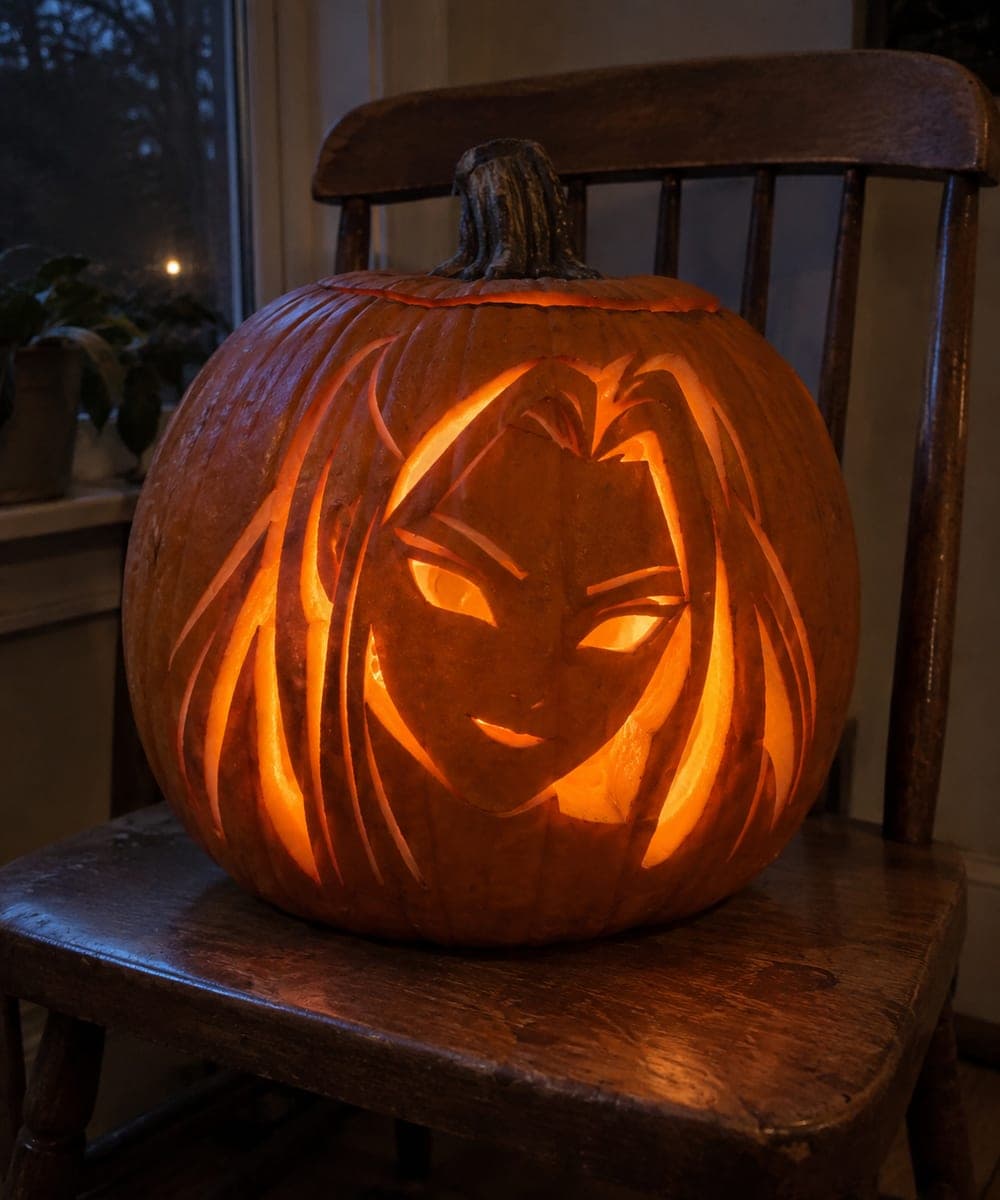
Mira KPop Pumpkin With Long Hair Channels

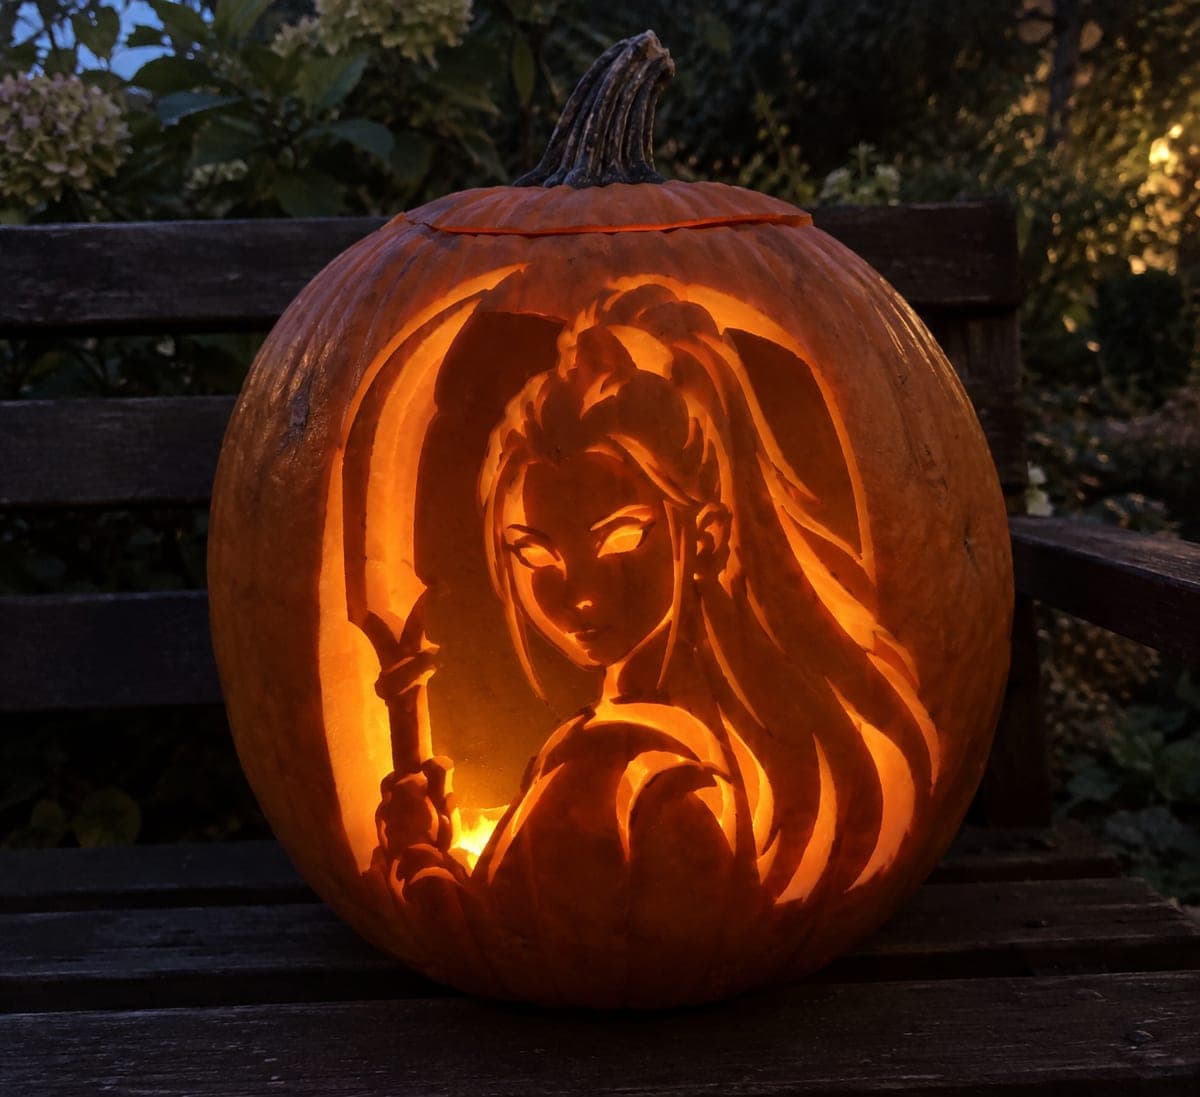
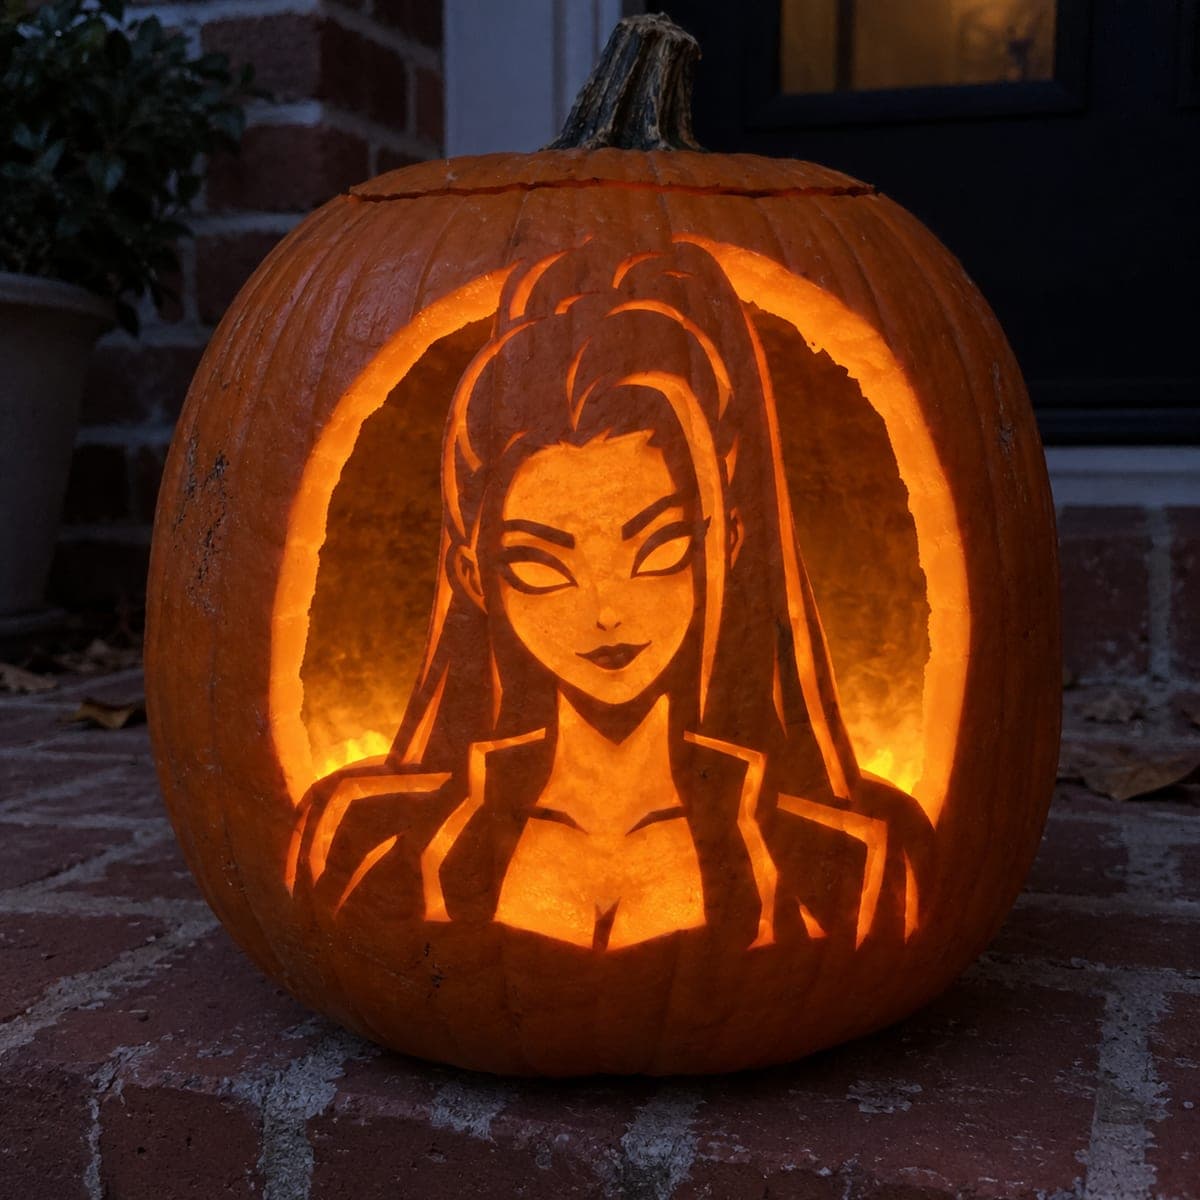
Mira's face glows on an intact rind in this intermediate mira pumpkin carving idea, with angular almond eye holes, a small smirk opening, and three sweeping long hair channel cutouts running down the sides, while fine hair strands remain as shallow-backed grooves between the main openings. Wide rind between each channel keeps the design stable during the hair-strand scoring. Cut the three hair channels first, then the eye and smirk holes, and finish with the fine hair grooves using a V-gouge or small Dremel bit. Candlelight visible through the hair channels creates a dramatic swept-hair effect.

No ratings yet · Sign in to rate
Comments (0)

  • No comments yet — be the first.

Save without an account. Sign in to like or comment.

Our tips for carving a similar design

This intermediate Mira design places the character's face on an intact rind, using angular almond eye holes, a small smirk opening, and three sweeping long hair channel cutouts that run down the sides of the pumpkin face. Fine hair strand grooves are scored between the main channels to complete the effect. Cutting the three hair channels first and confirming wide rind between each one is the correct structural sequence before moving to the face apertures and fine scoring.

From pumpkin to porch

  1. Hollow and plan hair channel positions

    Cut a back opening and hollow to a consistent 1 inch throughout. Before transferring, sketch the three hair channel positions down each side of the face in pencil and confirm at least 1 cm of rind between each channel and between the outermost channel and the pumpkin's edge. The channels can be adjusted slightly in spacing at this point without affecting the character's look.

  2. Transfer the full design

    Perforate the three hair channel boundaries, the two almond eye outlines, the smirk opening, and the fine hair strand groove positions. Mark the channels and hollow openings in the same perforation style since both are cut through, and mark the fine hair strands separately as they are shallow scored.

  3. Cut the three hair channels

    Cut each hair channel as a long sweeping cutout, using short curved saw strokes that follow the channel's organic curve. Remove each channel cleanly in one to three pieces depending on length. Confirm the rind bridge between every pair of adjacent channels is solid and at least 1 cm wide after each removal.

  4. Carve the eye holes and smirk

    Cut the two almond-shaped eye holes using a thin detail saw, keeping the angular points of each almond sharp rather than rounded. Then cut the small smirk opening in the lower face area. Mira's smirk is a small asymmetric mouth shape, so keep it proportionally smaller than a full grin.

  5. Score the fine hair strands

    Using a V-gouge, score fine hair strand lines between the main hair channels as parallel grooves following the same directional flow as the channels. Keep scoring at one-third rind depth. Work from the top of the hair strand zone downward, staying parallel to the adjacent channel edges.

  6. Light and evaluate

    Insert a warm LED and check the display in a dark room. The three hair channels should glow as distinct bright sweeps down each side while the fine hair grooves between them glow softly. Adjust LED position so the light reaches the outer channels as well as the central face features.

Written with AI to match this design

Gather your supplies

Check things off as you get ready.

Work on a stable surface, keep your free hand out of the cutting path, and have an adult handle sharp tools.

Three levels of light

  • Leave intact

    Solid face rind between the eye holes, nose area, and the intact rind strips between channels

  • Peel & shade

    Fine hair strand grooves between the main channels, glowing softly at mid-level

  • Cut through

    Three sweeping hair channel cutouts and the almond eye holes and smirk, all at full brightness

Learn the carving basics

Before you start cutting

How do I keep three long sweeping channels from cracking the rind between them?

Cut the outermost channel first, then the middle channel, then the innermost channel nearest the face. This sequence means you are always working with maximum rind on at least one side. Keep each channel cut at least 1 cm from the adjacent channel boundary and use short curved strokes rather than long sweeping saw runs.

Can I make the hair channels curve more dramatically for a more dynamic look?

Yes, within reason. A gentle S-curve looks natural and is carvable. Very sharp bends in a channel create stress points where the rind may crack when the piece is removed. If your template has extreme curves, trace the design test cuts on the back of the pumpkin first to see how the saw handles those angles.

My smirk opening looks too large and now looks like a regular grin. Can I fix it?

Once a cutout is made it cannot be reduced, but you can add a small wedge of toothpick or craft material painted to match the rind to partially fill one side of the smirk, visually asymmetrizing it again. Alternatively, embrace the wider mouth as a smile variant and add scored corner accents to suggest a specific expression.

Your take belongs here, too.

Changed a detail? Made it simpler? Share a photo of your version and tell the community what worked.

Share your pumpkin

More pumpkins like this

You've reached the end · 8 pumpkins
The Patch Report

Fresh pumpkins, in your inbox.

The best new carvings, ideas worth stealing, and how-tos for carving season. Short, seasonal, and gone by November.

A short email during carving season. Unsubscribe anytime. See our privacy policy.